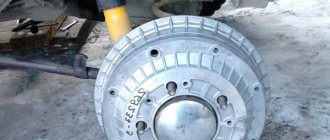
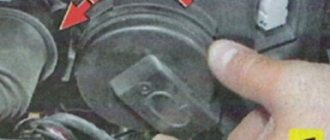
Rear brake pads Lada Largus - device
The rear brakes on the Lada Largus station wagon have not changed since the car began production. Those. All Lada Largus have identical rear brakes. At their core, these are archaic drums, inside of which there are two brake pads, a brake cylinder and a handbrake mechanism.
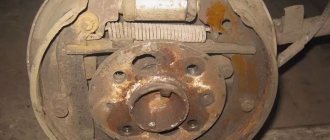
This system has completely outlived its usefulness, but is still used on budget cars due to its simplicity and low cost of production. Below in the photo you can see what the rear brake drum of the Lada Largus looks like inside.
1 - pressure washer 2 - soldier 3 - pressure spring 4 - brake pad 5 - spacer bar with automatic clearance adjustment mechanism 6 - brake cylinder 7 - lever for manual drive of the shoes 8 - protective casing 9 - parking brake cable 10 - upper coupling spring 11 - spring mechanism
Rear brake pads - removal and installation
Replacing Renault Logan pads: how to change the rear and front brake pads
Attention:
Replace brake pads as a set on wheels of the same axle. Installation of brake pads from different manufacturers or different types on wheels of the same axle is not allowed.
Removal
1. Place the car on a two-post lift, apply the parking brake and turn off the ignition (electrohydraulic lift type P-3.2G with a lifting capacity of 3.2 tons).
2. Remove the rear wheels.
3. Release the handbrake lever.
4. Raise the car to a height convenient for performing work.
5. Remove the rear brake drums.
6. Remove the lower, then the upper tension springs 2 and 7 (pliers for brake springs type 76 41 30 22 f. “Stahlwille”).
Replacing brake pads:
- emphasis;
- lower tension spring;
- brake pads;
- guide springs;
- springs for fastening the automatic clearance adjustment mechanism;
- spacer bar with automatic gap adjustment mechanism;
- upper tension spring;
- brake cylinder;
- springs for fastening the automatic clearance adjustment mechanism;
- manual shoe drive lever;
- guide springs;
- brake pads;
- manual brake cable.
7. Remove springs 5 and 9 securing the spacer bar with the mechanism for automatically adjusting the gap between the pads and the drum (flat-head screwdriver, pliers).
8. Remove springs 4 and 11 guide pads (pliers).
9. Remove spacer bar 6 with automatic adjustment mechanism assembly.
10. Remove brake pads 3 and 12 by disconnecting the cable 13 of the manual brake drive from the drive lever 10.
Installation
1. Clean the rear brake elements (metal brush).
Replacement of rear brake pads Lada Largus
Replacement of rear brake pads must be carried out on a flat surface. Be sure to place wheel chocks under the front wheels.
If you have not changed the front brake pads of your Lada Largus yet, we will tell you how to do it.
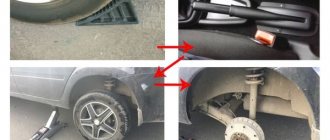
First of all, we tear off the bolts on the rear wheel, then we lift the car with a jack and completely dismantle the wheel.
Next, you need to remove the drum, but to do this, you need to bring the brake pads together. This is done through the threaded hole of the wheel bolt with a flat-head screwdriver.
The nut rotates from top to bottom, which allows you to reduce the length of the spacer mechanism and easily remove the brake drum.
Using a thin chisel and hammer, knock out the wheel hub plug.
Using a 36″ socket and a powerful wrench, unscrew the hub nut.
Remove the drum along with the wheel bearing. If the bearing is stuck, then tap the drum with a mallet and then remove it.
We turn the cup, thereby removing it from the soldier. We remove the spring, the cup and the soldier himself. We perform a similar procedure with the second block.
Remove the lower tension spring and put it aside.
Carefully remove the pair of pads along with the spacer bar and the handbrake lever.
Remove the handbrake cable from the lever.
Remove the upper spring from the engagement.
..and after it we unhook the spring from the automatic pad release mechanism.
We carefully examine all the details. We pay special attention to the brake cylinder boots. If they are worn out or torn, we replace them with new ones. We clean all parts from dirt, rust and dust. And only after that we install new brake pads in place.
Before installing the pads, be sure to tighten the spacer bar nut to its original position. This way you can easily put the brake drum in place, and adjust the required gap after installing it.
The drum should be tightened to a torque of 175 N*m. A torque wrench is used for this. It is advisable to use a new hub nut, as it is self-locking. If a new hub nut is not available, then bend the sides of the old one in three places to bring it to factory condition.
Reassembling the drum brake shoes is done in the reverse order. Similarly, we replace the rear brake pads on the second side.
Replacement procedure
First of all, drivers should know that such pads are replaced in pairs. Experts do not recommend doing this separately, because this can lead to destabilization of the entire car during a gradual or sudden stop. However, only the front elements of the system of the same name require frequent attention, although in many ways everything is justified by a specific malfunction.
Step one
The procedure for replacing the pads is carried out only in a set of 4 parts, 2 pieces on each side. First of all, you should check the brake fluid level in the tank of the corresponding cylinder. If it approaches the maximum, then the fluid needs to be pumped out, because after installing new pads this level rises significantly.
Step two
Next, the wheel bolts are loosened, from which the replacement of the pads begins. The corresponding part of the car is raised with a jack, reliable supports are installed and the wheel itself is removed. Using a screwdriver, the existing pads are removed from the disk, that is, the piston is pressed all the way into the bottom of the working cylinder.
Step three
A similar procedure is carried out with the bolts of the lower guide pin of the caliper, which is turned with a key. It is removed and raised. After this, the outer and inner brake pads are removed.
Step four
If the existing springs are deformed or heavily corroded, they also need to be replaced. Here you should check the protective rubber covers, as well as the features of the movement of the caliper in relation to the pad guides. If any difficulties arise with this, then all parts must be lubricated.
Step five
The guide pins are installed in the reverse order of removal. In this case, the protective rubber boots must be replaced if they become hardened or ruptured.
Step six
The old pads are taken out, their seat is cleaned, and new parts are installed there. Since they will be thicker in size, for them you need to “drown” the piston of the same name a little. Here you should use a clamp or a long screwdriver.
Step seven
When their replacement is completed, assembly is performed in the reverse order. During this process, it is advisable to lubricate the threads of bolts that were previously unscrewed or loosened. They change similarly on the other wheel.
If it is worth replacing the rear brake pads, then the principle is similar, but there are still some differences from the above-mentioned procedure.
How to replace rear pads on Largus? The instructions will allow you to carry out the planned event correctly.
At the very beginning of the event, lower the parking cable lever until it stops. To remove the drum, the pads are brought together. To do this, rotate the ratchet nut. The main task is to reduce the length of the spacer bar. You need to remove the protective cap and the wheel bearing nut. They do the same with the brake drum and bearing. At the next stage, the strut spring cup is rotated using pliers. The main goal is to align the groove in the cup and the stand tail. It is recommended to hold the support pole, as this guarantees the safety of the event. Then remove the cup with the spring, carefully pull out the support post from the hole in the brake shield. The hook of the lower spring used for tightening is disengaged and removed. To do this, use a suitable screwdriver. The rear brake pads are carefully moved away from the shield
Careful action will eliminate the risk of damage to the brake cylinder boots. Now disconnect the cable responsible for the brakes. At the next stage, the block is removed along with the spacer bar. The upper hook is carefully disengaged, as is the spring, which is part of the slack adjuster. It is necessary to separate the brake pad and spacer bar. Only then can the tension spring be removed. The automatic gap adjustment mechanism is set to the basic position. Installation of new units is carried out only in the reverse order. The final step is to adjust the parking brake using the brake pedal and release the lever.
The event was successfully carried out and the rear pads on the Largus car were replaced.
Saving on Largus pads is prohibited, so it is advisable to replace them when wear is 70% and use only high-quality parts.
How to install rear pads on Lada Largus
After installing the drums in place, it is necessary to adjust the gaps between it and the brake lining. This is done as follows. First, the brake pedal is depressed several times to pump fluid into the brake cylinder.
After this, without releasing the brake pedal, raise the handbrake. It is important to keep the handbrake button pressed at this time. We lower and raise the handbrake several more times. In this case, clicks should be heard from the side of the drum, which means that the mechanism is working. When the clicks stop, it means that the correct gaps have been set.
After this, do not forget to check the brake fluid level in the system and set it between the minimum and maximum marks.
Front brake pad replacement process
In order to begin the process of replacing the front brake pads, you will need tools, namely: a wheel wrench, keys 13 and 15, as well as pliers.
So, let's get straight to the process:
- First you need to remove the front wheel.
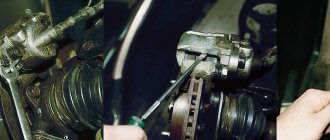
- We recess the working piston of the caliper. This can be done using a flat blade screwdriver.
- On the caliper, it is necessary to loosen the fastenings of the guide pin from below.
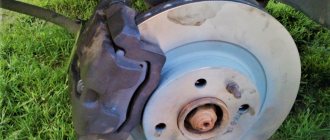
Without caliper and pads
New pads installed
The replacement procedure with and without the ABS function is the same. The only difference is that when replacing, the speed sensor is removed and inserted back.
Causes of malfunction
The reasons why it is necessary to change the front brake pads are:
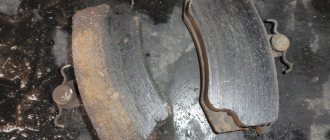
Degree of wear. The service manual states that the products must be replaced when the thickness of the friction part is less than 2 mm. But, as practice shows, the majority of motorists begin to change them when the wear level reaches 1.5 mm.
Comparison of the thickness of old and new brake pads
The pad is critically worn, it begins to “eat” the disc
All these indicators contribute to the fact that the front pads require replacement.
Failure to change this important part promptly will result in loss of brakes or wear of the brake discs.
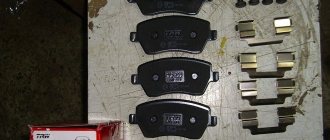
- First, we purchase suitable pads. The set of front consumables consists of 4 pieces (2 pieces on each side).
- We control the brake circuit fluid level in the corresponding reservoir (under the hood) using the marks on its body. If the level reaches the maximum level, then it will need to be taken with a syringe, since after installing the new pads there will be a natural (due to the greater thickness of the pads) rise.
- We loosen the tightening torques of the bolts of the front wheel from which the replacement is supposed to begin.
- We hang this part of the car with any available device designed for this purpose. We remove the wheel. Don't forget about safety supports (if a jack is used).
- We take a screwdriver, which we insert between the pad and the disc, and with a pressing force we move it towards the cylinder. The rod is hidden in the cylinder, which provides free space for removing the pads.
- Now we loosen the tightening torque of the caliper bracket, and then move it up.
- We remove the old pads.
- We inspect the springs of the clamping mechanism for their deformation and breakage. If this fact is obvious, then we change it.
- We check the integrity of the rubber covers on the caliper guides. We lubricate the guides themselves with a special compound. This will prevent them from souring, and the bracket will move freely during the exit or entry of the piston.
- We carefully clean the seats for new pads.
- The linings on “fresh” pads are thicker than on old products, so the piston must be recessed to the full extent of its stroke. This will provide enough space for the correct installation of consumables.
- After installation, perform the assembly process in reverse order.
Replacement of front brake pads is completed.
We repeat the entire list of these manipulations on the other side of the LADA Largus.
If there is a need to replace the rear pads, then the principle of operation is similar, with the exception of some nuances.
Lada Largus rear brake pads article number
Over the past few years, purchasing spare parts online has become increasingly popular. People go shopping less and less, and choose spare parts without leaving home. Of course, this method has one obvious disadvantage - to select the correct spare part, you need to know its part number. And you can find it in spare parts catalogs.
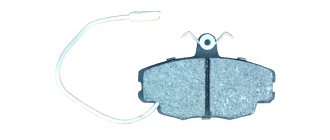
To correctly select rear brake pads for Lada Largus, use article number 7701210109. A set of original pads looks like this:
Moreover, under the same article number 7701210109 there may also be LADA pads:
Rear pads Lada Largus price
LADA 7701210109 Brake pads - 3457 rub. RENAULT 77 01 210 109 — 3280 rub.
Prices for analogues (replacement of original parts) differ. By purchasing a non-original part, you can save a lot of money. For convenience, we will enter all the data into a simple table.
Table 1 - prices for rear pads Lada Largus 8 and 16 valves
| Manufacturer and article number | Description | Price, rub |
| ADR ADR 011421 | Rear drum brake pads Lada Largus 2012 - present. vr. set | from 705.00 |
| RIGINAL RG7701210109 | from 727.00 | |
| PILENGA ITALY BS-P 8455 | from 752.00 | |
| ASP BD09101020 | from 760.00 | |
| QML BS-1003 | from 776.00 | |
| FRA-ROI 650128FR | from 804.00 | |
| GALLANT GL.BS.1.2 | from 819.00 | |
| FRANCECAR FCR210335 | from 830.00 | |
| AYWIPARTS AW1820015 | from 835.00 | |
| TRANSMASTER TR500.109C | from 865.00 | |
| QUATTRO FRENI QF21F20503 | from 867.00 | |
| PILENGA ITALY BS-P 8456 | from 868.00 | |
| STELLOX 17-9100-SX | from 869.00 | |
| HOLA BR807 | from 911.00 | |
| TRIALLI GF 0957 | from 962.00 | |
| METACO 302-0024 | from 971.00 | |
| GANZ GIJ20006 | from 980.00 | |
| KRAFT KT091501 | from 982.00 | |
| MANOVER MR2014793 | from 989.00 | |
| STELLOX 00-0489-SX | from 1 009.00 | |
| MOBILAND 431202750 | from 1,023.00 | |
| KORTEX KS028STD | from 1,025.00 | |
| CORTEX KS028 | from 1,052.00 | |
| FENOX BP53009 | from 1 102.00 | |
| MARKON M1183-502080 | from 1 127.00 | |
| JD JBS-0086 | from 1 147.00 | |
| MINTEX MFR610 | from 1 161.00 | |
| RENZO RZ083 | from 1,173.00 | |
| PATRON PSP4031 | from 1 189.00 | |
| NAKAYAMA HS7281NY | from 1,206.00 | |
| GOODWILL 2097RB | from 1,223.00 | |
| ALLIED NIPPON ABS1704 | from 1,247.00 | |
| FINWHALE VR811 | from 1,249.00 | |
| FAST FT30078 | from 1,266.00 | |
| DAFMI DA995 | from 1,296.00 | |
| IBERIS IB154035 | from 1,296.00 | |
| CAMPAR CMP2404 | from 1 319.00 | |
| ASAM 30299 | from 1,328.00 | |
| AMIWA CS3345 | from 1,338.00 | |
| BLITZ BB5050 | from 1 351.00 | |
| HSB HS9560 | from 1 403.00 | |
| LYNX BS-6304 | from 1,404.00 | |
| WEEN 152-2502 | from 1,429.00 | |
| ZEKKERT BK-4054 | from 1,495.00 | |
| FIT FT3255 | from 1,496.00 | |
| ABS 9268 | from 1,507.00 | |
| ALLIED NIPPON ABS3114 | from 1,532.00 | |
| ACDELCO 193-74074 | from 1,533.00 | |
| JP GROUP 1363901710 | from 1,573.00 | |
| NK 2739787 | from 1,649.00 | |
| FEBEST 0202G15RAR | from 1,697.00 | |
| LPR 09890 | from 1,718.00 | |
| JAPANPARTS GF015AF | from 1,760.00 | |
| ASAM 32393 | from 1,786.00 | |
| SANGSIN SA191 | from 1,807.00 | |
| FERODO FSB4031 | from 1,893.00 | |
| GIRLING 5187809 | from 1,968.00 | |
| LPR 9890 | from 2,043.00 | |
| NIBK FN43551 | from 2 142.00 | |
| TRUSTING 088.240 | from 2 149.00 | |
| GBRAKE GS-21003 | from 2 171.00 | |
| BOSCH 0 986 487 899 | from 2,218.00 | |
| BREMBO S 68 546 | from 2 221.00 | |
| MEYLE 16-14 533 0016 | from 2,283.00 | |
| DELPHI LS2022 | from 2,309.00 | |
| LUCAS/TRW GS8780 | from 2,341.00 | |
| HELLA/BEHR/PAGID 8DB 355 000-301 | from 2 350.00 | |
| TEXTAR 91069300 | from 2 421.00 | |
| BOSCH 0 986 487 754 | from 2,812.00 | |
| LADA 7701210109 | from 3,457.00 |
Rear pads for Lada Largus with ABS
Lada Largus cars with an anti-lock braking system have identical pads as Largus without ABS. There is no difference. The only difference in the brake system is the rear flap. For cars with ABS there is a mounting hole for the sensor. Otherwise the brakes are completely identical. To order, you can use article number 7701210109.
By the way, if your brake discs are worn out, then read the article on how to replace them on our website.
Largus hand brake cable
Dear customers, in order to avoid mistakes when sending a parking brake cable for a LADA LARGUS car, please indicate your car model and year of manufacture in the “Comment” line.
The parking brake (also known as the handbrake, or in common parlance “handbrake”) is an integral part of the car’s braking control. Unlike the main braking system used by the driver while driving, the parking brake system serves primarily to hold the vehicle in place when parked on sloped surfaces, and can also be used as an emergency emergency braking system in the event of failure of the main one.
1 — parking brake mechanism (360106743R), 1 — parking brake mechanism (360109167R), 2 — self-locking hex nut with collar (7703034256), 3 — parking brake cable (6001549112), 4 — double mounting bracket (7703179103), 5 — fastening bracket 1 (7703079254).
The parking brake cables (6001549112) are replaced if they are broken, pulled out or jammed inside the sheaths (rear cables), when adjusting the parking brake fails to keep the LADA LARGUS vehicle stationary on a slope of up to 23% inclusive.
The main purpose of the parking brake (or handbrake) is to hold the car in place during long periods of parking. It is also used in case of failure of the main brake system during emergency or emergency braking. In the latter case, the handbrake is used as a braking device.
The handbrake is also used when making sharp turns on sports cars.
The parking brake consists of a brake drive (usually mechanical) and brake mechanisms.
The mechanism is activated by moving the lever to a vertical position until the latch clicks. As a result, the cables that press the brake pads of the rear wheels to the drums are stretched. The rear wheels are blocked and braking occurs.
To remove the LADA LARGUS from the handbrake, you need to hold the locking button and lower the lever down to its original position.
The original cable 6001549112 for the parking brake drive, which is supplied to the AvtoVAZ conveyor, is intended to replace the failed standard one.
Regulations for replacing rear brake pads on Lada Largus
As such, there are no regulations for replacing brake pads on Lada Largus. Brake pads do not change over the years or mileage. They change due to wear. The minimum permissible thickness of the rear brake pads on the Lada Largus is 5 mm including the base, and 1.5 mm of which is the friction lining itself.
In addition, brake pads are replaced when the friction lining peels off, cracks appear on it, uneven wear, or when brake fluid or other fuels and lubricants get on it.
The following signs will help determine brake pad wear:
- Creaking or grinding noise from the rear wheels.
- Low efficiency of the braking system.
- No hand brake.
- The car pulls to the side when braking.
Causes of malfunction
The causes of rear brake pad failure are no different from the front ones. But it’s worth dwelling on them to know them:
- Wear of the friction part. It can only be seen if you take the drum apart. According to the manufacturer's recommendations, the friction part should not be less than 2 mm.
For comparison: on the left is a new brake pad, on the right is an old front brake pad
- If brake fluid gets on the linings , it also leads to replacing the pads.
- The friction part is cracked , broken off or chipped. This indicates that the pad needs to be replaced.
All these reasons become decisive in the decision to replace the rear brake pads.
Tuning
Many car enthusiasts want to improve the rear brake; to do this, they replace the standard drums with ventilated disc brakes. This operation is done quite simply, but in frequent cases, the hub needs to be replaced.
Installing rear disc brakes
The old rear drums are thrown out and replaced with brake discs, calipers and front pads. This significantly improves the car's braking. These and Sparko offer a full set of rear ventilated brake discs.
As practice shows, disc brakes are 30% more efficient in use, and replacement is carried out in the same way as front brakes. In this case, you do not need to buy separate pads for the rear and front parts. It is enough to buy 4 sets of front pads (each set contains 2 pads).
