Tools and spare parts
The fact is that the VAZ 2110 wheel bearing is a small part, and in order to work with it, you need sufficient lighting and some convenience. Therefore, a car prepared for repair should be driven into an inspection hole and sufficient light access should be created to the repair unit.
Before going down into the pit, you need to prepare all the tools and materials.
It should also be noted that replacing the front wheel bearings is much more difficult than doing the same work on the rear components.
Therefore, you need to start work from the front node.
A list of required tools should be provided:
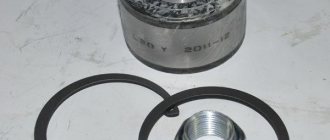
- A special puller to remove the bearing;
- The so-called mandrel, that is, a pipe cut of the required size. This device is used to knock out hubs;
- Head 30, equipped with a high-quality wrench;
- Socket wrenches 19 and 17 sizes.
In addition, you need to purchase new suitable bearings that will be needed for replacement. For a VAZ 2110 car, you should choose Russian-made bearing parts rather than giving preference to Chinese analogues. The difference in price for these products is small, so there is no need to experiment.
Preparing the work site and tools
Replacing the front wheel bearing on a VAZ 2110 requires preparation of the work site. A prerequisite is the presence of an inspection hole. This area should be well lit.
In addition, the following tools are prepared:
- puller for removing the bearing;
mandrel for knocking out the hub;- knob with 30mm head;
- a set of spanners, including sizes 17 and 19.
New bearings are being prepared in advance.
Stages of work
Work begins with the car being placed in a comfortable position and in first gear. To prevent it from rolling, it is better to install special wheel chocks under the wheels.
Now you can go down into the inspection hole and begin actions that are carried out in the following order:
In addition to the listed types of work, you may also need to remove:
- Trunnion assembly;
- Hub cap;
- Retaining ring.
After this, the hub part is available to the master and can be replaced. There are several options for reinstalling a component, so a few words should be said about each.
Replacement methods
First way
- In the first case, it is necessary to use a puller to remove the bearing;
- Simply carefully remove the bearing and replace it with a new one;
- After installation, all the steps above should be carried out in reverse order.
The main advantage of this method is the fact that the technician will not need to touch the camber adjustment bolt, which is very difficult to put in place later.
If we talk about the disadvantages, we can note the following: the master will have to take a very uncomfortable position to perform actions. That is why it is necessary to prepare a lift and climb into the inspection hole.
But it is still very inconvenient for a car enthusiast to knock out the hubs in this position and press in the bearing assembly.
Second way
Consists of the following steps:
- To remove the bearing using the second method, you must carefully dismantle the steering knuckle and completely remove the hub;
- After this, the master will need to go to the workbench;
- The VAZ 2110 wheel bearing is replaced directly on the workbench;
- After this, everything is installed back, just as it was removed before.
This method is undoubtedly much easier than the first, but since it affects the camber, problems with adjustment cannot be avoided. Before you begin to unscrew the knuckle mounting bolts from the strut, you need to mark their position with chalk or a marker.
The first mark in this case will indicate the location of the adjusting bolt on the rack. The second mark will indicate the previous position of the fists.
After the master begins assembly, he will focus precisely on these marks. Of course, it will be difficult to achieve great accuracy and it will not be possible to return the parts to their place. But with careful work, installation errors can be minimized.
There are some steps to follow:
- The master puts marks;
- Knocks out the knuckle bolts;
- Unscrews the mounting bolts from the lower ball joint;
- The bearing must be knocked out of the hub;
- The retaining rings are dismantled;
- Using a vice, the bearings are pressed out.
Before reassembly, the space in the fists must be thoroughly and thoroughly lubricated.
This method is often used when repairing not only one bearing component, but the entire chassis. As a result of this method, it will also be possible to safely replace ball joints, silent blocks of levers and steering tips.
Third way
It is carried out in the following order:
- In this case, you will need to remove the entire rack completely;
- After all the components have been removed, the technician will need a special vice;
- The wheel bearing will be replaced at the vise and all parts will be reinstalled.
This method is the most complex and difficult because it requires the technician to dismantle the entire rack. In addition, it will be necessary to unpress the steering tip, and you also need to unscrew the fastening nuts, they secure the upper support to the body base.
Direct removal of this VAZ 2110 unit is carried out only after the entire rack has been removed from the car. And this process takes a lot of time.
Removing and installing the bearing
To remove the bearing you need:
- Using special pliers, remove the retaining rings.
- Remove the old bearing. To do this, you can use any method - using a puller, a hammer and a mandrel.
- Thoroughly clean the internal surfaces - if there are nicks, you need to get rid of them.
- Install the new bearing using a puller. If you hammer it in, you can damage the seal. It is advisable to warm up the rear hub, but not more than 50-60 degrees.
- Install the retaining rings - be sure to check that they fit into the grooves.
After all these manipulations, assemble the entire assembly. After tightening the hub nut, bend the collars so that it does not unscrew.
The rear wheel hub bearing is designed to ensure its free rotation on the axle (hub axis), as well as uniform distribution of shock loads that occur while the machine is moving. VAZ-2114 cars are usually equipped with rear wheel bearings model 256706, which have a double-row angular contact ball closed type design. They are characterized by high rotation speed, but are not designed for high loads. Some craftsmen install roller bearings (model 537906) in order to increase the load-carrying capacity of their cars. They are in some ways stronger, although they have a relatively low rotation speed. Externally, these two types of bearings are practically no different, just as they are no different in price or characteristics, although ball bearings, for some reason, have become very popular.
Nuances
In the process of reassembling the entire node, you must proceed as follows:
- Press in the bearings;
- Install retaining rings;
- Collect your fists;
- Mount new bearing components on them;
- Mount the assembly on the hub;
- Using a mandrel, you need to drive the hubs until they stop.
You can use a puller or press to press in bearing parts. But in no case should you use a hammer, since in this case cracking of the component will inevitably occur. The forces should be directed to the outer rings.
It should also be noted that double-row ball bearings are installed in the hubs, which do not require lubrication and adjustment measures.
Due to the lack of such care, the VAZ 2110 bearings will certainly be destroyed when removed from the hub, so this measure should only be resorted to for a complete replacement.
Working with the puller
If you still don’t want to damage the bearing, then you can replace it without knocking it out of the hub. In order to remove it from there, you can use a special puller. Removal is much easier with this device.
To do this, you need to carefully insert the puller's paws into the grooves on the hub and remove the ring. Sometimes this requires some effort; the ring must be pryed with a screwdriver and removed. Using the device, the part is removed and the nicks on the component are smoothed out.
Then, using a puller, you can also press the new part into the steering knuckle. This tool allows you to press the hub with high quality. Working with a tool of this type greatly simplifies the entire process, and the technician will need less time for all removal and installation. But operating the unit requires some skill and great care.
As you can see from this article, even such a simple repair job as replacing a wheel bearing can have many nuances.
A wheel bearing malfunction on a VAZ-2112 can be detected when an unpleasant noise or hum is heard while driving. Since this problem is quite common on those cars whose mileage exceeds 100,000 kilometers, today we will analyze in detail the step-by-step process of repairing (replacing - approx.) this front-wheel drive system.
The video shows the replacement of the front wheel bearing on a VAZ of the 2110-2112 family.
Please note that front wheel bearings should only be purchased in Russia and from domestic manufacturers.
Chinese analogues, assembled from low-quality materials, have a short service life, and besides, the difference in price is not significant.
Do-it-yourself replacement of the rear wheel hub bearing
Any repair of a car's chassis cannot be called simple. Not because it requires special education and special skills. The difficulty, first of all, lies in the labor intensity of the repair. Removing some parts requires a fair amount of effort and a lot of patience.
You need to be prepared for this in advance. You can’t take a car with a half-disassembled rear hub to a service center anymore. If your determination is not lost, first of all, you need to stock up on tools.
Tools and accessories
To change the rear wheel hub bearing yourself you will need:
- Jack and suitable wooden support;
- A socket wrench, usually 30, and a suitable piece of pipe, as a reinforcement for the wrench;
- Key 12, for disk guides;
- Balloon wrench;
- Round nose pliers for removing retaining rings;
- Hammer;
- Chisel;
- Universal puller. You can do without it, but this requires some experience. Therefore, it is better to buy it; it is also suitable for the front wheel bearing.
- Mount.
- And, of course, a new bearing. It does not need to be taken out of the packaging ahead of time to prevent dirt from getting in.
Necessary tool
Before you start work, you need to prepare all the tools and assemble them in one place:
The tool is assembled and ready to use
Preparatory work
Make sure that the workplace is well lit, and it is best if it is on a viewing hole or a lift. Because this is the only way to talk about high convenience when carrying out such work. It would also be a good idea to familiarize yourself with the detailed diagram of the location of the bearing on the front hub of the VAZ-2112.
Thanks to this illustration, the diagram becomes very clear.
If work on replacing the hub bearings is also planned for the rear wheel, then the work should begin with replacing the front ones, since it is much more difficult to do them, and therefore it will take more time. .
Step-by-step work order
First of all, we place the car in a stationary state, put on the handbrake, and, if desired, install wheel chocks. And while the car is on the surface, we tear off all the bolts on the front wheels.
Please note that as a result of these actions, the caliper will not hold anything, and it will hang on only one brake hose, and in order to prevent it from breaking, we tie it with a rope.
For fixation, you must choose a strong rope.
Replacing the wheel bearing
Then, when access to the hub bearing is completely open, there are several ways to replace it.
First way
In this case, it is necessary to have a special puller to remove the bearing.
- The advantages of this method include the fact that during this work there is no need to touch the bolt, therefore, you will not have to add additional work.
- The disadvantages of this method include inconvenience during the process. Because you have to contrive and take an extremely uncomfortable position.
Second way
To carry out this work, it is necessary to carefully dismantle the steering knuckle and completely remove the hub.
The application of this method is much simpler compared to the first. However, this affects the alignment position, and subsequent adjustment cannot be avoided.
Advice! Before you begin removing the alignment bolts, mark their position with a marker or chalk.
In this case, the marks should indicate the current position of the bolt on the rack and the previous location of the knuckles. Thanks to such marks, during assembly it will be much easier to navigate the position of these bolts. Although it will not be possible to return to the previous state, it will still be possible to minimize it.
Putting marks
- We put marks.
- We knock out all the bolts from the fist.
- This will knock the bearing out of the hub.
- Remove the retaining rings.
- Press out the bearing.
- We mount a new bearing, having previously cleaned the space of the hub and generously coated its surface.
This repair method will be very effective when not only the wheel bearing is subject to repair, but also most of the VAZ-2112 chassis. Such elements include the replacement of steering tips and ball joints.
Third way
To perform work using this method, it is necessary to remove the entire rack completely.
The stand has been dismantled.
- Next, using a vice, we replace the wheel bearing.
- Because this is how the replacement will happen quickly and efficiently.
Although this method is the most difficult, because after dismantling the strut, you need to take care of dismantling the steering ends and mounting nuts, it is quite useful when replacing those same front shock absorbers.
After dismantling the bearings, we install everything in the reverse order, assemble the rack and mount it on the car.
Do we make the puller ourselves or buy it?
If you do not want to knock out a bearing, you can purchase a special puller in stores, since the entire process of working with such a device becomes easier and the time required for work is reduced..
This also applies to bearing installation work.
Or you can make your own. It will look like this.
Hand-made hub puller
conclusions
As you can see for yourself, there is nothing complicated in replacing the front wheel bearing; you just need to follow the instructions in our article exactly.
Today we will tell you how to independently remove and replace the wheel bearings on your VAZ-2110 and similar models. This type of work can be done simply on a flat surface, but it will be much more convenient for you if you find an overpass or inspection hole;) We will need 2 of these pullers from a non-standard tool
(it’s possible without them, but the process may take a long time, because without them it’s extremely inconvenient)
Let's start by carefully using a screwdriver to remove the hub cap.
Then, using a narrow chisel, we straighten the jammed collar on the hub bearing nut in two places. Essentially we knock down the counter notches.
We put the car on the handbrake, in 1st gear and put shoes under the wheels or whatever you have at hand to prevent the car from rolling away.
Use a wrench with a size 30 “head” to loosen the hub bearing nut. The nut is tightened with a large torque, so the head and knob must be quite reliable and have large leverage.
Having torn off the nuts securing the front wheels, we hang the face of the car (if you hang one wheel at a time, the anti-roll bar interferes with dismantling).
We remove the wheels, then dismantle the brake pad guide along with the caliper and the brake disc itself.
Unscrew the hub bearing nut and remove the washer.
We pass bolts about 130 mm long with an M12 x 1.25 mm thread through two holes in the brake disc. We screw the bolts into the holes of the hub to a depth equal to its thickness.
Using sharp blows of the brake disc on the heads of the screwed-in bolts, we press out the hub.
Unscrew the ball joint and remove the CV joint from the bearing hole.
Using suitable pliers, remove the retaining ring.
Then, using the puller mentioned at the beginning of the article, we press the bearing into the cup located outside the steering knuckle, while the bolt presses on the inner ring of the bearing through the washer from inside the knuckle.
Using the same puller, we subsequently PRESS the new bearing into the steering knuckle.
Don't forget about lubrication! So we learned how to change the front wheel bearing on a VAZ 2110, 2111, 2112 on our own.
If you still have questions, you can ask them on our forum in the VAZ-2110 - VAZ-2112 club. Good luck on the roads.
Free rotation of the wheel on the axle is ensured by the hub bearings.
They are installed in the hub body, and the inner race is put on the wheel axle. The ball mechanism is reliably protected from moisture and dust by plastic plugs secured between the clips. Timely replacement of bearings in the VAZ 2110 hub ensures long-term operation of the unit under heavy loads. The article offers instructions on how to properly replace bearings on a VAZ 2110 car with your own hands. DIAGNOSTICS OF VAZ 2112 HUB BEARINGS The wheel hub has two single-row roller bearings installed.
During operation, constant maintenance of the elements is required, which consists of adjusting the gap and replacing the lubricant in the bearings. To check the play or clearance, you need to hang the wheel and shake it. If the play cannot be eliminated by adjustment or noise appears while driving, then there is a high probability that the hub bearing has failed. Only one element or two at once can come out. The bearings should rotate on the axle without jamming and freely. Rollers and rings should not show any chips, pits or signs of wear. If they are detected, the bearing on the hub of the VAZ 2110 needs to be replaced. To check the bearing in the front wheel hub, you must: Raise the front wheel with a jack. Remove the wheel. Using a chisel, remove the protective cap from the front wheel bearing. Remove the brake pads. Attach a clock type indicator holder to the steering knuckle. Place the indicator leg against the wheel hub as close as possible to the adjustment nut. Place ring wrenches on the studs and tighten with nuts. The keys are taken to “14”. Holding onto them, the hub rotates and moves in the axial direction. The indicator measures the amount of axial movement or clearance. If it exceeds more than 0.15 millimeters, the gap must be adjusted. The wheel is installed in place without a protective cap and secured with two diametrically located bolts. Use a bevel or chisel to straighten out the jammed shoulder on the bearing nut and use a socket wrench “27” to unscrew the nut. The new adjusting nut is tightened to a torque of 2.0 kg-cm. Tip: The wheel needs to be rotated in both directions, this will make it possible to correctly install the wheel bearing rollers.
The nut is loosened and tightened again, but the torque is already 0.7 kg-cm. The adjusting nut is gradually released by 20-25 degrees, the wheel is rotated in a vertical plane until a barely noticeable play appears. The gap is checked; its value should not be more than 0.08 millimeters and less than 0.02 millimeters. In this position, the nut is locked with the collar caulked in the grooves located at the end of the axle in the steering knuckle. The old grease is removed from the protective cap of the hub and approximately 25 grams of new grease Litol-24 or similar is added. The protective cap is installed on the hub bearing. The wheel is put in place. The cost of such operations is not high, but it will prolong the life of the wheel bearing. After adjusting the gap, it does not correspond to the required parameter, then the wheel bearing on the VAZ 2110 needs to be replaced. How to replace a VAZ 2112 wheel bearing. The work is best done in an inspection hole or overpass: Remove the hub cap.
Using a narrow chisel, straighten the dented collar of the wheel bearing nut in two places. The car is put on the handbrake, and shoes are placed under the wheels. First gear is engaged. Use the wrench head at “30” to loosen the hub bearing nut. Tip: The nut in the assembly is tightened with a large torque.
This requires the use of a knob and head of sufficient strength when unscrewing it to transmit the necessary force. The bolts securing the wheels are loosened. The front of the car is hanging out. This is done so that the anti-roll bar does not interfere with dismantling; it will push up the suspension elements of the VAZ 2110 car. The wheel, along with the caliper, the brake pad guide and the brake disc are removed. The brake pad guide and caliper are tied in such a way that they do not hang on the brake hose. The wheel bearing nut is finally unscrewed. The washer is removed. Two bolts with an M12x125 mm thread and a total length of 130 millimeters are passed through diametrically opposite holes located in the brake disc. The mounting bolts are screwed into the holes of the hub to a depth equal to its thickness. The bolt heads are sharply hit by the brake disc, the hub is pressed out. The fastening to the steering knuckle of the ball joint is unscrewed and the CV joint is removed from the bearing hole. The CV joint is disconnected from a VAZ 2110 car. Another dismantling method involves first disconnecting the ball joint and removing it from the CV joint hub.
The hub rotates and is knocked out of the steering knuckle with a soft metal drift. Use pliers to remove the retaining ring. The VAZ 2112 bearing is pressed out with a puller into a cup located outside the steering knuckle. Then the bolt will press on the inner ring of the product through the washer located inside the fist. When pressed out, the bearing ring almost always remains on the hub, and it is difficult to remove it due to the tight fit. Tip: You can remove the ring using a puller; its paws should fit into two small grooves on the VAZ 2110 hub. If the puller fails to remove the ring, you can pry it off with a screwdriver and, moving it, remove it, as shown in the photo.
If necessary, nicks on the hub are cleaned with a file. The mud ring is installed and sealed on the hub. The inner surface of the car's steering knuckle is cleaned and lubricated. Replacing the VAZ 2112 wheel bearing ends with pressing the new element into the steering knuckle of the VAZ 2112 car. In this case, the large puller washer rests on the steering knuckle from the inside so that its mud rings are not damaged. You can press through the old bearing when pressing in a new bearing, while the old one will transmit force through the outer ring. The retaining ring is installed. Installation of the retaining ring The hub is pressed into the bearing using a puller.
The puller washer should rest against the hub and bearing ring. Replacement of VAZ 2112 wheel bearings has been completed. Further assembly is performed in the reverse order of disassembly. The bearing nut is tightened to the required torque, and the shoulder is locked by jamming it. As on a VAZ 2112 car, replacing the hub bearings is done correctly and can be clearly seen in the video. If you carry out preventive measures in time and replace worn wheel bearings of a VAZ 2112 car, you can increase the reliability of operation and the period between major repairs of the car. The VAZ 2110 wheel bearing should be replaced when signs of wear appear. When a continuous humming sound is heard from one of the wheels while driving, the first thing to check is the technical condition of the wheel bearing. If vibration is added to the audible humming sound, this means that the part has begun to deteriorate and needs to be replaced urgently.
- Use a jack to lift the wheel and, holding its upper and lower parts with both hands, pull it back and forth. If play is felt, this indicates wear of the wheel bearing.
- Rotate the wheel in different directions. If the bearing is faulty, an unpleasant sound will be heard, and the wheel may spin jerkily.
You can replace the wheel bearing yourself, although the operation is quite labor-intensive. To make the process easier, you will need a special puller to press out the bearing or its race. In addition, you will need the following tools and consumables:
- a set of wrenches or sockets, including ones for 30 mm;
- round nose pliers for removing the retaining ring;
- jack;
- wheel wrench;
- rags;
- fabric gloves.
Work can be performed both in the inspection pit and without using it, on a flat area. The car should be braked by placing 2 shoes under the wheel located diagonally from the one being removed.
Assembly
Clean and lubricate the inner surface of the steering knuckle. Use a puller to press the new bearing into the steering knuckle. In this case, the large puller washer rests on the steering knuckle from the inside so as not to damage its mud rings, and when pressing, the new bearing can be pressed through the old bearing, which will transmit force only through the outer ring. Install the retaining ring. Use a puller to press the hub into the bearing. Now the puller washers rest against the inner race of the bearing and the hub.
We carry out further assembly in the reverse order, tighten the bearing nut to the prescribed torque and be sure to lock it by jamming the collar.
In conclusion, I would like to note that replacing a hub bearing on a new car is not difficult, but if the suspension parts are many years old, then removing the hub and other elements will be very problematic. Replacing the wheel bearing is shown in the video:
By the way, do you know how to check the suspension yourself?
Replace the wheel bearing yourself...
1200 rub. for the photo report
We pay for photo reports on car repairs. Earnings from 10,000 rubles/month.
Write:
Many will agree that unscrewing the hub nut is an activity that can be punished in court; it is too inconvenient and difficult even for a physically strong person with all the necessary tools. However, since it is not always possible to choose the easiest one (option One, also known as the Main one!) - sending the car to a service station, where they will not only unscrew it but also carry out subsequent repairs. Then you will have to figure out the task yourself, using the easiest and most effective method possible.
