What are racks and what category are they?
A strut is a suspension element that serves to absorb energy that is transmitted to the car body through the wheels.
Very often it is confused with a “shock absorber”. Some say that they are one and the same, others say that one is part of the other. On the manufacturer's websites, the names are also mixed up: either it is just a strut, or a shock absorber strut, or a shock absorber. In any case, we will focus on the majority: the stand in our case is the “syringe” itself without springs and supports.
How to remove rear shock absorbers on VAZ 2114, 2115, 2109, 2108.
Begin dismantling the rear shock absorber by removing the plastic plugs located in the trunk.
Having removed the plastic, we will see the nuts screwed onto the shock absorber rod. We unscrew them with a special key. If it is not there, then we use a 17 socket wrench and a 6 wrench or an adjustable wrench.
Having unscrewed the top nut, remove the washer and cushion that stood between the nut and the body.
Before unscrewing the lower shock absorber mounting bolt, lift the wheel on a jack. The racks can be removed very easily if the bolts securing the rack to the beam can be unscrewed without any problems.
What to do if the shock absorber bolt is soured.
Removing the struts can be complicated by souring of the bolts with silent blocks. If you encounter such a problem, then you will not be able to remove the shock absorber without a grinder.
Just carefully file off the head of the bolt and knock it out with a hammer.
If the bolts are not soured.
If the bolts securing the rack to the beam have not soured, you are very lucky. Simply unscrew them and remove the stand from the eye.
Ready! Let's move on to installing the new part.
Lada 2114 Trudyaga › Logbook › Torsional vibration damper
I gave myself a day off today. I think: I’ll wash the car, take out the trunk and watch some movie with a beer!
I washed the car and wiped it dry! I remembered that the alternator belt whistles a little in the morning. I looked at the belt and decided that it needed to be changed... It was practically dry and cracked. I started the engine and decided to take a look. I came up and saw:
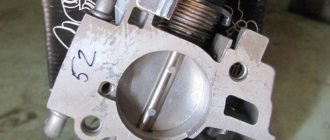
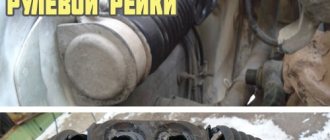
To begin with, I decided to unscrew the damper and look “into its eyes,” examine it and identify the cause. The damper unscrewed very easily and it was strange. Development at the damper
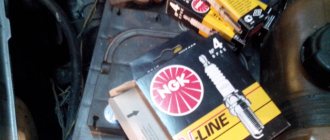
I went to the store. I took the factory damper and alternator belt. The damper was cast, without rubber.
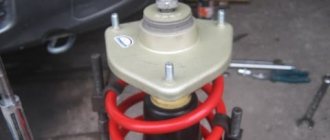
The lower gear is tightly stuck to the crankshaft. And he knocked and picked, she didn’t care. I decided to drill a hole and tap a thread for the puller. Then the thought came by itself. I placed the chisel in the hole and cracked it a couple of times with a hammer. The result is excellent!
There is no point in describing the assembly process. Yes, and I assembled everything quite quickly. As a result, a day off is not a day off. But the day was very successful!
About the racks on the VAZ 2114
As is the case with other cars, the struts on the VAZ-2114 (which is practically the same “nine” 2109, but with minor structural changes) are located next to the shock absorbers. In other words, there are front and rear pillars. The racks are attached using the hinge method using a long rod.
Racks are a very important detail. If for some reason they fail, they will have to be replaced. You cannot use a car with broken struts, as this is fraught with emergency situations and an increased risk of accidents.
The front and rear pair of suspension struts are usually sold separately, since sometimes only one part of the car fails. When purchasing racks, you must take into account what part of the machine they are intended for, since the rear and front pairs have some differences.
Types of racks for VAZ
Comparison table of manufacturers and models of racks.
| Manufacturer | Completeness | Type of depreciation | Rigidity |
| Demfi | Only included | Gas | Optionally |
| Trialli | Separately (right or left) | Oily | Standard |
| Asomi | Only included | Gas | Optionally |
| LADA | Separately (right or left) | Gas | Standard |
| KRAFT | Separately (right or left) | Gas | Standard |
| SS20 | Only included | Gas | Optionally |
Vehicle compatibility
The design of different models of VAZ cars is largely unified, so one model of racks can be suitable for different cars at the same time. For example, racks for VAZ 2114 are compatible with VAZ-2109, VAZ-2108, VAZ-21099 and other car models. The manufacturer indicates this in the rack specifications. Thus, when you buy racks, you can choose among models for different VAZ cars.
Types of racks for VAZ
Firstly, manufacturers distinguish between front and rear struts. Accordingly, when purchasing, you must first take into account the fact for which side of the suspension the kit is intended.
Secondly, different racks differ in rigidity - their ability to absorb vibrations. The more the car’s ride “softens,” the softer the stance. This characteristic in itself is not an advantage or disadvantage of the kit, since the driver must independently choose the stiffness of the struts in accordance with his preferences and driving style.
Video - Which shock absorbers are better and more reliable to install on your car
Reasons for failure of racks
Most often, shock absorbers break as a result of frequent trips on bad roads. Thus, even the best branded models of racks installed on domestic cars rarely withstand a mileage of more than 100,000 km (and factory racks installed on the 14th sometimes do not withstand even half of this distance).
Oil leakage strut VAZ 2114
It is for this reason that the condition of the shock absorbers should be periodically checked and, if necessary, replaced.
Signs indicating that the racks are broken may include:
- noises, crackling and grinding sounds in the area of the brake pads;
- deformation or damage to the compression buffer;
- oil leaks visible on the shock absorber body;
- jamming of the rear strut rod.
Having noticed them, you should pick up new racks in the store and replace them.
How to determine if a shock absorber is faulty
The first thing to do is conduct a visual inspection. Oil stains on the shock absorber itself, boot or rebound buffer warn that it needs to be replaced. Also, uneven tire wear may be an indication of problems with the rear suspension strut.
When driving at a speed of more than 80 kilometers, the car's handling noticeably deteriorates, the steering reacts late to road irregularities, and the car's swaying does not subside.
But the most reliable way is to inspect it at a specialized service station stand.
Removing the rack
After preparation, make sure that all threaded connections are treated with lubricant, the car is installed securely and will not fall during repairs. The step-by-step repair looks like this:
- Remove the shield located in the luggage compartment that protects the upper mount of the shock absorber strut.
- Remove the pad and support washer. All these steps do not need to be done if you only need to replace the silent blocks on the VAZ-2115.
- Unscrew the nut that secures the shock absorber to the rear beam.
- When removing the strut there is no need to compress the spring.
- Lower the shock absorber and remove the lower cushion and support washer.
- Slightly press the shock absorber rod down.
- Remove the spring and protective cover, cover, bump stop.
- Remove the shock absorber completely.
- If there is no gasket on the spring, it should be at the top of the cup.
When replacing the rear struts on a VAZ-2115, it is imperative to install new gaskets, anthers and bump stops. Otherwise, the shock absorbers will not be able to work properly.
What is the part for?
The depreciation system of a car poses a number of important tasks.
- Smoothing out bumps on the road.
- Preventing some fragile suspension parts from failing due to constant vibration.
- Ensuring comfort for the driver and passengers in the vehicle.
Without shock absorbers, it would be impossible to drive long distances, since all the people in the car would constantly suffer from strong shaking and sharp impacts.
Determining the malfunction of the rear shock absorbers of the VAZ-2115
The role of shock absorbers in ensuring the safe operation of a car is often not taken into account by many, especially novice car enthusiasts. And this can lead to unpleasant and even tragic events. If the shock absorber fails, or even partially fails, the car wheel loses contact with the road.
And, as a result of this, the braking distance increases in case of emergency braking. When cornering, the stability of the car deteriorates, the chassis and tires are subject to greater load, which leads to their wear, and so on.
Replacing the front strut of a VAZ 2114
To replace both the rear and front struts, we will need to prepare in advance:
- Chisel, pliers.
- Jack.
- Wheel key, also for 19.
- Vice, cotter pins, puller.
There are few tools, but they are all needed during the work. If you are not well versed in the nuances of replacing spare parts and do not know, for example, what a key is for, it is better to contact a salon. The rack replacement service is not that expensive, but you will be completely confident in the quality.
Let's move on to the actual process:
- We remove the front wheel and get rid of the cotter pins located on the stabilizer link and the tie rod mount.
- Using a 19mm wrench, remove the rod securing nut. We disconnect the pin and the stand, remove the brake hose from the holder.
- We hang the rack by jacking up the lever. Now we need to get to the stem. To do this, we will dismantle the plug located on the body mudguard.
- Unscrew the stem using a wrench. Taking a 19 mm socket and a wrench, we get rid of the fasteners connecting the steering knuckle and the shock absorber strut.
- We get rid of the three nuts that secure the body to the support. We take out the stand directly. Having pumped the new spare part, we tighten the springs.
- We disassemble the rack by removing the top support. We assemble the mechanism in reverse order. The second rack is installed in a similar way.
As you can see, the process itself is not that complicated and takes a minimum of time.
The best racks for VAZ 2114
Bilstein 24-196529 B6 Performance
You can be sure that these are the best VAZ 2114 front struts on the market right now. For those looking for a high performance product, this is a good option.
Now you can upgrade your original dampers and make them even better. Since they are designed to fit correctly, they are fairly easy to pair with the original equipment factory spring. This means installation will be easier and faster. You can be sure that the shock absorber will work perfectly with many other vehicles.
The dampers are also thoroughly tested to ensure they can deliver good performance.
KYB 565102 MonoMax Gas Shock
The shock absorber will give you the best performance upgrade with impressive damping characteristics. It is estimated that it can provide 40% more damping capacity than standard shock absorbers.
When you need to improve the performance of your car's suspension, turn to this company. KYB is considered one of the best manufacturers.
KYB 565102 MonoMax Gas Shock is a monotube shock absorber. Thanks to this design, it is able to outperform other standard shock absorbers on the market. Being galvanized and also made of stainless steel, it is great for extreme conditions.
You will love the fact that it has a rubber boot to protect the shaft. It can also prevent dirt and debris from getting into the seals.
Bilstein BE56681H8
Which front struts are better to install on a VAZ 2114? Choose Bilstein. The shock absorber from this company is much better quality than other analogues. You will realize that this shock absorber is good in terms of settings. This is the reason why you get one of the best solutions because there is no difficulty in installation, fitting or customization.
Another good thing is that the shock absorbers are of a monotube design. It is able to provide stable performance for many years. Thanks to high-quality performance, you will always feel maximum comfort.
The product comes with an impressive piston. This is good as it will perform at the highest level regardless of the road conditions.
Bilstein 24191203
This is another great solution from an already well-known company. The shock absorbers are capable of operating at maximum load to achieve better performance.
Another advantage of the damper is that it is single-pipe. This is another reason why you can choose it to enjoy the comfort. It will work perfectly even at high speed.
Monoroe 5779 OESpectrum
This is definitely a good option for many people who want to enjoy using a shock absorber because it is capable of providing maximum comfort. When you compare this damper with some others, you will find that this one is better in many ways. Many buyers believe that this product is worth the money spent.
The damper's design makes it suitable for use in a variety of road conditions. It is also quite durable, and therefore can be safely used for several tens of thousands of kilometers.
So that you no longer have the question of which racks to put on the VAZ 2114, the manufacturers have made it as easy as possible to install.
Monroe Load Adjust Shock Absorber
These all-weather hydraulic shock absorbers feature special modifiers to reduce friction, giving them more control over the road for a smoother, more comfortable ride. Once all four dampers are installed on a vehicle, they can easily adapt and change depending on the terrain thanks to their fully offset design, which is specifically tuned to handle the roughest highways and roads.
The dampers can withstand the most extreme road conditions. They consist of pistons, which ensures increased durability and perfect handling of your car. They are also lightweight and easy to install. Monroe shocks can also be installed on other vehicles for hauling and towing heavy loads, a feature we found extremely useful.
One problem is that you can get a lot of noise from these struts while driving. While this doesn't affect how they cope, it can be annoying. They can also make your ride a little rougher.
ACDelco Professional Premium Gas Shock Absorber
These dampers are designed to handle all types of terrain. One thing we found most useful was the hardened chrome plated piston rod, which is corrosion and scratch resistant. This added feature means they will last longer and perform better.
When it comes to the inside of the shock absorbers, they all contain a sliding mandrel (DOM) pressure cylinder for a high quality sealing process. This reduces internal friction, which helps extend the life of each damper. They are also gas charged, making them more efficient and providing faster response times. Each piston rod is self-lubricating to keep out contamination, dust and other debris for improved performance.
While they are a great set of shocks, they are inferior to the stock OEM shocks. They are also shorter, so your vehicle may not be able to handle as much height as the original shocks.
Bilstein
These heavy-duty, monotube shocks are designed for those who want to get off the beaten path. As a gas shock absorber, they improve the car's handling, both on and off the road.
Nitrogen shock absorbers resist fluid foaming, making them incredibly durable. They are made of metal so that the dampers last as long as possible. You also get a lifetime warranty and they are easy to install yourself, saving you money without having to call a professional.
Your ride may be more comfortable, but it will also be rougher.
Why do you need to twist the crankshaft pulley?
Removing the crankshaft pulley is performed for various reasons.
Crankshaft pulley
Most often it has to be removed when replacing the timing belt or replacing crankshaft seals. Usually the belt is changed either according to the regulations, or when defects are identified that require its replacement. Oil seals are replaced when oil leaks occur due to product wear.
On a VAZ 2114, the crankshaft pulley is secured with a bolt. During removal, a problem arises when unscrewing the mounting bolt. Firstly, it is inconvenient to get to. Secondly, at the factory they always tighten it very tightly so that it does not unscrew on the road. If a fastener comes loose while driving, it can result in costly repairs. During operation, thanks to the right-hand thread, the tightening is enhanced. In addition, coking and sticking of the part occurs. Thus, sometimes the bolt is very difficult to remove.
Tools
To successfully dismantle the VAZ 2114 crankshaft pulley and replace consumables, you should prepare the following tools:
- standard set of keys;
- jack;
- support or stump;
- socket head;
- extension;
- pulley puller;
- pry bar, screwdrivers.
Replacing the front spring
This work is best done on an overpass or inspection hole, although it can also be done simply on a flat area without a slope:
- First we need to stop the car with the handbrake, then remove the bolts that secure the front wheel, then lift the car with a jack
- Finally removing the wheel
- To replace the spring and shock absorber of the front suspension, you need to remove and disassemble the spring strut
- After removing the wheel, turn the steering wheel in the direction opposite to the removed wheel until it stops
- Now it is convenient to remove the cotter pin
- Then, using the “19” key, unscrew the nut that secures the pin of the tip of our tie rod to the strut arm
- We take a puller and press the finger out of the lever
- If suddenly there is no puller, then unscrew the nut not completely, then insert the mounting blade (pry bar) into the spacer between the strut arm and our steering rod, then apply sharp blows to the end of the strut lever with a hammer
- Be sure to remove the brake hose coupling from the strut holder
- To unscrew the shock absorber rod nuts, you need a special wrench that allows you to keep the rod from turning
- We go into the engine compartment and remove the plug from the upper strut support
- Then loosen the clamp on the shock absorber rod nut
- Then, from below, before unscrewing the upper bolt securing the strut to the steering knuckle, paint the installation marks on the bolt and strut bracket
- Of course, when installing the guide of this spring strut, even precise alignment of the marks does not guarantee you an accurate setting of the desired wheel camber angle, but it allows you to achieve a minimum deviation from the desired value; the instructions still require you to check the camber and toe of the wheels after changing the spring or shock absorber
- Take the head “19” and unscrew the nut from the top bolt, hold the bolt from turning with a wrench of the same size
- Remove the camber angle adjusting washer, then use a soft (copper, aluminum) metal drift to knock out the bolt itself
- This is a bolt and washer for adjusting the camber angle of the wheels.
- In the same way, unscrew the nut from the lower bolt securing the strut to the steering knuckle, then knock out the bolt
- So as not to interfere, move the steering knuckle away from the rack without tightening the brake hose
- Then, using a “13” key, unscrew the nuts securing the upper support of the spring strut and remove the strut
- Now we install the spring ties opposite each other, and they should capture five turns of the spring, as in the photo below
- We compress the spring by alternately turning the tie screws
- When its pressure on the cups weakens, you can unscrew the rod nut
- And you can remove from the rack its upper support, support cup, and spring along with ties, then the protective compression buffer and cover
- We check the condition of the removed parts and replace damaged ones.
- Screeds, installed on a new spring
- By alternately rotating the tie screws, we compress the spring
- After this, you can install the spring together with the ties in the lower support cup
- Place the upper support cup and support on top, then attach and tighten the rod nut with a special wrench
- You can remove the tie rods from the spring
- Install the spring strut on the machine in the reverse order
- The strut spring on the opposite side is replaced in the same way.
- After replacing the springs, the wheel alignment angles are adjusted; it is recommended to carry out the procedure at a service station with the appropriate equipment
- If you forget to do this, don’t be surprised why you start to “eat” rubber or move the steering wheel to the side, that’s the price of forgetfulness
Rear spring
Replacing the rear spring on a VAZ 2115 requires preparatory work. Before you start lifting the rear of the car, engage 1st gear and place the stops under the front wheels. After lifting the rear part, we install reliable supports (large wooden blocks) next to the jack. In our case, it is impossible to install supports under the rear beam; the suspension must be unloaded when replacing springs:
- From the tool you need keys “17”, “19”, a pair of screwdrivers
- Remove the protective cap from the rear pillar mount inside the trunk
- We unscrew the nut from the upper mount of the rack, use a special key with a slot to hold the rod so that it does not turn
- Remove the support washer along with the top cushion
- Removing the wheel
- The bolts that secure the wheels on a car that is standing on the ground are loosened and tightened (in a suspended state this is inconvenient and even dangerous)
- Recommended tightening torque for mounting bolts is 65-95 Newtons per meter (6.5-9.5 kilograms per meter)
- Unscrew the nut from the lower shock absorber mounting, then remove the bolt
- We lower the shock absorber and remove its lower cushion with the support washer from the rod, pull it out through the spring coils using a spacer sleeve
- We push the shock absorber rod down
- Then remove the spring along with the protective cover, compression buffer and cover
- We remove the shock absorber (see Rear shock absorbers and their replacement) from the rear wheel niche
- Remove the insulating gasket from the upper spring cup (if the gasket is not on the spring)
- We take out the cover from the spring and remove the compression stroke buffer from it
- Cushions that are torn or have lost their elasticity must be replaced.
- We replace the torn cover; in the process of replacing the cover, remove the cover from it
- If the compression progress buffer is destroyed or damaged, replace it
- A torn or lost elasticity gasket for insulation must be replaced.
- We replace the spring if cracks or deformation of the coils are found on it
- We check the spring settlement by applying a load of 3188 Newtons (325 kgf) to it.
- Moreover, the length of the spring under such a load is no less than 201 millimeters (or 182 millimeters for machines intended for export)
- The marking of VAZ 2115 springs is divided into two classes A and B, class A is designed for higher loads
- All springs of the same class are installed on the car
- When the length of a spring marked yellow (class A) is less than 207 millimeters (or 188 millimeters for cars intended for export), then replace it with a spring marked green (class B). The spring must be compressed along the axis of the spring
- The supporting surfaces must coincide with the surfaces of the shock absorber and body support cups
- As in the previous article, it is recommended to replace both rear springs of the VAZ 2115 at once; the springs should be exclusively of one group
- Assembling the stand
- When installing the cover on the casing, we tuck its edge onto the cover flange
- We install the insulating gasket on the spring so that the end of this spring rests against the special protrusion of the gasket
- We attach the gasket to the spring with insulating tape (or thin copper wire) so that it does not come off during installation
- We fix the stand and put on it a protective case with a lid
- We pull out the shock absorber rod and install the lower cushion on it with a support washer, as well as a spacer sleeve
- In this case, the shock absorber rod will be easy to pull out if you first screw the nut onto it
- We install the spring on the strut so that the beginning of the very first turn falls into the stamping under it in the lower cup
- To compress the spring when installing the strut, place a jack under the beam
- Then we gradually lift the beam with a jack, thus compressing the spring, and insert the shock absorber rod through the hole in the body arch
- Install the upper cushion on the shock absorber rod with the washer together
- Then we tighten the nut of the upper fastening on the rack, using the second wrench we hold the rod from turning
- Screwing the wheel
- We lower the car to the ground and shake it vigorously several times.
- Tighten the nut on the lower shock absorber mount to the required torque to 68-84 Newtons per meter (or 6.8-8.4 kilograms per meter)
- And the nut on the upper shock absorber mount - 51-63 Newtons per meter (which corresponds to 5.1-6.3 kilograms of force per meter)
- Replacement of rear springs on VAZ 2115 is completed
- And after a run of about 100 kilometers, we once again tighten the threaded connections to the required torques.
All you have to do is watch the training video.
How to properly remove a pulley
As already mentioned, the crankshaft gear of the VAZ 2114 is secured quite seriously, and therefore the dismantling process should be thoroughly prepared.
You will need:
- jack;
- shoes;
- flat mount;
- a set of keys;
- flathead screwdrivers;
- set of socket heads;
- head extension.
The operation itself is best performed on a special platform equipped with a lift.
After the necessary tool is prepared, let's look at how to unscrew the crankshaft pulley on a VAZ 2114.
Fixing the flywheel
This procedure should be performed strictly in the sequence indicated below in order to avoid possible errors and accidental damage to the car’s mechanisms:
- Place the car on a platform or overpass and secure it.
- Loosen the alternator belt tension adjustment bolt.
- Remove the generator retaining bolt.
- Raise the car using a jack.
- Remove the front right wheel.
- Remove the alternator belt.
- Fix the flywheel in a stationary state (it is best for this purpose to use a screwdriver, which should be inserted into the hole under the plug located on the side of the transmission).
- Remove the timing belt (after setting its position marks).
- Impregnate the threads of the pulley mounting bolt as much as possible with VeDeshka or another composition that actively affects the oxide layer (for greater reliability, you can wait a while and then repeat the procedure again).
- Place a suitable head with an extension on the mounting bolt and turn the fixing bolt counterclockwise so that it moves (if this cannot be done by hand, use a hammer or a piece of wood, carefully striking the head extension).
- Unscrew the fastening bolt (after it is removed, you should pay attention to the presence of a key located on the shaft. It can be easily removed, so it should be immediately removed to a safe place so as not to be lost during further dismantling).
- Remove the crankshaft pulley using a special puller.
Crankshaft key
Reinstalling the pulley is done in exactly the same way, but in reverse order.
After reading the removal procedure, some drivers may wonder what to do if there is no special puller available (especially since it is extremely rare to remove the crankshaft pulley, so such a tool can not be found in every garage).
The way out of this situation is quite simple - you should take a pair of flat pry bars (or powerful flat-head screwdrivers), which should be carefully inserted between the crankshaft and its pulley. Gradually rocking this tool back and forth, first move the pulley out of place, and then, moving it to the edge of the shaft, remove it completely.
Using a pry bar to remove the pulley
Before you begin dismantling the crankshaft pulley using pry bars, you should carefully tap the pulley itself using a small rubber or wooden hammer. This will allow you to move it slightly and avoid sticking.
As mentioned above, the installation of the old (or, in case of replacement, a new) crankshaft pulley is carried out in exactly the same sequence as its removal.
The only thing you should remember is that before you begin installing this part, its seat should be generously lubricated with grease or another lubricant similar in consistency, and the fastening bolt should be tightened with the maximum possible force.