Replacing the fuel pump Lada 2105 (VAZ 2105)
Welcome, friends, to the DIY car repair website.
Using the example of a car with a carburetor engine, we will look at how to remove and install a VAZ 2107 fuel pump. We will also look at the types and main faults of a fuel pump. As you know, the fuel pump is one of the main parts of the car, but like many parts, it also becomes unusable over time.
Fuel pump malfunctions:
- The engine does not start or stalls after starting.
- The engine will not start hot or cold.
- The engine does not develop speed and does not produce full power.
- Poor fuel supply to the carburetor or none at all.
All these reasons may be the following: the elastic membrane has burst or torn, the valves have become clogged or worn out, the spring under the diaphragm has broken, the rod (pusher) of the fuel pump has worn out.
All these faults are easily repaired, and repair kits for them are not difficult to find in auto stores, but it is still easier and more reliable to purchase a new VAZ 2107 fuel pump, because its price is not so high.
Types of fuel pumps for VAZ 2107:
- Citron.
- Baker.
- DAAZ.
All these three types of fuel pumps, quite common, at one time had to be installed differently, but I consider the DAAZ to be the most reliable, at least this is my opinion, but which one to install is up to you to decide.
Yes, I would like to add a little that the gas pumps for the classics are the same and fit even an old penny, even a VAZ 2106 or another model, and the instructions presented below for replacement are also identical. Also, do not forget to read the article replacing the VAZ 2107 crosspiece.
Causes of malfunction of the VAZ-2105 carburetor
Before you begin the repair procedure for a faulty VAZ-2105 carburetor device, you should understand the features of its device and the possible causes of malfunctions in it.
Experts emphasize that the VAZ-2105 is equipped with a carburetor device 2105-1107010, with the following characteristics:
- with EMXX (forced idle economizer to reduce carbon dioxide levels during braking);
- emulsion;
- two-chamber;
- with falling flow.
The most common parts that fail in a carburetor are:
- Float chamber.
- Jets of an econostat (enrichment device) with a pneumatic drive.
- Fuel liquid dosing system.
- Distributor.
- Pipe for supplying a rarefied fuel mixture to the regulator.
- Needle valve.
- Fuel jet.
- Spray.
Therefore, the causes of carburetor failure should primarily include failure of the above listed parts. In addition, repair of this device can be carried out as a result of:
- irregular carburetor cleaning;
- incorrect assembly;
- presence of various damages.
Ideally, repairs to a car carburetor device should be performed by experienced auto mechanics at service stations.
But often motorists try to independently identify and fix problems in garage conditions at home.
Possible causes of malfunction
It is impossible to determine at first glance why the carburetor broke down in your VAZ 2107. This mechanism is so complex that only with a detailed examination can you understand the cause of the breakdown in order to make repairs. Let's look at the most common problems.
- leaky connection between the carburetor and the exhaust pipe;
- insufficient amount of fuel in the float chamber;
- dirty jets and channels;
- the float has gone astray.
You can easily fix all this if you do the repairs yourself, without the help of professionals.
General information about the VAZ-2105 carburetor
Listed below are basic information about the carburetors used on the 2105 VAZ model.
- Purpose. To obtain gasoline from the fuel system, mix it with air and transfer it to the engine cylinders.
- Operating modes. There are four of them: preheating, idle load, medium speed, increased power.
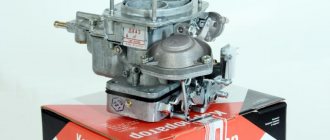
- Carburetor type: 2105-1107010 for engines with a power of 1.3 liters. The marking is applied to a special plate that manufacturers attach to various places on the outside of the device. The most popular modifications presented on the Russian market are DAAZ, Ozon, Solex. They are selected according to the volume of the car engine.
- A carburetor is a complex system of interconnected structural parts for various purposes. His main responsibility is to ensure correct fuel consumption and efficient engine operation.
Removing and installing a carburetor on a VAZ 2105 Zhiguli car
- Repair manuals
- Repair manual for VAZ 2105 (Zhiguli) 1980-1992.
- Removing and installing a carburetor on a car
| EXECUTION ORDER |
↓ Comments ↓1. Vehicle operation 1.0 Vehicle operation 1.1. Starting the engine 1.2 Controlling the gearbox 1.3 Driving the vehicle 1.4 Braking and parking 1.5 Operating a new vehicle 1.6 Adjusting the ignition timing 1.7 Precautions when operating the vehicle 1.8 Caring for the body 1.9 Storing the vehicle 2. Car maintenance 2.0 Vehicle maintenance 2.1 Maintenance operations 3. General information 3.0 General data 3.1 Technical characteristics of vehicles 3.2. Controls 3.3. Control of interior ventilation and heating 3.4 Tightening torques for threaded connections 3.5 Tools for repair and maintenance 3.6 Used fuels, lubricants and operating fluids 3.7 Basic data for adjustments and monitoring 4. Engine 4.0 Engine 4.1 Possible malfunctions, their causes and methods of elimination 4.2 Removing and installing the engine 4.3 Disassembling the engine 4.4 Assembling the engine 4.5 Bench tests of the engine 4.6 Checking the engine on the car 4.7. Cylinder block 4.8. Pistons and connecting rods 4.9. Crankshaft and flywheel 4.10. Cylinder head and valve mechanism 4.11. Camshaft and its drive 4.12. Cooling system 4.13. Lubrication system 4.14. Power system 4.15. Carburetor 2105-1107010 4.16. Carburetor 21051-1107010 5. Transmission 5.0 Transmission 5.1. Clutch 5.2. Gearbox 5.3. Cardan transmission 5.4. Rear axle 6. Chassis 6.0 Chassis 6.1. Front suspension 6.2. Rear suspension 6.3. Shock absorbers 7. Steering 7.0 Steering 7.1 Possible malfunctions, their causes and methods of elimination 7.2. Inspection, check and adjustment of the steering 7.3. Steering gear 7.4 Steering gear rods and ball joints 7.5 Bracket for pendulum arm 8. Brakes 8.0 Brakes 8.1 Possible malfunctions, their causes and methods of elimination 8.2. Checking and adjusting the brakes 8.3 Clutch and brake pedal bracket 8.4 Vacuum booster 8.5. Main cylinder 8.6. Front brakes 8.7. Rear brakes 8.8. Rear brake pressure regulator 8.9. Parking brake 9. Electrical equipment 9.0 Electrical equipment 9.1 Possible malfunctions, their causes and methods of elimination 9.2 Circuits protected by fuses 9.3. Battery 9.4. Generator 9.5. Starter 9.6. Ignition system 9.7. Lighting and light signaling 9.8. Sound signals 9.9. Windshield cleaner 9.11. Heater fan electric motor 9.12. Control devices 9.13. Carburetor pneumatic valve control system 10. Body 10.0 Body 10.1 Possible malfunctions, their causes and methods of elimination 10.2. Doors 10.3. Hood, trunk lid, bumpers 10.4. Body glazing, windshield and headlight glass washers 10.5 Instrument panel 10.6. Seats 10.7. Heater 10.8. Body frame repair 10.9. Paint coatings 10.10. Body anti-corrosion protection 11. Car modifications 11.0 Vehicle modifications 11.1. Features of repair of VAZ-21051 and VAZ-21053 cars 11.2. Features of repair of VAZ-2104 and VAZ-21043 cars 11.3 VAZ-21044 cars with a fuel injection system 11.4. Central fuel injection system design 12. Electrical circuits 12.0 Electrical diagrams 12.1 Interactive electrical diagram of the VAZ-2105 car 12.2 Electrical diagram of the VAZ-2104 car 12.3 Electrical connection diagram of the injection system 12.4 Connection diagram of the instrument cluster 12.5 Connection diagram of the brake system warning lamps 12.6 Connection diagram of the headlight cleaners and washers 12.7 Connection diagram of the heater fan motor 12.8 Diagram inclusion windshield cleaner and washer 12.9 Diagram for switching on direction indicators and hazard warning lights |
How is the carburetor float device adjusted?
Experts say that it is possible to adjust the carburetor without necessarily removing it from the vehicle. A float mechanism is responsible for ensuring the required volume of fuel in the described device, which is adjusted as follows:
- the engine is started and it idles for several minutes;
- The carburetor cover is removed and the fuel level is measured, which should be 28 millimeters.
If these same 28 mm are not observed, perform:
- bending the float tongue touching the needle valve (more precisely, its ball) to a value of 6.2 to 6.75 mm;
- After visual inspection, align the parallelism of the float with respect to the lower level of the cover, as well as the perpendicularity of its tongue to the axis of the valve (needle);
- align the position of the bracket in situations where the distance between the float, allocated to the greatest length, and the cover gasket does not fall within the range of 13.5–14.5 mm.
There is nothing complicated about the operation of a carburetor. The intake manifold connects the fuel system to the power unit. When the engine is running, the pressure in this manifold decreases. This causes a vacuum to form in the carburetor. It is the reason why both gasoline and air are sucked in at the same time. As a result, these two components are mixed to form a working mixture. And thanks to this mixture, the pistons begin to move.
In order for a vehicle engine to work efficiently, it is necessary to achieve ideal operation of all carburetor systems. This includes engine starting and warming up systems, idle speed, gasoline level control system, accelerator pump, elements of the main metering chamber, and econostat.
According to experts, you can adjust the carburetor even without removing it from the car.
Before you start adjusting the carburetor, you need to be sure that you know the structure of the unit. The VAZ 2105 carburetor has several most important components. It is they who will need to be regulated. This is a system that doses, starts and warms up the engine; system responsible for the level of gasoline; idle system; econostat; acceleration pump.
How to repair a carburetor yourself
Repair work on the VAZ 2106/2107 carburetor involves removing and disassembling the mechanism. In this case, the repair includes all two stages:
- Washing (cleaning, blowing) elements from carbon deposits and adhering dirt.
- Replacement of worn or failed parts.
Before carrying out any actions with the unit, you must firmly make sure that the carburetor is faulty. Often, incorrect operation of other systems can affect the performance of the carburetor mechanism.
For the smooth operation of an internal combustion engine, high-quality cooling is necessary. One of the elements of this system is a water pump, which circulates the antifreeze. You can read more about repairing your pump yourself here:
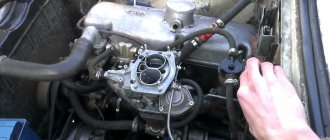
The carburetor is located under the hood, above the engine.
Troubleshooting
DAAZ carburetors of any modification are designed to operate stably regardless of operating modes. However, it is precisely the change of modes (for example, starting “cold” or accelerating when overtaking) that can show the first problems in the operation of the device. The carburetor is clearly faulty if:
- at idle there are failures in engine operation;
- while driving, a time interval is noticed between pressing the gas pedal and accelerating the car;
- jerks in engine operation at high speeds;
- a series of jerks when overtaking;
- Gasoline consumption has increased significantly;
- Difficulty starting the engine after long periods of parking.
Each of these signs, as well as their combination, indicates that there is a problem with the carburetor and repairs or adjustments are necessary.
Overflows
One of the most common problems with carburetor engines is the so-called overflow. An excessive amount of fuel is supplied inside the device, and for some reason the check valve is not able to drain excess gasoline back into the tank. Therefore, under the carburetor and on it itself, the driver may notice drops of fuel.
In this case, it is recommended to clean all the fuel supply and exhaust channels, as well as the jets - most likely, the holes are clogged with debris. Diagnostics of the accelerator pump will not be superfluous.
Shoots
This concept is inextricably linked with transfusion. If the carburetor begins to shoot (or sneeze) - that is, jerk sharply while driving and even ignite - there is a fuel leak. The mechanism needs to be flushed.
Gasoline is not supplied
The problem may lie either in the carburetor itself (the jets are seriously clogged or the pump is broken) or in the supply hoses. It is recommended to blow out the fuel supply pipe and test the operation of the fuel pump. If they function normally, you will have to remove the carburetor and wash it.
The secondary internal combustion chamber does not work
Failure to operate PIC No. 2 will immediately affect the vehicle’s dynamism: it loses almost 50% of its original speed characteristics. The problem is that the throttle valve is sticking, which regulates the flow of fuel into the chamber cavity. You will have to disassemble the mechanism and replace the damper with a new one.
Video: how to repair a carburetor on a VAZ 2106
The third stage is checking the technical condition of the VAZ-2105 carburetor device
After the carburetor has been removed and disassembled successfully, diagnostics should be carried out for faults. Diagnostic procedure:
- checking the condition of the fuel filter (washing and blowing with compressed air);
- checking the float mechanism (washing all its parts in acetone, visual inspection for damage);
- checking the carburetor cap (rinsing in acetone, blowing with compressed air, visual inspection of sealing parts);
- checking the starter (all actions are similar to the previous step);
- checking emulsion tubes and jets;
- checking the housing (cleaning and visual inspection for damage);
- checking the accelerator pump and pneumatic throttle actuator.
If during the diagnostic process the listed parts are found to be in a faulty condition, they are simply replaced with serviceable ones. Experts emphasize: do not use metal tools to clean the jets, do not wipe with cloth so that the lint does not get into the fuel-emulsion path.
Carburetor adjustment
After cleaning and repairing the carburetor, it should be adjusted.
How to set the fuel level
- First you need to adjust the float, which primarily affects fuel consumption.
- Unscrew the screws securing the cover and, for convenience, place it vertically. Make sure that the needle lightly touches the float.
- Check that the gap between the cover with the gasket installed on it and the bottom of the float is 6.2 ± 0.25 mm. If there is a discrepancy, correct it by moving the float tongue.
- After this, check the movement of the float. Its value should be 8±0.25 mm.
Video: how to adjust the fuel level in a VAZ carburetor
Adjusting the starter
- To do this, the carburetor must be installed on the engine, but not covered with an air filter. After this, pull out the choke as much as possible.
- Then you need to warm up the engine and use a screwdriver to open the air damper a third. The throttle linkage must be adjusted to 3200–3400 rpm.
- Then lower the throttle and reduce the speed to 2800–3000 per minute.
Do not overlook the hole for the plug - it must be clamped so that rarefied air is formed under the diaphragm of the starting device.
Idle adjustment
Performed with a warm engine. Only the quality screw is engaged.
- Using the quality screw, we accelerate the engine speed to the maximum level.
- After this, use the quantity screw to increase the rotation speed by 100–150 revolutions and, without stopping the engine, reduce the speed by the same number, but using the quality screw.
This operation completes the engine adjustment and ensures high-quality and stable operation with the minimum permissible amount of carbon monoxide.
Using the quality screw, you can lean or enrich the fuel mixture - it is responsible for the supply of gasoline, and tightening it leans the fuel mixture, and unscrewing it, on the contrary, enriches it.
Replacing the carburetor VAZ 2107
The age of carburetor cars is gradually coming to an end. All over the world there are practically no manufacturing plants left that produce engines with carburetors. Nevertheless, the number of such cars is still huge, and first of all this concerns the Zhiguli classics and, of course, the sales leader of the domestic automobile industry, the VAZ 2107 - “Seven”.
Due to its design features (the presence of small parts, dependence on the purity of the fuel, many manual adjustments and a large number of functions performed during operation), a part such as a carburetor very often fails during operation. Replacing the repair kit, purging and cleaning can restore the normal functioning of the unit.
When is it necessary to repair a VAZ 2107 carburetor?
- excessive fuel consumption;
- poor start;
- absence or unstable idle speed;
- failures during acceleration and movement;
- lack of dynamics when overtaking and accelerating;
- gasoline leakage from the chambers;
- fuel overflow.
Conditions for carburetor repair
- mandatory replacement of all sealing gaskets and rubber rings (including under the carburetor);
- When cleaning channels, do not use soft wire or cable (there is a possibility of breakage in the channel);
- after repair - check for leaks of all connecting parts of the carburetor (it is also necessary to check the internal chambers so that there are no overflows)
- adjustment of the fuel level in the float chamber and the quality of the mixture after each intervention in the device;
There are cases when repairs do not bring results (or repairs are not cost-effective), for example, complete coking of air or fuel channels or bending of connecting planes, causing air leaks or fuel leakage. And then the only correct action will be to replace the carburetor of the VAZ 2107. Moreover, it is possible to change it not only for a similar one, but also for a more efficient one, and one step higher in classification, “Solex”.
- This carburetor is much more economical due to the optimization of mixture dosing, the presence of a reverse fuel flow (return) and a more efficient idle system (including the EPH system and shutting off the fuel supply from the idle system during acceleration and movement).
- Installing such a carburetor is not particularly difficult; it is practically no different from installing a conventional carburetor. You just need to buy a tee for the return, a bracket for throttle (“gas”) control, another insert (smaller) for the carburetor and a hose for the return, with a check valve, from 2108
Replacement and installation
First of all, before removing the carburetor on a car, it is necessary to cool the engine if it has been used before, since when removing the fuel hose, gasoline may get onto the hot exhaust manifold and ignite.
Procedure:
- remove the air filter (be careful when removing, as the filter mounting nuts may accidentally fall into the carburetor, and then into the engine, damaging it when starting);
- remove the throttle control rods;
- disconnect the fuel supply hoses (by plugging the hose, for example with a bolt) and ventilation;
- disconnect the cold start control cable;
- remove the ignition angle advance control hose;
- disconnect the idle air solenoid valve control wire;
- unscrew the four carburetor mounting nuts;
Before installing the VAZ 2107 carburetor, you should carefully check the ceramic spacer insert for cracks and chips. Replace the paranitic gaskets located under the carburetor to prevent air from entering through the air channels.
Replacing the gasket
The gasket is located between the carburetor body and its cover. If during disassembly you find any damage to the gasket, it should be replaced.
This is not so difficult to do - you just need to dismantle the float and put a new one in place of the old unsuitable gasket. Then install the float and put the carburetor cap back.
After washing the internal elements of the carburetor, it should be blown out. An air or car compressor is perfect for this.
Video: how to remove and clean the carburetor on a VAZ
Carburetor design
1. Carburetor heating unit VAZ 2105; 2. Throttle valve of the first chamber; 3. Crankcase gas suction pipe; 4. Accelerator pump drive lever; 5. Accelerator pump drive cam; 6. Accelerator pump diaphragm; 7. Fuel jet for power mode economizer; 8. Carburetor body VAZ 2105; 9. Power mode economizer diaphragm; 10. Solenoid shut-off valve; 11. Idle fuel jet; 12. Carburetor cover VAZ 2105; 13. Fuel supply pipe; 14. Main air jet of the first chamber; 15. Air damper; 16. Accelerator pump nozzles with fuel supply valve; 17. Trigger diaphragm; 18. Adjusting screw of the starting device; 19. Adjusting screw for the amount of idle mixture; 20. Second chamber lock lever; 21. Vacuum supply pipe to the vacuum regulator of the ignition distributor VAZ 2105; 22. Idle mixture quality adjusting screw; 23. Throttle valve drive lever; 24. Adjusting screw for slightly opening the throttle valve of the first chamber; 25. Air damper control lever; 26. Starter rod; 27. Electrical wire for the idle speed economizer limit switch; 28. Choke lever; 29. Main air jet of the second chamber; 30. Emulsion tube of the second chamber; 31. Sprayer of the main dosing system of the second chamber; 32. Fuel filter VAZ 2105; 33. Needle valve of the float chamber of the VAZ 2105; 34. Throttle valve of the second chamber; 35. Second chamber throttle lever; 36. Main fuel jet of the second chamber; 37. Second chamber throttle drive lever; 38. Float.
The design of the VAZ-2105 (2106) carburetor provides a number of structural elements that provide the necessary characteristics of the combustible composition. The engine can operate in various modes: warming up, idling, medium speed and heavy load. Each of the above situations requires a certain consistency of the ingredients of the air-fuel mixture. The carburetor consists of more than fifty parts. Let's take a closer look at each element of the device. It is worth mentioning that all segments are important components of the device; their dismantling can have a negative impact on the operation of the power unit.
Disassembling carburetor 2105, 2107 Ozone
The need to disassemble your carburetor arises during its repair, major cleaning, replacement of individual parts, etc. In these cases, it is very important to have a visual aid on how to properly disassemble and reassemble the carburetor. In this article we will try to cover this process from all sides and in as much detail as possible.
Disassembling and assembling carburetors 2105, 2107 Ozone, the procedure is not so complicated, it requires a minimum of tools and skills. Separately, you should only focus on care during work and the cleanliness of the workplace.
Tools required for disassembling the Ozone carburetor
— Spanners (7, 7, 8, 10, 11, 13, 19)
For loosening the carburetor mounting nuts, the bolt securing the choke cable sheath, the fuel filter plug in the carburetor cover, the needle valve housing, etc.
— Phillips screwdriver (long, 3-4 mm thick)
To unscrew the screws securing the upper part (cover) of the carburetor and the screws securing the covers of the housings of the starting device, accelerator pump, etc.
— Slotted screwdriver (thin with a blade width of 2-3 mm)
To unscrew the screw for adjusting the quality of the fuel mixture.
— Slotted screwdriver with a blade width of 3-4 mm
For disassembling other connections.
— Thin beard (or nail)
To knock out the float axis.
— Light hammer, pliers, file
Procedure for disassembling carburetor 2105, 2107 Ozone
Remove the carburetor from the car engine.
To do this, remove the air filter housing and disconnect all tubes, hoses, rods, cables, and electrical connections leading to the carburetor. We unscrew the four nuts securing the carburetor to the intake manifold, and slightly rocking it from side to side, remove it from the studs. If it cannot be removed, carefully pry it off with a slotted screwdriver, alternately from different sides.
The procedure for removing carburetor 2105, 2107 Ozone from a car engine is described in more detail on the page “Removing carburetor 2105, 2107 Ozone from a car engine.”
Remove the upper part (carburetor cover).
— First, we disconnect the telescopic rod by removing its tip from the groove in the boss on the three-arm lever. To do this, squeeze the telescopic rod housing with your fingers or a slotted screwdriver.
Removing the telescopic rod
— Then unscrew the screws securing the upper part (cover) to the carburetor body.
Screws for securing the upper part (cover) of the carburetor 2105, 2107 Ozone
We use a long Phillips screwdriver for this. There are only five screws. In the image they are numbered from one to five.
— Carefully lift the lid up and remove it.
Removing the upper part (cover) of the carburetor 2105, 2107 Ozone
— Place the floats up on a horizontal surface. We try not to lose the cover fastening screws that have fallen out of their sockets.
Inverted carburetor cap Ozone
For more details, see “Remove the upper part - the carburetor cover Ozone 2105, 2107”.
We disassemble the upper part (cover) of the Ozone carburetor.
- Using a thin beard - a mandrel (or a small nail) we knock out the axis of the floats.
Removing the float shaft
— We take it out, remove the float along with the shut-off needle of the needle valve. It is placed with its bow on the tongue, on the float lever.
Elements of the float mechanism
— Turn out the needle valve body. A 10mm socket wrench is suitable for this. There is a metal O-ring under it.
— We turn the plug of the fuel strainer with a wrench to 19 and take out the filter.
— Remove the cardboard cover gasket. If it sticks too much, carefully pry it off with a knife.
Removing the fuel strainer, cardboard cover gasket, unscrewing the needle valve body
— Disconnect the telescopic rod. We remove its curved tip from the groove in the lever on the air damper axis.
Removing the telescopic rod
— We disassemble the housing of the starting device. Use a Phillips screwdriver to unscrew the two screws securing the starter housing to the carburetor and remove it. At the same time, we remove the trigger rod from engagement with the rod going to the lever on the air damper axis.
Screws for fastening the housing of the carburetor starting device 2105, 2107 Ozone
We take out the rubber sealing ring of the vacuum supply channel into the starting device housing. Use a Phillips screwdriver to unscrew the three screws securing the starter housing cover. Let's take it off. We remove the diaphragm with the gasket and rod, and the diaphragm return spring. Using a slotted screwdriver, unscrew the adjusting screw from the starter housing cover.
Elements of the carburetor starting device 2105, 2107 Ozone
More information about the components of the upper part (lid) of the carburetor 2105, 2107 Ozone on our website is described in the article “Design of the upper part (lid) of the carburetor 2105, 2107 Ozone”.
We disassemble the carburetor body 2105, 2107 Ozone.
— Using a slotted screwdriver, unscrew the fuel jets of the main metering systems of both carburetor chambers. They are located at the bottom of the float chamber.
— Using the same screwdriver, we unscrew the air jets of the main metering systems of both carburetor chambers and, turning the carburetor upside down, shake out the emulsion tubes from the emulsion wells.
Removing fuel, air nozzles, emulsion tubes of the GDS carburetor 2105, 2107 Ozone
A problem may arise here - the tubes, which are stuck and never removed in their entire lives, do not want to fall out at all. Screw the self-tapping screw into the tube a little bit from the top and try to remove it by pulling it with pliers. Also, don’t forget about the VD-shku and LIGHT tapping of the body with a hammer.
— Use a slotted screwdriver to unscrew the accelerator pump nozzle housing. It consists of a body with a spray nozzle, a screw valve and two O-rings.
— We pull out the small diffusers of both carburetor chambers from their seats in the body.
The most convenient way to do this is with pliers.
— We unscrew the accelerator pump screw and remove it from the carburetor body. A slotted screwdriver with a thin blade is useful for this procedure.
— Turn out the solenoid valve. We use an open-end wrench size 13. On carburetors with a fuel jet holder plug, unscrew it with a slotted screwdriver. We remove the fuel jet of the idle system. Some types of plugs sometimes have a rubber O-ring installed. Let's take it off too.
Removing the atomizer, diffusers, EMC, accelerator pump screw
— From the back of the carburetor, use a slotted screwdriver to unscrew the fuel nozzle holder of the transition system of the second chamber of the carburetor. We pull the fuel nozzle out of it.
Removing the fuel jet of the transition system of the second chamber of the carburetor 2105, 2107 Ozone
— We disassemble the accelerator pump housing. Using a Phillips screwdriver, remove the four screws securing its cover.
Removing the accelerator pump housing cover
— We remove it and the diaphragm with a pusher and a return spring located under it. If the lid does not come off easily, pry it off with a knife.
Carburetor accelerator pump elements 2105, 2107 Ozone
— Remove the return spring.
Removing the return spring
— Disconnect and disassemble the pneumatic drive housing of the throttle valve of the second chamber of the carburetor. Using a thin slotted screwdriver, pry up and remove the lock washer of the tip of the pneumatic actuator rod on the throttle valve axis. Unscrew the two screws securing the pneumatic drive housing to the carburetor body. Remove it and the cardboard spacer underneath. On the housing cover, unscrew the screw securing the sheath of the drive cable with the air damper (key 8). Using a Phillips screwdriver, unscrew the three screws securing the carburetor pneumatic drive housing cover, remove it, the diaphragm with the rod underneath, the return spring and the rubber sealing ring of the vacuum supply channel. Loosen the locknut and turn the rod out of the diaphragm. The locknut is loosened with two 7mm wrenches.
Elements of the pneumatic drive of the throttle valve of the second chamber of the carburetor 2105, 2107 Ozone
— Using a Phillips screwdriver, unscrew the screw securing the three-arm lever to the carburetor body.
Removing the three-arm lever
— We remove the lever together with the return spring mounting bracket and the rod to the lever on the axis of the throttle valve of the first chamber. We carefully remove the curved end of the rod from the groove on the lever on the throttle axis, and then from the groove on the three-arm lever, and disconnect it. There is a spring under the three-arm lever; remove that too.
Three-arm lever and its elements
We remove and disassemble the throttle valve block of the carburetor 2105, 2107 Ozone.
— Using a Phillips screwdriver, unscrew the two screws securing the throttle body to the middle part of the carburetor and disconnect them.
Carburetor throttle valve block mounting screws 2105, 2107 Ozone
— Between the middle part (body) of the carburetor and the throttle body (lower part) there is a heat-insulating spacer and two cardboard spacers. We take them all down.
Gaskets between carburetor body and throttle body
— On carburetors without an EPH system, unscrew the two screws securing the housing (holder) of the fuel mixture “quantity” screw to the throttle valve block (housing). We use a Phillips screwdriver for this. There will be a cardboard spacer underneath the holder.
Fastening the fuel mixture “amount” screw housing
Then use a slotted screwdriver to unscrew the “quantity” screw from the holder and remove it. There is a rubber O-ring on the “quantity” screw. Let's take it off.
Elements of the screw housing “quantity” of the fuel mixture of the carburetor 2105, 2107 Ozone
— On carburetors with an EPCH system (forced idle economizer), use a Phillips screwdriver to unscrew the two screws securing the microswitch bracket (they are also the screws for securing the economizer housing) and remove them together. Disconnect the bracket with the microswitch. There is a cardboard sealing gasket under the economizer body; remove it.
— Using a Phillips screwdriver, unscrew the two screws securing the economizer cover and remove it. Under the cap there will be a diaphragm with a gasket and a needle inserted into the economizer body. The connection here is not removable, so you can only remove the screw from the economizer housing cover.
Carburetor economizer elements 2105, 2107 Ozone
— Using a thin slotted screwdriver, unscrew the “quality” screw for the fuel mixture and remove it from the seat in the damper housing. There is a rubber sealing ring on it, remove it.
Removing the fuel mixture “quality” screw
— Using a 11 key, unscrew the nut securing the levers on the axis of the throttle valve of the first chamber, having previously bent the tongue of the locking plate that locks it. We remove in turn the locking plate, the throttle drive lever, from the hole on it we take out the bushing, washer, lever for blocking the opening of the throttle valve of the second chamber, another bushing, spring washer, link lever with the starting device drive, another washer, throttle lever, spring and spool of the crankcase ventilation system.
Elements on the throttle axis of the first chamber of the carburetor 2105, 2107 Ozone
— Remove the throttle valves of both carburetor chambers. To do this, use a slotted screwdriver to unscrew the screws securing them and pull them out of the grooves in the axles with pliers. Before unscrewing the screws, you need to file their ends, and when installing them back, lock them.
Throttle valve mounting screws
— We take out the throttle valve axis of the first chamber and remove the return spring from it.
Removing the throttle shaft of the first carburetor chamber
— Remove the throttle axis of the second chamber. To do this, use a size 8 wrench to unscrew the nut securing the axle lever. We remove the engraver located under it, the axle lever, the intermediate lever with its spring and bushing, and the spacer washer.
The throttle axis of the second chamber of the carburetor 2105, 2107 Ozone and the elements located on it
Carburetor 2105, 2107 Ozone disassembled. It is better to put it back together in parts: lower part, middle part, upper part, then combine all the parts and adjust the carburetor.
Twokarburators VK - More information on the topic in our VKontakte group, on Facebook Twokarburators FS , in Odnoklassniki - Twokarburators OK and in Yandex Zen - Twokarburators DZ
More articles on the Ozone carburetor repair website
— Checking and repairing the carburetor accelerator pump 2105, 2107 Ozone
— Check and repair of the EPH system of carburetor 2105, 2107 Ozone
— Cleaning the carburetor idle system 2105, 2107 Ozone
— Cleaning and purging of carburetors 2108, 21081, 21083 Solex and 2105, 2107 Ozone
— Carburetor needle valve 2105, 2107 Ozone
— Pneumatic drive of the throttle valve of the second chamber of the Ozone carburetor, diagram
Fifth stage - installation of the VAZ-2105 carburetor device
The last stage is the procedure for installing an already repaired carburetor device in its rightful place. The main actions are performed in the reverse order of the first stage:
- installing the carburetor in place;
- connecting the fuel supply hose (the plug must be removed from it first);
- connecting the air damper drive rod;
- connecting the return spring;
- connecting the rod from the throttle drive lever;
- installing an air filter.
At this stage, the throttle valve drive is also adjusted and the engine idle speed is adjusted.
Removing the carburetor VAZ 2107
December 11, 2011
The VAZ 2107 carburetor is removed to disassemble it or replace it with a new one if it cannot be repaired. Removal requires a standard set of tools.
The procedure for removing the carburetor is as follows:
- First of all, it is necessary to remove all attachments and damper drive cables. Remove the air filter housing by unscrewing the four nuts securing it to the carburetor studs. Unscrew the clamping nut and remove the choke cable sheath from the mounting bracket. Disconnect the throttle drive levers from the carburetor.
- Loosen the fastening clamp and remove the fuel supply hose. Also remove the crankcase gas exhaust hose.
Now that everything that interferes is disconnected, you can remove the carburetor itself. Unscrew the three nuts securing it to the intake manifold using a socket wrench and unscrew one nut with an open-end wrench and remove the carburetor. Plug the intake manifold opening with clean material to prevent any debris from getting inside.
A sealing gasket made of heat-resistant material will be installed between the carburetor body and the intake manifold. Check its condition, it should not be damaged, if necessary, replace it with a new one.
At this point, the repair work on removing the VAZ 2107 carburetor is completed; make the necessary repairs and install it on the car in the reverse order of removal.
- Sound signal VAZ 2106 common faults
- Niva 2121 2131 replacement of hydraulic clutch reservoir
- Niva 2121 and 2131 - how to remove the electric radiator fan
Source: https://remont-vaz2106.ru/snyatie-karbyuratora-vaz-2107
