Replacing the front headlight on a VAZ 2110, VAZ 2111, VAZ 2112
A front headlight when driving outside the city or even in the city itself behind a car, in some cases does not lead to anything good, since front-facing cars are a very high source of threat, because when driving, for example, on gravel at high speed, the front-facing car can cause good damage to the rear one because all the stones from under the wheels will fly into the rear moving car and thus they can destroy the hood, radiator grille, headlights, foglights of the car that is driving behind and after which some parts will have to be changed for you.
In order to change the block headlights (This is one hundred percent what the headlight itself is called), you will need to stock up on some equipment, and specifically: You will need to take with you a socket head approximately “8” along with a wrench or an extension cord , as well as a wrench you will need to take “10” and an ordinary screwdriver!
What is included in the headlight assembly?
Firstly, the main headlight
, and secondly, the turn signal, these two parts can be replaced separately if, for example, only the main headlight is broken, how to do this is described in this article, so read carefully, for clarity, there is a photo below that shows the entire headlight block.
When should you change your headlight?
It needs replacement if it breaks or the insides of the headlight are very damaged, causing the light to shine worse and in a completely different direction, but this is not a reason to go to the store and buy a new headlight
if the light begins to shine in the wrong direction, the whole point is that on cars of the tenth family, the so-called hydro-corrector of headlights was installed from the factory, and therefore if it fails, the headlight may start to shine either very high, or very low, more For more information about the signs of failure of the hydraulic corrector, as well as how it can be changed, see the article entitled: “Replacing the hydraulic corrector for headlights on cars.”
In some cases (the rarest of times) people go to buy a new headlight if it just stopped glowing, because you know, keep in mind that the headlight can stop glowing due to the failure of the light bulb that is built into it, read about how to change the light bulb in the article: “ Replacing headlight bulbs in dozens”, as well as due to a fault in the wiring or a faulty fuse that goes to both front headlights, so if your headlight suddenly stops burning but it’s in good condition, don’t go to the auto store and get a new headlight, first inspect yours from all sides; there may be a problem either with the wiring (a wire has jumped out), or with a light bulb that needs to be changed to a new one!
- Basic principles
- troubleshooting
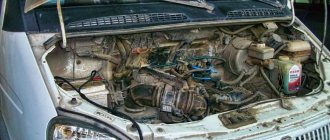
For a car to operate as efficiently and reliably as possible, all its systems require coordinated operation. Electrical wiring plays one of the leading roles in this matter.
Today we will talk about the electrical wiring diagram that is used on VAZ 2110 cars, we will study the main components, and we will look at the difference between injection and carburetor versions.
Basic principles
Regardless of the type of engine used, the basis of the wiring used in the VAZ 2110 car is the same. It's easy to find a diagram, but not so easy to understand.
Let's look at the basic principles of wiring.
- All equipment and devices powered by electricity in the VAZ 2110 are based on a single-wire connection. VAZ designers specially provided for wires of certain colors to each be responsible for their own functions. Therefore, certain equipment is connected using wires of their own color. This allows you to independently understand the wiring, make it easier to carry out repair work and not spend money on car repair services.
- The downside to the VAZ 2110 is that the mass is the car body itself.
- The positive wire of the batteries on the top ten always comes only in red. Therefore, when making repairs, try not to change the color of the wire, so as not to confuse yourself.
- For each system that is connected to the electrical system, it is equipped with its own separate wiring harness.
- The VAZ 2110 is designed in such a way that when the battery is turned on, all electrics and electrical equipment are energized. This is related to the most common recommendation, which you have seen more than once in our materials, where we described the repair or replacement of certain components - disconnecting the negative terminal from the battery.
- Do not forget about the existence of the so-called contactless system. This system is required to create a high-quality spark, which is simply necessary to ensure combustion of the air-fuel mixture. In order for a contactless system to function, high voltages are indispensable.
Carburetor models
The first versions of the VAZ 2110 model, which the domestic plant began to produce, were equipped exclusively with carburetor engines. Only after some time more modern injection versions appeared. They are objectively better. But this does not take away the fact that many have dozens of them under the hood with a carburetor.
Are there any significant differences in terms of electrical circuitry between a carburetor and an injector? We can say no. The carburetor systems used are almost entirely the same as on the more modern version.
Part of interior wiring
Also, you will not encounter serious problems in the form of electrical wiring if you suddenly want to replace a carburetor engine with an injection engine or equip the car with additional electrical equipment. You will even find identical plugs in the engine compartment.
The only nuance of switching from a carurator to an injector is the need to install additional wiring from the fuel pump to the on-board computer.
Engine instability. What is “mass” and how to find it
Almost any car model is created according to the principle that its body is assigned the role of a single source of electricity. In other words, it is the base conductor with a negative charge to which all electrical appliances are connected. Thus, the weight of the Samara and other car models is attached to the body.
Having understood this principle, it is much easier to calculate the causes of many problems associated with the car’s power supply. For example, quite often the Samara breaks down, which is reflected in the blinking of the headlights. However, a poor ground connection of the VAZ 2115 can cause much more serious damage, primarily related to engine operation and the electronic control system. This article will indicate the weakest points of VAZ cars in the context of working with “mass”.
How to find the location of a mass
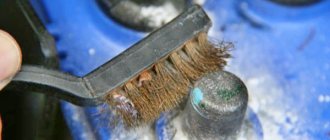
As a minus, a car battery has two conductors: one thin, the other thick. The role of the thick wire is to secure the ground in the VAZ 2114 from the battery negative to the motor housing. A faulty contact in this area leads to a decrease in charge transfer from the battery, a drop in starter power, and ECM problems.
To make sure that the ground is properly connected to the engine, you need to inspect the two fastening nuts that secure the contact to the engine housing. To do this, slightly loosen the outer nut and tighten the inner nut, after which we apply additional tension to the outer one.
The role of the thin wire is to connect the battery to the area of the car body in close proximity to the battery. This conductor is a single source for all electrical appliances in the car. The process of checking contact is also carried out by tightening the nut near the terminal and near the body. ECM
Power for the control system is supplied from the motor housing, namely from the plugs located on the right side of the head block. Answering the question, where is the mass of the VAZ 2110 engine, which is equipped with a new generation ECM, the mass is taken from the stud attached to the dashboard frame. Sometimes it happens that the pin is not tightened too securely and eventually becomes loose.
Dashboard
The connection in this case is located in the area of the torpedo harness, combined with the mounting relay block and fuse system. It is located under the steering shaft mount. Malfunctions of this connection can lead to incorrect instrument readings during operation of large energy consumers, for example, headlights.
Heating motor
The connected mass of the heating motor is located under the instrument panel, on the left side of the housing. The main reason for the loss of conductivity properties by contacts is the fact that their surfaces are not treated in any way by the manufacturer, in addition to applying a layer of paint.
troubleshooting
The search for any wiring fault always starts with the contacts.
To check the condition of the contacts, it is necessary to carefully inspect the wires included in the system harness. This is done using different methods. Namely:
- Visual integrity check;
- Checking resistance with a device;
- Inspection of reliability, contact integrity, etc.
Pay special attention to high-voltage wires. They have a great responsibility to ensure the performance of all volatile equipment. But at the same time they are in a rather unfavorable environment. This is why a common cause of device failure is a wiring problem.
There are several main signs of a malfunction in high-voltage wires:
- When the radio is operating, noises are heard that were not there before;
- When driving, the car periodically jerks;
- Fuel consumption indicators increase;
- The engine begins to choke at low speeds;
- Exhaust toxicity increases significantly.
Prevention measures
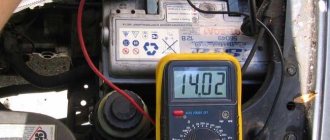
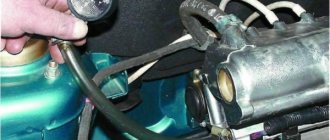
If you notice or suspect that there are some problems with the electrical wiring, use a multimeter to check the high-voltage resistance. This is done as follows:
- The black wire is inserted into the left hole;
- The red wire is installed in the middle;
- The multimeter turns on to the blue twenty position;
- The probes are closed to each other;
- If the multimeter shows that the resistance is zero, then everything is fine with the high voltages;
- If the arrow points to 1, then the resistance is higher than normal. This indicates that the damaged wire must be replaced.
Golden rules
There are two basic rules associated with checking and replacing high-voltage wires of the electrical circuit of your VAZ 2110. Be sure to rely on them.
- Different wires may show different resistance. This is due to the difference in length. Therefore, take into account the tips from the instruction manual, which indicates the normal resistance values of a particular high-voltage device.
- There is always an aggressive environment under the hood, which can lead to failure of one of the high-voltage circuits. But if one wire produces increased resistance, everything still needs to be changed. Because over time, the others will also fail if one of them is already damaged.
Before attempting to change or repair the wiring yourself, be sure to disconnect the negative terminal from the battery. An incredibly important rule that should never be forgotten.
Vehicle wiring is one of the main components that ensures normal operation of the car. This material will allow you to understand the main features of the VAZ electrical circuit of the tenth model. What the electrical circuit of a VAZ 2110 car looks like, what malfunctions are typical for it - read about it below.
Basic principles
It doesn’t matter what kind of engine the Lada is equipped with - it could be a VAZ 2110 injector or a 2110 carburetor - the basic electrical components in this model will not be different.
Below are the main features that the VAZ 2110 wiring has:
- Any electrical equipment, as well as devices that are powered by electricity, is based on a single-wire connection. Lada engineers equipped the electrical wiring with wires of different colors, and each of them is responsible for the operation of certain functions. Accordingly, certain devices will be connected to the circuit through a specific wiring harness. Thanks to this, the car enthusiast has the opportunity to understand the nuances of the wiring himself, especially since, if necessary, he himself will be able to repair certain elements.
- The VAZ 21102 has 8 or 16 valves, it makes no difference, the minus is the ground, that is, it is connected to the vehicle body.
- As for the positive cable, on an 8- or 16-valve engine it will always be red. So, if the VAZ 2110 wiring is being replaced or repaired, there is no need to change the color of the wires, otherwise you will confuse yourself in the future.
- Each equipment or system associated with the vehicle’s electrical circuit is equipped with a separate cable harness.
- The tenth model of the VAZ family is designed in such a way that when the battery is activated, the entire electrical circuit and equipment operate under voltage. Therefore, when performing any work related to the on-board network, you should always disconnect the battery.
- Remember that there is also a contactless system. As a rule, it is necessary in order to create a high-quality spark when starting the engine, which also contributes to better combustion of the combustible mixture. For the normal functioning of such a contactless system, it is necessary to use high-voltage cables (the author of the video is MR. BORODA).
Carburetor models
The first models of 8- and 16-valve VAZ 2110 cars were equipped only with carburetor engines. A few years later, the domestic automobile concern began to equip its vehicles with injection engines. Of course, the injection model is more advanced, but today in Russia and the CIS countries tens of thousands of carburetor cars with 8- and 16-valve internal combustion engines are used.
Most likely, dozens of owners are interested in the question: is the circuit different on carburetors and injectors 21102 or not? In principle, there are no special differences between these versions in terms of the electrical circuit. Almost all systems used on injection 8- and 16-valve engines are identical to carburetor units. Accordingly, if you need to replace a carburetor engine with an injection one or install additional devices, then there will be no problems with this. If you look into the engine compartment, you will notice that both versions of the car even have the same outputs and plugs.
One of the main points that must be taken into account when replacing a carburetor with an injector is the connection of the fuel pump. In order for the fuel pump to always work correctly, it is necessary to additionally install wiring to power it to the control unit.
Injector
In addition to the fact that the electrical wiring in the carburetor and injection versions is virtually identical, the injector has certain features. For example, it is equipped with fuses, and also in the injection versions of the car there are a larger number of sensors.
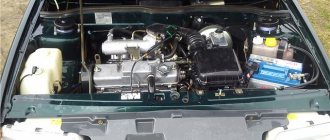
In fact, as a result of the fact that these vehicles are equipped with a large number of different sensors designed to provide ECU functionality, the system itself is more complex. It should be noted that carburetor versions do not have an electronic control unit. To repair the system if necessary, you need to clearly know about all its components and their installation locations. The electrical circuit itself in any car is divided into the engine compartment and the interior. Above you can familiarize yourself with the electrical circuit diagram, and below are its main symbols.
VAZ VDO dashboard disease
Many owners of Lada 2110, 2111, 2112, 2113, 2114 and Kalina cars have encountered the problem of failure to switch between the readings of the standard on-board computer or jumping arrows on the panel. There are three reasons for this malfunction in the “VDO” instrument panel.
Dashboard arrows stuck on Kalina
- Loss of ground contact on the bolt where the wires from all devices are attached.
- Wires are loose/broken in the steering column switch itself.
- Poor soldering quality of one of the two E6E resistors on the panel board.
If you experience malfunctions of the vdo panel and some indicators do not work, read the article, we will look at how to repair it.
Troubleshooting
In any case, when certain malfunctions in the wiring are identified, diagnostics must begin with a search for contacts. To check their condition, you must first check the wires themselves, which are included in the wiring harness.
There may be several options for diagnosis:
- visual diagnostics consists of identifying breaks by eye;
- use of special resistance devices;
- checking the reliability and integrity of connectors, contacts, etc. (video author: Evgeniy Churilov).
First you need to diagnose the condition of high-voltage cables. They are mostly responsible for ensuring the functioning of any electrical equipment of the vehicle. Moreover, high-voltage cables are always in an unfavorable environment. Accordingly, often the main reason for the failure of equipment or devices is the electrical circuit.
Below are the main symptoms of faulty high-voltage cables:
- When you turn on the radio on your car radio, you begin to hear interference that was not there before.
- The engine starts to stall, and the car may jerk while driving.
- Gasoline consumption figures are increasing.
- The engine periodically begins to “choke,” especially when driving at low speeds.
- The level of toxicity of exhaust gases increases significantly.
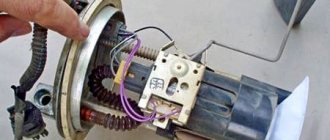
Where is the mass of the VAZ engine mounted?
Therefore, over time it may become loose and when the fan is turned on, there will be a drop in the voltage of the following sensors (which will lead to jumps in speed):,. 3) Weight of the torpedo (instrument panel) At this point in the bundle there are connections of the torpedo harness, circuit diagrams of the mounting relay and fuse box, and rear harness. This connection is located under the steering shaft mount. If this connection is unreliable, then deviations in the instrument panel readings are possible when energy consumers (headlights, turn signals, etc.) are turned on. 4) Heater electric motor ground This ground connection is located under the instrument panel on the left side of the heater housing. In conclusion, it is worth noting that absolutely all factory-made studs are not treated in any way other than paint, so over time, corrosion, oxidation appears, and voltage drops begin.
Similar materials
Kia Spectra 2006
Cars from 2004 were considered. Where are the fuses and relays located? Most fuses and relays are located in the mounting block under the hood in figure 1. To access the elements of the mounting block in the engine compartment, press the latch and remove the block cover. On the other side
Read more
kia noise 2 fuses on
Since there is no information in the manual about relays and some fuses, I decided to stir up this topic. The information will be supplemented and corrected. No fluff Just to the point! Comments, suggestions, etc. Relay and fuse block in the engine compartment Relay block diagram: 1P. Emergency Alert Relay
Read more
kia spectra fuses
Replacing cigarette lighter fuse KIA Spectra Cars from 2004 were considered. Where are the fuses and relays located? Most fuses and relays are located in the mounting block under the hood, figure 1. To access the elements of the mounting block in the engine compartment, press
Read more
fuel pump for Renault Logan
The Renault Logan passenger car has an electric fuel pump in the engine power system, which is located in the gas tank. Includes it in the relay operation. It is located under the hood of the car inside the mounting block located next to the battery, on the side of its positive terminal. In the same
Read more
all masses of VAZ 2115
1) Battery weight. The negative on the battery has two branches: a thick wire and a thin one. A thick wire runs from the battery negative to the engine housing. If this contact is not secured properly, the battery is not fully charged, the starter does not develop full power, and it stalls.
Read more
Prevention measures
If you notice that the electrical circuit of your ten is not working correctly, first of all you need to seek help from an electrician. Or you can independently diagnose high-voltage wires; for this you need to use a multimeter.
The diagnostic procedure is carried out as follows:
- First of all, the black wire must be installed in the left hole.
- The red cable should be installed in the middle.
- Next, the diagnostic device itself turns on. The multimeter must be activated in blue twenty mode.
- Now you need to carefully connect the multimeter probes to each other.
- If the arrow on the device display points to zero, that is, zero resistance, this indicates that everything is in order with the high-voltage wires. This means that the problem must be looked for elsewhere. If the multimeter needle on the dial points to one, this indicates that the resistance level is quite high and exceeds the norm. In this case, you can understand that the problem lies in a certain wire. Most likely it is interrupted or has poor contact. In order not to have to deal with repairs, the best option would be to purchase a new wire and install it.
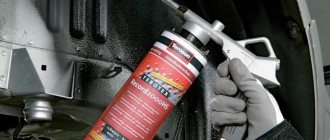
When repairing wires, you need to use not only electrical tape, but also corrugated tape; it is more resistant to rubbing than electrical tape.
Video “How to repair wiring yourself”
Find out more about how electrical circuit repair is carried out in a garage from the video below (video author - Ramanych).
Wiring in a car plays one of the most significant roles, since it is actually the connecting link of many functional elements of the car. In the VAZ 2110, wiring is replaced if it malfunctions, or if the owner decides to upgrade. This, in turn, will help to significantly improve the efficiency of the vehicle's electronic systems. Often, old wiring simply cannot withstand the load of various additional high-tech devices. Replacing the wiring in a VAZ 2110 can be easily done on your own.
Information that a motorist must know before replacing existing wiring
First of all, the car owner must know when and in what cases the car wiring is replaced. At the same time, it is also necessary to have information about the final operational life in order to objectively understand when the wiring may need to be replaced. List of the most common reasons that cause wiring to malfunction:
- the appearance of cracks in insulation during a long period of operation;
- oxidation;
- corrosion;
- fuse blown, etc.
Components needed to perform wiring replacement:
- multivariate set of wires;
- fuse block for VAZ 21104;
- housing for the heating system;
- various types of sensors: brake fluid, cooling system, etc.;
- pads;
- many terminals;
- Of course, it goes without saying, duct tape.
A practical look at rewiring
So, a detailed step-by-step algorithm for replacing the wiring:
- first you need to dismantle the front part of the cabin;
- then you can deal with the proper degree of isolation, if there is a desire for it;
- after which, you need to pay special attention to the front headlight switch;
- The windshield wiper (see Replacing windshield wipers on a VAZ 2110 on your own) operates using its own mini-motor, the wiring of which must be checked for serviceability, since very often it simply becomes acidified;
- understand all heating modes;
- the connection of all electronic devices must be carried out strictly sequentially, by increasing the number of connected wires.
Note. Before disconnecting all electronic devices, it is necessary to draw your own conventional electrical circuit by hand in order to correctly make the appropriate connections in the future.
- now it’s time to tackle the fuse blocks, or rather their installation;
- most wires exceed the required length, so they simply do not fit into the allotted space;
- the bracket is the most rational solution to the problem; it will allow you to successfully replace the fuses with new ones;
- with the installation of a new fuse, the position of the front light indicator light, as well as the emergency warning light, will change;
- the heater will also have to be affected: first you need to remove the old radiator and then disassemble it to make it possible to replace the fan;
- Assembly is carried out strictly in reverse order.
Note. Before you begin the wiring replacement procedure, you need to find its current diagram. Otherwise, during the process of assembly and disassembly, you can quickly get confused, and you will have to send the car to a car service center.
The main advantages of the new wiring:
- the emergence of a practical opportunity to connect any gadget;
- longer service life compared to old wiring;
- high degree of reliability of everyday functioning;
- improving the quality and stability of electronic devices and much more.
It is always necessary to remember that installing homemade wiring is an easily feasible technical manipulation; the main thing is to understand all the necessary nuances.
The main objective signs of a car wiring fault
- the car engine does not start;
Note. If the essence of the malfunction lies in the ignition system, then one of the diagnostic signs is that the car will not start. Moreover, if the car starts poorly, but still starts, then problems with the wiring can be excluded from the list of possible causes.
- the central ignition lock has stopped functioning properly;
- the car’s electronics begin to function intermittently or do not work at all;
- headlights function intermittently or do not function at all;
- the characteristic smell of burnt rubber began to appear regularly in the car interior;
- the battery discharges too quickly, although it was functioning properly before;
- and of course, it goes without saying, multiple problems associated with the ignition system.
Weight of the VAZ 2110 tidy
Guys, please tell me how to throw additional mass on the instrument panel, the temperature indicator arrow lives its own life!
Comments 14
My temperature jumped when the lights were turned on, what about you?
This means that the wire that comes from the minus of the battery and is attached in the area of the thermostat to the engine has poor contact, I unscrewed it and cleaned everything thoroughly (clean the minus wire that goes to the TV, too, just in case), some others, if stripping does not help, transfer the wire from the engine on the box, there is a convenient bolt just under it.
This means that the wire that comes from the minus of the battery and is attached in the area of the thermostat to the engine has poor contact, I unscrewed it and cleaned everything thoroughly (clean the minus wire that goes to the TV, too, just in case), some others, if stripping does not help, transfer the wire from the engine on the box, there is a convenient bolt just under it.
Neither one nor the other helped!
It’s bad, there is an option to throw an additional minus from the battery to ground.
I directly threw the wire from the negative battery to the bolt in the photo
2110 2111 2112 Arrows jump on the instrument panel, the dashboard does not work
The situation looked like this: the engine is running, the engine is heating up, and the moment the cooling fan turns on, the arrow indicating the engine temperature jumps an order of magnitude higher. The car owner tried to change the engine temperature sensor, which takes readings for the instrument panel! Please note there are two of them, one for the shield and the other for the engine control unit. So the replacement did not lead to anything, everything remained as it was.
In the photo the arrow indicates the sensor that works for the instrument panel
My searches led me to the conclusion that this car is one continuous “bad mass.” I tried for a long time to determine the weak point, there was some kind of voltage loss at each contact, in the end everything worked fine only when I freaked out and attached the crocodiles for lighting, one to the other engine into the cabin to ground only after such a maneuver did the differences balance out and the sensor readings stopped jumping with the appearance of load.
I got out of the situation by throwing an additional wire that connected the ground of the engine and the sensors on the instrument panel. The mass on the instrument panel is screwed behind the socket near the driver’s right foot.
This is also a sore spot, often it unscrews and the instrument panel does not work at all!
Without departing from the topic, I had a case when the interior air blower in a car did not work, the reason also turned out to be a mass, only that mass was located near the mounting block and on the left side under the inner trim
So, if you have similar symptoms, I recommend checking the weight of your car first, given that this is a very common problem with these cars.
Text and photo: I.N. Skrydlov, Lyubertsy (aka Aktuator)
Nowadays, the vast majority of vehicles use the vehicle body (vehicle) as a common wire for the majority of electrical consumers. The body is therefore called the mass (foreground, ground) of the car. If any of the connections to the mass becomes unreliable, miracles begin. The simplest example of this is the blinking of all the lamps in the rear light. We turn on the turn signal, and it starts blinking with the brake light or reverse light. At the same time, at the required consumer, the voltage is two to three times different from the required 12 - 14 volts, and at the unnecessary (not turned on), on the contrary, quite sufficient voltage appears for its operation. This is with light bulbs. What if this starts in the Electronic Engine Control System (ECM)? Then the engine may begin to spontaneously change its operating mode - from gaining high speeds to stalling.
I’ll try to describe the places where the loss of a reliable connection to ground is most likely, and the glitches that appear in this case. I ask you to forgive me in advance for the sometimes strange and unusual names of components and car parts, but since I work at a VAZ warranty station, the situation obliges me.
Information that a motorist must know before replacing existing wiring
Replacing wiring VAZ 2110
First of all, the car owner must know when and in what cases the car wiring is replaced. At the same time, it is also necessary to have information about the final operational life in order to objectively understand when the wiring may need to be replaced. List of the most common reasons that cause wiring to malfunction:
- the appearance of cracks in insulation during a long period of operation;
- oxidation;
- corrosion;
- fuse blown, etc.
Components needed to perform wiring replacement:
- multivariate set of wires;
- fuse block for VAZ 21104;
- housing for the heating system;
- various types of sensors: brake fluid, cooling system, etc.;
- pads;
- many terminals;
- Of course, it goes without saying, duct tape.
A practical look at rewiring
Replacing wiring on a VAZ 2110
So, a detailed step-by-step algorithm for replacing the wiring:
- first you need to dismantle the front part of the cabin;
- then you can deal with the proper degree of isolation, if there is a desire for it;
- after which, you need to pay special attention to the front headlight switch;
- The windshield wiper (see Replacing windshield wipers on a VAZ 2110 on your own) operates using its own mini-motor, the wiring of which must be checked for serviceability, since very often it simply becomes acidified;
- understand all heating modes;
- the connection of all electronic devices must be carried out strictly sequentially, by increasing the number of connected wires.
Note. Before disconnecting all electronic devices, it is necessary to draw your own conventional electrical circuit by hand in order to correctly make the appropriate connections in the future.
- now it’s time to tackle the fuse blocks, or rather their installation;
- most wires exceed the required length, so they simply do not fit into the allotted space;
- the bracket is the most rational solution to the problem; it will allow you to successfully replace the fuses with new ones;
- with the installation of a new fuse, the position of the front light indicator light, as well as the emergency warning light, will change;
- the heater will also have to be affected: first you need to remove the old radiator and then disassemble it to make it possible to replace the fan;
- Assembly is carried out strictly in reverse order.
Note. Before you begin the wiring replacement procedure, you need to find its current diagram. Otherwise, during the process of assembly and disassembly, you can quickly get confused, and you will have to send the car to a car service center.
Electrical diagram for VAZ 2110
The main advantages of the new wiring:
- the emergence of a practical opportunity to connect any gadget;
- longer service life compared to old wiring;
- high degree of reliability of everyday functioning;
- improving the quality and stability of electronic devices and much more.
Replacement of electrical wiring of VAZ 2110
It is always necessary to remember that installing homemade wiring is an easily feasible technical manipulation; the main thing is to understand all the necessary nuances.