Setting the dashboard backlight
- Registration
- Entrance
- To the beginning of the forum
- Forum Rules
- Old design
- FAQ
- Search
- Users
For some reason, I only have the “dimensions on” light bulb adjustable, but the brightness of the dashboard itself is not adjustable
+100 This is what a fresh morning look at a problem means
I'll ask the question here so as not to start a new topic (yet).
The instrument panel lighting stopped working, i.e. At night you can't see a damn thing on the panel, only the low beam lamp. Moreover, the rest of the lamps (icons) work, i.e. They glow, but neither the speed nor the temperature are visible. When you turn the knob, the brightness does not change. And there is no backlight on the regulator itself. I’ll note right away that no wires were mixed up, because at one point the backlight simply stopped working, I haven’t even disassembled the panel yet. Does this mean that the backlight brightness control is broken or are there options? If it is a regulator, how do I change it?
Source
Video - night controls
Idea:
When driving at night, the backlight should barely glow; when driving during the day, it should be bright, and all this should be automatic. Those. it should change smoothly depending on the range of illumination.
1. Observations and tests
This idea was prompted by the fact that Sonic cars have such an adjustment, only it is manual.
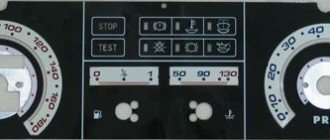
Removed the light switch in the car
I took it apart and see unused sliding contacts on the right side of the board.
This is where the backlight control should be located in the form of a rocker, like on the steering wheel - control for switching songs
Having connected the board without the box, I tried to close the sliding contacts...
And lo and behold, when one pair is short-circuited, the backlight goes out, while the other pair is short-circuited, it glows brighter. (If you wish, you can simply display two buttons)
Well, the contacts have been found, all that remains is to solder the wires to them and solder a board that would receive light from the sensor and switch these pairs of wires.
2. Board layout and board cost
I take the wires and solder them...))
The circuit and sketch for Arduino are described by me in the article bigbarrel.ru/?p=332 The total cost of the board is approximately 150 rubles
The board is ready, I connect the device, and immediately encounter a problem. The controller on the board turns on before our backlight and the adjustment goes nowhere. As a result, nothing works as it should (((
At first I wanted to receive a signal directly from the LEDs, but the currents on them are pulsed, which means it’s confusing.
Finally I found a wire whose voltage is reset to zero when the backlight is turned on. I started using it - everything works great.
3. Assembling the light control unit
Soldered the wires to the contacts
I cut the board with a Dremel so that the wires would not get snagged. Using a drill, I drilled holes in the box for the wires.
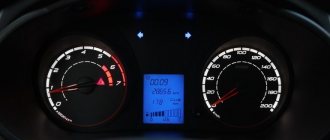
Dashboard lighting Lada Vesta
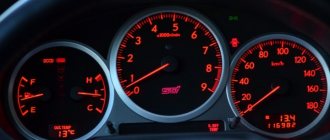
On cars of the Lada Vesta family, dual-mode instrument panel lighting is used. What does it mean? The vehicle dashboard has two backlight modes - day and night. The driver switches these modes constantly, without even realizing it; the daytime backlight mode works when the lights are off, and the night mode works when the lights are on.
There is no fundamental difference between the backlight modes, however, the very fact of their existence makes it possible to adjust the backlight brightness depending on the time of day. When driving in the daytime, usually the brightness is set to the maximum value or close to it, since under the rays of the sun the instrument panel indicators become difficult to see. This mode is completely unsuitable for an evening or night trip; the high brightness of the dashboard will “hit” the driver’s eyes and distract from the road, so in night mode the brightness of the indicators is reduced.
On Lada Vesta cars, the backlight brightness is divided into three parameters: LCD backlight (on-board computer readings), scale backlight and arrow backlight. For each parameter, the brightness is set separately, allowing for flexible settings.
Electric rear window defroster
Page 163
- Image
- Text
157
Instruments and controls
Electric rear window defroster
For vehicles equipped with automatic climate control
The heater automatically turns off approximately 10 - 30 minutes after switching on, depending on the outside temperature (when it is above 0
O
WITH).
Before driving, be sure to check that the rear window is clean and provides sufficient visibility to the area behind the vehicle.
The thin electrically conductive mesh of the heater glued to the rear window can be easily damaged. When wiping the rear window, move the sponge from side to side horizontally, not vertically.
For some vehicle variants
Simultaneously with the heated rear window, the heated outside rear view mirrors are switched on. For more information, see page 211.
Vehicle shown with climate control system
Lada Vesta, self-adjustable brightness via ELM, dashboard lights
We copy the APK file from the archive to any place on your phone, the ecu.zip archive, without unpacking, we copy it to the root of the phone’s internal or external memory. Run the APK file on the phone (provide installation rights if necessary) - the software will be installed. We launch the installed Ecu Tweaker program (after launch it will detect the archive that we placed in the root of the memory and install it) and connect to our ELM scanner.
Click the “Meter Cluster” button:
Now the button: “PP_VESTA”
Select “Settings 2”:
We get to the brightness settings screen:
On the screen, the fields are empty, since the application is not connected to the Lada Vesta, they will be filled in with values.
In this window, we adjust the brightness of the backlight to suit you. In the right columns we enter the values (indicated in percentages) opposite the desired parameter (LCD, scale or arrow). Then press the record button, depending on the parameter being edited, the record buttons will differ; Daybacklight_CF - when adjusting brightness in day mode and Nightbacklight_CF in night mode.
Does the grant include adjustable display backlight brightness?
Good afternoon! Does the grant include adjusting the brightness of the display backlight? And how to use it?
Similar articles
- 20191021_
- Fourth oil change at 20052 km LADA GRANTA FL
- VID_20191020_
- I decided to get a Kalina cross 106l
- After turning off the gas the EUR light came on
- Which ones + which ones - and is it worth taking it
- Please share
- They are sold as a set
- The standard Granta Luxury casting has 185 tires installed.
- Tomorrow I will install technospring springs minus 50 on the original stoics
- We will find good shoes for your car for everyone
- Has anyone encountered this problem?
- Consequences of 1 liter of cheap antifreeze - clogged radiator
- Tell me, can the interior mirrors come off if you hang them on them?
- I have a Starline A93 signaling
10 comments on “Does the grant include adjustable display backlight brightness”
Vadim says: Alexey says: Konstantin says:
No. And it's not convenient.
Sergey says:
It doesn't have a lot of things, sensors: engine oil level, coolant level, windshield washer fluid level. Glove compartment lights, dipstick in box (cable)
Stepan says:
This makes it even more interesting :). I install everything myself
Sergey says:
Konstantin, but you drive it.
Konstantin says:
Sergey, yes, I drive it. I also don’t like it when it rains and I don’t have an umbrella. And Diogenes actually lived in a barrel, because he had a lot that he didn’t like. You shouldn’t take every little thing to heart, especially one that you can fix yourself. There is no washer sensor - I always don’t empty the canister completely, but leave a liter in the trunk. When you run out, you fill up a liter and immediately look for where to buy a new one. Solution? No brake sensor. pads? So when you change your tires, be sure to check the condition of the pads. And this is 2 times a year. Quite enough. There is no engine temperature sensor - so it is not really needed. There is an overheating lamp - that's enough.
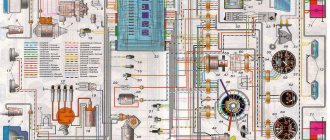
How to make your own dashboard lighting in a car with LEDs
What car enthusiasts don’t do to make their car more convenient and unusual. Some car owners spend a lot of money on professional dashboard tuning. And some craftsmen prefer to do it themselves. This kind of tuning is quite easy to do. In order to replace conventional light bulbs with light-emitting diodes (LEDs), you do not need to have special knowledge or skills. We’ll tell you how to make LED backlighting for the instrument panel in a car with your own hands.
Immobilizer
Page 168
- Image
- Text
162
Instruments and controls
An immobilizer is an effective means of protecting a car from theft. Attempting to start the engine using an inappropriate key or any other device will result in the engine's fuel supply system being shut down.
When you turn the ignition to ON (II), the immobilizer system indicator lights up for a short time and then goes off. If the indicator starts flashing, it means that the immobilizer system has not identified the key code. In this case, you must turn the ignition key to the LOCK (0) position and remove it from the lock, and then reinsert the key into the lock and turn it to the ON (II) position.
The system may not identify the code of the key located in the ignition switch if there is any other key with an immobilizer or a metal object (for example, a chain, key fob, etc.) nearby.
If the system fails to identify the key code several times, contact your authorized Honda dealer.
Do not attempt to make any changes or additions to this system or its associated devices. This may disrupt the normal functioning of the vehicle's electronic systems and make it impossible to operate.
If you lose the key and cannot start the engine, contact your authorized dealer.
(For vehicles sold in Europe) EU Regulations The vehicle's immobilizer system complies with the R&TTE regulations governing the operation of radio systems and telecommunications devices.
(For vehicles supplied to South Africa)
Immobilizer
Disassembling the console
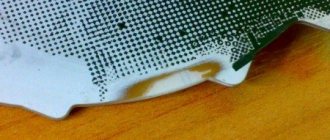
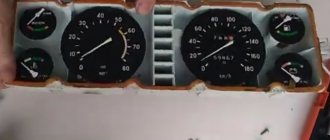
Initially, you need to disassemble the dashboard: remove the protective glass, then the arrows, but keep in mind that they are very fragile, and in order not to damage them, it is better to slip thick paper under the screwdriver; it does not require much effort.
And to remove the dashboard backing you will need a knife, with its help you need to cut through the layer of sealant around the entire perimeter.
After removing the “cover”, use a knife to carefully scratch the filter; it is a special paint. Then degrease this area with acetone or alcohol.
How to make dashboard arrows backlit
The color of the speedometer and tachometer needles is important. If they are white, then you can leave them as they are. But if not, then you need to remove the old paint with a knife and treat them with alcohol, then paint them with white varnish or regular paint.
The color of the arrow should be white, because only it conveys the entire gamut of LEDs.
You can try and highlight the arrows separately. This requires LEDs with a diameter of 3 mm at 12 V.
Important! In the car network, the voltage is 12 V; if the LEDs are designed for a lower value, then they cannot be connected directly. They should be connected through a stabilizer.
If the diameter of the LEDs is larger, you will have to make additional holes for them.
It is recommended to place LEDs either along the entire scale or opposite those values near which the arrow is most often located.
We collect
When everything is ready, we begin to slowly assemble the console. First of all, we install the substrate. Apply sealant to the back side and glue it to the panel.
Then we put the arrows and protective glass in place. After modernization, the instrument panel looks bright and unusual.
LED lighting not only looks unusual and bright, but is also a good addition to the car in terms of economy, which helps save battery power, since LEDs consume 80% less energy than a regular light bulb.
Source
Dashboard lighting: how to do it yourself
The dashboard allows the driver to monitor the main operating parameters of the car, read the readings of various sensors, indicators and instruments.
Over the past few years, instrument panels have changed from analog to digital, and instrument panel lighting has also changed to make information easier to read and improve overall information content.
For this reason, many drivers are replacing conventional dashboard lighting bulbs with more modern solutions:
- to improve the appearance of the interior;
- in order to improve the quality of information reading.
At the same time, replacing the light bulbs in the dashboard can be done independently on almost any car. Read more in our article.
Reviews
| № | Positive |
| 1. | Mikhail Aleksandrovich , 41 years old (drive2.ru): I have one of the first models, the dashboard lighting in bright weather is insufficient, but I have already adapted. I didn’t reflash it, I darkened the side windows a little, and readability improved. |
| 2. | Vitaly Nikolaevich , 38 years old (prom.ua): I reflashed the dashboard, the brightness of the dashboard illumination increased. Now instrument readings are visible at any time of the day. |
| 3. | Gennady , 30 years old (autotoday.com): I ordered the installation of a 2-channel PWM controller from a service station, the guys completed it in an hour and a half. Now I have adaptive backlighting for the dashboard: when the ignition is turned on, it is brighter, when the high beam is activated, the DRL is dimmer. |
| 4. | Gavriil Stepanovich , 42 years old (rozetka.ua): I bought the car second-hand, the previous owner slightly modified the panel board, updated it with version 035. I like it, the information content is good in any weather. |
| 5. | Saveliy Timofeevich , 40 years old, (avtoflit.com): I recommend installing a PWM regulator, tested from personal experience. I installed it myself and finished it in half an hour. Purchasing a KIT kit cost 700 rubles. |
| 6. | Vasilyevich , 36 years old, (autotoday.com): A year and a half has passed since the installation of the 2-channel KIT, there are no complaints about the quality of work, it works as usual. |
| 7. | Petr Nikolaevich , 42 years old, (drive2.ru): in general, I’m pleased with the quality of work and efficiency of the KIT, the backlight is bright, the data can be read well in any lighting. |
| Negative | |
| 8. | Sergey , 30 years old (prom.ua): I reflashed the electronic control unit, but the quality of lighting did not improve significantly, I expected more. |
| 9. | Georgy , 25 years old, (avtoflit.com): I reflashed the ECU for the first time, but didn’t notice any significant changes. On the advice of my friends, I installed a 2-channel PWM controller, the backlight became adaptive. |
| 10. | Kostya , 24 years old, (drive2.ru): The PWM regulator worked for a little over a year, after which it failed. Wasted money, effort, time. |
| 11. | Dmitry , 26 years old, (autotoday.com): sad experience of using KIT, I do not recommend installation. |
When to change the instrument panel lighting
Modern cars today are equipped with LED backlighting or have a combined circuit (digital panels and LED backlighting of individual buttons). As for older machines, in this case, conventional light bulbs and analogue devices are used.
Installation of modern diode backlight lamps allows:
- change the appearance of the instrument panel;
- change the overall color of the instrument panel lighting;
- Get high-quality dashboard lighting.
As a result, you can count on overall modernization and increased driving safety (improved backlighting allows you to quickly and accurately read information in the dark and during daylight hours).
Also, subject to proper installation, the driver can count on an increase in the level of comfort (the ability to adjust the brightness of the backlight, select the optimal color, etc.). This helps reduce fatigue and eye strain, especially at night.
Headlight beam direction corrector
Page 164
- Image
- Text
158
Instruments and controls
For vehicles equipped with halogen low and high beam headlights
Your car is equipped with a headlight beam adjustment that allows you to adjust the low beam headlights depending on the number of passengers in the cabin and the load in the luggage compartment.
Turn the ignition key to the ON (II) position. Turn the headlight range control switch to the position that most closely matches the actual vehicle load.
0: Driver only or driver and passenger
in the front seat.
1: Five people in the car.
2: Five people on the front and back
seats, as well as cargo in the luggage compartment, within the limits of the maximum permissible axle load and maximum permissible vehicle weight.
3: One driver and cargo in the luggage compartment
department. The weight of the vehicle and the load on the front and rear axles do not exceed the permissible values.
For vehicles with high-voltage discharge headlight lamps
Your car is equipped with an automatic headlight beam control system, which ensures that the low beam of the headlights changes the direction of the headlights in the vertical plane depending on the number of passengers in the cabin and the load in the luggage compartment.
Headlight beam direction corrector
CORRECTOR SWITCH
Which lamps are best to install in the dashboard?
First of all, when choosing lamps for your tidy, the optimal solution would be to use LEDs. This solution is the most effective, since the diodes shine brightly and evenly, and also have a long service life.
- LEDs are small in size but still shine brightly. Thanks to this feature, they can be installed almost anywhere (in the dashboard area, used for hanging buttons, regulators and other elements).
- Diodes are not difficult to solder, and even a small number of them allows you to obtain uniform and effective illumination.
LED lighting of the instrument panel can be done as follows:
- Using separate LED elements. This method allows you to organize high-quality lighting; if necessary, you can make tuning (diodes of different colors are installed).
- Using diode strip. In this case, you can change the overall color scheme more easily and quickly (the tape has a self-adhesive base), however, in terms of originality, the tape is inferior to individual diodes. Another disadvantage is the frequent need to replace the entire tape if the diodes in the circuit burn out.
The instrument panel backlight does not light up on the Lada Kalina - why and what to do
The instrument panel of any car is designed to inform the driver about the technical condition of the car. If in the daytime all sensors are clearly visible, then at night for their normal viewing it is necessary for the backlight to work. There are cases when the instrument lighting on the Lada Kalina stops functioning and in the dark it is difficult for the driver to control the readings. This not only creates inconvenience to control, but can also lead to dangerous situations when the driver is distracted to see the information on the dashboard.
Why does the instrument panel backlight on the Lada Kalina not light up?
During operation of the Lada Kalina, situations may arise when the dashboard backlight disappears. If this happens, then you need to find the cause of the breakdown as soon as possible and eliminate it. There are several reasons for the backlight to disappear, but they are all related to a malfunction of the car's electrical network.
If the dashboard backlight disappears, the problem must be corrected immediately
Removing the instrument panel
In most cases, before establishing the reason for the disappearance of the backlight on the Lada Kalina dashboard, you first need to dismantle it.
To remove the instrument panel you will need the following tools:
- a set of keys;
- Phillips and flathead screwdrivers of different lengths.
The procedure for dismantling the instrument panel on the Lada Kalina:
- Turn off the power to the car. To prevent a short circuit during work, you must first disconnect the negative terminal from the battery. If this is not done, there is a possibility of electrical equipment failure.
- Lower the steering column to its lowest position. This will allow you to gain easier access to the instrument panel.
- Unscrew the two screws securing the cover; this will require a short screwdriver. Then it is carefully pulled out, while it is necessary to overcome the resistance of the spring clamps. It is necessary to shake the lining and gradually pull it towards you. To remove the lining, unscrew two screws
- Unscrew the console mount. It is also secured with two screws located at the edges of the case. You must hold the screws, otherwise they may fall inside the panel. The console is attached in two places along the edges of the case
- Disconnect the plug with wires. To do this, tilt the instrument panel forward slightly and pull out the plug. To do this, you need to use a screwdriver to move the lock on the plug to the right side.
- Remove the dashboard. Now that the instrument panel is not holding anything, it can be carefully pulled out. Turn the shield a little and pull it to the side; it’s easier to do this to the left. After disconnecting the plug, the instrument panel can be easily removed
When the dashboard has been dismantled, you can proceed to diagnostics and search for the reasons that caused its malfunction.
Brightness adjustment lost
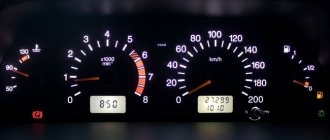
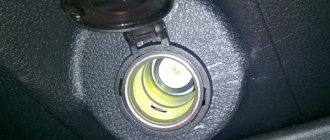
One of the very first actions to take when the instrument panel backlight disappears is to check the brightness adjustment. The driver himself or his passenger can change the setting. There is a wheel on the panel with which you can set the brightness of the instrument lighting. If it is turned to minimum, the backlight may glow very weakly or not glow at all. Just turn the wheel and adjust the brightness.
The brightness control for the instrument panel lighting is designed as a wheel.
Fuse problems
The next step in troubleshooting is to check the fuses. To do this, you need to use the technical documentation of the car and find where the fuse responsible for the instrument lighting is located. The fuse box is located on the left side under the cover with the light switches.
Instrument panel lighting: how to replace
To install diode bulbs in the dashboard, you need to purchase diodes or an LED strip. It is important to pay attention to color, brightness and other indicators.
It is recommended to buy LEDs from the same batch, since the brightness and color shade of even two similar lamps may differ slightly. Naturally, after installation this may be noticeable.
The next step is to install new lamps in the instrument panel. To replace the instrument panel light bulbs, you must:
- remove the negative terminal from the car battery;
- lower the steering wheel (if there are adjustments), move the driver’s seat as far back as possible;
- remove the instrument panel (instrument panel) by unscrewing the bolts and disconnecting the clamps of the wires connected to the panel;
- Please note that depending on the car model, the process of removing the shield may have certain nuances, which will require additional study (it is recommended to review the manual, visit specialized forums or involve third-party specialists);
- the next step is to detach the glass (it can be glued, in this case it is necessary to heat it with a hairdryer around the perimeter of the glass);
- after removing the dashboard glass, standard light bulbs are replaced with LEDs;
- after the old dashboard lamp is removed, diode analogues are installed in the same way;
- Having completed the process, before starting reassembly, you need to check all the diodes for functionality (you need to supply power to the panel);
- if all the diodes work, then you can install the glass and mount the shield.
Replacing dashboard light bulbs “Lada-Kalina”
To install new elements you will need to disassemble the “tidy”. For Lada Kalina, work according to the following algorithm:
- lower the steering wheel down (otherwise it will get in the way; the regulator is located behind the column);
- unscrew the self-tapping screws securing the cover (get from below);
- pull the part towards you;
- unscrew the fasteners with a magnetized tool;
- disconnect the wires with the block by tilting the panel.
During the process of replacing the Kalina dashboard lamps, be careful not to lose small parts. When going on a road trip, make sure you have a spare “lighting” kit and a minimum set of tools in your car. Then an unexpectedly faulty dashboard will not become a critical event - you can quickly correct the situation. If you have doubts about your own knowledge, find a video with step-by-step instructions.
Recommendations
- As a rule, when replacing instrument backlight bulbs, many owners want to obtain high clarity and brightness. Please note that if the lights on the dashboard are too bright, this brightness is sufficient on a sunny day. However, at night the panel may glow too brightly, making it uncomfortable to look at the instruments. The result is high eye fatigue and difficulty reading information in the dark.
- To get maximum comfort, it is better to immediately install an additional brightness control in parallel with the diode lamps. This will make it possible to adjust the brightness of the instrument panel illumination. To change the brightness, you need to connect the backlight through a variable rheostat. This solution will allow you to adjust the intensity of the glow taking into account different conditions. Typically, such regulators are on sale in the same place where the diode backlight bulbs themselves are sold. It is important to determine in advance where these regulators will be installed.
Source
Adjusting the steering wheel position
Page 165
- Image
- Text
159
Instruments and controls
Adjust the steering wheel before you start driving.
WARNING
Adjusting the steering wheel while the vehicle is moving could result in loss of vehicle control and a serious accident.
Adjust the steering wheel only when the vehicle is stationary.
1. Press the lever all the way down,
located under the steering column.
2. Moving the steering wheel up and down
and back and forth, position it so that it is directed not at the face, but at the chest. Make sure that the steering wheel does not obscure the instruments and indicators located on the dashboard.
3. Lift the lever up to
fix the steering wheel in the selected position.
4. Make sure the steering wheel is
securely fixed by trying to move it up and down and back and forth.
Adjusting the steering wheel position
LEVER ARM