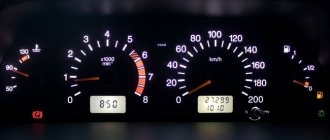
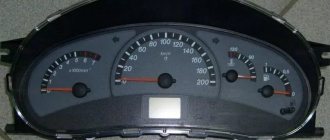
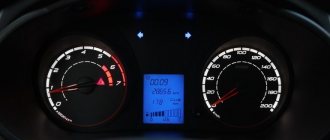
Many owners wonder which torpedo is suitable for the VAZ 2107. This is not an idle question. After all, the driver spends most of the time on the road looking at the dashboard. The “seven” torpedo was developed more than 30 years ago. In this regard, its angular shape hurts the eye.
Also, the devices are quite faintly visible. After all, their scales are simply painted on plastic with white and sometimes red paint. This reduces the ability to see instrument readings in the dark. Also, this appearance has no attractiveness. Therefore, many drivers replace dashboards.
Panel or torpedo?
Which torpedo is suitable for the VAZ 2107? The issue is complex, but completely solvable. Just to begin with, you should determine how radical the alterations will need to be made. Such tuning can be done in two ways:
- Replacing the dashboard;
- Replacement of the entire torpedo.
The first option will allow you to get by with little expense and replace the panel with another one that suits you more. You just have to adjust the socket a little in size. It is somewhat more difficult to install a new panel. At the same time, it must be suitable in size and provide the ability to connect all vehicle systems. The final choice depends on your ultimate goals and capabilities.
Which seats are suitable?
You can replace the seats either by contacting specialists at service stations in tuning centers, or by yourself.
Which seats are suitable:
You can install standard, original, factory seats, but most often car enthusiasts try to replace the old “Seven” seats with seats from foreign cars, sports cars, or anatomical ones. Of course, installing new ones is not a cheap process. Therefore, a frequently asked question among car enthusiasts on various forums is which seats are best to choose or which seats are suitable (preferably with the least amount of intervention in installation).
READ Charger for VAZ 21099 is missing
It is indeed possible to install “foreign” seats on a VAZ two thousand one hundred seven. For example, seats from a Mercedes W210 (preferably one thousand nine hundred ninety six year of manufacture), or from a Toyota Corolla (1993 year of manufacture) are perfect for this purpose. Another option that works well are seats from SKODA and Fiat. In this case, it will be necessary to make two additional holes to install a more reliable fastening.
They also use seats from the Peugeot and Nissan brands, but you will have to deal with some inconsistency and a little work during the installation process. From the Volkswagen brand, these parts fit well without unnecessary modifications. These seats are quite convenient and comfortable, but it is not recommended to install them, since they will be quite high, which will lead to inconvenience. According to experts, any seats can be installed, the main thing is that they fit the dimensions and there is the possibility of welding.
Dashboard
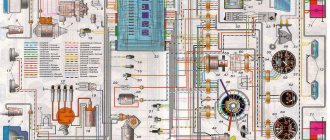
Let's start with the simplest tuning option. A donor will have to be found for a replacement. The simplest option would be to install a panel from a VAZ 2110. There will be a minimum of problems with this work, and the resulting design will look much more advantageous. You will have almost no problems connecting wires. Here they are almost identical. All main devices are also connected in the same way. Tools you will need are a soldering iron and scissors. To make the devices work better, you need to install fluid reservoirs from 2110 under the hood.
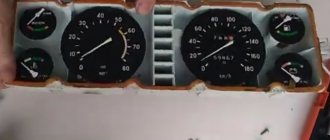
Another equally common option is to install a dashboard from a GAZ 3110
. It also looks much better. The installation itself is practically no different from similar work with a panel from a VAZ 2110; it can also be adjusted to size using a soldering iron and scissors. But here you will have to tinker with connecting devices.
For example, you purchase a tee from a “six”, and use it to connect an econometer and an oil pressure sensor. It is recommended to install a speed measurement sensor used in the tenth family of VAZs.
These are the easiest panels to install. But you can use this part from other foreign cars. Just be sure to take into account the compliance of the VAZ 2107 devices with the chosen foreign car. The easiest way is to find a similar set of sensor readings displayed on the panel in foreign-made cars produced in the late 80s and early 90s.
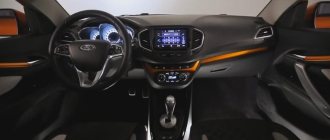
Changing the torpedo
Some drivers are not satisfied with the appearance of the torpedo on the VAZ 2107. Sometimes this element from the “five” may be installed on the car. In this case, a purely practical inconvenience is added to the unpleasant appearance. You have to close the glove compartment with a universal “lock”, or rather, seal it with tape. Otherwise it will constantly open. Therefore, you can change the torpedo.
Of our models, the best fit is a spare part from a VAZ 2115. You just have to use polyurethane foam to seal small non-joints. Of the foreign cars, the best fit here is a torpedo from a BMW E30
. She will look much more advantageous.
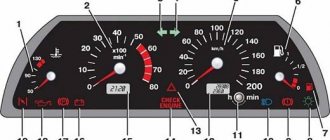
Other signs
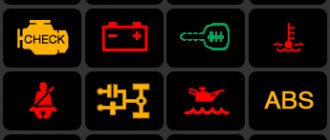
The VAZ-2107 torpedo also has a number of signaling devices. Among them:
- Engine control malfunction sensor (relevant on models with a fuel injection system). The indicator glows orange when the ignition is on. After starting the power unit, it goes out. If the light flashes frequently and is constantly on, contact a repair shop. In this case, operation of the machine is allowed, the system goes into backup mode.
- Battery charging signal. When the engine starts, the indicator lights up red and goes out. If the lamp continues to glow, you should pay attention to the battery charge. The main causes of the malfunction are: poor timing belt tension, alternator malfunction, or disturbances in the electrical circuit. If this problem is ignored, it will lead to a complete discharge of the battery and in some cases, a fire.
- Side light indicator (lights green when turned on).
READ Replacement Timing Chain Kia Sorento Diesel
Tuning methods
Which method of tuning the dashboard to choose will depend on the skills and financial capabilities of the car owner.
- You can buy ready-made parts for tuning and install them instead of the original ones. This is not the cheapest or most original method, but it is simple and will immediately change the appearance of the panel and the entire interior. There will be no problems with installation; the connectors are designed in such a way that it is impossible to make a mistake when connecting devices.
- Purchase additional instruments (econometer, on-board computer, thermometer and much more) and harmoniously fit them into the classic design of the car’s instrument panel.
- Make tuning yourself by replacing the arrows and scale, installing backlighting on the instruments. You can buy arrows and instrument scales or make them yourself.
You should start by removing the panel, regardless of whether you do the dashboard tuning yourself or install ready-made devices.
How to remove the dashboard
Before removing the dashboard, you must disconnect the ground terminal from the battery.
The panel is removed in the following sequence:
- remove the plastic handles from the interior ventilation and heating control levers;
pull out the daily mileage reset cable;
unscrew the self-tapping screw securing the instrument panel and pull out the panel; to access it, you need to remove the decorative trim;
unscrew the speedometer cable and disconnect it;
- disconnect the hose from the econometer;
- disconnect the wire connectors from the devices;
- pull out the dashboard.
How to install a ready-made tuned device on a seven
Car owners who do not want to redo the dashboard on a VAZ 2107 themselves choose the modernization method by purchasing ready-made kits. This kit contains everything you need to tune the instrument panel on a VAZ 2107. Moreover, such kits are suitable not only for carburetor sevens, but also injection ones.
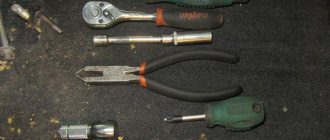
Even a beginner can cope with installing a tuned device on a VAZ 2107. The kit comes with instructions so you can carry out the work without contacting specialists. To carry out work on upgrading the tidy on the seven, you will need a minimum set of tools, in particular a screwdriver.
The principle of tuning the tidy is to perform the following manipulations:
- Dismantling with disconnecting connectors. When disconnecting connectors, it is recommended to make appropriate marks so as not to make a mistake when connecting.
- Install new hands and scales from the purchased set.
- Reinstall the tidy.
This option is simple, but it is not always popular. This is due to the fact that only the sticker is installed, that is, the design changes, but the backlight remains the same. This simple upgrade can be complemented by installing LED lighting. We will consider in detail how to do this in the material.
Self-production of arrows and instrument stickers
Buying ready-made arrows and stickers for the dashboard of a VAZ 2107 is the easiest way of tuning. A more difficult option is to develop your own custom sticker design. The result will be a truly unique tidy on the seven. Making stickers yourself is a more labor-intensive method, and if you decide to use it, then you will need to make templates for implementation. Using these templates, cut out and draw stickers. As practice shows, it is much easier to buy ready-made stickers and, if necessary, upgrade them.
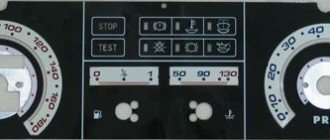
Tuning the instrument panel of VAZ 2107
Perhaps, everyone has a moment when the instrument panel in their VAZ car begins to seem dull and inconspicuous. In order to “revive” it, no expensive changes will be required, just make the backlight brighter and install a decorative sticker, which can be found in almost any car store, and replace the inserts on the dials. So, armed with a screwdriver and a soldering iron, we begin tuning the instrument panel of the VAZ 2107.
Removing the VAZ instrument panel.
The first step is to remove the sliders that control the operation of the heater (stove) using a flat-head screwdriver. Then, to the right of the emergency light button, unscrew and remove the nut and washer that secure the speedometer reset button. To the right of the removed sliders there is a small round plug that needs to be removed and the screw located behind it unscrewed. Then you need to carefully remove the instrument panel and release the speedometer cable by unscrewing the nut that tightens it. We disconnect all the wires, and the freed instrument panel remains in our hands.
We recommend: How to properly check oil scraper rings and what is needed for this?
The next step is to remove the arrows. This must be done extremely carefully so as not to bend either the arrow or the pin on which it sits. It is quite possible that you will have to apply force, but carefully, pulling the arrow in a direction parallel to the pin.
Instrument panel tuning.
Before all work, align the speedometer needle with the limiter, and make a mark on the back side so that you know in which position the needle “lies.” This will greatly simplify the installation of the speedometer and eliminate unnecessary work.
First of all, we remove the old VAZ 2107 shields (this is done quite simply) and install new ones in their place. Then carefully install the arrows, again, so as not to bend the pins. In this case, it is important to align the marks on the back side of the speedometer and, with the marks aligned, set the arrow in the “lying” position. We also carefully apply the sticker you like, having previously degreased the surface. In this case, it is especially important to ensure that it lies flat and without distortions.
Installing LED lighting.
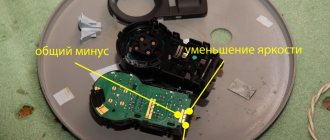
There are two options for installing LED backlighting on a VAZ - directly behind the scale numbers, or as a general backlight for the entire instrument panel. Naturally, all this remains at your discretion, the main thing to consider is that in the first case the backlight will be quite bright and you will have to spend quite a lot of time soldering and gluing the LEDs.
The LEDs should be designed for an operating voltage of 12 Volts, and it is best to increase their contacts by 2-3 cm. For the first option, we remove all the standard light bulbs and solder LEDs in their place. After this, connect the power (it is best to dim the light and adjust the position and direction of the LEDs).
For the second option, if you want to illuminate the entire panel, you can install either four LEDs located in twos at the top and bottom of the instrument panel (choose the distance yourself, it depends on which part of the instrument panel you want to illuminate more), or six - three up and down. In this case, you will need to solder additional wires to connect the LEDs to power and drill out the mounting points. One option is to glue the LEDs with glue if they do not coincide in location with the power points. In this case, it is recommended to use only good glue, and be sure to degrease the installation sites.
In addition, with this arrangement of LEDs, there is a little trick to increase the strength of the backlight. Along the inner perimeter, you can cover the side surface of the instrument panel with foil - it will reflect light from the walls inward, enhancing the backlight. To decide how much you need it, it is better to assemble the panel, connect the power and think carefully about whether the backlight of such power will suit you.
Assembling the VAZ 2107 dashboard is done in the reverse order, there is nothing complicated about it. The main thing is that you achieved the desired result!