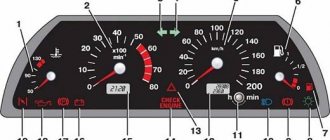
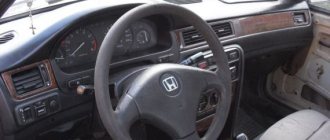
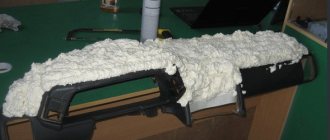
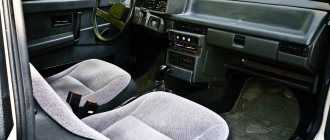
Today we will talk about tuning the instrument panel on a VAZ 2109. In this case, by tuning I will mean reworking the instrument panel itself, and not replacing light bulbs. Everyone wants his swallow to stand out from the crowds of other nines, and not only that. After this material and your implementation of it in the car, even the owners of foreign cars will look at your panel. After all, we will invest our souls, not huge amounts of money.
1. So, let's begin. First, we need any trim on the instrument panel. I would recommend a light transmitting one. It has more effect and looks unusual. In our case, we take this one:
2. Remove the instrument panel itself and the standard trim on it. We need to make cutouts in it to make the lighting brighter. I advise you to take a soldering iron. Then we glue the new cover to the old one.
3. Then we take an LED strip for every taste. Which one do you like? And we attach 3 LEDs to the instrument panel, speedometer and tachometer for brightness, and one LED to the fuel and oil levels. For better light output, I recommend using foil on the panel itself.
4.Now we connect everything as expected, i.e. to the original backlight (do not confuse the polarity). We collect and voila.
If, however, the new lighting seems too bright to you, then it can be tinted with a marker or tinted. The color will be richer and will please the eye. Well, that’s it, tuning the instrument panel of the VAZ 2109 with your own hands is completed.
Tuning the dashboard of VAZ 2108, 2109, 21099 cars. How to make the scale backlight with your own hands?
The dashboards of VAZ 2109 and VAZ 2108 cars are equipped with lamps that illuminate the dial from the outside, i.e., from the arrow side. Such illumination does not always satisfy drivers because the brightness is low and the detail is unclear.
This article will look at how you can illuminate the dashboard from the inside using the example of tuning a VAZ 2109 yourself. Of course, you can turn to a specialized company for tuning, they will quickly make a backlit panel like on foreign cars, but the cost of such work will be high. In order to save a lot on your car and create the desired lighting, you need to modify the instrument panel yourself, especially since there is nothing very complicated about it.
Making a DIY LED panel for a VAZ 2109
To tune the lighting of your car, you will need a light-transmitting cover suitable for the instrument panel.
We remove and disassemble the instrument panel from the car. We remove all the arrows and the old trim; it will no longer be needed. Using a heated knife or soldering iron, you need to make cutouts on the purchased trim so that the light from the backlight hits the instrument panel from the inside.
The lighting itself will be made of LED strip. The tape must be cut into pieces of three diodes. To distribute light evenly over the entire surface, you will need regular foil, which we distribute over the entire panel under the devices.
Algorithm for tuning the VAZ 2109 interior
VAZ 2109 tuning in the cabin
You can, of course, entrust the tuning of a car's interior to professionals, but still, work done with your own hands looks truly magnificent and your soul is always happy.
What you need to buy
If the modification work will be carried out on your own, then you must purchase the following materials:
- Vibroplast M2;
- New instrument scales (color selected depending on the owner’s preferences);
- Automotive LEDs designed for all devices;
- Self-adhesive film;
- Fluorescent paint;
- Cartridges and sockets;
- New wires;
- A new steering wheel, preferably from a famous and expensive manufacturer;
- Regular foil;
- Necessary tools and so on.
Tuning the instrument panel: illuminated scales from the inside
In the previous article on the topic of tuning the backlight of the VAZ 2109 dashboard, the option of LED backlighting without serious intervention in the tidy was considered. There we simply replaced the backlights with LEDs, so although there is an effect, over time you want more. The expectation for more comes down to the fact that on the next generations of Samar devices and on foreign cars, the instrument dials are illuminated from the inside, and it looks as if the numbers and instrument scales themselves are glowing. The instrument panels of the VAZ 2109 and VAZ 2108 are illuminated by lamps that emit their light onto the dials from the outside, from the pointer side, while the brightness and detail of such illumination is low.
Let's try to illuminate the instrument panel from the inside, like on foreign cars, using the tall panel of the VAZ 2109 as an example. It should be noted that tuned instruments from specialized companies are quite expensive, so you can save a lot of money by modifying the instrument panel yourself.
Instrument panel and its tuning
VAZ 2109 tuning interior and panels
As a rule, any interior tuning begins with the instrument panel, which needs to be given a delightful and stylish appearance. Of course, we should not forget about the practicality of this part of the car.
Backlight
VAZ 2109 interior tuning with low panel
Probably every VAZ 2109 owner dreamed of having the same lighting on his car as on imported models.
Note. The appearance of the car interior largely depends on the lighting.
- We remove the standard dashboard and disassemble it.
- We remove the instrument needles, as well as the old trim.
Note. In order for the backlight to shine better on the overlay, it is recommended to make cutouts yourself from the inside. They are easy to make using a heated knife or soldering iron.
- Take the LED strip.
- We cut it into pieces of three diodes.
- Using regular foil, the glow is uniform.
Tuning the dashboard lighting
To upgrade the dashboard lighting in the VAZ-2109, it is necessary to replace the standard lamps with LED ones. In this case, you will need to make a small modification of the scales yourself.
What you need to tune the backlight:
- modern dial sticker kit;
- overlay with scales;
- UV lamp;
- fluorescent marker;
- car paint.
Having provided all the necessary parts and tools, you can begin to work. After dismantling the dashboard, remove the original insert with scales. Remove all arrows from it and set aside for later use. If necessary, you will have to make additional holes in the new scales.
The second stage will be to dismantle the original instrument panel lighting. Remove the board with the lamps and carefully remove them. In their place, install new neon or LED lamps. A protective plastic cover must be placed on top. During operation, it is necessary to control the polarity, which is displayed on the backlight control unit, so as not to mix up the wires and not disrupt operation.
After completing the main work, you can begin to refine the scales. Using a fluorescent marker, highlight all the numbers on the newly purchased overlays to make them clearer.
The final stage of tuning will be the following combination: install the board with lamps, on top - your overlays with scales. When doing this work, be careful not to damage the locks of the windshield wiper blades.
Sound insulation and cladding
VAZ 21093 salon tuning
After the dashboard has been tuned, it’s time to start soundproofing the interior. So:
- We dismantle all interior elements and standard trim.
- We cover all the necessary surfaces with sheets of vibroplast (how to carry out high-quality sound insulation is described in detail in the article “VAZ 2109 interior sound insulation”).
Note. Typically it takes about 14 pieces of insulating material measuring 0.6 x 0.9 meters.
- After soundproofing, we trim the interior.
- First of all, we change the covering on the ceiling (professionals advise gluing it twice, leaving an interval of 5 minutes).
Note. When upholstering the interior, it is imperative to take into account the color scheme and do not forget to glue the doors, dashboard, area next to the gearbox and other parts of the car.
Beautiful modifications to the VAZ 2109 panel
Every driver of a domestic car wants to make the instrument panel of his VAZ-2109 as bright and original as possible. Here is one of the options for how beautifully you can modify this element of the machine.
You will need a soldering iron. Next you need to buy numbers and a scale panel. It is important that they are translucent from the inside. You should also purchase an ultraviolet lamp. It is powered by 12 volts. Therefore, nothing needs to be changed.
You will also need a fluorescent marker or paint. It will change color if exposed to ultraviolet light. This technique is often used in modern nightclubs. You will also need ordinary light bulbs with sockets, like those in the “tidy”. There is no need to change the LEDs; they will remain in place. Everything you need is there, you can get started.
First you need to remove the plastic, then the dashboard. Also, don't forget about the black plastic that surrounds the glass. We disassemble the standard insert, as well as the arrows. Most often, there are no holes in the new insert. Therefore, you will have to do them. For the arrows, the holes will be needed wider than in the standard trim. Otherwise, the arrows will start to stick.
Next you need to dismantle the lighting that is installed. The work should be done carefully so that the plastic is not damaged. We take out the board with the light bulbs. We install a neon light bulb instead of the usual ones, and stick a plastic protection on top. It used to have factory bulbs screwed in. Don't forget about the control unit for the new neon light bulb. Be careful not to reverse the polarity at all times.
If this happens, nothing will shine. Next you need to screw in the instrument lighting bulbs. This should be done in parallel to the neon lamp. We lay the wiring from the inside; first, for this you need to make holes in the partitions.
Let's check if everything is correct. The light bulbs inside should be adjusted. Next we put on the overlay and seal it. After these steps, all we have to do is paint the hands with a purchased fluorescent marker or paint. It is advisable to repeat painting after 10 minutes. After this, the arrows can be installed in their place. This completes the tuning.
Check the work, otherwise you will have to disassemble everything. If there are no problems, you can assemble everything in strictly reverse order. After such tuning, the interior of the VAZ 2109 will be equipped with a colorful panel like good foreign cars. If desired, you can use fluorescent paint to paint the dashboard trim in the place where the needle reaches its limit. It looks very nice.
Steering wheel and its tuning
All experts and professionals believe that the safest is the stock steering wheel of the vehicle. It is this wheel that was developed by the manufacturer and it is this wheel that has passed the necessary tests in accordance with the design of the car. As a last resort, it is recommended to replace the steering wheel with a wheel from the same manufacturer, a newer model. In particular, comfortable and “grippy” steering wheels from the VAZ 2115, etc. are perfect for the VAZ 2109. On the other hand, if the owner wants more, then you can always purchase any “steering wheel” on the market, both from a renowned manufacturer and a steering wheel handicraft wheel.
Internal revision
Tuning the VAZ 2109 interior includes upgrading the dashboard and installing new upholstery. If necessary, we equip the car with more comfortable heated seats. To aesthetically modify the VAZ 2109 torpedo, it is recommended to use various inserts. Functional modernization of the panel means the installation of additional devices.
You can install an electronic tachometer yourself. To carry out such tuning of the interior, you will need screwdrivers and 3 wires. Then you need to make power wiring to the electronic device. The third wire is connected to the ignition coil.
To easily find out fuel consumption, an on-board computer is installed. This type of dashboard tuning is provided by the manufacturer. Therefore, we find an opening on the dashboard, closed with a plug. To install the BC you will need wires. If the car is equipped with a high panel, then the block with 4 wires is installed under the factory plug.
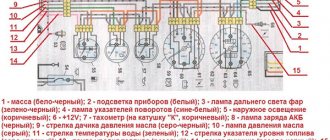
If there is no block, use the cigarette lighter or ignition switch. Before tuning the interior of the 2109, you will need to remove the negative terminal from the power supply. If the on-board computer is connected, study the operating instructions. Then we configure the device parameters and check its functionality. It is recommended to carry out work on upgrading the dashboard after studying the diagram of instrument combinations.
To create comfort inside the car, we use high-quality upholstery (carpet, velor). To tune the interior of the 2109 you will also need glue and sealant. To ensure that the upholstery sticks without wrinkles, we use a steam generator. Covering the interior with carpet is a labor-intensive procedure. But such material burns out quickly, so it is not recommended to use it.
To cover a ceiling with carpet yourself (it is not exposed to sunlight), you will need:
- remove nozzles, handles, visors and old ceiling;
- treat the surface with glue, after 5 minutes the procedure is repeated;
- press the carpet;
- After 24 hours we make holes in the structure.
External modernization
External tuning of the VAZ 2109 includes modifications to various body elements, including optics. A simple modernization of the external parameters of a car is presented in the form of installing aerodynamic body kits. This kind of work can easily be done at home.
To protect the car from damage, we install cut moldings. When choosing moldings, we take into account that the degree of protection depends on the thickness of the product. Experts advise buying oval-shaped rubber pads. To install them, we use glue or double-sided tape. If the “Nine” is equipped with plastic moldings, then we use caps to fix them. We first drill holes in the body. Complex tuning of a VAZ body includes repainting the car. In this case, it is recommended to trust the professionals.
How to do easy tuning of the VAZ-2109 dashboard with your own hands
During the salon of the domestic “nine”, tuning its “tidy” becomes a truly irreplaceable element. Beautiful modifications can be done with your own hands. To do this, you will need to make a new dial on a computer using special design programs and printing the picture on a printer.
However, first you need to clearly think through the appearance of the dials for the car's tachometer and speedometer, as well as for all the sensors that remain. Once the dials are printed, they need to be laminated, and then you can start removing the instrument panel.
To do it correctly, you must first remove the steering wheel pads and also mark the steering position relative to the shaft. Then carefully unscrew the fastening nut.
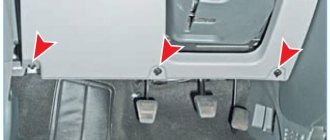
Next, you can remove the steering wheel and unscrew the screws that are located in the area of the car lower casing. After this, you will have to disassemble the steering column. When the instrument panel is removed, you should unscrew the arrows from the old speedometer and tachometer. Subsequently, they will be attached to the updated dials.
During this time, you can also repaint the dials and hands in bright colors. Regular spray paint cans are suitable for this. At the same time, it is better to make the dial a rich black color.
You can make it matte using special products. In this case, the arrows need to be painted in bright pink or original red-burgundy tones. After the painted plates of the machine dial have dried, they are completed with an old or pre-prepared scale and removed hands.
In a situation where the owner wants to modernize the instrument panel in a more modern way, he should also use a special (original, as in the video) backlight. You can add an original touch using a fluorescent marker, but more on that below.
Every driver of a domestic car wants to make the instrument panel of his VAZ-2109 as bright and original as possible. Here is one of the options for how beautifully you can modify this element of the machine.
You will also need a fluorescent marker or paint. It will change color if exposed to ultraviolet light. This technique is often used in modern nightclubs. You will also need ordinary light bulbs with sockets, like those in the “tidy”. no need to change, they will remain in place. Everything you need is there, you can get started.
First you need to remove the plastic, then the dashboard. Also, don't forget about the black plastic that surrounds the glass. We disassemble the standard insert, as well as the arrows. Most often, there are no holes in the new insert. Therefore, you will have to do them. For the arrows, the holes will be needed wider than in the standard trim. Otherwise, the arrows will start to stick.
Next you need to dismantle the lighting that is installed. The work should be done carefully so that the plastic is not damaged. We take out the board with the light bulbs. We install a neon light bulb instead of the usual ones, and stick a plastic protection on top. It used to have factory bulbs screwed in. Don't forget about the control unit for the new neon light bulb. Be careful not to reverse the polarity at all times.
If this happens, nothing will shine. Next you need to screw in the instrument lighting bulbs. This should be done in parallel to the neon lamp. We lay the wiring from the inside; first, for this you need to make holes in the partitions.
Let's check if everything is correct. The light bulbs inside should be adjusted. Next we put on the overlay and seal it. After these steps, all we have to do is paint the hands with a purchased fluorescent marker or paint. It is advisable to repeat painting after 10 minutes. After this, the arrows can be installed in their place. This completes the tuning.
Check the work, otherwise you will have to disassemble everything. If there are no problems, you can assemble everything in strictly reverse order. After this, the VAZ 2109 will be equipped with a colorful panel like good foreign cars. If desired, you can use fluorescent paint to paint the dashboard trim in the place where the needle reaches its limit. It looks very nice.
Salon tuning for VAZ-21099
This procedure conventionally consists of two stages:
- Replacing the seats with new ones/upgrading the standard front ones. For example, installing a heating system, covering it with high-quality modern fabric.
- Updating the interior trim. Such innovations are easy to make on your own or by purchasing a new set in ready-made form.
- Installation of shaped carbon inserts (you can choose wooden, plastic, chrome, etc.) on the side panels of car doors. Thanks to this, the inside of the car will look more representative and luxurious.
Finally, it is worth drawing the attention of readers to the fact that tuning the interior of a VAZ-21099 on its own is more of a creative process than a technical one. Here you will need to show a lot of patience, accuracy and precision in decisions in order to end up with high-quality tuning that can make a proper impression on both the car owner and strangers.
Despite all the ridicule of foreign skeptics, the history of the domestic automotive industry remembers many outstanding car models. Among the latter is the legendary car, a real people's favorite - the VAZ 2109. Many of our compatriots still successfully use this car, so it will be quite logical if we consider the most common methods of tuning the interior of this popular model.
