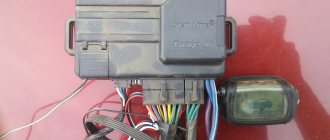
The modern Starline A9 car alarm is connected according to a clear scheme, allowing the security system to work correctly. This is necessary for the proper functioning of the alarm and the absence of glitches. Also, professional connection according to the diagram makes it possible to use additional options: central locking, auto start, turbo timer and other nuances.
How to use the scheme
The electrical diagram of the installation is very easy to understand - all the necessary points are indicated here, as well as the nodes for connection. However, there are several fundamental nuances that are worth remembering during the work process.
Car alarms are installed exclusively on cars with an electrical circuit of 12 volts. It is advisable to place the main unit in a place protected from vibrations. The most preferable installation location is under the dashboard - this guarantees privacy from prying eyes, as well as a minimum length of connecting wires. The block is fixed using self-tapping screws or double-sided tape to eliminate the possibility of spontaneous movement.
A transceiver with a signal diode is mounted on the windshield of the car. The main condition is a distance of at least 5 centimeters from metal parts in order to avoid interference or distortion when receiving signals. The interior temperature sensor is mounted so that it is away from heat sources or direct sunlight for it to work correctly.
The engine temperature sensor must be mounted on its body using one of the M6 bolts. It is advisable to attach it closer to the crankcase cover rather than the cylinder head.
A siren is also mounted in the engine compartment. The main condition is to avoid moisture, and also place it away from large heat sources to prevent the horn from melting. Also, the siren connection wires should not be accessible from under the car so that an attacker cannot cut them.
The Valet service button is installed in an accessible but hidden place. The inner sides of pockets for small items, the central tunnel between the seats, the plane under the decorative plugs of the front panel, etc. are suitable.
Without autostart
To install a car alarm you will need a set of standard tools:
- wrenches and sockets of various diameters;
- drill, industrial hair dryer;
- soldering accessories: lamp, tin, rosin, etc.;
- heat shrink tubes, insulating tape.
All Starline A9 car alarm wires must be laid away from sources of interference. These include ignition coils and high-voltage armored wires. It is important that they do not come into contact with moving parts of the chassis. All contactless connections are soldered and well insulated.
Connection of the control unit and main components is carried out only after completion of installation. The transceiver operates through a standard 5-pin connector, which is connected to the central unit.
Next, the main wires responsible for the main functions of the alarm are connected. First of all, the built-in engine blocking circuit is installed.
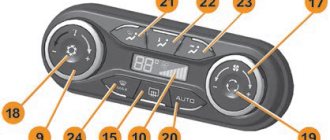
The factory circuit between the ignition switch and the starter opens. The black-and-white and black-yellow wire of the 6-pin connector is connected to this gap. In this case, the maximum current should not exceed 40A.
An additional relay can be connected to the gap. This is necessary for programming various functions. Connecting an external engine locking circuit using a wireless lock significantly increases vehicle protection and also reduces the chances of vehicle theft.
The alarm is connected to the trunk release locks. The yellow-black wire goes here, and an additional relay is used for this operation. In a similar way, you can connect the Starline A9 alarm system to the low beam headlights to activate the “Light Path” option. The yellow-red wire is responsible for this.
The Starline A9 Tweig car alarm has the option of controlling the central locking. The cables are routed to a 6-pin connector, and the maximum current in this case should not exceed 15A.
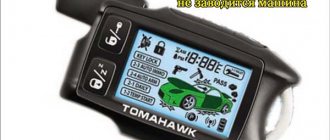
Setting the time: step-by-step instructions
In order to set the time on the Starline A91 key fob correctly, you must follow the following instructions step by step:
1. Button number 3 (star drawn) is held until 3 beeps sound. After completing the steps described above, the clock icon will start blinking. Now you can set the time using buttons 1 and 2. Button 1 increases the number of hours, and using button 2 the time value decreases accordingly.
2. After setting the clock, briefly press button 3 and set the minutes. By analogy with adjusting the clock, minutes are set by pressing buttons 1 and 2.
3. At the next stage, the alarm clock is adjusted. For this purpose, briefly press button 3. After the icon starts flashing, the indications for this mode can also be set by pressing buttons 1 and 2.
As you can see, there is nothing complicated in adjusting the time on the Starline A91 key fob, but when making settings you should be very careful not to confuse the modes. Flashing the corresponding icon on the display helps to configure the key fob correctly.
Reasons for frequent alarm settings being lost
If time adjustment has to be done quite often, then it is necessary to determine the reason for the unstable operation of the electronic system. The most common reasons for the temporary settings on the Starline A91 key fob being lost:
- Low battery charge.
- Lack of reliable contact between the battery and the terminals of the device.
- Factory defect or device software malfunction.
In the first case, the problem of frequently changing time settings is solved by replacing the battery. To carry out this operation, it is enough to disassemble the key fob, remove the dead battery and install a new battery.
The new battery must be completely identical to the element being replaced in terms of size and current ratings. If it is possible to purchase a more expensive battery, then this must be done. When using a high-quality battery, the frequency of replacement will be significantly reduced.
If the unstable operation of the key fob is caused by bending or destruction of the contacts, then this problem can also be solved on your own. In the first case, it is enough to straighten the elastic contacts to increase their pressure on the contact part of the battery. If the contact is broken, then this part can be soldered using a low-power soldering iron with a thin tip.
A key fob malfunction caused by a manufacturing defect must be corrected at the manufacturer's expense. If the functionality of the device is impaired due to the fault of the motorist, then repair or replacement of the device is carried out at personal expense.
If malfunctions occur that cannot be fixed by yourself, you should contact specialized workshops, where professionals will determine the exact cause of the device’s inoperability and carry out high-quality repairs or replacement of the Starline A91 car alarm key fob.
PS How to set the time on the Starline A91 key fob is described in the article. If the device has a high-quality battery, then this procedure will rarely be necessary. Over time, the sequence of actions is forgotten, so it is recommended to bookmark this article in your browser for quick search if necessary.
Setting the time on the key fob is necessary for a reason: the alarm system has the ability to automatically start the engine using a timer. You will be able to go out to an already warmed-up car all work week without making any effort - and park the car so that it has a stable connection with it.
The site employs an auto electrician-diagnostician, a certified StarLine specialist. If you have questions about car alarms, ask them at the end of the article in the comments or on Vkontakte.
Connection diagram for Starline A9 with auto start
There is a variation of the Starline A9 car alarm with an auto-start option. This is a very useful function that allows you to remotely start the engine based on various parameters: battery charge level, clock, alarm clock, engine or interior temperature.
This variation does not differ in the board layout, but the connection has additional features. First of all, the gray-black wire is connected to the tachometer sensor. This ensures that the starter turns off when the engine starts running during autostart. The gray-black wire is also connected to the generator output. This allows you to determine the successful start of the motor by the presence of positive voltage and also open the start in a timely manner.
Below is a typical color diagram that will help you understand how to connect the Starline A9 alarm with auto start.
Also, for the correct implementation of the autostart function, the connection of an orange-violet wire is required, which is shorted to the housing when the parking brake is applied. This is necessary so that the autostart does not work on a car that is not using the handbrake.
Connecting the A9 alarm
The Starline A9 car alarm circuit, which is included with each car protection kit, is quite simple and understandable to the average car enthusiast. You can connect the system yourself if you have certain skills in the field of automotive electrical engineering. The connection diagram can be viewed below:
The basic principle of operation is strict adherence to the instructions, according to which you can connect and configure the car alarm without problems.
Connection instructions
One of the most important points is the correct connection of the main connectors to the central control unit. There are two of them - 6-pin and 18-pin. The first one is connected as follows:
The first wire is yellow-black. It is connected to the ignition switch and is responsible for preventing the starter from being blocked. You must first disconnect the standard cable.
The second one is blue. Connects to the ACC terminal.
The third one is black and white. Starter activation control. Mounted on terminal 50/1.
The fourth one is red. Positive battery power. Connects to the red terminal of the battery.
The fifth is yellow. Installation is carried out on terminal 15 of the ignition switch.
The sixth one is green. Output for ignition support.
The next connector, connected to the central unit, has 18 contacts.
1, red wire. The battery positive, which connects to the positive terminal of the battery;
2, blue. Negative charge with a maximum load rating of 300 mA. Additionally can be connected to electric windows;
3, black and red. Negative wire. Designed for operation and programming of the turbo timer mode.
4, black and yellow. Minus with a maximum load of 300 mA. Used for additional engine blocking and anti-theft protection.
5, yellow-red. Negative wire. Used to connect additional equipment.
6, grey-black. Monitoring engine operation.
7, blue-red. The positive contact, which is responsible for the correct functioning of the central locking.
8, orange and white. Automatic trunk lock connected to push-button compartment switches.
9, black. The main disadvantage is the mass that must be supplied to the car body.
10, green-black. Connection to side lights and direction indicators. Necessary for correct display and programming of system settings.
11, green-yellow. Another cable connected to the markers and turn signals. The maximum load current is 7.5 A.
12, black and white. Negative wire, which is also used to block the engine.
13, grey. Positive contact going to the sound siren. The maximum current strength is 2A.
15, yellow-black. Negative cable with a maximum load current of 300mA. Used to connect an additional relay.
16, orange-violet. Negative cable for controlling the handbrake and brake pedal. Necessary for correct programming of the autorun function.
17, blue-black. A wire that connects to the door push-button switches.
How to implement autorun
Let's see what is given in the basic instructions attached to the Starline A9 signaling:
The six wires shown above are connected to the ignition switch terminals. For example, the “red” cord is connected to the 30th terminal, at which the voltage “+12” remains all the time. And the 15th terminal, which receives potential when the key is turned, should be connected to the “yellow” wire. The last requirement is always observed, even if installation is performed without autostart.
Power Connector Wiring
Let’s immediately list what all the cables are connected to:
- Red – lock terminal 30;
- Yellow – terminal 15 (ignition);
- Blue – lock terminal, the voltage on which is absent during starter operation, but appears when the key is turned to the ACC mark;
- Green – can duplicate the yellow or blue wire, and by default the first option is selected;
- Black and white - plug into the gap in the starter cable, connecting the signaling cord to terminal 50;
- Black and yellow – starter power supply.
The "Blue Cord" is usually connected to the "15/2" terminal to feed the second ignition line. If it is missing, you can apply current to the accessory circuit. It all depends on the standard scheme - the car alarm itself is compatible with any of them.
When an autostart is performed, the signaling emulates the behavior of a standard lock. But some lines, such as accessory power, do not need to be connected at all. But the starter must receive power in any case:
If you know that the owner does not use autostart, connect only one wire - “yellow”. You need a turbo timer - add a “red” cord here. In the second case, all connections must withstand significant current (up to 30 A). In the first option, this requirement is skipped.
Installation of signal circuits
If everything is done as indicated above, it will be impossible to start the engine by autostart. The car alarm itself must “know” whether the car is in the parking lot, and it is also desirable that the engine operation be controlled. By connecting only the brake limit switch, you can observe the following: the sound of the starter appears, and then the engine starts and stalls. The point is that you still need to install a crawler. The three wires shown here are in the main connector:
- Black-red (3) – lineman control;
- Orange-violet (16) – monitoring the condition of the brake pedal or handbrake;
- Gray-black (6) – engine operation control input: the cord is connected to the tachometer or to the terminal on which the “+” potential appears during startup.
Note that the third cord does not need to be connected to anything, and then you don't even need to do any programming.
In the latter version, the car alarm “monitors” the network voltage, using it to control the operation of the motor. But the instructions say that this method is the most unreliable. It’s better not to use control at all during operation, assigning option 6 the value 3.
Unlike most car alarms, the Starline Twage A9 system only recognizes the presence of ground potential, if we talk about the brake control input. So, it’s better to add a diode to the basic circuit:
The resistor dampens the excess voltage, and the capacitor makes the signal symmetrical. The standard instructions do not cover these details.
Connect the gray-black sheathed cord to either the generator terminal or the tachometer. By default, the settings are set to the second option – “tachometer”.
Of course, the Starline A9 system can control the crawler. The lineman relay coil is connected as follows:
- Black-red cord – minus power supply to the winding;
- Terminal 15 – “positive” supply voltage.
This option, as the only correct one, is indicated in the basic instructions. Let's say the engine stalls immediately after starting. Then try connecting the winding not to the 15th terminal, but to the 30th. The essence of the last sentence is clear: the alarm may turn on the ignition later than necessary. The immobilizer will then not recognize the presence of the key.
Trial run
If the alarm installation is completed, test run the engine. Make sure that:
- The gearbox selection loop is cut if the system was installed on a car with a manual transmission;
- The connection of the brake sensor for cars with a manual transmission is made according to the diagram - the wire is connected to the handbrake button;
- Even for cars with “mechanics”, preparation is carried out, which is then carried out during operation.
The test looks simple: take the main key fob and press key 1. The duration of the press is 3 seconds.
The sound of a working starter will appear, but that’s not the main thing! The key fob should display the “smoke” icon.
You can turn the motor off or on using the same key. Note that after stopping the engine, the pictogram should disappear. If the condition is not met, you cannot use autorun. By the way, the system may not work correctly if “training” has not been carried out. What is true for one option is control by a tachometer.
Let's look at what the preparation procedure looks like:
- Engage the handbrake without turning off the ignition;
- The key is removed (the engine is running);
- In 30 seconds they leave the salon and close the doors;
- The engine will stop when half a minute has passed after step 2.
Let one of the conditions be met: the sound of the running motor changes or the engine stalls before step 3. The situation can be corrected this way: when programming function 15, assign the value 2 or 4. Then another action will be added between steps 1-2. Having taken the key fob, you will need to press button 1 without releasing it until a melodic signal sounds.
Please note that any of the additional key fobs is not suitable in this case.
Each key fob that does not have a display is equipped with one key that allows remote start. The button is designated number 2, and you need to press it for half a second.
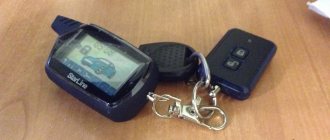
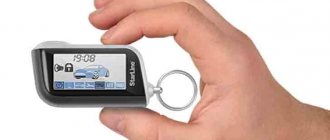
Description of the alarm key fob
Standard key fobs are necessary for system management, programming and monitoring. The main key fob has a vibration and sound signal. They are used for information and configuration.
This is interesting: How to perform the exercise “Reversing into boxing”? Step-by-step instructions for maneuver and 5 common mistakes
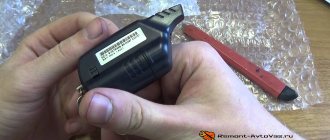
Key fobs have replaceable batteries. In addition, it is a lithium cell, but basically it is a conventional AAA battery.
The instructions specifically note that water should not get into the devices. If the keychain does get wet, it needs to be disassembled and dried.
There are three buttons on the main key fob. We numbered them in order. Both short-term presses, less than a second, and long-term ones, 3 and 6 seconds, are used.
Basic key fob buttons
Let's look at the functions of the buttons on the basic key fob. For example, many are interested in how to enable auto start on a Starline alarm system. Let's find out.
First button:
- the system is turned on with a short press;
- When the engine is running, the security system is activated by a long press;
- the engine can be turned off or on in automatic start mode by using a long press;
- if you press for a long time, in sequence with button 2, the panic mode is activated;
- a short press, in turn with a short press of button 2, starts searching for a car.
The second button is needed to open the lock on the trunk (long press). It also confirms the command that was selected by the cursor. Here you need a short press.
Button 3 also has many functions:
- short press to move the cursor on the display;
- you can turn off the alarm message of the key fob with a short press;
- the function of button 1 is also specified by long pressing;
- You can use a long press to configure different functions of the key fob, while keeping an eye on the display;
- a timer is set, with a short press, alternately with a short press of button 2;
- the button also configures the warning system (presses in succession with button 1, short).
Additional key fob buttons
There is also an additional keychain. It is equipped with four buttons with fairly wide functionality. Apply short and long presses.
The first button of the additional key fob is used in the following cases:
- control of an additional third channel (long press);
- turning off or turning on the security mode (short);
- control of the operation of the sensor that records the impact (short press, together with a short press of button 3);
- you can activate the panic mode (briefly, together with button 2);
- The service mode is also activated (press briefly, simultaneously with button 4).
Using button 2 on the additional key fob, perform the following actions:
- You can use a long press to increase the operating time of the motor;
- a short press turns the engine off and on;
- The daily automatic start mode is activated by briefly pressing together with button 4;
- you can enable autostart based on temperature (short press in sequence with button 3);
- the security system is also turned on when the engine is running (long press).
The fourth and third buttons are also effective:
- The trunk lock is opened by button 3, with a long press;
- The car can be found in the parking lot by briefly pressing button 3;
- the anti-robbery mode is activated by simultaneously briefly pressing buttons 4 and 3;
- you can record parameters during the programming process by long pressing buttons 4 and 3 in turn;
- The system also silently turns off and turns on by briefly pressing button 4.
There are quite a lot of options, and the system is easily programmed using both key fobs.
Connecting a temperature sensor - errors
If we talk about the Starline A9 alarm, it controls the temperature like this:
- If an external sensor is connected, it monitors the engine temperature, and the key fob displays the interior temperature;
- Without connecting the sensor, be aware that the car alarm measures the temperature inside its housing.
It seems that the option using an external sensor is the most suitable. The connection, in turn, is carried out in parallel with the microbutton contacts:
The button closes when the hood is opened.
The following is true for Starline Twage A9 systems, and in general for any car alarms that are installed additionally. The sensor itself, that is, the resistor, is connected to a standard microbutton. But during operation there is an effect:
- When the hood is open, the contacts are closed - everything is correct here;
- By closing the hood, you can get a “positive” potential at the signal terminal, which is unacceptable.
The latter is due to the fact that in the standard circuit the microbutton is connected to a lamp, which, in turn, always receives power. The lamp filament has low resistance, and “12 Volts” remains at the signal input. Well, or “almost 12”.
There are two solutions to the problem discussed above. If the light under the hood is not used during operation, cut the cord that goes to the lamp:
But interfering with standard wiring is wrong. It is better to install an additional micro button. In addition, it is always present in Starline A9 kits.
Obviously, something must be done according to the instructions. But at the same time, the features characteristic of each car are also taken into account. This rule is used when installing any alarm system. We wish you success.
What and how to program
For the system considered here, a simple settings table is suitable:
The number of options specific to the Starline Twage A9 model is 16. Seven of them, as we see, are connected by autostart. To complete the setup, you will need any of the key fobs. Values 3 and 4 are set as follows: press key 1 or 2 and hold for three seconds. This is true if the main fob is used.
The additional alarm panel is equipped with four separate keys. They, of course, correspond to the values from "1" to "4". Be aware of this.
Here is a commentary on paragraph 15. Let’s say three conditions are met:
- The alarm was installed on a car with a manual transmission;
- Everything is connected according to the instructions;
- When you remove the key from the lock, the sound of the engine running changes.
If all statements are true, use the SAFE setting. In any other case, leave the AUTO option. As you can see, everything is simple.
The above advice is important in two cases: if autostart is implemented or if a turbo timer is needed. We are talking about a timer built into the alarm. By the way, the latter still needs to be enabled (option 16).
By activating the SAFE item, the owner will have to press the key fob button - otherwise the ignition support will not turn on. Here we were talking about the procedure performed during operation.
The important things have been considered, but only one list remains:
- After turning on the ignition, press the Valet button 6 times;
- The ignition is turned off - the sound of a siren and 6 flashes of the indicator will follow;
- The Valet button is pressed once, a short siren sound follows, the button is pressed again, etc.;
- By selecting the option number in step 3, set a new value, for which any of the key fobs is used;
- The car alarm can return to “normal mode”: just turn on the ignition or wait 10 seconds.
This is exactly how the Starline Twage A9 system needs to be programmed.
Operation of the Starline A9 alarm system
For maximum convenience when using the system, it is advisable to always have both key fobs with you. They should not be exposed to moisture, they should not be dropped or hit. It is also important to change batteries on time, because when the charge decreases, the key fobs begin to work worse and their range becomes shorter.
Function programming
When the system is already connected to the vehicle's on-board network, it is important to start setting up the settings. Remember the step-by-step algorithm:
- First of all, the ignition is activated. You must press the Valet key six times in a row.
- Then the ignition is turned off. The siren will sound six times and the LED on the dashboard will flash six times. This means that the system is already ready for programming.
- We select each function using the Valet key. The number of clicks is the function number. Each press will be confirmed by a diode and siren.
- Within 10 seconds you need to press keys 1 or 2 on the key fob.
- When one function is recorded, you can move to the next option by pressing the service key.
- If all options are recorded, you need to exit the setup mode. You can wait. After a few seconds of inactivity, the system will finish programming itself. Five flashes of the alarm signal - confirmation of exit.
When something goes wrong, you can reset the settings. Just press Valet 10 times.
Key fob key combinations
We have already examined most of the key combinations while studying the features of key fobs. But there are some combinations that are especially often used. Let's look at them:
- Panic mode is a good option if suspicious persons are noticed near the car. By combining buttons 1 and 2 you can turn on the siren.
- The timer on the communicator is set by a combination of buttons 2 and 3.
- To adjust the backlight, you need to press buttons 1 and 3.
In general, the car alarm system is quite simple and easy to use. Car enthusiasts get used to it very quickly and begin to use all the options without difficulty.
“Training” and the meaning of its use
Let each of the conditions be met:
- The engine is controlled by a tachometer;
- The sound of the starter operating during automatic starting stops later than the engine starts.
Only if both conditions are met does it make sense to carry out “training”. The system will “learn” to recognize idle speed. You don't need a key fob for training.
These difficulties, in theory, are typical for any car alarm, and not just for Starline brand systems. So, be patient.
Below is a sequence that is not in the basic instructions:
- The ignition is turned on, the Valet button is pressed 9 times;
- Turn off the ignition - the indicator lights up constantly;
- Start the engine “with the key”;
- When the idle speed is established, press the Valet button once - 1 siren sound will follow;
- The indicator should go out - training is complete!
When the alarm is trained correctly, it controls the motor without errors. By the way, connecting to a tachometer is recommended. That is, there is no point in “simplifying the problem” by switching to generator control.
Using the key fob functions
Let's look at a simple operation: how to turn off the sound in the remote control itself. Press and hold keys 1-3. The display will show the MUTE symbol and a vibration signal will follow.
You can return everything to the way it was by pressing it again.
Now let's turn on the security without the sound coming from the siren. The cursor method is used here: press button 3 twice, and then, pressing the same button, move the cursor over the icons. Having moved to the desired mark, press key 2. This is how the Starline A9 system is controlled.
It is known that not every car alarm is equipped with a built-in timer. This means that the main key fob should be kept near the antennas. But this requirement does not apply to the system considered here. And yet, despite all the “advantages”, we warn the reader about the following: the Starline Twage A9 signaling does not use a dialogue code. Reliability and ease of setup are two important qualities that characterize the Twage family. If you need resistance to hacking, go to the Dialog family.
Possible problems and their solutions
If Starline Twage A9 malfunctions, you can reset the settings. To do this, press the Jack key 10 times.
All I needed from it:
1. Reset to factory settings
It is possible to reset the values of all programmable functions to factory presets. To do this, you need to do the following procedure: 1. Turn on the ignition and press the service button 10 times. 2. Turn off the ignition. The siren will sound 10 times indicating entry into reset mode. 3. Press the service button 1 time. 1 siren signal will follow. 4. Press button 1 of the key fob. There will be 1 short beep, confirming the reset to factory settings. 5. To exit the reset mode, switch the ignition or wait for the system to automatically exit. As confirmation, there will be 5 flashes of dimensions and a melodic signal from the key fob.
I did just that, but the miracle didn’t happen, I spent a couple more days on various forums and came across an entry about the settings of buttons 1 and 2 and realized that they were all messed up for me!
2.Programming button 1 of the key fob
The purpose of button 1 of the Starline a9 alarm key fob is programmable and can be changed by the car owner himself an unlimited number of times. For ease of use of the alarm system, it is recommended to program this button to turn on/off the security mode. Programming is performed in the following order: 1. Quickly press button 3 of the key fob two or more times to make the cursor appear. 2. By pressing button 3 of the key fob, set the cursor to the position corresponding to the desired command (for example, the command to turn on and off the arm security mode) 3. Press button 3 of the key fob and hold it pressed for 6 seconds until 2 and then 3 more beeps appear. 4. Press button 1 of the key fob to activate the selected function. In the future, when using the alarm, a short press of button 1 of the key fob will lead to the execution of the command assigned to it (turning the security mode on and off). When the button is pressed, the icon corresponding to the programmed function will light up. Note. To reprogram the assignment of button 1, you need to do the described procedure again. The assignment of button 1 will be replaced with the new one. Further, the operating instructions are written taking into account the fact that button 1 is programmed to turn the security mode on and off.
Purpose of button 2 of the key fob
The purpose of button 2 of the Starline a9 car alarm key fob is determined by the current position of the cursor on the key fob display. The cursor is moved by pressing the key fob button 3 in the following order: 1. Quickly press the key fob button 3 two or more times to start moving the cursor. 2. When you press button 3, the cursor will cycle through the icons indicated by the letters on the display diagram. By successively pressing button 3 of the key fob, set the cursor to the position corresponding to the desired command. The next press of button 2 of the key fob will execute the selected command
I did just that, installed the first ARM button to turn the security mode on and off. And I went to try resetting to factory settings again. And voila =) Everything works
Programming functions and operating parameters
Some functions and parameters of the alarm can be changed using the service button and key fob without the need to access the central unit. The list of functions is given in the table below.
The programming procedure is as follows:
Turn on the ignition and press the service button 6 times. Turn off the ignition. There will be 6 LED flashes and 6 siren signals will sound indicating entry into programming mode. Press the service button the required number of times equal to the number of the selected function. Each press of the service button will be accompanied by the LED indicator lighting up and short beeps indicating the number of the currently selected function. Every fifth press produces a long beep. Within 10 seconds, press button 1 or 2 of the key fob briefly (0.5 sec) or long (3 sec), depending on the desired state of the selected function. Confirmation will be confirmed by 1, 2, 3 or 4 short beeps from the siren and key fob, depending on the set value of the function. To move to the next function, press the service button, and then press the key fob button to set the desired function value. Repeat this procedure for any features that require changes. To exit the programming mode, switch the ignition on or wait for the system to automatically exit. 5 flashes of dimensions will follow as confirmation.
How to register a new key fob
Starline A9 Twage is a security alarm for a car, which is equipped with auto start and feedback. The manufacturer has not produced this model of device for several years, but car owners continue to actively buy such security systems. The increased demand is due to simplicity, reliability, low price and proper operation in difficult climatic conditions.
Specifications
The radio transmitter has an operating frequency of 433.92 MHz.
The communication key fob (equipped with a display) can operate within a radius of 600 m.
The pager receives signals at a distance of 1200 m from the head unit.
The auxiliary control panel has a range of up to 15 m.
A piezoelectric element is used as a type of shock sensor.
The device is intended for active use in the temperature range from -40 to +85°C.
In standby mode, the current consumption is 25 mA.
The power supply voltage at the terminals can be 9-18 V.
The range of the antenna adapter and the main key fob may not be the same. This indicator is influenced by several components:
- building density in the city;
- pager installation location;
- the location of the transmitter and receiver relative to each other;
- car battery voltage indicator;
- presence of power lines;
- weather;
- voltage level of the batteries installed on the switched-on communicator.
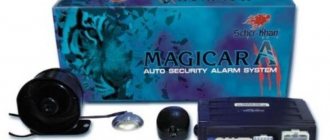
Equipment
The Starline A9 alarm system is available as a set. It includes several elements and additional parts.
- Main communicator. This device is equipped with two-way communication option, 3 buttons and an LCD display.
- Spare communicator. It is made without a screen.
- Main microprocessor unit.
- Transceiver.
- Temperature controller for the power unit (determines the temperature for starting the engine).
- Diode indicator (necessary for diagnosing the operation of the anti-theft system).
- Two-level controller for sensitivity and impact diagnostics.
- Jack button. Such a device is required to activate the service mode.
- Hood limit switch.
- Buttons designed to turn on and off the anti-robbery mode.
- A set of installation tools for installing and connecting working elements.
- User's note.
- Detailed operating instructions with which you can install the system yourself.
How much does the A9 kit cost and what does it include?
The Starline A9 alarm system can still be found on sale in some retail outlets. Its cost is low and amounts to approximately 44-46 dollars (the price is current as of 10/05/18).
The anti-theft complex includes:
- central control processor;
- transmit-receive device in a plastic case with an antenna;
- interior and engine temperature sensors;
- control panels (main, with LCD monitor, and additional, without screen and feedback);
- shock sensor;
- indicator light;
- Valet service switch;
- wiring and connection plugs;
- hood button;
- instruction manual (in Russian).
Advantages and disadvantages
Before purchasing this anti-theft system with auto start, you need to study all its positive aspects and disadvantages.
Among the advantages related to Starline A9 are:
- durable casing of all elements - thanks to this, shockproof properties are achieved;
- channels for connecting additional options (for example, you can connect sunroof and window closers);
- presence of a display on the body - this makes operation as simple and fast as possible;
- Extensive settings and the ability to set activation by time, alarm or temperature (for auto-warming).
- simple installation (can be done without a technician, but you should take into account the advice of those who have already set up the device).
Among the disadvantages of the Starline A9 car alarm are:
- Timer malfunctions;
- small radius of operation of the communicator in dense urban areas;
- absence of a dialog box (this makes the system vulnerable to code grabbers);
- rapid failure of the key fob buttons (they begin to jam and become stuck).
Installation instructions
If the Starline A9 system is installed incorrectly, the anti-theft alarm may not work correctly. To prevent this, you should contact a service center or carry out installation yourself according to the instructions. Manufacturers recommend following several rules.
- The system should be installed on vehicles with an electrical voltage of 12 V. The negative poles are connected to the body panel.
- Installation should only begin after disconnecting the battery terminals.
- It is important to familiarize yourself with the recommendations on the operation of the standard radio and airbags. This is explained by the possibility of encoding the device.
- If it is necessary to increase the wiring, then the additional conductor must have the same cross-section and material as the main one.
- The wires must be connected using soldering. After this, this section of wire is wrapped with electrical tape or heat-shrinkable tubing is used.
What you will need
To carry out installation work according to the Twage A9 instructions, you must prepare the following tools and materials:
- instructions that come with the system;
- M6 bolts;
- several suitable sizes of ties or screws;
- plastic spatulas;
- a set of socket heads or wrenches;
- drill (for work you will need several metal drills);
- pulling (it is necessary for laying and connecting the cable in the cabin);
- pliers (they are used to remove insulation when extending cables);
- materials for cable insulation.
Connection diagrams
If it is necessary to connect the 6-pin central locking connector, the following connection diagram is used.
- Red wire for plus 12 V (connects to the battery terminal “+”).
- The cable with the yellow winding is the IGN1 output, it is needed to maintain the ignition.
- When pinned out, the blue cable is attached to the ACC ignition switch.
- The green wire remains free.
- A yellow-black cable with a larger cross-section must be connected to the starter.
- Black and white. Required if the starter is blocked.
Step by Step Actions
Installation steps are described step by step in the installation instructions.
- First of all, you need to disconnect the battery terminals.
- The Starline A9 alarm processor unit is installed in the hidden cavity of the car. It is important to choose a place that is protected from moisture. Most often, installation is carried out in the instrument panel at some distance from the climate control equipment. The block can be secured using double-sided tape, zip ties or self-tapping screws (in standard holes).
- The antenna unit is mounted on the windshield. In this case, there must be a distance of more than 5 cm from the device to the metal (otherwise interference may occur).
- The antenna is installed on a cleaned and degreased windshield. The device should be mounted away from climate control equipment and direct sunlight.
- The external controller must be installed under the hood on the cylinder block body.
- A siren is mounted in the engine compartment away from high humidity and heat. In this case, the horn should be directed downward, which will prevent the accumulation of water.
- The shock regulator is placed in the cabin (preferably in the central part). In this case, the device can determine the impact on the car from any direction with equal accuracy.
- A diode indicator is placed on the control panel. In this case, the cables are hidden under the dashboard.
- The anti-robbery button and Jack should be located close to the driver, but have a hidden location.
- Push-button switches are recommended to be located under the hood and on the tailgate.
- The cables are laid under the car trim.
Installation of alarm system Starline A9
Nowadays, high-quality installation of Starline car alarms is guaranteed from official dealers. They will definitely do everything correctly, perform all the necessary settings, and, if necessary, give comprehensive advice and answer questions regarding the operation of the system.
Of course, you can install an alarm in the service. But questions often arise there. Then car enthusiasts have to come back and ask for the work to be completed. There is another option - to install an alarm on your personal car yourself. This is not so difficult if you have step-by-step instructions, as well as special Starline installation cards.
This is interesting: Tuning GAZ Volga with photos
Self-installation: step-by-step instructions
Let's take a closer look at the alarm installation algorithm.
- First of all, the base module is installed. Its place is on the instrument panel, in a recess. It is important to make sure that there are no water leaks. It is important to secure the block well with plastic ties or self-tapping screws so that it does not move due to vibration.
- The engine compartment sensor is mounted on the box or attached to the engine.
- An antenna with a temperature sensor, with a block, is fixed on the windshield. In this case, the minimum distance from the body panel should be 50 mm.
- The shock sensor is rigidly mounted in the cabin. It must be within reach for configuration.
- A siren is installed under the hood. It must be protected from overheating and getting wet. The siren is purchased separately. Model S.20.3 is suitable.
- Care must be taken to ensure reliable contact of additional limit switches to avoid false alarms.
- The diode is installed on the instrument panel, in plain sight.
- An additional button for activating the system in the event of an attempted robbery or theft, as well as the Valet button, are placed hidden, but in the access area for the owner.
- The ignition system may cause interference. Therefore, all wires should be laid remotely from it.
Any twisted wiring must be well insulated.
How to set up autorun
To automatically start a car engine, you can use several methods. Among them, activation according to alarm clock data, by time (at the same time or by temperature indicators).
By alarm
To set up the Starline A9 alarm, you must first set the correct clock value and set the alarm.
- Using button 3 (C) select the desired icon; the choice must be confirmed with button 2 (B).
- After a single siren signal, the device will begin to play a melody. In this case, 2 shortcuts will be activated on the display, and the diode will emit 2 flashes each.
By timer
Thanks to the timer setting, the Starline A9 car alarm will start every day at the set time.
- Select the desired shortcut on the display and confirm the action. The user will hear a light flash and a siren sound.
- After this action, the car engine will start and warm up. All subsequent autostarts will take place exactly 24 hours after the set time.
By temperature
Programming is carried out in several steps.
- On the key fob screen, select the desired function by moving the cursor.
- Press the key to confirm (the device will beep). At this time, the light alarm and siren are activated. Immediately after this, the temperature threshold will appear on the display.
If this mode is used to start the engine to warm up, the information comes from a sensor in the engine compartment. In this case, one of 4 temperature levels can be used (from -20 to -5°C).
Page 36
Operating and installation instructions
After successfully completing the above procedure, the car will be prepared to start the engine.
Attention !
If, after turning off the ignition according to step 3, there is a sharp change in engine idle speed or the engine stalls, it is recommended to program the SAFE engine support mode. In this case, to enable the “soft neutral” mode, the steps in step 3 must be performed as follows: With the engine running, press and hold button 1 of the key fob until 3 flashes of the dimensions and a melodic signal from the key fob appear. The display will show
and the engine operating time will be displayed. If the turbo timer is not
programmed, the symbol r 00 will be displayed. If the turbo timer is programmed, an icon with the corresponding turbo timer time r 01, r 03 or r 06 will be displayed. Now you can turn off the ignition and remove the ignition key from the lock. The engine will continue to run.
Remote engine start
There are two options for remote engine start, regardless of the security mode state.
Option 1
- place the cursor on the icon
press button 2 of the key fob; Option 2
— press button 1 of the key fob for 3 seconds. The first attempt to start the engine is accompanied by 3 siren signals, 3 headlight flashes and a melodic signal from the key fob. If the engine starts successfully, additional 3 light flashes will appear and a melodic signal from the key fob will sound. The LED indicator will light up continuously. The key fob display shows the engine starting process
is displayed as follows: 1. During startup attempts, the vehicle status is indicated on the key fob display and the inscription lights up
2. When the engine is started, the key fob display shows an icon and a programmed engine warm-up time of 10, 15, 20 minutes or without a time limit. In the latter case, the warm-up time is indicated by the symbol r 99
.
3. 1 minute before the end of the engine warming up, the key fob display displays the inscription r01
and a sound signal sounds, the dimensions will flash 4 times.