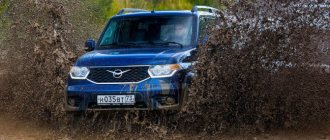
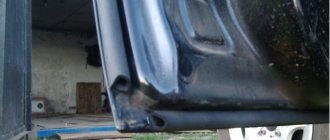
Car owners install a snorkel on a Niva when it is expected that the car will be operated in extreme conditions. These include frequent trips over rough terrain, fording water obstacles, across sand dunes and other methods of “combat” off-road conditions.
This circumstance is connected with the fact that for normal operation of an internal combustion engine, oxygen must constantly flow into it, and when crossing, for example, a river, such access can be blocked, causing the engine to stall. A device such as a snorkel allows you to take air for this from the surface of a reservoir “without surfacing.”
The literature on the selection, installation and operation of snorkels identifies several varieties. Moreover, those of them that are designed to supply the power unit with oxygen under water are, in any case, installed on the car so that they can take air from the surface of the reservoir for this purpose.
From a technical point of view, they represent an air intake pipe placed on top of the car. In some cases, a snorkel can power an SUV’s engine from a depth of up to two meters, which significantly expands the capabilities of your Niva when driving in extreme conditions.
Depending on the conditions under which the owner of the Niva intends to operate it, the following types of this air intake are distinguished:
- "safari". This version of the device is intended for installation on SUVs operating in desert conditions or in sandy areas. A design feature of the snorkel is that its upper part is positioned towards the movement of the machine. This technical move prevents sand from penetrating into the power compartment and engine due to the rarefaction of air created at the air intake while the car is moving.
- "swamp". In this case, the engines do not receive dust, but this is precisely where it is necessary to overcome water obstacles and wet sections of roads. To do this, the upper part of the snorkel is turned against the movement of the car, and the pipe is supplied to the filter secretly, for which the hood or wing is cut. As a result, the device is protected from damage when moving from contact with tree branches, as well as when falling to one side.
In addition, it is worth noting that there are both homemade snorkels and industrially produced devices. So, for example, if you purchase a “hundred-fold” snorkel, then all you have to do is install it on your Niva, since it is produced in a ready-made form. If you are going to make this air intake yourself, you will have to spend additional money and time on it, but the accessory will fully satisfy all your needs.
Technical characteristics of snorkels
Snorkels are used to prevent water hammer when the car is immersed in water, as well as to supply the engine with oxygen while the SUV is in the water. Naturally, for the normal performance of these functions, the air intake must meet certain requirements. Usually, when choosing it, pay attention to the following characteristics:
- the material from which the product is made,
- type of head nozzle,
- main pipe diameter,
- mounting options.
How to make a snorkel for the Niva with your own hands.
First you need to prepare the material.
These are clamps and tubes. To create a more durable structure, it is better to use metal tubes with a diameter of at least 6 centimeters. Don't forget about the top. It should be slightly bent towards the rear of the car to prevent splashes and raindrops from entering the system while driving. Additional pipes are also welded to the product to allow atmospheric pressure to be released. They are installed in the air intake system. Typically, 3 materials are required to create a finished structure:
- corrugation
- metal
- plastic
You can use plastic corrugation to save a little money. It will also be easier to install due to its flexibility. The main course of work is as follows:
- select the required corrugation length. Typically no more than 2 meters will be required
- securely fix the connection points using clamps
- holes are made in the area of the windshield on the driver's side for further fastening the corrugation to the pillar
- a hole is made in the hood/fender to remove the pipe
- the end of the tube is closed with a ventilation grille, after which the outermost part is bent and fixed with the help of additional brackets.
During work, all holes must be thoroughly coated with sealant and covered with sealing tape to prevent corrosion.
Selecting the right part
Before going to a specialized retail chain, a car enthusiast should clearly understand several things:
- The only determining factor will be duct compatibility. Everything else is the seller’s desire to sell a more expensive model. Selecting a snorkel for a Niva will take less time if you take the technical characteristics of the vehicle with you.
- The second mandatory rule is that the diameter of the purchased snorkel should not be less than the diameter of the existing air duct. By equipping a Chevrolet Niva with such a part, the car owner will provoke oxygen starvation and rapid failure of the iron horse’s engine.
- The third rule is that the Niva 2121 will drive faster and without problems only if the entire system is sealed. That is why, before purchasing a snorkel, you need to check it for cracks and chips that could lead to low air pressure in the system.
Once all of the above has been completed, installation of the part begins by searching for the following list of tools: electric jigsaw, metal blade, electric drill, drills with diameters 3 and 6, silicone sealant, masking tape. In order to properly install the purchased snorkel, it is necessary to completely remove traces of dirt from the body surface.
Mark the area for future work with masking tape. Do the same with the contour of the hood, which will then have to be slightly modified. Only after this can the snorkel be installed in place. Installation of fixing elements is allowed only if the snorkel elements are in perfect contact with the body surface.
If everything is correct, the contact points of the tides to the wing flange on the Niva are marked. After this, the snorkel is removed, and fasteners are installed according to the indicated marks. Once all the holes are ready, remove the masking tape and permanently attach the part to the surface of the car. At the same time, correct installation of the snorkel implies mandatory treatment of its surface with a sealant.
Installing a snorkel on a Niva 21213 carburetor
You can make the part yourself
How to install plastic arches on a cornfield. arch extensions for the field
It happens that the parts presented in the retail chain do not fit certain parameters. In this case, a car owner with experience and experience working with tools will make a snorkel for the Niva himself. To do this, you will need to visit a plumbing store where you can purchase a pipe with the following parameters:
- D= 50 mm;
- L=0.5 m.
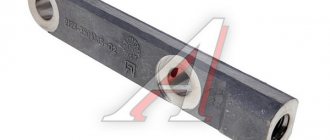
A drain made of stainless steel will help to install it correctly. Screws with a diameter of 3 and 6 mm are used as the main fastening material. To prevent a homemade snorkel from falling off with a sudden flow of air, you should make metal fasteners in the shape of petals. They are installed in places where the structure bends.
Final fastening occurs using M3 screws and several nuts. Correct installations are checked in a garage.
A properly installed snorkel reduces the load on engine components, improving its performance. Even if the original package did not include such a gadget, the car owner is always able to buy or make it himself.
Features of installation on the injector and carburetor
Installing a Chevrolet snorkel on a Niva has its own characteristics when it is done with your own hands. The fact is that cars of this brand are produced with both injection and carburetor engines. Connecting a new air duct to them has its own characteristics and is usually done using adapters. So, for example, if you are installing a snorkel on a Niva 2121, you will have to install the carburetor body with just these adapters. They should be selected depending on the specific engine model installed in your car.
Usually the snorken on the Niva is installed by experienced car enthusiasts who know how to perform such an operation.
Beginners should be advised to pay special attention to sealing the entire system. So it is imperative to seal the hole in the hood through which the air duct will be inserted into the engine compartment, as well as all pipe joints
Such an improvement will cost you very little, and as a result, you will be able to overcome fairly deep bodies of water with a hard bottom on the Niva as standard.
Good day. I decided to share a method for making a snorkel with my own hands. Although I don’t participate in competitions, I decided and thought that perhaps it could still be useful to me later. When will the car even come out of stock? Having studied the Internet about this, it was decided not to order a ready-made one of unknown quality and manufacturer for a lot of money. The workpiece was a sewer pipe Ф50 mm. Sorry in advance for the quality of the photo and for the dirty car =)
The use of ready-made adapters for pipes was immediately rejected due to lack of availability =) At the same time, I decided to make it as closely as possible to the same shape as the body. I cut out the “wedges” with a hacksaw, heated them with a torch, and connected them
Question for experts =) Is it possible to connect this snorkel to the air filter housing through a corrugation? So that the air filter remains. It’s just that everywhere they haven’t looked they put some kind of “Muscovite bullshit.” I will be glad to criticize and advice.
P.S. Please do not say that this is a small pipe diameter, otherwise they suggest blowing into the dropper hose. I am sure that such a diameter will not have any negative effect on the operation of the engine.
Advantages and disadvantages
Installing a lift kit has an ambiguous effect on the driving performance of the car. The advantages of this type of tuning include:
- Increased ground clearance.
- Improved machine design.
- Possibility of installing larger wheels and mud tires with large lugs.
- Improving cross-country ability on rough terrain.
- Reduces the likelihood of damage to the engine crankcase, exhaust pipe or transmission.
However, the suspension lift not only has a positive effect on the characteristics of the Chevrolet Niva.
A change in the factory design manifests itself in the form of the following disadvantages:
- The breaking angle of CV joints increases. This reduces the service life of the drives.
- The center of gravity rises. The car's behavior when cornering worsens and the likelihood of capsizing increases.
- The load on the transmission and chassis is growing. As a result, parts wear out faster.
Tip: a suspension lift improves off-road traction and worsens the car's performance at speed. Therefore, increasing the ground clearance only makes sense if the Niva is regularly used on a primer, in mud or sand.
Additional actions
Although the engine is now protected from water, before going to the nearest pond to check, it is worth doing a few more steps.
Hidden installation of a winch in the field
Insulation and sealing of the electrical part
The first is contact insulation. To work, we will need silicone sealant (preferably quick-drying). First, the distributor and the ignition system coil are processed. Then all connectors and joints of the computer system pass through. Next in line will be the caps on the candles. If in doubt, it is better to replace them with high quality silicone wires.
Fan
The next component that will require your attention is the cooling fan. It is completely useless in water, moreover, it can fail. This issue can be resolved in two ways. Either install a switch that we can use to turn off the fan during a “swim”, or install a couple of viscous couplings - they are not cheap, but they will be able to turn it off themselves.
Headlights
The final thing to pay attention to is the headlights. When wading through bodies of water, they must be turned off.
Water getting into working lights may cause an explosion. There are models on the market today with grooves for draining water, and if you are serious about storming rivers, it is worth considering installing one of these.
The idea of using a snorkel for the Niva cannot be called a new solution. If desired, you can find recommendations on both the material used to create it and how to mount the device on the car.
- 5
- 4
- 3
- 2
- 1
Purchase options
If you decide to install such a part on your Niva, you have several solutions:
- buy a branded part;
- buy from a Russian manufacturer;
- do it yourself.
Everyone chooses their own option. A branded part will cost 15-20 thousand rubles, the same, but produced in Russia - 5 times cheaper (can be bought for 3-5 thousand).
Brand option
And the cheapest option is to do it yourself. To do this you will need several pieces of metal or plastic pipe and corrugation. Well, if you are used to digging into a car, and not just driving, the latter option is even more preferable. Let's consider it.
Features of installation on the injector and carburetor
Installing a Chevrolet snorkel on a Niva has its own characteristics when it is done with your own hands. The fact is that cars of this brand are produced with both injection and carburetor engines. Connecting a new air duct to them has its own characteristics and is usually done using adapters. So, for example, if you are installing a snorkel on a Niva 2121, you will have to install the carburetor body with just these adapters. They should be selected depending on the specific engine model installed in your car.
Usually the snorken on the Niva is installed by experienced car enthusiasts who know how to perform such an operation.
Beginners should be advised to pay special attention to sealing the entire system. So it is imperative to seal the hole in the hood through which the air duct will be inserted into the engine compartment, as well as all pipe joints
Such an improvement will cost you very little, and as a result, you will be able to overcome fairly deep bodies of water with a hard bottom on the Niva as standard.
Installing a winch on a field with your own hands
When your car has to drive off-road or cross shallow bodies of water, there is a danger of water getting into the engine. What could this mean for the car? Destruction of the cylinder block and failure of connecting rods. There is no point in delving into the calculation of the funds that will need to be paid for expensive long-term repairs. Moreover, not every service station can competently remove a car after a water hammer on the engine.
Prudent car owners install an external air intake for the engine, that is, a snorkel, which can be purchased not only branded, but also made with your own hands. In our article, we will try, together with experts, to figure out what the correct installation of a snorkel on a Chevrolet Niva and UAZ “Patriot” should be, after which your car will not be afraid of either a road without asphalt or concrete, or mud with water and sand.
The snorkel looks like a tube leading from the engine to the roof of the car. If you put some effort into its appearance, you can give your car a unique design style that no one else will have.
Let's look at the benefits of installing a snorkel:
- cooling the engine with a flow of cool air without foreign objects;
- protection of the engine compartment from the ingress of various types of debris from under the wheels of vehicles in front, especially on bad roads;
- the motor is reliably protected from water;
- the pick-up point has been moved from the lower position to the upper one.
How can you equip a car with a snorkel? You have only two options: buy a branded one or make your own snorkel. It's no secret that when buying a factory snorkel, you will receive not only a high-quality device with an excellent service life, but also a factory warranty, and also:
- stylish design;
- excellent mechanical characteristics, thanks to the unique composition of linear polyethylene;
- durability;
- resistance to body cracking.
What is a snorkel, what is it used for and what does it look like?
In simple terms, a snorkel is the same air intake, only of an unusual design. Due to it, this device is able to supply cooled air to the engine, whereas the usual factory one draws in air from under the hood.
The benefits of cold air are difficult to overestimate. There is an increase in engine power and durability of parts, but the main advantage of this design will be the protection of the motor from water if we want to ford the river. Thus, the snorkel is a pipe extended along one of the front pillars.
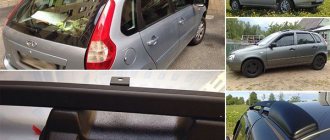
Examples of varieties in the photo
How to make a snorkel for the Niva with your own hands.
First you need to prepare the material. These are clamps and tubes. To create a more durable structure, it is better to use metal tubes with a diameter of at least 6 centimeters. Don't forget about the top. It should be slightly bent towards the rear of the car to prevent splashes and raindrops from entering the system while driving. Additional pipes are also welded to the product to allow atmospheric pressure to be released. They are installed in the air intake system.
Typically, 3 materials are required to create a finished structure:
- corrugation
- metal
- plastic
You can use plastic corrugation to save a little money. It will also be easier to install due to its flexibility. The main course of work is as follows:
- select the required corrugation length. Typically no more than 2 meters will be required
- securely fix the connection points using clamps
- holes are made in the area of the windshield on the driver's side for further fastening the corrugation to the pillar
- a hole is made in the hood/fender to remove the pipe
- the end of the tube is closed with a ventilation grille, after which the outermost part is bent and fixed with the help of additional brackets.
During work, all holes must be thoroughly coated with sealant and covered with sealing tape to prevent corrosion.
Installation on Niva
The entire system is assembled from two parts, which, in turn, are also assembled from component elements.
The first part is the engine compartment
The process looks like this:
- Remove the air filter;
- We disconnect the standard tip of the cold air intake from it;
- We replace it with a sealing coupling (the inner and outer diameters are selected experimentally, but the coupling must be such that force must be applied to install it in the filter).
- We lay the corrugated tube so that one end can enter the air filter coupling, the other is in the area of the battery under the left cab pillar.
- We install the air filter in place, connecting all previously released contacts.
This completes the under-hood preparation. The tube may have a small margin.
Installation of external outlet tube and inlet
We will place the outer tube along one of the cabin pillars. Where exactly depends on how the tube is laid under the hood. On a regular Niva, the outer part of the snorkel is located on the front passenger side; on a Chevrolet Niva it may also be near the left pillar. We try on the tube, simultaneously deciding how to attach it. These can be screws, glue or sealant
When trying on, we pay special attention to the outlet hole. We need to decide how, and most importantly, where it will be directed.
It is not allowed to leave an open hole directed vertically upward. The first heavy rain will lead to a major overhaul of the engine.
If we are going to fasten it using self-tapping screws, we cover the stand with masking tape, mark the fastening points with a marker and make holes with a 4 mm drill.
Connecting both parts
The location of the pipes will tell us where the hole will be: in the hood, in the upper gasket between it and the windshield, or in the side part - on the fender. We glue masking tape to the future location and draw a circle on it with a diameter of 62 mm (slightly larger than the outer tube). If the place turns out to be far from the nearest edge - for example, in the middle of the wing - you can use the original solution and drill it out.
You can also cut a circle with a drill
We treat the edges of the circle with Anticorrosive to prevent rust. We fill our outer pipe by filling the cavities around it with sealant. Next, under the hood, we insert one pipe into another, and use either O-rings or sealant to secure it tightly. The snorkel is ready.
Design options for the upper snorkel hole
Each master can decide for himself how to direct the upper hole. Here are some examples:
- turn the tube and direct it along the roof rails (if there are any);
- can be installed with an outlet on the cabin roof (direction from top to bottom with a small gap for air access);
- put on the “mushroom” from the tractor exhaust pipe (the only option when the pipe can be left pointing upward);
- bend and point forward in the direction of travel (this option will require attaching an additional grid to the hole).
This is interesting: Will the car return in its original form from the impound lot?
The latter option has one undoubted advantage - the wind stream generated when the car moves will be directed towards the engine. But in this case, you should think about securely fastening the grille. In the case of a metal tube, you can resort to welding.
This is what the final version might look like
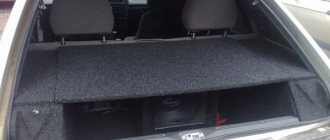
Tuning the trunk of Niva 2121
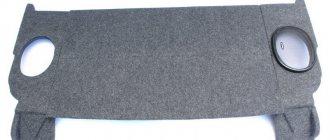
The Niva's extensive luggage compartment is an advantage only at first glance. The large volume provides absolutely no functionality, and the rib at the bottom of the trunk is a completely unnecessary element that interferes with loading. On later modifications it is missing. Also in the way is the folding shelf, which divides the trunk into two parts in the transverse plane.
Also interesting: Niva Chevrolet installation of air conditioning - Auto magazine MyDucato
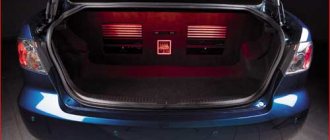
You can also go the standard route and install a speaker system, LCD monitor or other fashionable gadget in the trunk. The latter option is impractical if the car is being tuned for difficult off-road conditions.
An expeditionary trunk for the Niva wouldn't hurt. It will allow you to take a lot of things and save internal space. It will also be a harmonious addition to off-road style. An alternative would be to install an arc with headlights. This will increase the driver's visibility. It is a useful element when driving in bad weather conditions.
Chevrolet Niva Svetly › Logbook › Installing a snorkel
First, you need to acquire some tools. Namely, metal crowns for 64 and 52 (or 54). In the morning I wandered around construction stores, bought small items and crowns. I took the last crowns, 52 were missing, so I took 54. The pleasure is not cheap, 2 crowns and a holder cost almost 1500.
We seal the place where we will drill the wing with masking tape.
We attach the template from the instructions.
You need to be very careful with the template from the instructions! F-design is lazy to print instructions as expected and reproduces them on a copier, which is why the scale floats. In my copy, the hole with a diameter of 52mm had a size of 50mm. It seems like a small difference, but the holes for the bolts will float away. Therefore, I got hold of an electronic version of the instructions and printed them out at 100% scale. After that everything came together.
Next, I removed the roof rail cover (I suffered for a long time) and installed the bracket. The hole in the lid was first drilled according to the instructions - 3cm up from the bottom edge of the lid. It turned out that you need to drill 4 -4.5 cm. Fortunately, the lower hole was completely blocked by the snort.
I drilled the wing with a crown and primed the edges with an anti-corrosion primer. After measuring ten times, I drilled 3 holes for screws. I attached the snorkel to the top bracket and tried it on, checking the template. It matched the pattern, not to say perfectly.
Everything is drilled and primed
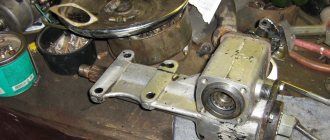
Next, I removed the battery, removed all the wires, and removed the air filter housing. I began drilling a hole in the wall of the engine compartment.
And there's also an amplifier
The site has been cleared and drilling has begun.
I drilled the amplifier. I also primed the hole.
Next, I partially unscrewed the fender liner and drove it away.
The main part is placed from under the fender liner, the black bend is placed from the engine compartment. I first put its seal into the hole, and then threaded the pipe.
Then I installed the seal on the snort itself and put it on the pipe protruding from the wing. It fits tightly, but the pipe from the inside rests against the body and the snork is pulled onto it when the screws are tightened.
Screw it on and pull it carefully so that there are no strong distortions.
The main part is completed, let's move on to the filter. Once the filter was removed, I immediately changed the filter element.
I installed these filters:
The lower part is dusty and full of debris
The top is perfectly clean
Salonnik also changed for the company.
The inlet from the plumbing to the filter box is placed in the box using sealant. I coated the pipe with sealant, inserted it into the box, then somehow put it all in place. The idea arose to glue the pipe to the box so that they could be easily removed together without breaking the seal. To be safe, I disassembled the box again, removed the volute and coated the joint with sealant from the inside.
There was even a little bit of water here once.
Of course I put the snail back.
I returned the battery to its place, screwed on the filter box, connected the ABS unit connector (I removed the harness so as not to interfere with drilling) And this is what it looks like under the hood:
Soon there will be photos of what the car looks like now...
Snorkel made from scrap materials
Thrifty drivers manage not to spend money on a factory part, but make it themselves. To do this, pipe cuttings and knowledge of several rules are used:
- It is advisable to take a metal pipe, and stainless steel. You can also use plastic, but, firstly, the snorkel will turn out to be very fragile, and, secondly, it will not add aesthetics to the car;
- The diameter of the pipe should not be too small, however, you don’t need one that is too thick. The optimal value can be considered 60 mm.
- When assembled, your device should have as few bends and curves as possible. Ideally, there are only 2 of them in a snorkel: the first is for bringing the pipe up from under the hood, the second is to protect it from precipitation (to the side, most often towards the roof). It must be remembered that any change in direction in the air flow increases its resistance.
Frankly, even a lovingly and carefully made homemade snorkel will still look rather clumsy. Therefore, most car owners prefer to buy a ready-made tuning element. A branded one will cost $500; a Russian-made one can be found for 3-5 thousand rubles. And installation of a purchased part costs at least 6 thousand rubles. It is not surprising that people prefer to make do on their own.
Rear suspension lift
To do this, you cannot do without a lift or inspection hole. You will also need a welding machine; it is better to use a semi-automatic machine. The algorithm of actions is as follows.
- Place washers under the springs.
- Dismantle the rear shock absorbers and install new ones from the kit instead, using welding to attach the brackets.
- The lower bowls are cut off and attached to the desired location.
- Pins are welded under the shock absorber struts.
- Next, it remains to lengthen the rocker arm of the brake circuit.
After lifting the suspension, in addition to the wheel alignment, it is necessary to install the main pairs with different gear ratios. Alloy wheels will also no longer be relevant. For a complete set, all that remains is to install a self-locking differential on the rear axle. To achieve success in this matter, you should carefully follow all points of the detailed instructions.
The consequences of such modernization can be any; responsibility rests only with the car owner.
Chevrolet car repair manuals and tips
And so it's time to install the snorkel. In my report, two types of snorkels are presented - for about a year and a half I drove with a mini-san-tech snorkel located in the engine compartment higher up, and now I got around to installing the snorkel from F-design that had been lying on the mezzanine all this time.
Air intake outlet in the engine compartment:
General view of the mini-san-tech snorkel in the engine compartment.
Sealing collar 50x70.
c) into the cuff we insert a corner from a san-tech pipe with a diameter of 50 and an angle of 45 degrees and turn it to the top, into the corner we insert a cut san-tech pipe also at 50 (it is needed to put the corrugation on it).
Here you can see the cuff in the filter housing and the corner inserted into it. the extension pipe is not visible from it, because sits in the corrugation.
d) then we turn the removed bottom of the air filter housing 180 degrees compared to the stock (original) version and screw it to the body using three ordinary furniture corners, self-tapping screws screwed into the plastic filter housing and three bolts with wide washers. everything fits very simply, tightly and reliably. As I wrote above, I’ve already been riding like this for 1.5 years and practice has shown that damping rubber bands are not needed.
The corners of the fasteners for the bottom of the air filter housing.
assembled structure
All. Such an air intake outlet is enough to clearly and immediately not grab water. The 50th pipe is enough for the car to breathe. The downside of a sub-hood snorkel is that the car breathes hot air, and when fording, when a hot car gets into the water, a lot of steam appears and as a result the jerker breathes this steam and the thrust drops quite significantly.
Air intake outlet to the roof
a) bi-metal bit for metal 54mm with a holder for a drill. As practice has shown, it’s a cool thing!
Bimetal bit for metal 54 mm with holder for drill.
Crown assembled.
Accessories.
c) in the installation instructions from f-design and installation descriptions on the internet, for some reason everyone screws the snorkel onto the bolts. those. If it is necessary to remove the snorkel (due to a breakdown or something else), you will need to at least remove the plastic wheel arch liners and fiddle with the wrench to unscrew the bolts. I am not happy with this situation and therefore I decided to attach the snork to long screws. As practice has shown after installation, they hold it securely, but if it comes loose or rips out, I’ll replace it with a larger diameter one or put it on bolts.
Fastening with self-tapping screws.
d) and so, to install, first we apply the snork to the wing and roof and see how it becomes. outline the contours of the fit. Next, we take the snorkel, drill it for screws and make a stencil from it. We apply the stencil to the previously marked contours on the wing and mark the holes. Stencil on the wing.
Hole in the wing.
We remove the battery, remove the wheel (for convenience), remove the fender (see the Kama Sutra on removing the fender, you can’t do without removing the fender), mark the center of the hole, first drill a 5mm hole in the engine compartment behind the battery with a drill, then insert a bit and start drilling . Here it should be noted that at first you will have to drill only part of the crown - it will go exactly along the bend of the amplifier in the engine compartment. At first I thought it wouldn’t work, I thought I’d help with a grinder to cut out a triangle, but then I decided to try with a crown and... it flew in, I drilled both holes in two or three minutes)) I was fascinated by this possibility of a crown - it only drilled with the edge, I had to hold the twitching drill , but she drilled in and without straining! We process the edges with a file. Hole in the engine compartment, view from the outside.
Hole in the engine compartment, view from the inside
h) into the sealing ring in the engine compartment, having slightly soaped the joints, insert a corner from the sanitary-tech 50 pipe at 75 degrees, turn it towards the mirror and from the engine compartment place the air intake corrugation on it, grabbing it at the junction with a clamp. Connections in the engine compartment without battery.
connections in the engine compartment to the battery
i) next, insert a 75-degree corner from a 50-degree san-tech pipe into the o-ring in the wing using soap, place the wing on the target location, look under the wing, align the location of the corners relative to each other and measure the required length of the 50-degree san-tech connecting them pipes, using soaping we introduce it into the corners.
O-ring with angle on the outside of the engine compartment.
Connecting the corners inside the wing.
O-ring with an angle on the outside of the wing.
k) next, we glue the double-sided tape onto the top of the snorkel, approximately distributing it over the area to ensure a reliable connection
Double sided cattle on top of snorkel.
Types of snorkels
The literature on the selection, installation and operation of snorkels identifies several varieties. Moreover, those of them that are designed to supply the power unit with oxygen under water are, in any case, installed on the car so that they can take air from the surface of the reservoir for this purpose.
From a technical point of view, they represent an air intake pipe placed on top of the car. In some cases, a snorkel can power an SUV’s engine from a depth of up to two meters, which significantly expands the capabilities of your Niva when driving in extreme conditions.
Depending on the conditions under which the owner of the Niva intends to operate it, the following types of this air intake are distinguished:
- "safari". This version of the device is intended for installation on SUVs operating in desert conditions or in sandy areas. A design feature of the snorkel is that its upper part is positioned towards the movement of the machine. This technical move prevents sand from penetrating into the power compartment and engine due to the rarefaction of air created at the air intake while the car is moving.
- "swamp". In this case, the engines do not receive dust, but this is precisely where it is necessary to overcome water obstacles and wet sections of roads. To do this, the upper part of the snorkel is turned against the movement of the car, and the pipe is supplied to the filter secretly, for which the hood or wing is cut. As a result, the device is protected from damage when moving from contact with tree branches, as well as when falling to one side.
In addition, it is worth noting that there are both homemade snorkels and industrially produced devices. So, for example, if you purchase a “hundred-fold” snorkel, then all you have to do is install it on your Niva, since it is produced in a ready-made form. If you are going to make this air intake yourself, you will have to spend additional money and time on it, but the accessory will fully satisfy all your needs.
Technical characteristics of snorkels
Snorkels are used to prevent water hammer when the car is immersed in water, as well as to supply the engine with oxygen while the SUV is in the water. Naturally, for the normal performance of these functions, the air intake must meet certain requirements
Usually, when choosing it, pay attention to the following characteristics:
- the material from which the product is made;
- type of head nozzle;
- main pipe diameter;
- mounting options.
The most modern snorkels are made from metal, which is usually aluminum and steel. They are strong and durable, which allows the air intake made from them to be used for a long time without replacement. In addition, the often described accessory is made of polymers, such as polyurethane and ABS (engineered plastic).
As for the upper head attachment, it is made in the form of a “gander” or “cyclone”. The most popular are the rotating nozzles of snorkels, which allow you to rotate, if necessary, the inlet of the air intake in the desired direction. If you use non-rotating models, you will have to decide in advance in which direction along the direction of travel of the car they will be located.
Since the main volume of air will be pumped through the main air duct pipe, special attention should be paid to its selection. So, to power the Niva engine, a device with a diameter of 50-60 millimeters will be enough
If a forced power unit is installed on it, you will need a pipe with a diameter of 70-75 millimeters.
Snorkel on Niva Suspension lift on Niva
Where can I find a suitable snorkel?
You can purchase a ready-made model; a large number of manufacturers make additional devices for SUVs, or you can make it yourself. A factory-produced part will have several advantages: build quality, service life and the ability to contact the manufacturer in case of warranty claims.
The only disadvantage can be the cost, which is usually at least 14,000 rubles
But it is important to understand that the price is determined by the use of high-quality materials, namely especially durable LLDPE polyethylene, which provides a number of advantages:
- resistance to high temperatures and cracking
- mechanical stability
- design created specifically for a specific type of car
But there are also cheaper models characterized by simple design, the cost of which does not exceed 6,000 rubles. It is not recommended to use the cheapest options, because despite the apparent benefits, they may suffer minor mechanical damage over time. But due to the use of less plastic material in the composition, microcracks will appear on the body, through which water can enter the engine when forcing various kinds of obstacles
When using such materials, it is important to periodically inspect the snorkel in order to identify damage in time.
But there is also the most budget option - making a snorkel yourself. To do this, you first need to ensure reliable fastening in the engine compartment in order to prevent air leaks and bring the pipe as high as possible in the hood. To do this, first a horizontal part is laid under the hood, then a connecting tube is inserted into an additionally prepared hole between the windshield and the hood.
It is important to remember that the straighter the pipe and the shorter the path to the air intake, the better the aerodynamic qualities of the snorkel