How to install roof rails on Kalina? Detailed analysis in moments
Before we look at the question of how to install roof rails on Kalina, let's look at what they are and what they are used for.
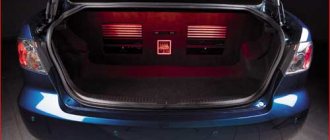
Lada Kalina has long become a people's favorite. It is roomy and comfortable to use. Imagine if you need to take a lot of luggage with you on a trip, but there is not enough space in the luggage compartment. In this case, you simply cannot do without roof rails. At the same time, they are also part of the car’s tuning and add zest to its appearance.
Luggage compartments of Lada Kalina
The interior of the Kalina station wagon is especially good because it can be transformed quite easily. Thanks to such simple manipulations, the car owner receives a luggage compartment with greater capacity. If we compare the station wagon with the Lada Kalina hatchback, we can say that the first option has a larger cargo compartment - with a capacity of 355 liters. It is generally designed in an interesting way. The peculiarity of the station wagon is that, despite its rather small size, the trunk volume is selected as competently as possible, almost optimally.
The trunk volume of the Kalina sedan is even larger. But the luggage compartment of the universal Kalinka has its own special, undeniable advantage: it consists in the ability to quickly fold the rear seats.
It is worth saying that this version of the AvtoVAZ model, like a sedan, entered development in 1993. And it was launched into series in 2000. Today, the dimensions of the car are such that its owner has the opportunity to move without problems on both city and rural roads. Moreover, the trunk volume of the sedan allows you to transport a wide variety of items. Also note that the length of the car is about 4 m.
Why install roof rails?
How to install a railliner on Kalina? Let's start with the fact that car roof rails are longitudinal bars that are installed on the roof and are used for cargo transportation. The optimal weight of the load on the roof should range from 45-50 kg. The Kalina manufacturers themselves took care of convenience and developed original railings for the roof of the car. They can be made of aluminum profile or high-strength plastic, providing high rigidity.
Self-installation of roof rails
How to install roof rails on a viburnum, yourself or at a service station? The answer is quite simple: installation is not at all complicated and will not take more than 15 minutes. Let's look at what you need for this. First of all, you need to know that regardless of what class Kalina is, be it a hatchback, sedan or station wagon, it is equipped with roof rails of standard dimensions 1660*310*110 mm.
, and the installation itself is performed in two ways. They can be installed using double-sided mounting film, or screwed with self-tapping screws.
Now you need to get a set of elements, open the car doors along one of the sides, and remove the rubber seal. This procedure must be performed from the rear door forward. After removing the side sealing rubber, you will need to remove the protective film that is located under the rubber, covering the mounting holes.
Then you need to try on the plastic fairings and mounting brackets, and use a marker to fix the installation location. To avoid loose connections of the brackets and more secure fixation, we use double-sided tape. Excess holes will need to be sealed before reinstalling the sealing rubber.
How to attach roof rails to Kalina 2 station wagon
Installation of roof rails on the Kalina 2 roof is quite simple and can be done using adhesive double-sided mounting film or self-tapping screws. The most popular is the first method, which does not require drilling holes in the body.
'); if(“undefined”===typeof loaded_blocks_drive){loaded_blocks_drive=[]; function n(){var e=loaded_blocks_drive.shift(); var t=e.adp_id; var r=e.div; var i=document.createElement(“script”); i.type=”text/javascript”; i.async=true; i.charset=”utf-8″; i.src=”https://www.drivenetwork.ru/data/”+t+”.js?async=1&div=”+r+”&t=”+Math.random(); var s=document.getElementsByTagName(“head”)||document.getElementsByTagName(“body”); s.appendChild(i); var o=setInterval(function(){if(document.getElementById(r).innerHTML&&loaded_blocks_drive.length){n(); clearInterval(o)}},50)} setTimeout(n)}loaded_blocks_drive.push({adp_id:e ,div:t})})(47602)
To work you will need:
- double-sided adhesive mounting tape (double-sided tape);
- alcohol;
- set of hexagons;
- colored marker.
The installation process may differ depending on the type of roof rails, as indicated in the instructions for them. Thanks to the standard holes provided by the manufacturer in the body of the Lada Kalina station wagon, no difficulties will arise during operation.
Trunk mount
In any case, the sequence of actions consists of several basic steps:
- 1. Along one of the sides of the car, it is necessary to remove the side sealing rubber and the protective film under it, after opening the doors. In this case, you should start from the back door to the front. This will open the standard mounting holes.
- 2. Attach the plastic fairing parts to the body and mark the installation locations with a marker.
- 3. Degrease the working area with alcohol and apply double-sided tape to the attachment point to ensure a tight fit of the roof rails.
- 4. Install the rails and secure them using fastening screws and hexagons. The front screws are tightened first, then the rear ones.
- 5. Install the side seals in reverse order.
Having finished fastening the roof rails, you should make sure that the installation is secure. To do this, you need to try to move the device from the roof of the Kalina station wagon. Even with a slight shift, you need to secure everything in a new way, and then check the quality of the fasteners again. Such monitoring must be carried out regularly, since during operation the screws may loosen, and a slight oscillation of the rails will appear at speed.
If you encounter any difficulties when installing roof rails on the Lada Kalina, you must seek help from an experienced specialist. You should also study in detail the attached instructions and the experience of installing such devices on the network.
A little about installation details
Preparatory work for marking
and the installation of roof rails must also be done on the opposite side. Then you need to remove the protective film from the tape and press the brackets firmly. Now you can start installing them, for which they are fastened with self-tapping screws to the car body. You need to tighten them without tightening them too much, after which you will need to install fairings and slats on the roof.
If installed correctly, there will be no rattling or knocking noises on the roof. Once installation is complete, the seal will need to be reinstalled. As you can see, installing the roof rails is not at all difficult and is done very quickly.
As for the hatchback
, then when wondering how to install roof rails on Kalina, it should be noted that the luggage compartment is limited in volume. Therefore, we can advise choosing a design that can be installed across the car. Preparation for installation is carried out in the same way as in the previous version. First, the rubber seal is removed, then you need to make markings. The roof rails are installed evenly and neatly, after which the seal is installed in place.
How much are roof rails for Kalina station wagon?
Lada Kalina has long established itself among Russians and neighboring countries as a popular car. It is comfortable, practical, quite roomy. It is often used for trips with the whole family to the countryside or nature. Hence the conclusion: roof rails on Kalina are simply necessary for convenience and transportation of large cargo outside the cabin.
Rails are functional hanging accessories in the form of slats, installed on the car body for decoration or additional loading space. Installing a trunk and box on the roof of the car increases the resources of the car.
Main characteristics of roof rails for Kalina
Railings consist of various types of elements: side pipe fastenings, plugs and the pipe itself with a diameter of 25-51 mm, made of chromed metal or plastic. Such devices are in demand among car enthusiasts and are easy to use.
Scope of application of roof rails: design of kitchen furniture with built-in lamps, tuning of boats when installing equipment, versatility of use in the automotive industry. Translated from English, roof rails are railings. Car tuning is carried out by the driver independently, in some cases the assistance of a specialist is required. You can install roof rails on any brand of car, regardless of body shape.
The driver of a Lada Kalina station wagon cannot always use a trailer when traveling through narrow country streets. In this case, roof rails will definitely help out. Car owners, independently or with the help of someone else, install railings on their cars, without spending too much money on it.
Installation of roof rails on Lada Kalina station wagon
These side rails, if installed correctly, will replace the trunk for transporting large cargo. The cost of roof rails depends on the place of purchase and the manufacturer of the product. Therefore, before you buy them, you need to take the issue of choice very seriously and study all the qualities well.
The manufacturer of Lada Kalina station wagon cars has provided a place for installing roof rails, so there will be no difficulties with the work. The modern device for transporting goods is made of lightweight anti-corrosion metal, the installation of which will not affect the painting of the roof or the control of the vehicle. The kit is universal and does not require additional adjustment of the transverse grooves, but precautions and installation rules must be observed:
- do not overtighten the bolts;
- The trunk must be equipped with special locks to ensure the safety of the property being transported.
In addition to the kit, it is possible to purchase bike racks, boxes or baskets. Any of the listed devices is accompanied by instructions with a detailed description of the sequence of installation work. The roof rails are installed without changing the structure or compromising the integrity of the machine.
Having opened the doors, dismantle their seals. Before installation, you need to make sure that the roof rails on the car are parallel to each other. This is especially important once all the fairings are attached.
Double-sided tape is laid along the drawn markings. It will come into contact with the roof, so it is imperative to treat the entire surface with a primer. A primer is a transparent liquid that is necessary to enhance the adhesion of a car film to a specific surface.
After the procedures have been completed, carefully remove a small part of the protective film in the outer direction relative to all fairings and fix the roof rails on the car roof. Using bolts, tighten the device and secure all fairings. After this, the protective film is removed. Sequentially, starting from the front bolt and ending with the rear, they are re-tightened. The fairings must be additionally fixed by pressing your hand first on the upper part, then on the lower one.
In terms of trunk volume, the sedan is located between a hatchback and a station wagon.
Let us remind you that this family is presented on the market in three different bodies:
- sedan;
- hatchback;
- station wagon
Now let's look at the numbers. According to the manufacturer, the trunk of a Priora with a sedan body can be placed between a hatchback and a station wagon in terms of volume. Its volume is 430 liters. This is a very good indicator for cars of this class.
The hatchback's trunk is the least spacious. Its volume, according to the manufacturer, is inferior to the sedan and is only 306 liters. However, there are two very important points here. Firstly, the large rear door allows you to load much more cargo into the car than can be placed in the trunk of a sedan.
In addition, with the rear seats folded down, the luggage space of the Priora with a hatchback body increases to a very respectable 705 liters. Agree, it is quite possible to place here, for example, a washing machine, which, even if you wanted to, cannot be stuffed into a sedan. The rear seat folds down quite simply, but the designers have not been able to come up with a solution that allows it to be laid flush with the floor. In addition, the wheel arches take up some luggage space. Nevertheless, the numbers, compared to other classmates, are quite decent.
Well, the most spacious in the Priora family is, of course, the station wagon model. The trunk volume here is 444 liters. Naturally, the rear seats can also be folded down. In this case, the volume of the luggage compartment increases to 777 liters. Add here a large rear door - and you will get the most optimal option for transporting various cargo, including quite large ones, among all Priora cars.
As you can see, the sedan, all other things being equal, is practically not inferior to the station wagon in terms of trunk volume in liters. At the same time, it is also significantly ahead of the hatchback. But as soon as you fold down the rear seats, the picture completely changes. The station wagon continues to confidently hold the lead, while the hatchback is already ahead of the sedan.
When choosing a Priora, this point is also worth taking into account. If you are not going to often transport bulky cargo, then a sedan is quite suitable for you.
If you plan on relatively regular transportation, for example, delivery of goods to shops, then you should pay attention to a more spacious station wagon. Cars of the Priora family have proven themselves to be a very good option for their price. They have good dynamics, while being quite economical, hold the road confidently, and the ride here is more comfortable than on the VAZ “tenth” series
They have good dynamics, while being quite economical, hold the road confidently, and the ride here is more comfortable than on the VAZ “tenth” series.
Don’t also forget that the Priora was restyled in 2013. The designers added a number of new options to all cars in the family, further increasing their competitiveness in the automotive market. In particular, the updated Priors received more modern optics controlled by a light sensor. Many people liked the slightly changed bumper, and the LEDs built into the lights and foglights made the car less “gluttonous” in terms of electricity consumption.
The interior of the car has also undergone changes for the better. The designers included finishing materials in the restyled version that cannot be called typical for VAZ products. In particular, soft-look was used here - a type of plastic that looks very much like expensive leather.
In addition to its excellent aesthetics, the undoubted advantage of this material is also its fairly high resistance to various types of influences. Also, owners of the restyled version will be pleased with the new shape of the steering wheel, a beautiful instrument panel and a touch screen. Well, thanks to higher seats with armrests, the designers were able to increase the level of comfort for both driver and passenger.
Features of using roof rails
According to engineering characteristics, roof rails for the Lada Kalina Universal are produced in several versions:
- for smooth car roof;
- for use on vehicles with aluminum hard edges located at the rear of the roof;
- for cars with stiffeners located along the entire length of the roof.
The manufacturer created a special original design for Kalina. Characteristics of the installation kit: protective, decorative, durable aluminum or high-strength anodic oxide covering, ABS - plastic mass of protective thermal roll.
Installation diagram - steps 1-4
5-7 installation steps
Installation is quite simple - fasteners specially designed for this purpose are attached to the roof using screws, without sealing the roof holes with double-sided tape. The kit contains a body paint protection system - an adhesive backing made of transparent, high-strength plastic.
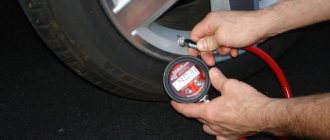
According to statistics, roof rails can support at least 100 kg of luggage, because the metal composition provides greater rigidity. But the recommended load is limited to 50 kg according to the manufacturer’s specifications.
- Roof load capacity is limited based on factory requirements.
- Functional reliability of the main fasteners that are installed on the roof of the car.
- The passivity and activity of external forces created during the movement of a loaded vehicle increase the load on the entire metal structure.
When using roof rails on Lada Kalina cars, you must adhere to the following recommendations:
- small cargo and other heavy loads should be placed as close as possible to the roof rails;
- crossbars will help to simultaneously place different weights on the sides, lighter ones are placed closer to the middle of the trunk;
- absolute fixation of luggage to the roof rails and crossbars;
- transportation of long cargo must be safe, with fasteners to prevent swinging;
- movement speed is reduced, constantly monitored, in order to avoid sudden maneuvering.
The maximum load length is 1645 mm. The crossbars are secured horizontally. Packaging dimensions - 1730x170x180 mm.
APS roof rail design
These high-quality products are designed for installation on the roof of Lada Kalina station wagon cars, released in 2013, with 70x1630mm ribs located along the entire roof of the car. They have a unique fastening system developed and patented by AutoPolymerService LLC, one of the leading manufacturers of car roof rails in Russia. Installation method - fastening to standard places located under the door seals in the car body, using a screw connection, without gluing to the roof surface. The kit includes a special body paint protection system - a protector (self-adhesive backing made of transparent high-strength plastic). No changes are made to the design of the car!
The product has an original design that harmoniously complements the appearance of the car and was specially developed by the APS company. Materials and components of the highest quality - reinforced aluminum profile with a protective and decorative anodic coating and ABS plastic with a protective layer that prevents fading and discoloration.
Installation of roof rails
— load capacity 50 kg; — installation without drilling the body; — installation time 10 minutes.
After reading the installation instructions and the contents of the package, it turned out that for installation you will need alcohol, a set of hexagonal L-shaped socket wrenches, an alcohol marker or electrical tape, and double-sided automotive tape.
— open the car doors; — remove the rubber seal in the direction from the rear door to the front; — peel off the electrical tape covering the mounting holes; — we make a fitting installation of roof rails on the roof of the car, using a marker we mark the installation locations of brackets and plastic fairings;
— after fitting, remove the roof rails; — according to the markings made, degrease the roof contact surface and treat it with a cloth soaked in an adhesion activator; — since during the fitting process it was discovered that the brackets did not fit tightly to the mounting points on the body, we glue them with double-sided tape, and seal the unused holes with electrical tape;
— from double-sided tape glued to the plastic fairings, remove small sections of the protective film and bend them outward; — install the roof rails on the car’s roof without tightening the bolts too much; — fix the plastic fairings on the roof of the car; — using the ends bent outward, remove (pull out) the protective film from the double-sided tape along the contour of the plastic fairings; — tighten the front mounting bolt, and then the rear one; — fix the fairings by pressing firmly from above, then press the edges, moving along the contour of the fairing; - Reinstall the rubber seal.
Recommendations for using roof rails as a luggage rack (provided that crossbars are installed)
The load capacity is 50 kg, in accordance with the maximum permissible load on the roof of the car recommended by the automaker, although it will withstand a heavier load if necessary. When transporting goods, the following points should be taken into account:
- Place small and heavy loads as close to the rails as possible
- When placing several loads on the rails at the same time, distribute them evenly over the surface of the crossbars. Moreover, heavier things must be placed closer to the rails, and lighter ones towards the center
- Securely secure the load to the crossbars and the roof rails themselves
- Additionally, secure the hanging ends of long loads to the car body to prevent them from swinging during transportation
- Choose the most optimal driving mode with a reduced speed, avoiding sudden acceleration and braking
- Under the car box, it is recommended to install AERO crossbars with a screw clamp (fastening the crossbars - with a screw connection in the longitudinal groove of the aluminum profile of the railing) or AERO crossbars with a CRAB type fastening (fastening in the girth of the railing)
- The installation width of the crossbars is floating, fixing the crossbars is possible anywhere on the aluminum profile of the railing, maximum width 1030 mm
Installing roof rails on Lada Kalina
Rails for Kalina are installed by those vehicle owners who want to increase the vehicle's carrying capacity. If you travel frequently and don't have enough trunk space to carry things, installing cargo rails will be a great way to expand the capabilities of your car.
In addition, by installing roof rails on the Kalina station wagon, you will change the appearance of the car and give it individual features. Install the fastenings yourself or entrust this work to specialists at the service station. If you want to save money and have the skills to work with cars, then do the work yourself.
Installation of the structure on the machine
Do you have a Lada Kalina station wagon, sedan or hatchback? The class of the car does not matter, because standard roof rails are installed on Kalina. You can do the installation in two ways. The first involves the use of a special double-sided film for installation. The second is based on the use of self-tapping screws. This method of fastening the arches is the most reliable.
Buy self-tapping screws and a set of hexagons. In addition, you will need the following things:
- colored marker for marking;
- ethyl alcohol for surface cleaning;
- double-sided adhesive tape for installation.
Get all the elements, prepare the tools. Open the car doors and carefully remove the rubber seal. Please note that the installation process must be done from the rear door side. As you work, you will move forward.
When you remove the side rubber seal, carefully remove the protective film. It is located under the rubber and is used to cover the mounting holes.
Take mounting brackets and plastic fairings. Install cargo rails level and neat. Perform the fitting, highlighting the installation locations with a marker. Use double-sided tape in your work, this will allow you to fix the brackets more tightly. Seal all excess holes and install the sealing rubber in place.
Make markings on both sides and secure the Lada Kalina roof rails with tape. When all structural elements are placed on the roof, secure them with self-tapping screws. There is no need to tighten the fasteners too much. After completing the work, install plastic fairings and slats on the roof. If you do everything correctly, there will be no knocking or rattling when driving. When installation is complete, return the seal to its place.
Paint protection
You can install the arches on the Kalina 2 hatchback yourself. If you do everything strictly according to the instructions, then scratches may appear on the surface of the body during the operation of the arcs. These marks are left by the metal from which the structure was made.
Flexible plastic can be used to protect the body.
Buy 2 sheets of transparent film and prepare a template in the shape of an arch support. Glue the template to the body. In addition, craftsmen recommend additionally protecting the metal near the screw holes. To do this, you should use double-sided tape.
Please note that before applying film and tape, the surface must be degreased. Use alcohol for this.
Body protection when installing roof rails
Sometimes situations occur in which, after the installation procedure, paint scratches appear on the roof surface of the Lada Kalina sedan. To avoid this, it is recommended to use flexible plastic to help. To do this, we purchase a couple of sheets of transparent film and make a template in the shape of arc supports. Then we glue the resulting template to the body element.
Experts also advise resorting to protecting the metal around the mounting holes on the Lada Kalina sedan. Double-sided tape is useful for this purpose.
Please pay attention! Before directly applying the film with tape, thoroughly degrease the surface. The best choice here is White Spirit.
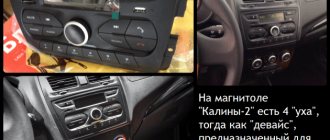
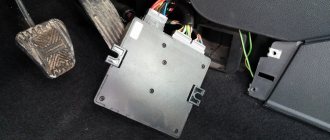
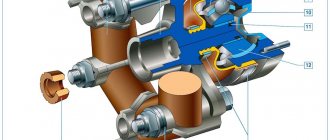
Diagnostic connector Kalina 2
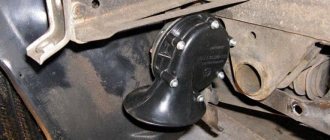
Alternator belt tensioner bracket Kalina
Operating book for Lada Kalina
Installation of roof rails on the Lada Kalina-2 hatchback
Rails, that is, brackets for transporting luggage on the roof, can be installed on any car of the Kalina-2 family. On each of the two sides, the body already has threaded holes for mounting roof rails. There are four such holes on each side, but this does not mean that you need to use all of them. The thread cut in the mounting hole is M6. How to install the roof rails yourself and how to supplement the standard design for more “gentle” operation - all these issues are discussed further.
The roof rails are designed for the LADA KALINA station wagon
Available in three types depending on the year of production of Kalina and the design of its roof:
- Rails for cars manufactured before September 2008 with a smooth roof.
- Rails for cars produced before 2013, with stiffeners 50x1040 mm located at the rear of the roof
- Rails for cars produced in 2013 before the release of the modernized "KALINA-2", with ribs 70x1630 mm located along the entire roof of the car - you are looking at them now
Be sure to take this information into account when selecting and purchasing roof rails for the Lada Kalina station wagon!
We act according to the instructions
The kit with metal roof rails intended for installation on the Kalina/Kalina-2 hatchback may contain M6 screws, as well as external plastic linings. The number of certain elements depends on the design of the railing. The manual supplied with the equipment lists the basic installation steps:
- Before installation, it is necessary to remove the upper door seal, which prevents access to the mounting holes;
- All fastening elements are initially covered with tape, which also needs to be removed;
- Under the tape there are holes with M6 threads. Each rail is installed and secured with screws;
- Finally, all decorative elements are mounted, then the mounting screws are finally tightened.
Each of these actions is illustrated in the photo:
If you act in accordance with the instructions, scratches may appear on the body covering - traces of the metal from which the roof rail is made. How to prevent these consequences will be discussed further.
AERO racks with “SCOBA” fastening on roof rails
The trunk is a removable device used for civilian purposes to accommodate and secure payload, additional devices and equipment carried by the vehicle.
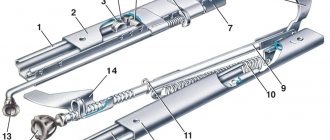
The luggage rack is designed for installation on roof rails with clearance between the roof rail profile and the roof. The luggage rack consists of two aluminum crossbars with appropriate fastenings. DESIGN FEATURES OF LUGGAGE RACKS.
The trunk crossbars are streamlined to reduce air flow resistance when the vehicle is moving. They have a standardized groove for installing additional accessories for luggage racks: mounting skis, bicycles, baskets, etc. with the appropriate type of fastening. The presence of an anti-friction insert on top of the crossbar profile allows you to securely secure the load and protect the surface of the trunk crossbars from damage. The insert into the bottom groove of the profile prevents the appearance of aerodynamic noise.
Original design.
The end caps of the crossbars bear an image of the registered trademark
High quality materials and components - reinforced aluminum profile with anode coating, elastic rubber profile, rubber inserts, aluminum brackets.
The trunk crossbars have two types of coating:
1. GRAY ANODE. It is a colorless anodic-oxide high-strength coating. This is the most reliable way to protect aluminum and its alloys from corrosion and other aggressive environmental influences. The electrolytically produced oxide layer has a density hundreds of times greater than the density of the natural oxide film. In comparison with other coating methods (painting, varnishing, coating with polymer films, etc.), anodizing eliminates the problem of under-film corrosion and coating peeling. This coating has high decorative and performance properties. Due to the transparency of the anode film, the profiles have a natural metallic color. Before coating, the profiles are subjected to special treatment, which creates a velvety surface that sparkles in the sun.
2. POLYMER BLACK. This type of coating of aluminum profiles is two-layer. The first base layer is a colorless anodic oxide coating. It is a conversion layer that reliably protects the aluminum profile, sealing it from all sides. This is the most reliable way to protect aluminum and its alloys from corrosion and other aggressive environmental influences. It can be used as a stand-alone silver-colored finishing coat, or as an excellent base for applying subsequent layers of coating. The second layer is a black polymer coating. It is applied electrostatically and baked at high temperature directly onto the product. It is a reliable decorative layer. It has a matte, deep black velvety surface.
Method of installing the trunk - fastening is carried out in the girth of the roof rail profile.
Net weight of the trunk is 2.5 kg.
The permissible load on the trunk is 80 kg.
The length of the trunk crossbars is 1300mm.
IMPORTANT!
Make sure that the dimensions of your roof rails correspond to those indicated in the diagram in the INSTRUCTIONS.
To make an informed choice, you need to make sure that the designs of the trunk and the roof rails of your car match.
The necessary data can be found in the PRODUCT INSTRUCTIONS (see the INSTRUCTIONS tab).
There is also an installation diagram and safety requirements for operating the product.
ATTENTION!
IMPORTANT: Until the product is installed on the car, you must save all packaging (boxes, branded tape, packaging materials, etc.)! If you find any discrepancies in the product name, configuration, integrity or quality, you must contact us immediately. IT IS STRICTLY PROHIBITED: To independently modify, complete or repair the purchased product, as this entails loss of consumer and operational properties of the product, as well as loss of warranty
IT IS STRICTLY PROHIBITED: To independently modify, complete or repair the purchased product, as this entails loss of consumer and operational properties of the product, as well as loss of warranty.
Flexible plastic will help us
The paintwork can be protected from scratches. To do this, purchase sheets of transparent film “A3” (2 pieces will be enough). You can cut the film to the shape of the roof rail support and then glue it to the body, as shown below:
Protecting the outer paint layer from scratches
Threaded holes that are not used during installation must be sealed. And the metal near the holes into which the screw is screwed is protected with double-sided automotive tape:
Additional paint protection
It is important to know that when applying film or tape to any surface, degrease it first. Vodka or technical alcohol is suitable for this. It is recommended to use WD-40 only to remove traces of tape.