Once upon a time I found this “List of Priora lamps”. Because The recording has become popular and is often used; I designed it beautifully in Photoshop so that it would be pleasant to look at. Well, I’ll leave it in text format for copying.
Lamp installation location - [Lamp type] (Power, W)
Headlight block:
Side light - [W5W] (5) Low beam - [H7] (55) High beam - [H1 / H15] (55) Turn signal - [PY21W] (21) Turn signal - [W5W] (5) PTF - [ H3/H11] (55)
Back light:
Signal brake/gab. light - [P21W / W5W] (21/5) Add. Brake Light - [P21W] (21) Turn Signal - [P21W] (21) Reverse - [P21W] (21) Fog Light - [P21W] (21) License Lamp - [C5W] (5)
Interior lighting:
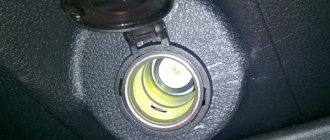
Ceiling light interior — [C5W / T4W] (5/4) Ceiling light. thing drawer - [C5W] (5) Illumination of the cigarette lighter. — [AMN13-3-1] (3) Clock backlight — [W1,2W] (1,2) Lamp lighting. trunk — [C5W] (5) Instrument lighting — [W3W] (3) Center lighting. consoles - [W1,2W] (1,2) Engine compartment lamp - [R10W] (10) Indicator lamp - [W1,2W] (1,2) Push-button switches - [W1,2W] (1,2) Switch blocks - [LEDs] Advanced brake light - [LEDs]
If you liked the article, click >> “Like”. Thank you all for your attention and good luck on the roads =)
Lamps in foglights
The effectiveness of PTF in foggy conditions is determined by several factors. Their low placement, different range, and direction of the light flux make it possible to illuminate only the road surface itself, without affecting the surrounding area, like high-beam headlights. This allows you to see the road even in heavy fog, which completely scatters the light of the headlights, creating a snow-white wall in front of the car.
DS111
Attention!
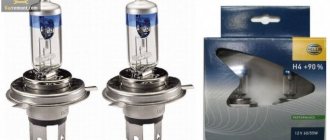
The fog lamp is halogen. You should not touch its glass flask with your fingers, as traces from them will lead to darkening of the lamp when heated. You can remove dirt from the flask with a clean rag soaked in alcohol.
We install the new H11 lamp in the reverse order.
If you have a Chinese car with burned out fog light bulbs and you don’t know how to replace them, then this instruction is especially for you. After all, replacing a fog light bulb is necessary for safety reasons, unless of course you want to get into a dangerous situation on the road. In principle, there is nothing complicated about this, but you still have to be patient and demonstrate your skills. I want to warn you right away that replacing the right headlight bulb will seem more difficult to you than the left one. You will ask why? Yes, because on this side the spring latches are located out of sight and you have to act by touch.
Here's a list of the tools and accessories you'll need:
- short screwdrivers (phillips and flathead);
- wrench 7;
- mirror;
- flashlight;
- a new bulb that matches your car;
This is not a difficult matter at all, and it’s not worth going to a service station for such a small thing. Any car owner can do this. And, if you have never done this, you have an excellent reason to learn something new. Replacing a fog lamp (after mandatory car washing) is carried out in several stages.
To gain access to the PTF, the first step is to free up space in the work area. To do this, turn the steering wheel all the way to the right for the right fog lamp, for the left one, respectively, to the left, while the engine must be started. Also, in order to facilitate access, you can raise the front of the car using auxiliary materials - bricks, boards, a jack, or simply drive the appropriate front wheel onto the curb. In this case, you need to be especially careful and make sure that the wheel does not jump off the ledge.
Next, you need to remove the protective plastic material located on the wing. We equip ourselves with a 7 key and unscrew the screws around the wheel. It is also necessary to unscrew the plastic bolt located on the bottom of the machine. Use a flat screwdriver to pry up the tip into which the plastic bolt was screwed. We bend the freed wing plastic until the wheel allows it. Don't be afraid to break this plastic - it's very flexible and durable.
How to adjust the light flow
In order to prepare for testing and debugging fog lights, the Priora should be placed in conditions as close as possible to real ones. You need to place a load weighing approximately 200 kilograms in the cabin, a spare tire in the trunk, and completely fill the tank with fuel.
After this, the car is installed five meters from a flat wall. The tester measures the distance from the ground to the center of the fog, and draws a horizontal line on the wall five centimeters lower. If the headlights have been adjusted correctly, the light spot will be approximately at the level of this line. You can also test and debug each of the headlights separately (to do this, you need to repeat the procedure, closing each of the headlights in turn).
Installing PTF in Priora 1 and 2: are there any differences?
The PTF connection on the Priora differs in the position of the headlights: in the pre-restyling version, the round headlights are located closer to the center of the front end, and in the Priora 2 - restyling: the trapezoidal PTFs are located closer to the edges of the front bumper.
Installing PTF in Priora 2 can be complicated by the fact that instead of a trapezoidal headlight, the headlight of a pre-restyling Priora car will be installed; you will have to stock up on screws and patience in order to secure the headlight well in the frame, and the plastic frame to the bumper. You can install fog lights in a couple of hours, the main thing is to understand the wiring connection order.
The procedure for installing the button inside the cabin, powering the circuit
In order to connect the PTF button, you need to perform the following steps:
- Remove the negative terminal of the battery;
- Disassemble the steering column. It is secured with three plastic latches; they need to be turned 90 degrees. Find the safety block;
- The block holds a self-tapping screw, unscrew it;
- Disassemble the center console by unscrewing four screws: under the ashtray, under the radio and near the OPEN sign. In place of the plug, put the on/off button for the fog lights and connect the blue wire to the safety block, possibly through a relay;
- Using clamps, connect the remaining wires to the heated rear window button.
How to connect fog lights on Lada Priora?
When there is not much left in stock, you just have to disassemble everything and install the PTF, then put everything back together and enjoy the work done. Kidding :-).
- Let's start with the fact that we need to de-energize everything, to do this we remove the “-” terminal of the battery.
- Next, you need to remove the bumper; to do this, unscrew the screws that secure it one by one. The screws that need to be unscrewed are marked in the photo. After all the fasteners are unscrewed, carefully unclip the bumper from the latches and dismantle it completely.
- Next, take a screwdriver and remove the foglight plugs, which are attached with self-tapping screws.
- We prepare our fog lights and proceed to an important stage called “installation of fog lights.” We carefully place the PTFs in their regular places and secure them with the self-tapping screws that secured the plugs. Then we start laying the wiring. The wiring is routed from the inside of the bumper; it is advisable to use corrugated wire.
- The wires need to be pulled into the cabin in the GTZ area; to do this, we take out a special plug, under which the holes we need are hidden. For convenience, it is recommended to remove the frill along with the wipers, as well as the expansion tank with bracket.
- In the cabin, in order to extend and connect the fog lights, you should pull off the trim (sound insulation) and pull the wire into the cabin.
- When the wires are brought into the interior, you can start connecting. The diagram according to which it should be connected is usually included with the PTF kit, but just in case I decided to post the diagram.
- Connecting the fog lights to the button requires the removal of the central panel. When installing the PTF relay in the unit, it is important not to mix up the wires and follow the PTF connection diagram.
Installing fog lights on a Lada Priora is quite an extraordinary task and can be done by any car enthusiast. The only problem is the connection; as a rule, difficulties arise with it. However, if you follow the instructions and carefully study the connection diagram, then everything should work out. If difficulties arise during the connection, I recommend contacting an experienced electrician, he will easily help you for a minimal fee. Before final assembly, do not forget to check everything and make sure that the PTFs are working as they should.
That’s all for me, thank you for your attention and see you again at VAZ Repair! Bye!
Photo from here
Description of the scheme
The relay must be connected according to this diagram. The relay has only 4 contacts, which are assigned numbers: 85, 86, 87 and 30.
- We connect contact number 86 to the negative of the battery;
- We connect contact number 30 to the “plus” of the battery;
- Contact number 87 is connected to the power wire (plus) of the PTF;
- We connect contact number 85 to the PTF ON/OFF button with a blue wire through a fuse;
We hope our article was useful to you.
Fog lights are simply necessary on a car, because they help you drive in the fog with confidence that oncoming cars will see you, in the dark, and in general they help improve the standard light. Fog lights on the popular Lada Priora are installed only in the “Luxury” configuration. PTFs are sold for Priora, and you can install them yourself, instead of plugs, when they are not included in the package, but they have a different article number for the model before restyling and after restyling.
Fog lights for the domestic Lada Priora are not expensive, starting from 800 Russian. rub. Connecting the fogs occurs quickly and without significant effort. We will talk about this in our material. When car owners decide to install PTF, they are faced with the question of choosing between LED and lens headlights.
If the standard fog lights are not satisfactory
You can often meet motorists who are categorically dissatisfied with the light of their standard fog lights. This is especially true for those who often travel long distances. Indeed, often in conditions of heavy fog, installed PTFs do not cope with their main task. As a rule, such headlights have conventional lamps. It is not advisable to replace them with similar ones, but with higher power; it is much more reasonable to replace them with LEDs or xenon.
It is worth noting that LED lamps in fog lights can be installed without any restrictions and conditions, as is required for xenon. To independently replace a halogen lamp with an LED one, you do not need special knowledge or equipment. But there is one rule that should not be neglected: you can purchase diode dumps for fog lights only if they belong to a trusted brand. Inexpensive Chinese samples do not meet quality requirements and do not last long.
Before purchasing LED lamps, you should remove the halogen lamps and look at the base to find a similar one - this will allow you to minimize the work of fitting the lamps into a standard fog lamp. An important parameter of a fog lamp is its brightness value. This parameter is measured in Lumens (Lm), and for fog lights the brightness must be at least 1000 Lm, otherwise the effect, compared to halogen lamps, will become invisible.
Diode bulbs in fog lights almost never cause any complaints when passing a technical inspection; they do not require the purchase of expensive lensed headlights. As with xenon, they have a wide range of possible colors, which will allow you to do without installing additional light filters.