Firmware for standard radios LADA Kalina 2 and Granta
To change the appearance of the menu of the supplied radio and expand its capabilities, you will need an SDHC (SD) memory card with a size not exceeding 4Gb. The SD card should be formatted in advance on the computer using the FAT file system.
Preparation for firmware:
1)Save the archive with the firmware on your PC and unzip it;
2) Copy all files from the FirmWare folder to the SD card via a card reader.
Firmware:
1. The USB port of the radio should not contain a flash drive;
2. Insert the card with the firmware files into the car radio connector;
3. Reboot the head unit by holding down the function keys (power key or volume key) until the display completely darkens;
4. After this, starting the desktop will talk about flashing.
Preparing for work:
1) Calibrate the screen. Click on the phone icon. Go to the “Calibration” section. Click on the “Recalibrate” button. The time countdown will start;
2) Without waiting for the time to expire, tap on the screen;
3) Without removing the SD card, restart the GU. A new menu will be presented to your attention. The firmware process is completed.
Firmware download
1. Stock firmware
software version with Russian locale, WiFi drivers, Russian Windows interface and keyboard
software option only for MMS from new batches, THIS SOFTWARE IS INCOMPATIBLE WITH THE FORMER 23.0.2.38 a distinctive feature of this software is the presence of the Launcher.exe file in the Windows folder, software with Russian locale drivers for WiFi and Russian Windows interface and built-in keyboard
2. Modified firmware
Firmware with altmenu ver.32 Kalina_mod_ver.23.0.2.32.rar (35.15 MB) Verified.
Russified time and date and correctly displayed Russian symbols Kalina_II_altmenu_rus_clock.rar (28.2 MB)
New menu XLada_NewMenu7.36.rar (12.09 MB)
3. REMOVING A DUMP FROM MMS
With an already flashed MMS, there is no point in taking a dump.
The dump is removed before flashing the firmware in case you have non-standard software and you destroy the device during the flashing process, then the device can be restored using the dump.
1. Download the program Attached file NDumpCE6+.rar ( 65.67 KB )
2. Unzip it onto an SD card or USB flash drive with the exFAT file system (in case the dump exceeds 4GB)
3. We go to the desktop of our MMS
4. Launch NDumpCE6.exe
5. In the program window, make sure that the “Full NAND” checkbox is checked and select “DISK1:” from the drop-down list and click “Save” to confirm
6. After the operation is completed, a file with the .img extension should appear on the SD (or USB) card, about 120 MB in size for old versions of MMS and about 4 GB for new ones, this is our dump
1. This operation is absolutely safe for your device
2. Before starting the procedure, it is best to remove everything from the USB port
Tips for beginners
The methods for flashing Japanese car radios were presented above. I would like to give some important tips to novice decoders:
- Never install a firmware program from another model, even if it is also Japanese;
- Microcircuits must be soldered evenly, in no case crookedly;
- Working with dumps is not a very good thing. It is much better to do the pouring, although it is much more difficult.
Uploading the firmware
When installing the firmware program yourself, you should do everything exactly according to the instructions. Video reviews, useful diagrams, and photo materials will also help here. In some cases, programs have to be purchased and the price for them depends on the specific car radio model.
Where can I get firmware for the Lada Priora radio and other car models?
Today it can be obtained from a technical service center, as well as downloaded on the Internet on various sites for a fee or free of charge. Be sure to check the reliability of the source, because... Many installation files in the form of archives can be compiled manually by specialists whose skill level cannot be trusted.
It is better to search on trusted forums and websites, where various firmware versions are given in lists along with instructions and descriptions of the process, as well as recommendations and tips. Be sure to study the contents of the archives, and also check the downloaded files for viruses.
Audio, video and photo
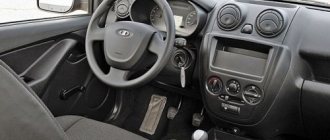
Review of the standard radio (mms) of Lada Granta, Kalina 2 and Priora (luxury)
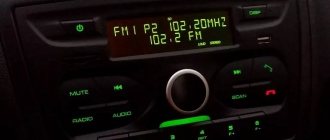
The radio tape recorder supports audio formats: MP3, WMA and WAV. While a tune is playing, the display shows information about the album, artist, and cover art (if any). You can adjust the shades of sound using the equalizer (there are 6 pre-programmed settings for Jazz, Rock, Voice, etc.). The sound quality is not bad, quite clear, without audible cuts in the highs or lows.
Read also: How to open Logan without a key video
MMS supports only one video format: WMV with a resolution of 320*240px. To play video files you will have to use a converter, for example, Xilisoft Video Converter Ultimate. It will not be possible to play a video without conversion, for example, in 720p resolution, the picture will slow down, and the sound will lag behind the video, due to the insufficiently powerful processor.
Review of MMC Lada Granta (luxury) and Lada Kalina 2 (standard)
Review of MMC Lada Kalina 2 (luxury) and Lada Priora (luxury)
The radio is capable of opening photos, supported formats: JPEG, .JPG, .JPE, .BMP, GIF, .PNG. For example, a photo with a resolution of 1400x800px and a size of 1MB will open in about 1 second, and a photo of 1978x3456px and a size of 7MB will take as much as 9 seconds.
It is worth noting that after purchasing a car, the antenna comes as a gift. You will have to install it yourself.
Grounding
How to install fog lights on Lada Granta, Kalina 2 and Priora
This point is of great importance for the reliable operation of an amplifier connected in bridge mode. The ground connection can be made directly at the installation site of the device. To do this, take a short piece of thick insulated wire. A common bare braided cable will do.
One end of the wire is connected to the negative terminal of the car amplifier, and the other is inserted between the bracket or bar securing the device and the floor of the body.
To avoid interference in the speakers, the body of the device should not be allowed to come into contact with the body of the car. Otherwise, ground loops will form, which will lead to unpleasant interference. To isolate the housing from the car body, you can place a strip of rubber under the mounting bracket.
Direct firmware mms 2190 grant
Decoding error codes for Lada Granta, Kalina 2
The firmware process is quite simple! All you need is an SD card
Note! The SD card must be formatted in FAT16. A common problem after flashing the firmware is the Lada logo freezing on the monitor of the standard multimedia system
This problem may occur as a result of:
• Failure to comply with the parameters of the required formatting system; • Old SD card model, different from SDHC.
If a problem of this kind arises, then it is necessary to check compliance with the above two points of the procedure for flashing multimedia firmware on the Lada Granta.
After the flash drive is formatted and the new software has been decided, for example, NewMenu V7.391Nitro, you need to download the new firmware NewMenu V7.391Nitro and unpack it directly onto the SD card itself.
As for the FirmWare folder, the files located in it must be moved to the root of the SD card. The root of the SD card implies placement of files in addition to other moved folders.
The copying process is complete, which means it’s time to remove the flash drive from the computer. It is worth noting the need for mandatory safe removal, which has long been known to all PC users.
An SD card with files placed on it must be inserted into the mms. After the removable media is inserted into the mms, it must be turned on. After waiting for the device to fully boot, long pressing the volume key will reboot it.
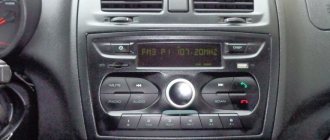
The reboot takes place in four stages, which is shown in the example of four boot lines, upon completion of which, MMS will start in normal mode (standard display menu). Just a few seconds after the standard menu, the radio will go to the altmenu.
Note! If any device is connected to the USB radio, the altmenu will not start. After removing the device, the radio must be rebooted again
The advantage of using the ATH-08 DNS USB splitter, which was mentioned at the beginning of the article, is multi-polarity. A GPS receiver and other USB devices connected to the hub will not interfere with the launch of the altmenu, but will become inactive.
How to flash
To flash the stock radio, you will need to prepare SD media with the update. The memory card is pre-formatted in accordance with the requirements of FAT16 or 32. The software distribution package downloaded from the technical support site is unpacked into the root directory of the drive.
Sequence of actions when flashing:
- Remove drives connected to the head unit ports.
- Place the memory card in the appropriate slot.
- Turn on the multimedia center, and then restart the system by pressing and holding the power button. The key is released only after an information message appears on the display confirming the start of flashing.
- Further installation of the update proceeds automatically. After the installation is complete, the standard menu will load.
- Since replacing the program resets the settings to factory settings, it is necessary to calibrate the screen.
If the user plans to further expand the capabilities of the multimedia center, then an alternative menu should be installed. The New Menu release contains a separate tab that allows you to launch the Navitel navigation system.
To ensure communication with satellites, you must purchase a 3G switching modem, which is located in the USB connector.
The Navitel program and terrain maps are recorded on a separate drive; launch is carried out through the dialog menu of the head unit.
Since the radio is connected to the car's electronics via a digital CAN bus, the display shows fuel consumption and distance traveled.
The user has the ability to program the cost of a liter of fuel, which allows him to calculate travel costs.
During operation of the updated equipment, the following problems occur:
- When trying to establish communication with satellites, a text message appears on the display indicating that the firmware executable file has failed. In this case, it is recommended to roll back the firmware to its original state, and then reinstall the new release of the program.
- Spontaneous turning off of the screen or the display switching to a uniform white glow mode, while radio broadcasting or music playback continues. You need to reset and re-configure.
- Errors when connecting iPhone smartphones. You need to restart the radio, sometimes you need to reinstall the program.
After the firmware is installed, you need to turn on the equipment and configure it. If the radio tape recorder freezes on the splash screen with the Lada logo, it is recommended to reset the settings again by disconnecting the battery from the vehicle’s on-board power supply for 5-7 minutes. If the error occurs again, you will need to reinstall the firmware using a different drive. The error also occurs during the initial boot of updated equipment with a USB drive or hard drive installed in the USB port.
Main functions and appearance features
The infotainment display is very bright and the touchscreen is sensitive to touch.
Multimedia supports three formats. It provides the opportunity to listen to audio, see the cover and artist name. You can adjust the sound quality using the equalizer. MMC Lada Granta has about six programs that perfectly optimize sound quality. Of course, such settings do not allow you to achieve ideal quality, but the music will sound clear and without interference.
MMC 2109 has the ability to view video files
Not all video formats can be viewed using multimedia. For this MMS, only WMV format is available. Therefore, you can only record video files using a converter. Higher file resolution will cause the system to freeze. The processor used in the multimedia system is quite weak. Viewing photos is a little difficult. The better the quality of the photo, the longer it takes to open.
The standard version of the MMC Lada Granta Lux allows you to use the Bluetooth installed in your mobile phone and listen to the recordings that are on it. The multimedia system can “read” flash drives, but their maximum capacity should be no more than 64 GB, as well as SD cards up to 32 GB.
Firmware selection
To update the firmware for the Lada Granta Lux radio, you can use the following software versions:
- Original. The software was created by specialists from an audio device manufacturing company commissioned by AvtoVAZ. The requirements of car manufacturers and dealerships are taken into account. The head unit has all the functions stated in the instructions. New versions of the program are not posted on the manufacturer's official website. Only basic firmware is available to Grant car owners.
- Alternative. Private companies or programmers are developing extended versions of the firmware. They are produced on the basis of basic software, which is complemented by various add-ons. When choosing such firmware, you need to take into account that installing upgraded software leads to the termination of warranty service. It is recommended that you copy the software to separate media. This will return the control unit to its original settings.
FAQ on MMC firmware.
- Take the SD card and format it to the FAT file system
- We unpack the contents of the downloaded firmware archive into the root of the SD card, after which the root of the SD card should look like this:
- We insert our SD card into the MMC, make sure that there is nothing in the USB connector of our multimedia system
- Turn on the device and long-press the “On/Off” button (for Kalina II) to start the firmware process
- The firmware process will be displayed on the screen, 4 status bars will run through:
- If the firmware is successful, the standard MMC shell will automatically load
- After the above steps, you need to calibrate the screen, which for the best accuracy can be done with a stylus or something similar (after calibration for 30 seconds, do not forget to “tap” on the screen to save the parameters)
PS There are often cases that after the firmware process the MMC hangs on the “Lada” logo, in this case the problem is most likely with the SD card, but now there is no clear opinion on what size card is best to use. If you still happen to see the “Lada” logo hanging, then first of all I advise you to try formatting the SD card into other file systems (FAT32/exFAT/FAT) and perform all the steps again. If this does not help, then try other SD cards. For information, I will say that I myself quite successfully use a 4 GB SDHC card with the FAT file system, although it is preferable to use an SD card up to 2 GB.
23.0.2.23 stock.rar (8.5 MB) - completely stock version of the software (rare), without access to the desktop, cannot be replaced by other versions
23.0.2.32 stock.rar (8.47 MB) -
completely stock version of the software
23.0.2.35 stock.rar (8.47 MB) -
completely stock version of the software (
suitable for replacing software 23.0.2.32) 23.0.2.38 stock.rar ( 9.15 MB) -
completely stock version of the software (
suitable for replacing software 23.0.2.32, 23.0.2.35) 23.0.2.38 rus_locale.rar ( 8.46 MB ) -
version of the software with Russian locale
23.0.2.38 rus_locale dll.rar ( 8 ,86 MB) -
software version with Russian locale and integrated drivers for WiFi
23.0.2.38 rus_locale dll_MUI.rar (9.09 MB) -
software version with Russian locale, drivers for WiFi and Russian interface Windows
23.0.2.38 rus_locale dll keyb.rar (8.91 MB) -
software version with Russian locale, drivers for WiFi and built-in keyboard
23.0.2.38 rus_locale dll keyb_MUI.rar (9.15 MB) -
software version with Russian locale, drivers for WiFi, Russian Windows interface and keyboard
23.1 .2.5 stock.rar (8.4 MB) -
Stock software
only for MMS with built-in navigation 23.1.2.5 cam_rus_locale dll keyb_MUI_autokill.rar (9.17 MB) -
Upgraded firmware from MMS with navigation (without StaticStore), camera operation has been patched, Added drivers for WiFi, Russian Windows interface and keyboard, Russian locale, after firmware it launches immediately on the desktop. To start the staff, you need to launch the “Home” shortcut from the desktop. To exit to the desktop, you need to restart the MMS by long pressing the power button and the MMS will turn on while on the desktop. Standard navigation only works from under the standard menu. Versions are not suitable for MMC with other factory software! Ps in some cases this firmware is not flashed and hangs on WELCOME, in this case, first flash this firmware Starter.rar (8.44 MB), and install the above mentioned one on it!
23.0.2.38 rev2.rar (8.49 MB) -
Stock software
only for MMS from new batches,
THIS SOFTWARE IS INCOMPATIBLE WITH THE PREVIOUS 23.0.2.38 A distinctive feature of this software is the presence of the Launcher.exe file in the Windows folder
23.0.2.38 rev2 rus_locale. rar (8.46 MB) -
software with Russian locale
only for MMS from new batches,
THIS SOFTWARE IS INCOMPATIBLE WITH THE FORMER 23.0.2.38 a distinctive feature of this software is the presence of the Launcher.exe file in the Windows folder
23.0.2.38 rev2 rus_locale dll keyb_MUI.rar (9.12 MB) -
software version only for MMS from new batches,
THIS SOFTWARE IS INCOMPATIBLE WITH THE PREVIOUS 23.0.2.38 distinctive feature of this software is the presence of the Launcher.exe file in the Windows folder, software with Russian locale drivers for WiFi and Russian Windows interface and built-in keyboard
Firmware for radio Kalina 2/Granta
You will need an SD card up to 4GB formatted in FAT. In the future, it will be possible to use a card in exFAT format.
Attention!
| The author is not responsible for all your actions. In addition, flashing the MMC leads to loss of warranty. |
Procedure : 1. Copy the firmware to an SD card (up to 4GB in FAT). 2. Copy files from the “FirmWare” folder to the root of the memory card. 3. Remove the flash drive from the USB port. 4. Insert the SD card into the radio. 5. Reboot the GU by long (about 15 seconds) pressing the power button (for Lada Kalina 2) or the volume button (for Lada Granta). 6. A flashing will occur (4 status bars will run through) and the radio will reboot itself into the desktop.
7. Without rebooting the radio, press the “Recalibrate” button and calibrate the screen. At the end, during the countdown, click on the screen. 8. Reboot the radio with the memory card inserted. The new menu will load.
If, after flashing the radio's firmware, the download freezes at the "Lada" logo , then most likely there is a problem with the SD card. Try formatting the memory card to other file systems (FAT32/exFAT/FAT) and flashing it again. You can also try using other SD cards, 4GB or 2GB in size.
How to return to the standard menu of the Kalina 2/Granta radio:
- Click on the “Media” icon in the alternative menu.
- Reboot the radio, first remove the SD card.
Nothing changes in the standard shell, everything remains the same.
How to change the cabin filter in Mazda 3 2008 - 2011?
Replacing the Mazda 3 cabin filter does not depend on the year of manufacture of the car and changes in the same way on models 2008, 2011, 2012. The article provides step-by-step instructions on how to change the air filter in the Mazda 3 cabin, and also contains a video showing the replacement process itself.
The cabin filter should be given the same attention as any other element of the car’s cleaning system. The health of the driver and passengers depends primarily on its cleanliness.
The purpose of the cabin filter element is to purify the air coming from the environment. Everyone knows that the air in our cities, especially megacities, is very polluted. It contains a high content of various gases, dust, plant seeds, leaves, soot and other contaminants.
Removing the standard radio in Grant Lux
The difference between grants of the luxury configuration: the MMS (multimedia system) installed from the factory. This is a 2 din device.
To remove standard acoustic grants:
- take a knife or plastic spatula to dismantle the acoustics and disconnect the decorative trims to the right and left of the radio. It is not necessary to take pictures;
- in the gap between the cover and the panel we find the head unit lock. There are two of them on both sides. Press it out with a screwdriver;
- we take out the GU on ourselves.
Everything is described in detail in the video:
Replacing the standard MMC in Grant
The process - after removing the acoustics, we install a new system.
Difficulties: you may have to finish the fastenings of the new system for VAZ ones. Plus you need the right frame. The factory MMC frame may not fit.
How to install 2 din in grant norm or standard
Everything is more complicated here. Need to:
- dismantle the center console trim - unclip the fastenings, move it forward and disconnect the buttons and heater handles;
- cut out a vertical plastic partition that will not allow you to install a 2 din device;
- file the plastic casing of the central air duct;
- try on a new acoustic unit, adjust the fastenings if necessary;
- install adapters from the delivery kit on the wiring (if required);
- install the device;
- if we leave the old center console trim: we cut out the partition, try it on, put it in place with the buttons and handles connected, adjust the decorative frame of the control unit, install it;
- if we install a new trim on the console under a 2 din device: we transfer the heater control unit and buttons from the old trim, install them in place, and put a decorative frame on the control unit.
Direct firmware mms 2190 grant
The firmware process is quite simple! All you need is an SD card
Note! The SD card must be formatted in FAT16. A common problem after flashing the firmware is the Lada logo freezing on the monitor of the standard multimedia system
This problem may occur as a result of:
• Failure to comply with the parameters of the required formatting system; • Old SD card model, different from SDHC.
If a problem of this kind arises, then it is necessary to check compliance with the above two points of the procedure for flashing multimedia firmware on the Lada Granta.
After the flash drive is formatted and the new software has been decided, for example, NewMenu V7.391Nitro, you need to download the new firmware NewMenu V7.391Nitro and unpack it directly onto the SD card itself.
As for the FirmWare folder, the files located in it must be moved to the root of the SD card. The root of the SD card implies placement of files in addition to other moved folders.
Video instructions for flashing firmware for Lada head unit
If after the firmware the radio does not boot, but freezes on the “LADA” logo :
- Make sure nothing is inserted into the USB port.
- Create an empty Explorer.txt file in the USB root. After rebooting, the WinCE desktop should load.
- Try turning off the power to the MMC (remove the battery terminal) for 5 minutes.
- Try formatting the SD card to a different file system (FAT32/exFAT/FAT) and reflash the radio again.
- Use another SD card to flash the radio firmware.
Let us remind you that we solve other problems of MMS related to its operation in this article.
Setting up GPS on a firmware MMS Lada Granta
Setting up GPS is quite simple and is done only after connecting the Globalsat BU-353S4 GPS module. The setup itself requires the following steps:
1. Go to the “Tools” menu;
2. Calling the on-screen keyboard;
3. Connecting the module itself;
4. You must enter the following path: staticstoredll232usb.dll
5. After the driver search request is displayed on the screen, you must continuously press the “OK” key. Press it until the request disappears from the screen.
If all five GPS settings are completed without errors, then you need to go directly to setting up the navigation software. Directly in the navigation program you need to select the COM5 port and the port speed of 4800bps.
After carrying out such manipulations, everything should work
Please note that Navitel from the archive is already configured
As a conclusion, we must pay tribute to the developers of this firmware, namely the guys from the grant club, who, in turn, developed the interface and additional software to improve the comfort and meet the needs of Lada Granta owners.
Nuances of multimedia firmware Grants (2190)
It is quite easy to carry out the firmware itself when installing the mms 2190 firmware. To do this, it will be necessary to use an SD card.
Among the common flaws that occur after the dashboard firmware is installed, even if it is the latest version, is the Lada logo freezing on the display of the head unit.
This moment can be provoked by the following factors:
- failure to comply with required formatting principles;
- the presence of an outdated version of the SD card that differs from “SDHC”.
After successfully formatting the card and selecting software (for example, “New Menu V7.391 Nitro”), you will need to acquire the latest firmware and unpack the product onto a previously prepared SD media.
Regarding the “Firm Ware” folder, note: the files located in it will need to be redirected to the root directory of the card itself. Upon completion of the copying process, disconnect the flash card from the PC, not forgetting about the safe removal technique.
Now we confidently insert the SD card with the prepared files present on it directly into the MMC. Then turn on the head unit. We wait for the full download to complete and by long pressing the volume button, we reboot.
The act of rebooting is characterized by four stages, the display of which is implemented in 4 lines of process status. After filling out these lines, the device starts in the usual mode, as evidenced by the appearance of the corresponding original menu. After a few seconds, the device transitions to the altmenu.
The USB splitter “DNS ATH-08” has acquired a significant advantage – multi-polarity. The GPS receiver and other USB modules connected to the “head” are combined with the altmenu, but become inactive.
After the MMS 2190 firmware is completed on a Lada Granta car, its display displays a new type of desktop, namely “Wince”. The 4 files previously mentioned and copied into the depths of the root directory of the map are “responsible” for the presence of the interface on the desktop.
The subsequent manipulation is associated with the need to configure new software in the standard multimedia device of the Lada Granta car. For these purposes, click the “Start” button, after which we follow the following route: “Start\Setting\Control Panel”. Sometimes owners complain about the slowness of the “Control Panel” opening process, but this phenomenon disappears after rebooting the MMC in forced mode.
When the control panel is open, in its interface click on the “Stylus/Calibration” symbol. With this action, the user of the new software gets the opportunity to calibrate the touch screen for response accuracy.
Upon completion of the simple calibration procedure, a timer appears; you should not wait for the completion of the counting process. Feel free to click on the screen.
Now the long-awaited time has come for the forced reboot process. Long and holding pressure on the volume key (10 seconds or more) allows you to implement this process in MMC. At this moment, the removable media, which contains the new software, continues to reside in the connector of the head unit of the Lada Granta car.
Having completed the reboot action, the device will first display the standard menu, and then, similar to the preparation procedure, the altmenu. If you need to return to the “native” menu, you should hold down the “Native” key.
The process of rebooting the device, after the dashboard firmware has been flashed, requires its connection via a USB splitter of the specified model with the Globalsat BU-353S4 GPS wave receiver. If there is none, then upon completion of the process itself the “head” will display the normal menu mode on the display.
Such common settings as sound, as well as audio or video, are present in any multimedia device in the domestic Lada Granta car.
“NewMenu V7.391Nitro” needs a manual way to install the indicated options, which will require:
- log in to the “soft/radio” folder;
- resort to activating the “start.exe” file.
The procedure will agree to associate present files with the extensions “exe” and “ahk”. This manipulation is quite important and allows you to achieve stable functionality of the MMC, which is used to flash the dashboard firmware.
Work order
The process itself is very simple. To use such a card, you must first format it in FAT16. During the flashing procedure, the Lada logo may freeze, this happens for the following reasons:
- Outdated map;
- The card was formatted in the wrong system as required.
Therefore, the procedure is simple, but it must be treated very carefully. You can download the new firmware on the official Lada website.
We connect the card to the multimedia system. Then we turn on the standard system itself. We wait for the system to start and then reboot the radio by pressing the volume key.
The program must go through four stages. Once enabled, you will see an alternative menu. This ends the preparatory stage. If everything is correct, you will see working Windows. Then all that remains is to install the software. Go to the folders Start – Setting – Control Panel.
If you experience freezing when moving from folder to folder, then simply reboot the system. Going to the panel, open the Stylus – Calibration icon. This menu will help you calibrate your screen.
Next, reboot the system again, press the volume key and hold for about ten seconds.
After turning it on again, open the Soft – radio folder and run the installation file.
These actions will help the system recognize files and stabilize the operation of your media system, as well as adjust the equalizer when you listen to the radio.
Then we set up a navigator if you need one. Go to the tools, connect the module, specify the path Staticstore\dll2usb.dll. After finishing the search, press OK, and continue to press until the menu disappears from the display.
Completion
All. You have flashed your multimedia system, and now it will work stably and efficiently. You can also return your standard operating system.
When installing a new operating system, you should use NewMenu V7.391 Nitro to work with the navigator. Today this is the newest and highest quality system for use in Lada Granta multimedia systems.
How to set up "GPS" on the firmware version of the multimedia?
Carrying out this action will not take much effort. The procedure involves preliminary switching with the GPS module and consists of the following algorithm of actions:
- go to the corresponding “Tools” menu;
- activating the display keyboard;
- direct module switching;
- route instructions: “staticstoredll232usb.dll”;
- continuously pressing the “OK” key after the prompt regarding driver selection is displayed on the screen.
If the indicated steps are completed correctly, then we proceed to the manipulations of setting up the navigation software. In the program, we select the “COM 5” port and the corresponding speed – 4800 bps.
Upon completion of the entire list of manipulations, we observe the operation of the system
Please pay attention to the presence of the configured Navitel program
Firmware for radio
It should be taken into account that the FirmWare folder and the files that are in it should be located in the root of the SD card. After the files needed for the firmware have been written, the card should be removed from the computer. You need to remove the card from the computer correctly, through a special safe removal menu. If this is not done, the card may fail.
You need to connect the SD card via USB to the multimedia system. Then you need to enable MMS. After the software starts, reboot the Lada Grant's head unit by pressing the volume key.
There are four steps that the reboot program must complete. After the MMC turns on in normal mode, an alternative menu will appear on the radio screen.
This completes the preparatory process for the firmware. If everything went as it should, a new WinCE desktop will appear. Now all that remains is to configure the new software that you installed on the Lada Grant's head unit. This is done by clicking the Start button, after which you need to go to the StartSettingControl Panel.
Sometimes there is a slight freeze when opening the control panel. You can get rid of this by performing a forced reboot of the multimedia system. Once the panel opens, click on the Stylus/Calibration icon - this will allow you to calibrate the screen sensor. For the most accurate calibration, you should use a stylus. If everything is in order, a timer will appear. You don't have to wait until the countdown ends; you can tap on the screen.
Now you need to do a forced reboot. You must press and hold the volume key for at least 10 seconds. One point to take into account: the flash drive with the software must be connected to the multimedia system.
It should be noted that during the reboot, the ATH-08 GPS USB DNS splitter with the Globalsat BU-353S4 receiver must be active. In order to turn on the standard menu, press the “standard” key. In order to be able to customize the menus needed to configure the radio, audio, and video, you will need to install the configuration module. This is done manually.
- You need to open the soft/radio folder.
- And then run start.exe.
This will allow the system to recognize the files that are installed on it. Installing these extensions will allow you to achieve stable operation of the multimedia system, as well as complete the equalizer settings while you listen to the radio.
How is GPS configured after flashing MMC Lada Granta firmware? In order to set up GPS, you need to take a few simple steps. This is necessary so that the Globalsat BU-353S4 module can fully perform its functions.
- You need to use the “Tools” item.
- Go to the screen keyboard menu.
- The module must be connected.
- Specify the path staticstoredll2usb.dll.
- After this, information about searching for a driver will appear, then you need to click “OK”.
- You need to press it until the menu disappears from the display.
After the work has been done, you can fully enjoy the capabilities of the Lada Granta multimedia system.
voice
Article rating
Service menu and WinCE desktop on MMC Lada Vesta
It is no secret that almost any complex technical equipment has a service menu, which is used by specialists in setting up and repairing these devices. The average ordinary user is most often not told how to access such a menu, since it is believed that he has nothing to do there, but this is absolutely not true, and even the most ordinary user can find interesting functions in the service menu. So, for example, we recently talked about how, using a similar menu, you can make it possible to view video files on MMC while the car is moving. Entering the service menu is not as difficult as it might seem at first glance.
The first step is to press the “i” key, which is located in the lower left corner of the main menu of the multimedia system. After which a small information window will open (see photo above), it is with this window that you need to interact to get to the service menu. To do this, click on the corners of the window clockwise in the following sequence: top left, top right, bottom right and bottom left.
If the login procedure has been completed correctly, a service menu will appear on the screen of your multimedia system (see photo above) with which many hidden functions can be opened, from here you can run several system tests, as well as find out information that is hidden in the main menu. You can play with the functionality of this menu for a few minutes, but there is nothing useful for the user here, so we move on.
In order to get to the WindowsCE desktop, you must do the following: From the system menu, press the “System status” button, after which another information menu with system statuses will open (see photo above), in this menu, just like last time, clockwise press the display several times, but now you don’t need to press to the edges of the window (which doesn’t exist in principle), and to the edges of the display itself, while retreating about one centimeter from the corners, the sequence is the same: upper left, upper right, lower right and lower left.
The photo above shows approximate places where you need to click to open the WinCE desktop, in addition, you can read the detailed video instructions on this:
After these steps, a Windows line will appear at the bottom of your display, with which you can launch many different programs and make owning a Lada Vesta car more comfortable.
Main functions and appearance features
The infotainment display is very bright and the touchscreen is sensitive to touch.
Multimedia supports three formats. It provides the opportunity to listen to audio, see the cover and artist name. You can adjust the sound quality using the equalizer. MMC Lada Granta has about six programs that perfectly optimize sound quality. Of course, such settings do not allow you to achieve ideal quality, but the music will sound clear and without interference.
MMC 2109 has the ability to view video files
Not all video formats can be viewed using multimedia. For this MMS, only WMV format is available. Therefore, you can only record video files using a converter. Higher file resolution will cause the system to freeze. The processor used in the multimedia system is quite weak. Viewing photos is a little difficult. The better the quality of the photo, the longer it takes to open.
How can you tell if your car is faulty?
There is a special lamp on the instrument panel with the inscription CHECK ENGINE. When you turn on the ignition, it lights up, and until you start the engine, a special program reads data from all systems and components of the car, thus transmitting data to the on-board computer to identify faults.
After you start the engine, the lamp should go out, but if it stays on for another 10 seconds, it means that some problems have been identified and error codes have been entered into the on-board computer programs. Communication with the controller is carried out using the diagnostic block.
CHECK ENGINE control signal on the instrument panel of a VAZ 2110