I bought a new MMS inexpensively for 2,500 rubles, they shared the phone number on the site. I wanted a new one with navigation, but the price kills all desire to buy it.
On the right side of the radio there is a USB connector, which is designed to connect:
1. USB Flash card (USB 2.0 and 3.0 up to 64 GB); 2.USB Flash player with a memory capacity of at least 1024 MB; 3.USB HDD with FAT32 file system; 4.Mobile phone (only in charging mode).
On the left side of the radio there is a slot for SD cards. SD Memory Card Slot: Supports SD, SDHC cards of 32 x 24 x 2.1mm size. SDHC up to 32 GB, SD up to 32 GB.
The file allocation table (FAT) of the connected device must be version FAT16 (2 GB). The maximum number of primary partitions should be no more than 4. It is advisable that the directory tree of the connected device have no more than eight levels. There should be no more than 1000 files in one directory.
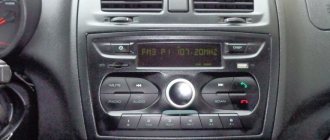
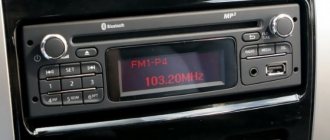
While playing files, the display shows all the necessary information about the track. The playback source is selected using the AUDIO button on the left side of the radio. The radio has equalizer presets (JAZZ, POP, CLASSICAL, VOCAL and USER). The range of timbre adjustments for bass, treble, balance, and front/rear balance is from “‒7” to “+7” units.
The radio has Bluetooth and Handsfree functions. You can connect your phone by long pressing the handset button. When pairing on the phone, the inscription “MMC12” should appear in the list of found devices, the default password is “0000”. After successful connection, the BT icon will appear on the display of the radio. There is no phone book on the Kalina 2 and Grant radio, but it is possible to save up to 6 numbers in the radio’s memory. The audio system also remembers the last outgoing and incoming calls. The manufacturer does not guarantee operation of a phone in Handsfree mode that uses two or more SIM cards.
The radio allows you to listen to audio files from your mobile phone. To do this, you need to connect your phone to the radio via Bluetooth and launch the player on your phone. The manufacturer states that certain cell phone models may not work correctly with this radio, but this is not a sign of a malfunction.
The Kalina 2 and Granta radio has its own battery, which allows you to save user settings after disconnecting the battery for 10 days.
Supported Audio Formats
The audio system supports audio formats (MP3. With constant or variable bit rate, bit rate 32–320 kb/s and sampling rate 44.1/48 kHz; WMA. (without DRM protection). With constant bit rate and bit rate 10–320 kb/s , with variable bitrate and transmission speed 32–192 kb/sec).
Video review of the radio, the video is not mine.
The standard radio for Kalina 2 and Grant has all the necessary functions for a modern car. The audio system works flawlessly, there are no freezes, all operations are performed instantly. The build quality is at a high level. The only disadvantage is the lack of a CD/DVD drive, but nowadays discs are becoming a thing of the past. The standard radio of the Lada Kalina 2 and Granta without an LCD display is a good alternative for those who find physical buttons more convenient than a sensor.
The standard radio for the Lada Granta model is an improved device, the design basis of which is the “Sirf Atlas” processor, supplied by the well-known. In addition to the presence of a radio receiver, the device is equipped with a large touch screen and has the ability to connect an external source via a video input by replacing the software and performing firmware. However, in the basic configuration of a domestic car there is only a push-button radio. Many owners are not happy with this fact and want to connect a more modern radio. This article will tell you how to install a radio.
What is the functionality of the radio?
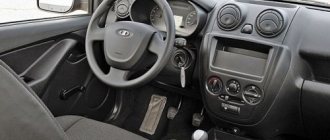
The fact that there is a standard radio in the domestic car Lada Granta Lux and in Kalina-2, and the devices are constantly being improved. A special feature of the radio is that it fits deep into the standard place, which is accompanied by minor difficulties when removing it. The large monochrome display displays a user-friendly interface.
Reviews from owners indicate that the software has an operating system based on the legendary Windows, the potential capabilities of which are increased by firmware. It is possible to create a desktop in the image of a household computer and connect to the Internet. To do this, you should use a 3g modem.
If you need to enter data, manipulation can be done using the on-screen keyboard. Own memory is not enough, so to meet the ever-growing demands of owners, it is recommended to use an SD card as a storage medium. This drawback is included in the list of reasons, due to the relevance of which, most motorists prefer choosing a foreign vehicle.
A convenient option for connecting with a mobile phone is available for the Lada Granta radio. This allows you to make calls without having to take your phone out of your pocket. You only need to activate a specific button on the device display. This is a kind of extended “hands-free” function.
The radio receiver is also not without pleasant features. If you program a news wave, the device will automatically switch to it from any other channel when a program on the designated topic begins broadcasting.
How to install a head unit on a car with basic equipment?
Since the Lada Granta base is not equipped with musical equipment, and only a push-button radio is installed on board, the question justifiably arises: how is the standard radio installed in the cabin? In reality, this is a simpler procedure than it might seem at first. The occurrence of problems during installation is excluded, since a seat is already provided for the standard device on the Lada Granta panel, regardless of the level of equipment.
You can purchase the device in a retail chain or on an Internet site, where you can actually find an improved version, equipped with a navigation system with a detailed map of the Russian Federation. Don't forget to buy an additional luxury panel. Although multimedia will fit into the standard panel without any problems, the appearance will not be so beautiful. The price for this device reaches 2.5 thousand rubles.
Next comes the installation of the radio. The design feature of the landing niche in the Grants panel does not provide for the need for additional wiring.
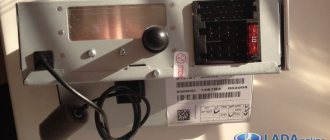
- The first step is to remove the plastic pocket in the audio system opening. This is done using a flat-profile screwdriver. There is access to several connectors that involve connecting a radio.
- We remove the frame from the head unit and fix it at the location of the pocket.
- Next we move on to the connection. To do this, connect a couple of connectors and install the device in the landing niche.
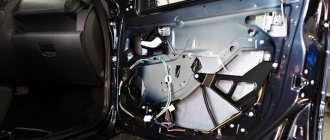
- After this, you can install the speakers in the front door cards. The procedure involves the need to dismantle door trims with unlocking handles and adjust the position of the glass. Using a special template, we begin cutting out the mounting holes.
We attach the speakers to the cards using self-tapping screws. We insert the cables from the speakers into the input connectors intended for this on the rear panel of the car radio. We install the decorative door panels in their original places and evaluate the sound provided by the standard head unit. Thus, the radio is connected.
Attention! We carry out all manipulations with the battery disconnected from the on-board network!
How to perform a flashing?
The stock firmware for the Lada Granta radio has become very popular among car enthusiasts. This does not require installation of a new type of radio. This function does not have any effect on the sound quality, but it allows you to provide the interface with additional options that are not available for the standard version of the radio. For example, you can generate a convenient touch keyboard that allows you to communicate with the Internet.
To flash stock multimedia, you should get an SD card formatted in “FAT” or “exFAT”.
- First, download the firmware from the network. It’s easier to find her among the “Grantavod” members of the forum.
- After downloading, we copy the necessary files to the root directory of the card itself, having previously saved them on a flash drive.
- We insert the card into the corresponding slot of the car radio and reboot it.
- After filling out the download status scale, we use the updated interface with expanded capabilities.
To resume options: “Radio” and “Bluetooth”, remove the SD card and reboot the system again.
Automotive forums will delight with the developments of many craftsmen who, as a result of experiments, offer firmware versions with the presence of updated radio software and other functions in the menu. There is an opinion that these “specialists” have learned the secret of reading and decoding data from the CAN bus combined with the MMC. Sometimes the firmware requires you to calibrate the screen before communicating with an alternative interface.
Firmware for radio Kalina 2/Granta
You will need an SD card up to 4GB formatted in FAT. In the future, it will be possible to use a card in exFAT format.
| The author is not responsible for all your actions. In addition, flashing the MMC leads to loss of warranty. |
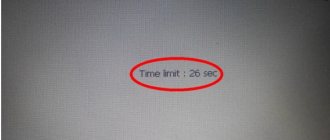
Procedure: 1. Copy the firmware to an SD card (up to 4GB in FAT). 2. Copy files from the “FirmWare” folder to the root of the memory card. 3. Remove the flash drive from the USB port. 4. Insert the SD card into the radio. 5. Reboot the GU by long (about 15 seconds) pressing the power button (for LADA Kalina 2) or the volume button (for LADA Granta). 6. There will be a flashing (4 bar statuses will run) and the radio
It will reboot itself to the desktop.
Without rebooting the radio, press the “Recalibrate” button and calibrate the screen. At the end, during the countdown, click on the screen.8. Reboot the radio with the memory card inserted. The new menu will load.
If, after flashing the radio, the download freezes at the “Lada” logo, then most likely there is a problem with the SD card. Try formatting the memory card to other file systems (FAT32/exFAT/FAT) and flashing it again. You can also try using other SD cards, 4GB or 2GB in size.
How to return to the standard menu of the Kalina 2/Granta radio:
- Click on the “Media” icon in the alternative menu.
- Reboot the radio, first remove the SD card.
Nothing changes in the standard shell, everything remains the same.
How to connect an amplifier and subwoofer?
In addition to the need to connect a radio, many people want to connect a subwoofer and amplifier. Not every Lada Granta owner will be able to enjoy the sound generated by the standard radio. This fact forces car audiophiles to lean toward the additional installation of high-quality audio amplifiers and subwoofers. The goal is known - great sound.
To install the indicated devices yourself, we resort to the following simple manipulations.
- First, we dismantle the lower part of the center console.
- We remove the panel and find mini ISO connectors.
- We insert the plug of the previously purchased adapter into one of these sockets (indicated in yellow). We do not touch the blue and green cables. Owners who have already performed this procedure note the following - we can no longer use standard wires, so we resort to the “mini iso” connector.
- Next, we connect a special fuse to the battery, having previously connected the cable from the amplifier (marked in red) to it.
- The subwoofer in combination with the loudspeakers is connected to the amplifier. We connect the battery ground wire (black) to the LADA Granta body and the corresponding terminal on the amplifier.
- After the measures have been taken, we return the panel and radio to their place.
- Enjoy the updated and high-quality sound.
How to remove a LADA Granta luxury radio
I want to share with you about installing the Luxury MultiMedia System.
READ VAZ 2107 knocking in the front suspension
Personally, I purchased it secondhand from an ad on Avito. I was looking for a similar option for a long time, and finally came across a valid ad. The seller decided to charge his luxury Granta with high-quality music; naturally, the standard MMC Granta is not suitable for these purposes. He decided to sell it along with the center console and install the Norm console under one DIN. (With the condition that the buyer replaces his luxury one with a standard one). Everything suited me. We agreed, met and exchanged consoles on the spot. If you also change consoles, do not forget to change the heater control unit. To do this, you need to unscrew two screws.
Before installation, you need to prepare four Zhiguli clips and four self-tapping screws with a flat head, 16 mm long. And also a USB extension cable approximately 60-100 cm long (if purchased without it)
This means everything is in order and step by step: First of all, you need to remove the “Normovskaya” central console of the panel. To do this, first pull out the shelf - a plug, under the tape recorder. To pull it out easily, you need to squeeze it with your fingers by the protrusions in the middle on both sides and pull it towards you. Behind this plug there will be two audio connectors. By pressing the latches of these connectors, we pull them out. Who already had a radio
, remove it and disconnect it. Then we pull out the air temperature selection knob, the air flow control knob and the air intake control lever. Leave the stove fan handle in place. Next, just carefully pull the entire console towards you. It is held on by iron clips, which can be easily released with force. After this, we move the console a little towards ourselves and begin to disconnect the connectors. We start with the connectors for the heating and air conditioner buttons (who has them), and two small connectors for the backlight of the stove control unit. Next is the round heater fan connector. To pull it out, you need to press the latch. And remove another alarm connector. Remove the console from the panel and place it to the side. We see this picture:
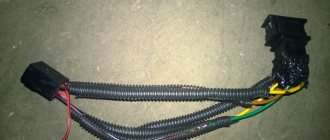
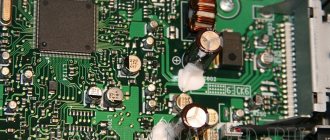
While I had access, I immediately wrapped all the wires with modelin. They dangle a lot in the connectors and make a lot of noise. By the way, after gluing, the small tapping noises that used to bother me disappeared. We insert the prepared clips into the grooves. (marked in red in the photo). We take out the antenna cable (if you haven’t already). It is located under the carpet at the passenger's feet, in the very corner of the center console. We dive in there with our hand, take it out and drag it through the panel into a special hole in the panel. The picture shows where and which cable should protrude. If you route it differently, you can pinch the wiring with the radio.
Then we lay out the USB cable. There is a hole for it in the glove compartment. I did it like this:
Then we try on the luxury console complete with MMC. We connect all connectors in the reverse order. We connect the MMC with two ISO connectors, an antenna cable and a USB connector. We put the console in place. Fasten with four self-tapping screws.
All that remains is to snap on the second silver part of the luxury console. If in the future there is a need to remove the console, remember the location of the latches on this plastic.
That's all. I hope this information will help someone in their endeavors. Good luck and success!
The topic lays out and discusses issues related to modification, firmware and installation/configuration of software on: Lada GRANTA and Lada KALINA-2/Priora
Attention. You CANNOT flash MMS with software version 23.02.27 or 21.1.2.39. Before flashing MMS firmware. check the software version, consult the forum about this, do not rush to kill your device. Perform all operations on MMS firmware only at your own peril and risk! Which leads to the loss of the manufacturer's warranty on the MMC.
- Exit to desktop
- Remove everything from USB
- Tap on the NewMenu Uninstall shortcut
- Restart the radio (press for 15 seconds)
- Remove everything from StaticStore
- Install new version (menu)
- Connect everything to USB (it is advisable to connect the GPS antenna first)
- Format an SD card up to 4 GB to FAT
- Copy the files for firmware to the root of the SD card: Chain.bin, chain.lst, NK.bin, TINYNK.bin.
- Remove everything from the USB radio.
- Reboot the device by long (about 15 seconds) pressing the power button (Kalina 2/Priora) or volume button (Granta)
- After flashing the firmware (we ran through the 4th status bar), the device will reboot itself into the desktop.
- Take a stylus (toothpick, key, etc.)
- Under no circumstances should we reboot the device! Go to: Start/Settings/Control Panel/Stilus/ to the Calibration/Recalibrate tab. We calibrate the screen and tap on the screen during the countdown. (or for beginners: Tap on the Home icon on the desktop, wait for the standard menu to load. Go to settings. screen. Screen calibration, calibrate without forgetting to tap on the screen during the countdown. Next, press the settings icon with your finger, without removing your finger, wait until it starts Desktop.)
- We reboot the device, the SD card must be inserted.
- The device is flashed. The SD card can be removed.
Preparing an SD card and flashing MMS Kalina II/Proira/Granta
Post has been edited by Pearl - 04/16/15, 09:53
[/color]
[/size] [/color]
[/size] [/color] [/size]
[/color]
[/size][/color]
[/size][/left] if you already have several “half-live” MMS software after the firmware[/color][/size][/left]
Stock firmware ver.35- Stock firmware ver .32-
READ How to change the antenna on a Ford Focus 2
Installation: 1., copy the contents to the card. 2. Copy files from the “FirmWare” folder. 3. Reboot the device for a long time (about 15 seconds) or 4. After flashing the firmware (we ran through the status bars, there are 4 of them), the device will reboot itself into the desktop. 5. Press: calibrate the screen and don’t forget to tap on the screen during the countdown. 6. Reboot the device, the SD card must be inserted.
The altmenu will load. If you remove the SD card and reboot the device, the standard shell will load, you can also get into it from the alt menu, but you can only go back to the altmenu by rebooting the device with the SD card inserted. , and then everything can be copied to a card formatted in exFAT, with a larger capacity.
If the radio tape recorder dangles in the slide and rattles
It happens that the acoustics hold weakly in the sled, although they sit firmly. Solving the problem:
- Using the keys for dismantling (included with the control unit), remove the radio;
- We take a small piece of vibroplast (resin-based foil) and glue it onto the slide from the inside, top or bottom - this way we will ensure that the tape recorder is completely pressed against the slide without unnecessary vibrations;
- Once again, use a screwdriver to press down all the fastenings of the slide: some might have been under-tightened;
- We put the acoustics back and check - all unnecessary vibrations during shaking should disappear.
Vibroplast helps not only with soundproofing a car.
Other features of standard multimedia
The general feelings of owners who have a standard radio in their car are positive. The display is informative and easy to read. The touch keyboard functions flawlessly. The standard radio itself is capable of high-quality reproduction of sound programs from micro-SD cards. However, using USB format media can be challenging.
The device also has some nice options:
- equalizer;
- activated replay mode;
- random sequence of playing tracks (“Random”).
Multimedia LADA Granta is capable of supporting images in 5 formats, which allows you to view photos without any problems. But not everyone can make the correct settings for the “phone” option on the first try. This function will be convenient for a busy owner who is forced to communicate by telephone even while on the road.
Choosing the right radio size
We carry out installation either independently or by contacting specialists at the service center. In the second case, the service is paid.
By default, all VAZ and Lada models are equipped with a 1-DIN radio. The opening dimensions correspond to: 180 x 50 mm. This is an old standardization that has been in force since the times of the USSR. Modern audio modules can be purchased complete with a pre-installed LCD display. The size of the opening must comply with the standard: 180 x 100 mm, that is, doubled in height. Size marking: 2-DIN.
To install the radio in the Granta liftback, cut out the top pocket, remove the plastic, and install the assembled module. For a beginner, the process will seem somewhat complicated, so strictly follow the instructions.
Video - Installing acoustics in Granta Liftback
Tools:
- Open-end wrench 10 mm
- Small flat screwdriver
- Knife (if necessary)
- Soldering iron (if necessary)
Parts and consumables:
Notes:
Initially, in this car model, the calculation is made for a 1-DIN radio. If the owner wants to install another type, a newer one, for example 2-DIN, he will need to start sawing the partitions in the console itself. And if the size is not suitable, then a suitable cantilever frame will have to be cut into the panel. This is much more complex than the first type of installation listed. In the second option, it is better to entrust the installation to a specialist, because there is a high risk of damaging the interior trim.
Here is a description of how to install a 1-DIN radio.
1. Remove the negative terminal from the battery.
How to connect a Lada Granta head unit with a 1-DIN connector
- We carry out the work inside the car, having previously disconnected the terminals from the battery in order to prevent a short circuit in the circuit;
- We remove the plastic partition - pocket. It covers the hole, preventing objects from falling inside the torpedo. We use a flat-head screwdriver to unscrew the bolts;
- Two ISO plugs are visible behind the partition body. These types of wire terminals are manufactured in accordance with international automotive standards. More than 98% of all automakers use the standard when equipping technical equipment;
- We remove the metal frame - the block - from the body of the audio unit and place it in the cavity of the torpedo.
- We first connect the blocks with wires. Fitting into the connectors is accompanied by a characteristic click;
- We insert the module into the metal frame.
Note to the driver. Incorrect terminal connections result in a short circuit. To ensure the safety of the connection process, the connectors have guides that allow you to install the block in only one position.
How to install 2 din in grant norm or standard
- dismantle the center console trim - unclip the fastenings, move it forward and disconnect the buttons and heater handles;
- cut out a vertical plastic partition that will not allow you to install a 2 din device;
- file the plastic casing of the central air duct;
- try on a new acoustic unit, adjust the fastenings if necessary;
- install adapters from the delivery kit on the wiring (if required);
- install the device;
- if we leave the old center console trim: we cut out the partition, try it on, put it in place with the buttons and handles connected, adjust the decorative frame of the control unit, install it;
- if we put a new trim on the console under a 2 din device: replace the heater control unit and buttons from the old trim, install it in place, put a decorative frame on the control unit.
Common mistakes when installing a standard Granta liftback radio with your own hands
- when connecting additional terminals, manual twisting of wires is used instead of classical soldering;
- regular insulating tape is used on connections instead of heat-resistant sleeves;
- Incorrect connection of a large number of speakers on one branch leads to overload, heating, and short circuit.
Installing a sound amplifier
By liftback radio amplifier we mean:
- crossover installation;
- subwoofer installation.
The choice is up to the owner of the Lada Grant, as different goals are pursued: cleanliness, sound quality. Obviously, the cost of equipment will also increase. Crossovers are installed in the cavity of the glove box, since their dimensions do not exceed 100 x 150 mm and are rectangular in shape. Subwoofers are fixed in the luggage compartment. Equipment requires more space.
Connection of an external device is carried out strictly in accordance with the operating instructions:
- brown wire color: responsible for the operation of the system;
- black: power supply to equipment;
- yellow: audio module activation;
- red: settings and programming.
At the very end, do not forget to connect a red wire with a pre-installed fuse to the positive terminal of the battery. It directly connects the amplifier (subwoofer) to the current source.
Installing two speakers in the front doors
- dismantle the door card, handle, control unit;
- We compare the standard cutouts for the speakers with the actual dimensions. If necessary, expand with a file or fine sandpaper. It is strictly forbidden to use cutting objects, as there is a high risk of damage to the plastic of the door card;
- we check for the absence of roughness in the hole, install the speaker, fix it, connect the standard terminals with wiring;
- we check the operation of the speaker, install the door card, and fix the metal grille to protect the speaker from mechanical damage.
Removing the standard radio in Grant Lux
The difference between grants of the luxury configuration: the MMS (multimedia system) installed from the factory. This is a 2 din device.
To remove standard acoustic grants :
Everything is described in detail in the video:
Replacing the standard MMC in Grant
The process - after removing the acoustics, we install a new system.
Difficulties : you may have to finish the fastenings of the new system for VAZ ones. Plus you need the right frame. The factory MMC frame may not fit.
Have you bought a new 2 din radio, but there is no frame for sale? You can do it yourself . Example at the link.
Characteristics of the standard radio "Lada Grants Liftback"
The radio for the Lada Granta liftback is supplied as standard equipment. Product in 2-DIM format (100 x 180 mm).
In addition to the classic radio, there is a built-in card reader, Bluetooth, and a USB output for connecting flash drives. The only disadvantage of the audio module is that it is a push-button type. Which is not to the liking of many car enthusiasts, which is why they install more modern modifications.
During the startup of the audio module, a greeting from Lada Kalina 2 is displayed. This is not an error, as many owners think. This type of audio was originally developed for the Lada Kalina 2. Obviously, the manufacturer did not change anything and started production for the Granta. Installation/disassembly of the module is somewhat complicated due to the tight fit, so be prepared for this.
It is based on the Windows operating system, which allows you to connect to the World Wide Web via a 3G modem. There is no such option out of the box; you first need to reflash the device, but more on that later.
Via Bluetooth, it is possible to connect to a phone, and the “hands-free” option is activated. Which is very convenient and practical when driving. The owners were also pleased with the stock radio. At first glance it looks simple, but it turns out not to be so. Available programming function for a specific channel on a given topic.
For example, as soon as a news broadcast comes on, the radio automatically switches to the programmed channel. The audio module reads the following formats: MP3, WMA, WAV, WMV. Control of the standard radio of the Lada Granta liftback is accessible and intuitive, even for an inexperienced owner.
Installing a radio on the Lada Granta
In a modern car, not only the engine and chassis are of decisive importance, which allows us to judge the comfort of movement.
At the time of the new era of multimedia technologies, it is becoming extremely important to provide the car with high-quality sound and image, providing the driver and passengers with a level of comfort that will allow them to fully enjoy the journey in the vehicle.
New creations of the Volga Automobile Plant make us talk about them as modern and high-tech vehicles, not deprived of the latest achievements of science and technology.
How to flash the firmware
- Buy an SD card, format it in FAT, exFAT format;
- We download the firmware for free on the manufacturer’s official website;
- We save the data in the root directory of the SD card;
- We insert the SD card into the slot on the radio, start it, wait for the update to finish;
- Turn on and off the module;
- We customize the new interface for ourselves.
If the firmware is installed incorrectly, additional screen calibration using the CAN bus will be required. It is impossible to do this yourself, only in a service station. After successful flashing, the following is available:
- graphic equalizer;
- viewing photos, pictures, videos;
- improved sound quality;
- possibility of installing a navigation system.
Disadvantages of a standard radio
- Outdated firmware from the “box”;
- Not all options are initially available;
- The need for periodic software updates;
- Push-button interface.
Connection to a vehicle where there is no player (or installed incorrectly)
Are you going to find out how to connect a Toyota radio? The main difficulty is that you will have to pull the wires yourself:
- Stretch the permanent one from the battery with a 2.5-4 mm wire. Don't forget to install a 10-15 A fuse.
- Find the cord under the panel where the multimeter will detect when the ignition is turned on. It is from there that you need to pull the cable to the audio device responsible for turning it on. The same guide is on how to connect a Honda radio.
- Lay the ground cord and secure it to the car body.
- Place the speakers in the standard zones, lay the wires, remembering the polarity.
- Attach the antenna.
Accordingly, this is the answer to the request “How to connect a Renault radio.”
- Make sure nothing is inserted into the USB port.
- Create an empty Explorer.txt file in the USB root. After rebooting, the WinCE desktop should load.
- Try turning off the power to the MMC (remove the battery terminal) for 5 minutes.
- Try formatting the SD card to a different file system (FAT32/exFAT/FAT) and reflash the radio again.
- Use another SD card to flash the radio firmware.
Let us remind you that we solve other problems of MMS related to its operation in this article.
I decided to flash a standard radio, after reading a couple of forums and discussions, it became clear that this process is not at all complicated. So, for those who are interested, I will download both the firmware and maps for navigation. So the installation process: Perform all operations on MMC firmware only at your own peril and risk! Which leads to loss of the manufacturer's warranty on MMC! Attention: before flashing the MMS firmware, check the software version, consult the forum about this, do not rush to kill your device! You CANNOT flash MMC with software version 23.02.27 or 21.1.2.39 Firmware instructions for those who do not have access to the WinCE desktop:
READ Ford Focus 1 radio does not work
Lada Granta - review of the standard multimedia system.
Take an SD card of maximum 4GB and format it to FAT (default). Copy files from the FirmWare folder to the root of the SD card: Chain.bin, chain.lst, NK.bin, TINYNK.bin. (that is, we simply dump these files onto SD without a folder). You can download the archive with the files here: Hybrid firmware with Russian locale v3438 for Grants from TarLink yadi.sk/d/ga_Fi4xTdsVof Firmware with Russian locale ver.38 for Kalina/Priors from TarLink yadi.sk/d/9Is1u7bwdsVu3 Then, with the radio turned on, insert the SD card into the slot and reboot the radio by pressing the power button (keep the button pressed until signs of life appear on the screen =)). The firmware process will begin and we wait. When the radio
flashed, it will restart automatically, then you can remove the SD card. Now you need to calibrate the screen (Settings - Screen - Calibration) and don’t forget after calibration, when the 30-second countdown begins, tap on the screen! You can then exit to the desktop by long pressing “Settings”. Most importantly, do not forget to remove all the gadgets from the USB when you flash MMS.
To install NewMenu via the WinCE desktop (manually), follow these steps: WINDOWS 8 NEW THEME WITH 4 SKINS BLUE-GREEN-BLACK-GRAY-GREEN 01/25/2015 Updated! No brakes. Everything is collected on the basis of AltMenu 7.391 Nitrogen and the menu has only 4 themes in different colors and ONLY Windows 8. The theme is very heavy, for this reason they did not clutter others and it helps it work very well. Everything is already inside the assembly with all the settings. When you select a different shell, a dialer is built in. All the innovations are here. Unpack the INSTALL folder from the downloaded NewMenu archive onto an SD card or USB drive. We push the card into the MMS and go to work by long pressing the “Settings” button. We go to the SD card and run install.exe from the install folder. You will be prompted to install NewMenu - we agree. At the end of the installation, the MMC will reboot into the mainframe. To exit to the altmenu, hold down the “settings” button of the standard shell.
After installation, the Install folder can be deleted, the menu is copied to Staticstore.
Firmware for download below. Be sure to delete the previous one.
| The standard radio of the 2nd generation Kalina or LADA Granta is significantly different from the head units (GU) of previous cars. The large touch screen makes it look like a foreign car radio, however, its functionality is poor. But you can expand the capabilities of the radio without a complicated operation. |
Reviews
| Module type | Price, rub.) |
| Standard 1-DIM (push-button version) | from 3500 – 3700 |
| Standard 2-DIM (sensor) only for Lada Granta liftback | from 7500 – 8000 |
| Third party manufacturers, depending on configuration and specifications |
| № | Positive |
| 1. | Victor, 39 years old: after buying the car, he did not change the radio, despite the push-button control option. The sound quality is good, the radio reception is excellent, that's enough for me. |
| 2. | Konstantin, 41 years old: bought the car second-hand, second owner. I didn’t change anything, I left the original radio. The functionality is good, the build quality is also good, it reads from a flash drive. |
| 3. | Vasily, 44 years old: I listen to the radio more, the reception in the city is good. True, it causes interference near metal structures, but this is natural. |
| 4. | Kirill, 36 years old: I work as a taxi driver, on wheels all day. The standard tape recorder saves the day, it works properly. My friends recommended replacing it with a touchscreen model from the new Granta, but so far the old one hasn’t failed. |
| Negative | |
| 1. | Victor, 38 years old: the standard audio module, although not bad, seemed to me not enough, so I replaced it with a foreign one and supplemented it with an amplifier. Now the volume is good, the quality is high. |
| 2. | Mikhail, 42 years old: I work as a courier, I drive for the entire shift. I expected more from the standard radio, so I had to replace it with a new one. The volume suits me, I plan to connect an amplifier - a crossover. |
| 3. | Ivan, 33 years old: I bought the car second-hand, immediately replaced the audio module, the reviews are not good. New and high-quality equipment from Trinity, no problems. |
| 4. | Vladlen, 40 years old: friends gave me a gift in the form of a radio with touch control for our anniversary. Before this there was a push-button one. Can't compare, quality, sound, control, functionality at a high level. |
Conclusion The opinions of motorists on the functionality and sound quality of the standard radio are divided, which is obvious. Everyone evaluates according to their own criteria. Some people care about sound, others about functionality, and others about control. Regardless of the type of radio: push-button or touch-sensitive, the workmanship is good. No massive breakdowns or defects were recorded. Maintenance is not expensive, parts and components are available both at official representative offices and on the Internet. Now it will not be difficult for the owner to remove the radio on the Granta liftback with his own hands without contacting a service station.