Every year a large number of cars appear on the streets of big cities. Motorists have nowhere to park their cars, so they have to learn to do it in cramped conditions. It is difficult for inexperienced drivers to do this without parking sensors. That is why many of them are wondering how to install parking sensors with their own hands, while still getting the job done efficiently and quickly. Maybe it’s better to turn to experienced professionals for help? Some car enthusiasts believe that this device is completely useless. What to do in this situation? Parking sensors are, of course, necessary for everyone who needs them. Installing it yourself is easy. The main thing is to follow the instructions and do everything carefully.
Types of parking sensors
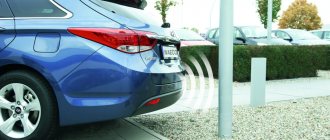
Car parking sensors are ultrasonic radar. With its help, the driver can estimate the distance from the car's bumper to the nearest obstacle. In a metropolis, every car enthusiast needs this device, since there are not always many parking spaces in the city.
The most budget and affordable devices are those equipped with 4 sensors. If you want to save more, you can install a gadget with 2 sensors. For those who are not at all confident in themselves, devices with 8 sensors have been invented.
The device includes the following items:
Sensors
LCD screen necessary for human interaction.
Signal processing unit.
Cables for connecting all systems.
Parking sensors equipped with displays are more expensive. However, they allow you to see everything that is happening behind the car. They can also show the driver the trajectory of movement if he has not yet gained experience in parking vehicles.
Operating principle of parking sensors
The main task of parking sensors is to promptly notify the driver of approaching obstacles when the car is moving forward or backward. This function helps to park in cramped urban conditions, and also gives confidence to beginners and women who do not yet feel the dimensions of their car.
The principle of operation of the parking sensors is quite simple. Sensitive sensors are located in the rear bumper (and sometimes in the front bumper). They send a signal of a certain frequency, which is reflected from obstacles and picked up by the same device. This reflected signal is then transmitted to the electronic control unit, where it is further processed. After this, the information is sent from the control unit to the display, where it is displayed in the form of a multi-colored scale and is accompanied by a sound signal. The obstacle detection range in different models of parking sensors ranges from 0-2.5 m.
A standard parking radar set looks like this:
- sensors (2-8 pcs.),
- electronic control unit,
- information display,
- set of electrical wires,
- connection and installation instructions.
Sometimes manufacturers of parking sensors carefully include a cutter for an electric drill or a screwdriver in the product kit. You will need it to carefully drill holes in the bumper when installing sensors.
Installation Tools
If the installation of parking sensors is carried out independently, the driver will need various tools.
These include:
device;
cutter;
screwdriver;
clamps.
To install the gadget you will need to drill holes. But before you begin the procedure, you need to check the device for functionality. The user will have to connect the sensors and the ECU with wires. If the device starts to make a loud sound when approaching an obstacle, it means that the parking sensors are functioning normally.
Along with the check, the owner should study the instructions for the radar. You may need to find additional tools. The installation process depends on the car model, but in general it is approximately the same for each brand.
Parking sensor cost and installation cost
The cost of parking sensors, depending on the model, configuration, and manufacturer, ranges from 900 rubles to 11,400 rubles. The price is also affected by the region in which the device is sold.
Prices for installing parking sensors range from 1000 rubles. For example, this price for installing parking sensors is valid in the Republic of Mari-El.
Parking sensors are practically not sold separately. The product is almost always sold with installation. That is, the price of the product includes the cost of installation. In Moscow, parking sensors for the rear bumper of the PARKMASTER brand can be purchased with installation at prices ranging from 5,300 rubles to 6,100 rubles. Naturally, the price depends on the modification and configuration of the product. There is a benefit to this. Along with the installation, you also receive a guarantee from the company performing the installation. For 3 years you can count on warranty service and repairs.
How to install front parking sensors
Installing front parking sensors with your own hands is a procedure that requires care and precision. The driver needs to make small holes in the bumper to insert sensors into them. The work is performed with the bumper removed, since there is electrical wiring inside the shell.
The cables, in turn, must be routed through the engine compartment. They should not come into any contact with the cooling radiator and exhaust manifold. It is best if the driver places the cables in a sleeve and attaches them to the wiring harness.
After installing the sensors, the car owner should once again check the correct installation and routing of cables. If some parts have not been connected correctly, elements will light up on the display indicating the location of the problem.
Display
The information display is placed in the car after the sensors are installed. The scoreboard is either an LCD screen or a block with indicators.
Monitor installation instructions:
First you need to choose a place on the dashboard. Nothing should block the driver's view.
After this, you should think about the cable route to the controller.
Before installing the display, the surface should be cleaned of dirt.
Remove the protective film from the device and install it on the dashboard.
Connect the patch cable.
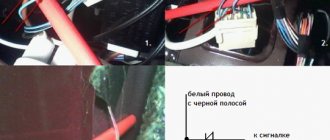
The wiring to the monitor is pulled under the pillar and runs along the ceiling to the luggage compartment.
Sensor installation
Most often, the control unit is installed in the trunk. The installation process begins from the rear of the car. As already mentioned, the bumper needs to be removed and washed from dirt and dust. Modern foreign cars are already equipped with markings for attaching sensors. Older cars do not have it, so the markings are applied independently.
Having made the markings, the driver must drill holes and widen them slightly with a cutter. The sensors are inserted into the holes, and the wiring is secured with clamps. The main thing is to ensure that the sensors are located at an angle of 90° to the ground.
Connection
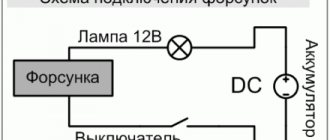
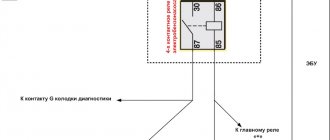
There are several options for connecting the front parking sensors: with a button, turning on the gear, or by pressing the brake pedal. The simplest method is the first. The method is considered the most effective. To implement it, you will need a button that is installed in a convenient place inside the cabin.
The power comes from the same place where the power comes from, for example, the DVR. When the engine starts, power begins to flow. When the engine is turned off, the system turns off. The operating principle is simple, but not ideal. According to the rules, the system should start automatically if the car is moving at a speed of 20 km/h or less.
Do you want to install parking sensors? Which to choose?
You can find all the technical characteristics of parking sensors, as well as the most current prices for the services of our auto studio, on our website, or by calling
Advantages of installing parking sensors with us
2 year warranty Licensed and certified installation center. We maintain the dealer's warranty.
Package of documents
Upon completion of the work, we issue a complete package of documents: a receipt, work order and a copy of the certificate.
Big choice
Large selection of parking sensors. Front and rear, all colors available
Rear parking sensors with installation
- Universal parking assistance system (parking sensors) with LED digital Price 4,200 RUR With installation 6,200 RUR
Order More details
- Order More details
- Parktronic ParkMaster 234 has 4 small-diameter sensors and has a Price of 3,990 RUR With installation of 6,000 RUR
New
Order More details
Front parking sensors with installation
- Universal parking assistance system (parking sensors) with LED digital Price 4,200 RUR
With installation 6,700 RUR
Order More details
- Parktronic ParkMaster 49F-4-A for the front bumper is ultrasonic Price 4,900 RUR
With installation 7,500 RUR
New
Order More details
Front and rear parking sensors
- Parktronic ParkMaster 834 has 8 small diameter sensors and has a Price of 7,990 RUR
With installation 12,000 RUR
New
Order More details
- Equipped with 8 FJ type sensors and an LCD indicator with a Price of 7,900 RUR
With installation 12,000 RUR
Order More details
Some of our work on installing parking sensors
Installed parking sensors on Hyundai Creta
- Front parking sensors (4 sensors)
- Rear parking sensors (4 sensors)
- Parking sensors front, rear (8 sensors)
- Blind spot sensors (4 sensors)
How to install rear parking sensors
Do-it-yourself installation of rear parking sensors starts with marking the bumper. The entire operation of the system depends on how correct the marking is. To avoid mistakes, you must first study the instructions and recommendations from the manufacturer. If there are inaccuracies in the markings, this will lead to the formation of “dead zones”.
Installation instructions:
The first thing you need to do is make a marking, while simultaneously gluing masking tape to the sensor locations. Sometimes a special pattern is included with the device. With its help, marking can be done faster and more correctly.
After this, the driver needs to take a tape measure and a laser level. Using these tools you need to find out the location of the centers of the holes. The sensors must be symmetrical in height.
Take a thin awl; the driver needs to mark the centers of the channels. Drilling occurs using a tool. The diameter of the hole must be equal to the size of the sensor housing.
The cutter is secured in the chuck and drilling begins directly. The tool is installed perpendicular to the surface, while controlling the location of the cutter.
Sensor housings and cables are placed in the holes obtained as a result of drilling. The sensors are fixed with mounting rings from the kit. The body of the parts has letters that allow you to determine the purpose of the element.
The cables are routed into the luggage compartment through an O-ring. Instead of a ring, you can use a plastic plug. The entry made through the plug is coated with sealant.
The car enthusiast has the right to place an assistant behind the car, regardless of its model. Plastic sensor housings may be painted so that they are the same color as the body. This will not change the operation of the device.
Required Tools
To install the parking radar, you need a special tool:
- ruler 50 cm;
- masking tape;
- pen-pencil);
- drill (screwdriver);
- steel wire;
- nylon ties;
- wire cutters, electrical tape;
- control light;
- Silicone Grease.
The car owner will need a lift or a garage with an inspection hole for ease of work.
Attention! The choice of parking sensors should be taken responsibly. If the parking radar is front, then you need to buy the appropriate kit. The sensor wires for the front and rear radars differ in length: the front ones are longer.
Tips and tricks
During the work during which you install parking sensors yourself, you need to follow several rules. These recommendations will help you avoid mistakes.
Installation Tips:
It is best to mark the bumper with a marker. Pencil lines are erased quickly, so there is a risk of making mistakes. Markers are removed with alcohol-containing liquids.
The holes must be drilled perpendicular to the surface of the bumper itself. The sensors must be positioned horizontally.
If the bumper has a damper, then an awl or nail is used to lay the cables.
The signal processing unit is fixed to the surface with tape.
It should also be noted that you should not place this unit next to the electronic unit of the car. This will result in interference that will have a negative impact on the operation of the automotive system as a whole.
How to choose and buy parking sensors?
When choosing parking sensors, you must remember that cheap or expensive models are not always clearly good or bad. When choosing a model, you need to read as many reviews as possible and get a truly objective assessment of the model.
The following parking sensors are popular among motorists:
1. Ultravox D-104B.
A popular parking sensor model among consumers. The kit includes 4 sensors, wired connection. The installation type of the model is combined. Obstacle detection zone up to 1.5 meters. LED display is used.
2. ParkMaster 32/33-8-A.
The system comes with 8 ultrasonic sensors. There are 2 displays that can be installed in any place convenient for the driver. Combined installation type. Obstacle detection zone up to 2 meters.
3. INCAR PT-208B.
A convenient and reliable device to use. The set includes 8 sensors. Combined installation system. It is protected from dust and moisture. The operating range of the device is up to 1.8 meters.
Possible problems
Most parking sensors are activated when reverse gear is activated. After this, the picture immediately appears on the monitor screen. Thus, the device does not need a button to turn on.
Sometimes after installing the device, the video is not displayed on the display. In rare cases, strange signals may be observed. There are several types of problems that need to be corrected immediately when problems are detected.
These include:
The danger signal does not turn off. This indicates that a short circuit has occurred in the system, or the sensor is “blocked” by an unknown substance. It happens that dirt or snow sticks to them. Sometimes, when water gets in, the sensor starts to act up, which makes the driver even more nervous. That is why the first step is to check for foreign objects. After making sure that they are absent, the owner must do the wiring.
The device does not indicate an approaching obstacle, although there really is one. Perhaps the sensor has broken down altogether, or the entire system has failed. First, the driver needs to check the sensor by hand, and then decide whether to change only it or the entire system.
The device produces a “violent” reaction to minor obstacles. It happens that the driver parks in the grass, and the device does its best to signal a collision. This happens if the gadget has hypersensitivity set in its settings.
If the device initially worked normally, and then began to act up, then the problem is most likely in the wiring. From time to time, its contacts come off, or the protective shell wears off. In case of such breakdowns, you can fix everything yourself. You will have to replace the device with a new one if the control unit fails.
The following main elements of a car parking system can be distinguished:
Electronic control unit.
Receives and processes signals from ultrasonic sensors. The central core of the parking sensors. Among the main tasks is timely warning of the driver about the malfunction of individual sensors or the entire system.
Sensors
They ensure timely detection of obstacles and transmit information to the electronic control unit. They can be placed on both the rear and front bumpers of the car. The principle of their operation is based on the use of an ultrasonic signal.

