If, when the car is moving, an unpleasant noise is heard in the area of the wheel, which may disappear when entering a sharp turn, then this indicates a malfunction of the VAZ 2110 wheel bearing.
Front wheel bearing
This is a fairly common malfunction; it occurs on every fourth car with high mileage. It’s not difficult to correct the situation; you just need to have a garage with a pit and detailed instructions for work.
Experienced technicians recommend not delaying the replacement of this component in order to avoid unnecessary troubles.
DIY wheel bearing puller
Homemade wheel bearing puller: drawings, photos, videos of a homemade device.
The author decided to make a homemade version of a tool for pressing out wheel bearings, an analogue of the one sold in stores.
Steel plates with a thickness of 8 mm and a pipe with a wall thickness of 7 mm were found as materials for manufacturing.
Wheel bearing puller drawings.
A 320 mm long stud was also needed and a nut was welded to it. I also pressed the ball from the bearing into the center of the stud.
According to the drawings, they made these:
Cup with mate.
Also two washers measuring 74 mm and 62 mm.
This is what the entire set of tools for pressing out wheel bearings looks like.
In this video, the author shows in detail a wheel bearing puller.
How to make a universal wheel bearing puller with your own hands? Read and craft
Most car enthusiasts are interested in how to make a universal wheel bearing puller with their own hands. After all, buying such a tool in a store is not a cheap pleasure. In addition, factory products are often made for a specific model. Therefore, if you buy a puller for one car, you are unlikely to be able to use it on another model. By making a universal puller, you are guaranteed to be able to change bearings on different machines. And almost every driver is faced with replacing this element of the hub, and repairs cannot be delayed. The wheel may become stuck while driving, causing a serious accident.
How to make a universal wheel bearing puller with your own hands? First, you need to understand the types and features of these bearings. Nowadays, only double-row bearings are used in passenger cars. They are more reliable and efficient. They are divided into the following varieties:
- Ball;
- Roller;
- Roller cones.
On passenger cars, ball or cone types are usually used. They are more compact and much more reliable. Depending on the installation method, they can be external or internal. Now, there are bearings with the ability to control the speed of rotation of the wheel. And depending on this, the operation of the bearing is regulated.
CV joint puller: types and method of self-production
A constant velocity joint performs the function of a universal joint, but its design is much more complex. In fact, this is a powerful ball bearing with a floating cage, to the cages of which the hub and axle shaft of the car's front suspension are attached. The hinge body is called a grenade due to its external similarity. The design is created as non-demountable.
Many manufacturers of spare parts offer to replace the entire worn joint. This is not an economical solution, since play appears only in one half - most often in the outer grenade.
CV joint puller: types and principle of operation
The general technique for removing a grenade from an axle shaft is quite simple - you need to pull the nodes in opposite directions with great force. This cannot be done by hand; you need a mechanical puller for the CV joint.
Such devices make it possible to save on visiting a car repair shop. You can purchase the tool at any auto store: both universal and for specific CV joint models.
Outer CV joint device
The hinge body contains a cage with balls, into which the axle shaft is inserted using a spline connection. Inside the so-called There are mechanical stoppers located on the glass, the size of which does not allow the assembly of the holder to be removed. The axle shaft is secured with a retaining ring, which is not accessible. This is not a power element; the stopper is designed to prevent the grenade from falling apart during transportation. However, using conventional tools, it is impossible to separate the splines without special pullers.
How to repair a CV joint with your own hands?
To replace the anthers or the entire outer hinge, a grenade puller is used. The device overcomes the resistance of the retaining ring and removes the splined joint from the cage.
Making a puller
To work, you will need a grinder, as well as a welding machine. You will need to drill a hole, so be sure to use a drill. To create such a device, you will need a metal profile and a corner. The device is assembled as follows:
This completes the assembly of the puller. It remains to be tested. To do this, we take the hub in which we are planning to change the bearing. We put a puller on it. To do this, the legs with hooks are inserted behind the hub, and the cylinder is screwed close to the bearing. Make sure that it fits completely onto the bearing race. Next, by tightening the bolt, we squeeze out the bearing.
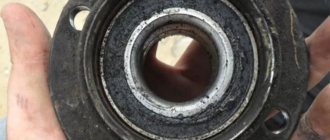
Checking the condition of the hub
The condition of the hub is checked for mechanical damage, cracks and wear. If defects are found, the hub will have to be replaced.
There are 2 main ways to check the hub, after which you should decide whether it needs to be changed or whether it is enough to change the bearing itself:
- Checking planes . We install the VAZ 2110 on a flat section of the road, grab the top of the wheel and swing it with strong jerks. If you hear metallic clicks, then the problem is in the bearing.
- Runout check . You need to remove the wheel, take a screwdriver and a wrench with a head. We rest the tip of the screwdriver on the caliper bracket, and use the wrench to turn the hub. If the sting leaves 2 arc scratches on the brake disc, then the hub needs to be replaced.
In VAZ 2110 cars with an anti-lock braking system, the condition of the sensor gear rotor is checked.
Replacement features
The main symptom of a malfunction is a whine from the wheel, which intensifies when cornering. An additional symptom will be heating of the hub. Delaying repairs may result in wheel jamming. In some cases, the heating can be so intense that the inner race of the bearing is welded to the steering knuckle axis. In this case, you will have to install a new fist.
When replacing, do not skimp on lubricant. The excess will simply be squeezed out of the hub. It is much worse if there is not enough lubrication. This will lead to rapid wear of the bearing. Therefore, experienced mechanics recommend periodically checking the presence of lubricant in the hub. If necessary, it is added. Most often, Litol 24 is used as a lubricant; this material is best suited for use in wheel bearings.
Conclusion
. There are a large number of different devices available for high-quality car repairs. Separately, there are pullers that allow you to remove bearings and seals. At the same time, drivers often wonder how to make a universal wheel bearing puller with their own hands. In fact, this is not difficult to do; all you need is straight arms and some tools. The puller will be comparable in characteristics to factory analogues. And such a design will cost significantly less.
Reliable simple do-it-yourself bearing puller
In this instruction you will learn how to make a simple, powerful puller that will always help you out in a difficult situation. To assemble it you will need a piece of thick-walled pipe and a thick steel plate. If you wish, you can make yourself several pieces of these pullers for products of various sizes. Let's consider in order how to make such a device.
Materials and tools used by the author: List of materials:
- thick-walled pipe; - thick steel plate; - bolt and nut (larger); - a metal rod (a handle is made from it); - dye.
List of tools:
— welding; — grinder (cutting disc, metal brush, and grinding disc); — a drill with large bits or a drilling machine; - lathe, cutting machine (optional).
Puller manufacturing process:
Step one. Preparing the main part
The main part of the puller is a piece of thick-walled steel pipe; it acts as a frame. If the pipe is not strong enough and the loads are large. It can easily bend. The thickness of the pipe walls must be at least 3 mm.
We cut off the required piece from the pipe; the author uses a cutting machine for this, but everything can be done with a grinder. Now comes the hard part, you need to cut a window in the pipe. This can be done using a grinder; it takes a long time, but is quite doable.
Step two. We make the upper and lower supports
For the upper support, the author decided to use the thickest sheet steel possible. Cut out a circle of the required diameter. The author uses a grinder for work, first we cut out the “polygon”, and then using a grinding wheel we bring it to perfection.
Cut out the other circle in the same way. Here the author used slightly thinner steel, but it’s better not to risk this, since the loads on both supports are approximately the same.
Finally, you need to finalize the supports. You need to drill a hole in the top support for the bolt. First we drill a small hole with a drill, and then drill it out to the desired diameter. The author used a lathe for these purposes.
As for the lower support, we also drill a hole in the center; its diameter should be slightly larger than the diameter of the axles from which you are thinking of removing the bearings. Then cut out a triangle shape for this hole. The supports are ready, let's move on!
Having welded the supports, you now need to secure the nut. We wrap the bolt in it and insert it into the hole. We weld the nut well, but try not to overheat, as the metal may become soft. The author attaches the nut from above, but I would recommend fastening it from the inside, so it will rest on the support, and the tensile weld may not be very reliable.
Finally, all you have to do is secure the handle; for this, the author used a threaded rod. Using a handle will make it convenient to remove bearings that are not too rigid. Otherwise, you can always use a wrench.
Well, let's check it out? As a test, the author tried to remove the bearings from the drill armature and so on. Now everything is done easily and at the same time it is guaranteed that you will not damage the product. In addition to bearings, this device can also remove various bushings and other similar parts. If the axle turns out to be too thin, you can come up with a spacer for the bearing to be removed that will rest against the base of the puller. Well, or you can make a separate puller for small parts, it’s easy to assemble.
Before removing, it is recommended to lubricate the axle with oil or WD-40, this will make things go faster. That's all, good luck and take care of yourself! Source
Receive a selection of new homemade products by email. No spam, only useful ideas!
*By filling out the form you agree to the processing of personal data
Design and principle of operation
The simplest wheel bearing remover is a device consisting of a metal rod and two gripping arms with ends bent inward attached to it. Thanks to the movable connection, it is easy to change the gripping distance. These paws can be used to lock and remove ball bearings, gears or rings. A tool with three gripping arms has more versatility because the arms can be deployed and used to remove internal elements. This device is also called an internal bearing puller. The most versatile is the combined extractor, which can be transformed from a three-legged one into a two-legged one. Its design has special clamps that make it easier to remove damaged elements.
Purpose and features of the device
If a hum or noise appears in the area of the car wheels that confuses you, this indicates that the wheel bearing has broken. It is not recommended to delay repair or replacement of this unit. If you are not a specialist in this field, then contact the nearest service station as soon as possible, where the car will be inspected and given a consultation.
However, it is not always possible to use the services of professionals; in some cases you have to act on your own. One of the most difficult repair operations is the dismantling of bearings. This requires special tools.
The most primitive wheel bearing puller is an item consisting of the following elements:
- metal rod;
- gripper arms (2 pieces) with ends curved inward.
The device has a movable connection and the gripping distance can be easily changed. The paws can be used to remove and fix the following:
- rings;
- ball bearings;
- gears.
If the tool has three gripping paws, then it has more possibilities, since the paws can be deployed and used to remove internal elements. It is called an internal bearing puller.
The most versatile device is the combined pressing tool, which has the properties of both a two-legged and a three-legged tool. Its design includes special clamps through which damaged particles can be easily removed.
Mounting and dismantling bearings requires applying manual pulling force to seat or remove one or another element. The success of your work, as well as your own safety, depends on how correctly you choose the tool.
Screw release mechanism
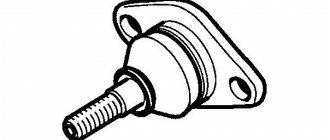
The second type of removable mechanism, which can be made from improvised means, is a screw release mechanism. It is perfect for replacing ball joints of classic VAZ models.
A special feature of the suspension design of these cars is that the upper and lower supports are located symmetrically to each other and the distance between them is not large.
It can be made at home only if you have a drilling machine, or you will have to go to a lathe. This puller consists of only two parts.
To make it, you will need a square or hexagonal rod with 17 or 19 key edges, the length of which is 7 cm. Using a drilling machine, we make a hole in this rod and cut a thread for a bolt of 8. Screw in the bolt and that’s it - the puller is ready.
Let's look at how it works using the VAZ-2107 as an example. To press out the upper support, you need to unscrew the lock nut, but not completely, you do not need to remove it. Then we install the manufactured puller between the pins of the supports with the bolt screwed in until it stops.
To squeeze out the finger, we take two keys - with one we hold the manufactured body, and with the second we unscrew the bolt until the finger falls off the socket. After replacing the upper support, we do the same, but with the lower one.
Screw L-shaped
The third type of removable mechanism, which you can make yourself, is also a screw mechanism, but it has shown itself to be excellent and allows you to work on any car.
To make it you will need a round metal rod with a diameter of at least 10 mm and a length of 15-17 cm.
From it you need to make an L-shaped blank with a shoulder length of 5 cm. That is, we take a rod, measure 5 cm on it, clamp it in a vice and use a hammer to bend it 90 degrees.
We cut a thread on the long part of the workpiece and select a nut.
All that remains is to make the thrust bar. It can be made in the likeness of the wedge described above. That is, we take a plate, but 0.5 cm thick. On one side we make a cut for the support pin.
If necessary, you can reduce the thickness of the plate on the cut side by grinding off the metal layer. The main thing is that the plate fits into the gap between the support body and the eye, but it is not too thin, otherwise it will bend during the pressing process.
On the other hand, from the cut we make a hole for the L-shaped workpiece. All that remains is to put the plate on the long part of the rod. If the thread is not long enough to squeeze out the finger, you can place several washers under the nut.
This puller works like this: Unscrew the nut almost completely, install the plate in the gap between the support and the eye, and turn the rod so that the short arm rests against the finger.
Then we simply tighten the nut, while the plate will act as a stop, and the short arm of the rod will squeeze out the finger.
Screw made from angle
Another screw puller can be made from a metal angle and a welding machine.
To do this, take a corner with sides 7-8 cm and the same length, and a thickness of 0.3-0.5 cm.
We make a cut in one of the sides to secure the mechanism to the eye. From sheet metal 0.3 cm thick we cut out two triangles that will act as braces. They need to be welded on the sides to the corner. This will significantly increase the strength of the structure.
We take a 17 nut and a long bolt for it. We weld the nut itself perpendicular to the cut so that its hole faces the cut.
So that in the future the bolt can be easily positioned on the same axis with the pin, before securing the nut by welding, a spacer must first be welded onto the corner.
All that remains is to screw in the bolt and the puller can be used.
These are the simplest types of removable mechanisms that you can make yourself.
In general, there are a lot of options, and with a little imagination and basic knowledge of plumbing, you can easily come up with and make your own puller.
We offer some drawings for viewing.
Tool for unscrewing the support
We will consider another type, which is used not for pressing out the finger, but for removing the support itself.
The fact is that on a number of cars (Peugeot, Citroen) the ball joint is screwed into the lever. Over time, the threaded connection sours, and it is quite difficult to unscrew this suspension element without a special tool.
But you can make the necessary puller yourself, rather than spending money on a factory one.
It is made from a 2" thick-walled pipe 8-9 cm long.
At the end of this pipe it is necessary to make 4 spikes with a width of 5 mm and a height of 7 mm, located at an angle of 90 degrees relative to each other.
That is, you should get 4 protrusions at the end of the pipe, evenly distributed around the circumference. This can be done using a hacksaw and a file, or with a grinder.
From the other end we make slits to a depth of 3 cm, dividing the circumference of the pipe into 8 parts.
Then we bend these petals to the center using a hammer, significantly reducing the diameter.
We take a 24mm nut and screw it to the end part, and then use a welding machine to seal the slots made.
It is quite convenient to work with such a puller - we put it on the support so that the spikes fit into special grooves on the support body.
In this case, the finger will pass through the manufactured tool, which will allow the locking nut to be screwed onto it, thereby securing the puller. All that remains is to use a 24mm wrench to unscrew the support using the welded nut.
Alternative method
Finally, we note that it is possible to press out the support pin or tip even if it is not possible to make a removable mechanism. But this method should be used only in extreme cases. To remove the finger you will need a pry bar and a hammer.
The pry bar is used as a lever and must be installed in such a way as to create a force to press the support or tip, for example, place it between the steering rod and the rack eye.
After creating force with the mount, it is necessary to apply powerful blows to the body of the eye with a hammer. If everything is done correctly, then after 2-3 hits the finger will pop out.
The disadvantage of this method is that the eye can be damaged due to shock loads, so it is advisable to use pullers rather than knock out the support.
DIY wheel bearing puller
It's been a long time since it was time to change the front wheel bearing. There is no puller, not all stores have them, the market is a bit far away, but there is a bunch of scrap metal. I turned on my BRAIN, picked up the barbell and off I went. The only thing I bought was a puller for ball balls, it was annoying and inconvenient to pick them out with a pry bar.
Here's the whole set.
A piece of 75mm pipe 50mm long, two strips 70x30x5 fastened with 6 bolts, a very thick-walled washer D45mm, an M16 bolt and most importantly a crown for 65mm sockets. The pobedit teeth need to be removed from the crown, I was lucky and the reinforcement in the concrete wall did it for me)) )
Which wheel bearing puller to choose or how to make it yourself
- ✅ Contents of the article:
- 1. Types of puller
- 1.1 Selecting a puller for removing and pressing bearings
- 2. Overview of wheel bearing pullers
- 2.1 Cup Force 9T0311
- 2.2 Three-jaw KS TOOLS 630.3002
- 2.3 Two-jaw Kukko K-2030
- 2.4 Hydraulic puller
- 3. Review of pullers for VAZ and LADA
- 4. Recommendations for choosing a tool
- 5. Making a puller with your own hands
- 5.1. Three-jaw tool - manufacturing instructions
- 5.2 Do-it-yourself cup puller
- 5.3 Self-production of two gripping removal tools
- 5.4 Instructions for removable traverse
- 5.5 Drawings for self-production
- 6. Operating principle of cup puller
- 7. How to work with a three-jaw puller
- 8. Operating procedure on a hydraulic press
- 9. Using a bench vise instead of a puller
- 10. Impact method instead of a puller
- 11. Conclusions and additional useful materials
A wheel bearing puller is a specialized tool designed for pressing and pressing parts into vehicle hub units.
Since the bearings are installed on the seating surfaces with interference, pressing or pressing them requires a lot of force to be applied to a limited area of the unit. Conclusion - for this operation you need a reliable and also universal tool.
A wide range of size ranges for hub units correspond to various types of wheel bearing pullers (HBP). Choosing the right puller for replacing bearings is not easy. You will learn what parameters to follow by reading the article. We will also touch on the topic of making the device yourself and how to operate the tool.
Types of wheel bearing pullers
Study the summary table, which presents several main types of BSC, as well as specific recommended models.
What pullers are needed to remove and press in wheel bearings?
For the front and rear wheels, it is recommended to use two types of tools: with three or two legs and a cup puller - this is the minimum set of removable tools for the correct and safe removal and pressing of parts of hub units.
Symptoms of malfunction
Replacing the VAZ 2110 wheel bearing is necessary when the following symptoms appear:
- The rolling round elements gradually destroy the clip. After this, their arrangement becomes disordered. This is accompanied by a strong crunch, which is clearly audible in the cabin.
- After a long run of the car, gaps form between the bearing parts. This manifests itself in the form of vibration. It extends to the steering column and body.
- The car begins to pull to the side. This also happens when the elements are faulty.
Wheel and bearing puller for VAZ and LADA cars
To replace the front and rear hub units on VAZs, according to the manufacturer’s recommendations, two types of removable devices are needed.
- Gripping tools are used to remove the ball bearing from the rear wheel.
- For pressing and pressing the bearing at the front wheel, cup types are used.
You can select models of these tools from the overview presented above. To select a cup puller, focus on the outer and inner diameters of your bearings, but as a rule, it is enough to read reviews and get advice from the seller.
vazoved
I drive a LADA VESTA CROSS, Moscow
Then there will simply be no one to pay the fines! This is a Korean 7 in 1 car tablet video recorder for Android..
I forgot about fines and Yandex Navigator.
There is FULL HD shooting, radar detector and GPS with 32 satellites. I got it at a reasonable price for just a few thousand here >>>> MORE...
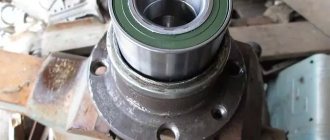
Installation procedure for a new VAZ 2110 hub
When replacing the front wheel hub of a VAZ 2110, the product is cleaned of grease and dirt with sandpaper, and burrs are sanded off. Installation process:
- First, a thin layer of lubricant is applied to the rear of the hub O-ring and the hub is installed onto the steering knuckle axle.
- A thrust washer is installed and a nut is screwed on to secure the hub.
- The hub fixing nut is tightened and the inner ring of the bearing is pressed onto the steering knuckle axle.
- Once the hub is installed, the hub bearing end play is adjusted.
- After the adjustment is completed, the clamping bolt is tightened, which secures the fastening nut from unscrewing.
- Then the brake disc is installed and, if equipped with anti-lock braking system, the sensor is installed.
The following is a step-by-step photo instruction on how to independently replace the front hub on a VAZ 2110.
Do-it-yourself universal wheel bearing puller
Buying a puller is not always justified, since it is not used so often when operating and repairing a car, so if you want, you can make the tool yourself.
Homemade tools also have advantages:
- Proven material.
- Possibility to make it to your own size.
- The cost is lower than that of a purchased device.
- Possibility of finishing or alteration.
Homemade three-grip tool
This type of tool is the most difficult to manufacture, since the parts have a unique shape and require precise dimensions to mate them.
Required tools and materials:
- Grinder with cutting disc for metal;
- Sheet 1 m2 10-20 mm thick;
- Hairpin M18x1.5x 400 mm;
- Two nuts M18x1.5 height 20 mm;
- Pipe section outer diameter 89 mm, wall thickness 7 mm;
- M10 bolts for hanging the legs in the eyes;
- Welding machine.
The legs are cut from a sheet of 10-20 mm, L = 200-220 mm, the cross is made from an M18x1.5 nut, or cut out of a solid sheet with a grinder. Mark the contours of the crosspiece, cut it out, drill a hole in the center, then use an M18x1.5 tap to cut the thread.
Second option: weld a nut to the sheet instead of threading it. Holes are made in the eyes for M8 or M10 bolts.
Video: “Making three grippers”
Cup puller
The main part of the tool: M18 pin, cup and replaceable disks. A threaded bolt and nut can be picked up in a store, but the remaining parts will have to be ordered from a turner based on a sketch or drawing.
For VAZ 2108, 2109, 2110, 2111 washers are suitable - 30, 34, 37, 77 mm, bowl (ring) - 77 mm. For other car brands, find the original part number and its dimensions, and then cut out the appropriate washers and cups.
Video: “Do-it-yourself cup puller”
Double jaw wheel hub puller
Having amateur welding skills, two gripping devices are made from plates, nuts, and studs.
Not the easiest way to make a SSP in a garage; to assemble it you will need:
- Sheet 5 mm;
- Bolt M 14x1.5x 240;
- Bolts with nuts M6;
- Nuts M14.
Video: “Do-it-yourself two-grip device”
Removable traverse for pressing out
This option is suitable for pressing and pressing the ball bearing out of the hub without removing it from the knuckle. The photo shows an example of such a design.
- One or two strong steel plates are taken, a hole for the bolt is drilled on top and a nut is welded.
- A second nut is welded coaxially from below.
- Next, holes are made for M10 bolts at equal intervals. The legs are cut from a 10 mm plate.
- The two plates are bolted together. Between them there is a long M16 bolt.
The only purchase is a crown to match the size of the ball bearing race. Cut the required washers from a 10 mm strip.
Tools and materials required:
- Bulgarian;
- Welding and drilling machine;
- Internal pipe section D 75 mm;
- Strip 70x30x5, 2 pieces;
- M6 bolts with nuts 4 pieces, lock nuts 8 pieces
- Thick-walled washer D 45mm.
MrPodshipnik
02/11/2019 Oleg Ladygin 0 Comment
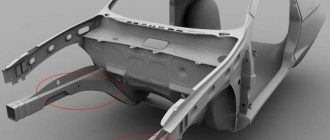
A VAZ car of modifications: 2110, 2111, 2112 is a strong option for use. However, with mileage up to 60,000 km, some parts are subject to wear. This article will talk about the front hub of the “tens” and describe step-by-step do-it-yourself repairs.
The following factors play an important role in bearing failure:
— quality of domestic roads; — aggressive driving. First you accelerate and immediately brake. This is especially noticeable when turning;
— operation of the vehicle in unfavorable climatic conditions. In summer, on rough terrain with holes and potholes. In rural areas with dirt, sand and dust. In winter, driving on roads sprinkled with salt; — installation of a known defective part;
— vehicle overload exceeding the norm specified in the technical passport.
It is especially necessary to pay attention to the front hub. It is quite possible to make the diagnosis yourself and does not require much experience and knowledge.
Determining the need to replace the bearing
To determine bearing failure, you need to perform simple steps yourself. I myself use the following diagnostics:
— after a long ride, carefully place your palm on the hub and check whether the metal part heats up; If so, this is the first sign of a breakdown;
— try accelerating to 40 km/h and listen to the sounds ahead with the windows open. Hear a whistle, hum, grinding or howling - another confirmation of the need to replace the part; - increase speed. As it increases, the howling will stop and then periodically appear with renewed vigor. Another bell rings;
- Place your car on a jack and manually spin the wheel. The grinding and whistling will repeat. To be completely sure, rock the wheel perpendicular to the axle. If you find any play, the bearing definitely needs to be replaced.
Preparation for repair of the front hub on VAZ 2110, 2111, 2112
You have made up your mind and decided to make repairs on your own in your garage.
To do this you need to prepare. Properly assemble tools and accessories.
- I would recommend making a list like this:
- - a jack is required; - hammer, chisel, pliers; - a set of keys and sockets. It is imperative that head No. 30 and key No. 17, No. 19 fit there; — mandrels; - vice; — liquid “Vedashka”;
- - torque wrench.
- When you have everything assembled, it is advisable to look at a sketch or drawing diagram of the assembly you will be dealing with.
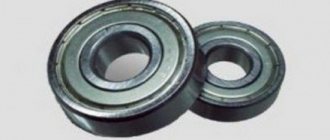
Selection of bearings for the “ten”, 2111, 2112
Now you need to decide on the choice of bearing. I advise you to buy parts only in a specialized automotive store.
- If we turn to the manufacturer's catalog, we see that the original number for the front wheel bearing of the VAZ 2110 should be: No. 6-256907.
- Orient by the dimensions of the part: - outer diameter - 64mm; — internal diameter – 34mm;
- — width 37mm.
- Let's analyze which bearing manufacturers it is advisable to buy and use for repairs:
— the Vologda manufacturer of bearings is rightfully considered one of the best. Its distinctive feature is the low cost of the product. Not bad quality. It is almost never counterfeited. Popular among motorists.
This is the 23rd State Bearing Plant (23GPP);
— however, those who are professionally versed in spare parts for cars use the products of the Saratov Bearing Plant (SPZ);
- if you want to save money, you can purchase inexpensive, but not high-quality bearings from the Samara plant. They are almost half the price, and the mileage after replacing the part will be no more than 20,000 km.
The choice is of course yours, but I would recommend you a Saratov manufacturer.
When purchasing a product, make sure that it is in oiled paper and free of rust and dents. So, you have selected and purchased the part.
Let's start replacing it.
Step-by-step instructions for replacing it yourself
Place the car on a flat surface. “Tear off” the bolts and nut of the hub with the wheel standing on the ground.
Raise the car with a jack. Don’t forget to install wheel chocks on both sides before doing this. For safety reasons, we fix the car on stands or adjust the spare wheel under the side member.
We remove the wheel. Using a screwdriver, disconnect the caliper. We take it to the side and secure it with wire.
Next, unscrew the brake disc fasteners. If necessary, remove the trunnion.
For easier removal of parts, use lubricating fluid VD40 (Vedashka). It is necessary to spray the dismantled parts. Wait 30 minutes and then continue working. They will be much easier to remove.
Let's consider several options for replacing the bearing:
Option #1
In this case, I use a puller and do not need to remove the steering knuckle and also remove the strut. In this case, the camber does not need to be weakened.
- Using a puller, we remove the bearing and install it.
- Option No. 2
It is significantly more difficult. We use it if we want to carry out a complete repair of the car's chassis. We carry out the work in the following sequence: — it is necessary to remove the tip from the steering rod; — insert the stand into the yew;
- — Replace the front wheel hub bearing;
- Option #3
You don't need a puller for this option. The downside is the wheel alignment adjustment. In this case, it is necessary to remove the fist and dismantle the hub.
- Remove the retaining ring.
- We clamp the hub in a vice and use a metal mandrel to knock out the bearing.
- Clean the inside with sandpaper.
- Wash with diesel fuel and wipe with a rag.
- Lubricate with lithol.
Again, using a mandrel with a hammer, carefully drive the part in 10mm. We make sure that there is no distortion. And then with stronger blows we put the bearing in place. You can use a puller for this purpose.
We carry out installation in the same way as dismantling, but in the reverse order. We adhere to the marks previously placed on the parts when dismantling them.
Advice from a practical master
I want to give you some practical tips when replacing your front wheel bearing:
- You can replace it at a specialized vehicle service station (service station). But it will cost you much more than if you did all the repairs in your garage yourself.
You can partially use the services of a service station. When you need to quickly dismantle a bearing and there is no puller. Service stations usually have a press.
By contacting them, you can change the part without effort for a reasonable fee;
- — when replacing a part, try to do without unscrewing the camber bolts;
- — regardless of the actual condition of the bearing, replace it after a mileage of 55,000 km;
- — when changing a part on one side, it is advisable to replace it on the other;
- — when dismantling parts, always use marks on them. This will make it easier to install;
- - when you have removed the hub, pay attention to the condition of the nodes around it. If you notice rust, dirt or oil buildup, remove it all;