After TURNING the screw to about 10 revolutions, the spark plugs became light brown (dark yellow) in color.
When the screw is turned out, air passes from the pre-throttle space of the first chamber to the bushing - the nozzle of the idle system, located in the pre-throttle space. If the quality screw is screwed in all the way, then the mixture is formed passing the idle jets. The mixture quality screw regulates the supply of ADDITIONAL air to the outlet channel, where the already formed mixture enters.
Of course, the question of increasing the speed when unscrewing the screw is interesting. But personally, I can explain this in such a way that when the screw is opened, due to the vacuum in the throttle space, the air flow accelerates, which in turn causes a higher flow of gasoline through the idle jet. That is, more of the mixture enters the throttle space compared to a fully screwed screw, but the mixture itself is POORER. That is why turnover is growing. Andrey. PS. Why are we already on “YOU” again?
Unfortunately, as established experimentally, at 113 carbs the plant made an UNDOCUMENTED change to the mixture quality control system. At 111, twisting leads to a leaner mixture, and at 113, to a richer mixture.
Economical and stable engine operation in most cases depends on the fuel level in the carburetor float chamber and the idle speed of the crankshaft, as well as on the proper operation of the carburetor.
The carburetor is adjusted to a low crankshaft rotation speed in idle mode with the engine running, warmed up to a temperature of 80-85 degrees Celsius, with the electrical system devices in working order, the timing belt adjusted and the air damper fully open.
Messages [20]
1↑ Topic from PATRIOT 03/25/2013 14:32:03
- PATRIOT
- Patriot IMZ
- Inactive
- Name: Ilya
- From: Krasnodar region, Krasnodar
- Registered: 18-02-2011
- Messages: 3 148
- Reputation: 177
- Motorcycle: No. Next will be the K750!
Topic: Carburetor adjustment (mixture quality) for beginners!
I think once again it will be useful for beginners to read about adjusting the quality of the mixture, and even the carburetor itself. As already noted, the quality of the mixture at different crankshaft speeds is adjusted differently:
for small ones, use the “quality screw” of the idle speed system;
at medium - with a throttle needle;
at maximum - with the main fuel jet.
Before proceeding with the adjustment, it is necessary to determine the quality of the mixture in various modes by external signs of engine operation. Signs of working on a lean mixture are popping sounds in the carburetor, a drop in power (deterioration of throttle response, drop in maximum speed). Signs of running on a rich mixture are black smoke from the exhaust at maximum speed, popping noises in the muffler, and poor engine response.
In addition, the quality of the mixture can be determined by the color of the spark plug insulator:
with normal mixture quality, the color of the insulator is brown,
with a lean mixture, the color of the insulator is whitish-gray or light brown,
with a rich mixture, the color of the insulator is dark brown or black.
Carburetors are adjusted on a warm engine. If the carburetor is adjusted on a cold engine, then when the engine warms up, it will be disrupted, since the volatility of gasoline in contact with heated parts will change and the quality of the mixture will change accordingly.
The left and right carburetors are adjusted separately. To do this, place the motorcycle on a stand and start the engine (to facilitate starting on two cylinders). On the carburetor cylinder that is not being adjusted, remove the tip from the spark plug and short it to ground. If the tip of the spark plug is not connected to ground, the process of spark formation in a working cylinder will be difficult, especially with discharged batteries. In this case, the engine will operate at an increased speed and the carburetor adjustment will be inaccurate. Next, you need to make sure that there is a gap between the cable sheath and the stop on the carburetor. If there is no gap, ensure it by screwing in the stop.
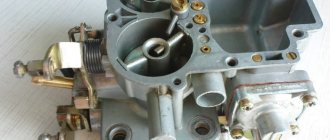
Then adjust the mixture quality at idle. To do this, you need to unlock the idle quality and quantity screws. Screw the “quality screw” 22 (Fig. 5.4) all the way and use the “quantity screw” to set the minimum stable crankshaft speed. Then slowly turn out the quality screw. In this case, the over-enriched mixture begins to become leaner, but will still be rich. When the mixture composition corresponds to the norm, the rotation speed will increase.
As you further turn out the quality screw, the mixture will become leaner, the rotation speed will not increase, and if the mixture becomes too lean, popping noises will appear in the carburetor, so during the adjustment process, turn the quality screw out until the rotation speed increases. It is difficult to determine from the first time at what position of the quality screw the increase in rotation speed stops, so it is advisable to repeat the adjustment operation 2 - 3 times. Turning out the screw, notice when the increase in rotation speed stops. Having finally established the required position, lock the screw. After adjusting the quality of the mixture at idle using the quantity screw, reduce the engine crankshaft speed to the minimum stable speed. After one carburetor has been adjusted, the second one must be adjusted in the same way. Then, with the engine idling, you must alternately remove the caps from the spark plugs of the left and right cylinders and check by ear whether the crankshaft rotation speeds are the same when operating on the left and right cylinders. If the frequencies are not the same, then you need to use the quantity screw, increasing or decreasing the rotation speed, to restore the balance.
This is interesting: In Russia they want to ban rear window tinting
After adjusting the quality of the mixture at idle, adjust the quality of the mixture at average speed. But first it is necessary to check the quality of the mixture by sharply “opening” the throttle. If at the same time popping sounds appear in the carburetor or “dips” in engine operation (flashes in the cylinder stop; at the same time, if the throttle is “opened” smoothly, the engine gradually picks up speed), then the mixture is lean. If the engine speed begins to increase slowly, the mixture is rich, if quickly, the quality of the mixture is normal.
The quality of the mixture at average speed is regulated by the throttle needle. If the mixture is lean, you need to move the needle lock to a lower groove so that the needle rises. If the mixture is rich, you need to lower the needle, move the lock to a higher groove.
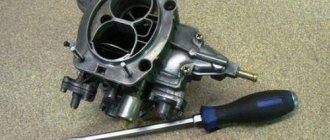
Carburetor adjustment with screws
First of all, before proceeding with the appropriate adjustment, it is necessary to debug the ignition system, make sure that the spark plugs are in good condition, adjust the fuel supply system, set the permissible gap on the device for automatically interrupting the current circuit, remove the gas pedal rod from the throttle valve and only then proceed to carburetor settings.
The engine must be warmed up to operating condition, otherwise after debugging “cold” during operation it will work completely differently. We completely disconnect the crankcase tube, completely eliminating the influence on the crankcase gas setting. The equipment you will need is a simple slotted screwdriver and preferably a tachometer (digital, since the dial does not show revolutions up to 10 units). In service centers, they could use a gas analyzer as a necessary, but not obligatory, one for fine tuning, but we will make do with the specified accessories.
- We reduce the number of idle speeds to a minimum using the “quantity” screw (the engine is running, but is about to stall).
- Using the “quality” screw, we look for the position at which the number of revolutions is maximum. We begin to screw it in, raising the speed; if the engine stalls, we unscrew it to the required criterion.
- We check the quality of the fuel mixture.
Give the gas sharply - the engine should not stall. If it suddenly stalls, then unscrew the “quality” screw until the engine starts working normally. The setup is complete.
Experienced drivers make such adjustments “by ear” based on the sound of the engine; for “confident” drivers, there are many instructions and training videos; for “beginners”, it is better to carry out the correct carburetor adjustment in the appropriate service centers.
Adjusting and tuning the carburetor: main steps
Most modern gasoline cars are equipped with fuel injection systems, but before they gained dominance, all cars were equipped with carburetor systems. For this system to work correctly, the carburetor settings must be performed flawlessly. High-quality carburetor adjustment will reduce fuel consumption, make the engine run smoothly at idle, reduce the emission of harmful substances into the atmosphere and increase the overall engine life.
Most domestic cars have a carburetor system, and the question of how to adjust the carburetor will not lose its relevance for a long time. Many owners of rare old foreign cars also face the problem of how to adjust the carburetor. Since the principle of operation of carburetors around the world is no different, the algorithm of work will be the same.
The carburetor is the main component of the fuel system of any carburetor car. This is where air and fuel mix to form a fuel mixture that enters the engine's combustion chambers. A properly adjusted carburetor produces a fuel mixture in the required proportions. Such a mixture will not detonate in the cylinders, which will increase the life of your engine.
How to adjust the carburetor and when to do it
Do-it-yourself carburetor adjustment is done after using low-quality gasoline or when engine operation is no longer stable. For prevention, the manufacturer recommends flushing the carburetor with a special compound every 6-7 thousand kilometers.
Possible malfunctions in the carburetor:
- Fuel leaks on the carburetor. In this case, you need to measure the fuel pressure. This is done using a special pressure gauge. The operating instructions will tell you what the pressure should be. Typically it ranges from 0.2 to 0.3 atmospheres. If the pressure is normal, the problem is in the float chamber and the fuel level needs to be adjusted;
- Carbon deposits on spark plugs with the smell of gasoline. This clearly indicates a problem with adjusting the carburetor floats or a burnt valve;
- Rough engine idling may not only be due to the carburetor. This often happens due to incorrect adjustment of the throttle cable. To check, you need to disconnect the cable and turn the valve manually.
Before you adjust the carburetor correctly, you need to clean it thoroughly. It is recommended to use special liquids for cleaning. The jets cannot be cleaned with toothpicks or needles. Damage to the jets will lead to calibration failure. If the holes cannot be cleaned with aerosols, you can carefully clean them with a soft wire. When cleaning, do not use rags. Threads can clog the holes, which will lead to malfunction of the carburetor. If the aerosol does not remove all contaminants the first time, you need to repeat the procedure.
Adjusting the idle speed of the carburetor on a VAZ-2107
As part of eliminating illiteracy on the basics of adjusting, tuning and repairing carburetors on the VAZ-2107, we are conducting a series of publications focusing on the main nuances and “secrets”, based on the experience of our colleagues from the forum. So, today we will tell you how to correctly adjust the idle speed on a VAZ-2107 carburetor without having a gas analyzer at hand, but guided only by the tachometer readings. The need for adjustment arises among owners of VAZ classics quite often. Signs - the engine idles unstably, stalls, troits, etc. So, let's go, this procedure is described in simple 6 steps for adjustment.
We draw your attention to the location of the quality and quantity screws on the OZONE carburetor for the VAZ-2107
2. By rotating the quality screw, we find its position at which the speed will be maximum.
4. We check that the position of the quality screw provides the maximum possible speed for a given position of the quantity screw. If this is not the case, then use the quality screw to achieve the maximum possible speed and use the quantity screw to restore the speed above the nominal speed by 15%. We again check that the position of the quality screw provides the maximum possible speed, and return the speed with the quantity screw to +15% of the nominal value. Etc. until the moment when, at a rotation speed 15% higher than the nominal one, any rotation of the quality screw will only lead to a decrease in speed.
5. Turning the quality screw, reduce the speed to nominal.
6. We check and make sure that the engine of the car runs smoothly, without “tripping” at idle and does not stall when the throttle is closed abruptly
Briefly, all this can be stated as follows:
1. Find the position of the quality screw at which the speed will be maximum. 2. If necessary, use the quantity screw to set the speed 15% (130.150 rpm) higher than the required XX speed. 3. see point 1 4. see point 2 5. When it is no longer necessary to adjust the speed with the quantity screw, by turning the quality screw we reduce the speed by 15%, i.e. to the required idle speed.
What to pay attention to:
If the adjustment is made correctly, then when you remove the terminal from the solenoid valve or the vacuum hose from the fitting of the “quantity” adjusting screw housing, the engine should immediately stall.
If, when you tighten the “quality” screw all the way, the engine does not stall, then most likely one of the throttle valves is too open - adjust the locking screws.
Pay attention to the return spring and the “gas” drive. The throttle valve should clearly return to its original position when the gas pedal is released.
Setting up the float mechanism
The level of the fuel mixture in the float chamber is directly related to its quality. At an increased level, the mixture will turn out to be lean, which will negatively affect gasoline consumption and increase toxicity. Without adjusting the floats, the question of how to adjust the carburetor cannot be solved. The process of adjusting the floats includes the following operations:
- Adjusting the floats in relation to the lid and walls of the fuel chamber. If deformation of the float fixing bracket is noticed, it should be aligned manually;
- We adjust the bracket with the needle valve closed;
- We adjust with the float retracted and the valve open; the distance between the float and the valve should in this case be set to about 15 millimeters.
Setting the fuel mixture supply
The carburetor control screws will help you figure out this setting. Before performing this procedure, you should know that the screws have a plastic factory press-on that limits the rotation of the screws (from 50 to 70 degrees). If turning in this range does not bring results, you need to break the press-on and turn the screws as much as necessary. Before setting the position of the screws, you should warm up the car engine to operating temperature.
To adjust the idle speed of the carburetor, you need to turn out the quantity screw and the mixture quality screw a few turns and, turning them, listen to the operation of the engine. When the engine starts to run smoothly, the carburetor idle adjustment is complete.
How to adjust carburetor idle speed on a VAZ 2107
After you have discovered the main signs of carburetor malfunction, you need to adjust the idle speed. Before starting this procedure, you need to make sure that the ignition system is working properly, the fuel filters are clean and the fuel pump is working properly, only then can you start adjusting the idle speed.
- First, warm up the engine to operating temperature. If this fails (the engine stalls), pull out the manual choke control handle. After the engine has warmed up, turn it off and find two screws on the carburetor that are located at an angle to each other. The one that stands perpendicular to the carburetor is called the quantity screw, or in other words, the idle screw. It determines the amount of mixture that is supplied to the engine cylinders. The second screw is responsible for the ratio of gasoline and air, which is mixed in the carburetor and is called the quality screw. Tighten both screws, and then unscrew the quantity screw by 4 turns, and the quality screw by 3. Don’t forget to remove the choke.
- Start the engine again. Most likely, the speed will not correspond to the norm, so tighten or unscrew the quantity screw so that the speed is 850-900 rpm. Now use the quality screw to set the maximum engine speed. To do this, unscrew or tighten the screw and carefully monitor the speed on the tachometer. To do this, you do not need to unscrew the bolt all the way, as the quality will reach its peak and the spark plugs will simply “flood”. Unscrew it until the corresponding interruptions appear.
- After this, again set the speed screw to the range of 850-900 rpm, then again bring the speed to maximum using the quality screw. Repeat this cycle again and tighten the quality screw until the motor begins to vibrate slightly and catch the moment between unstable engine operation and stable speed.
Please note that engine idle speed varies depending on the time of year. In summer it should not exceed 900, and in winter - 1000 rpm.
Adjusting the carburetor draft
Before you begin adjusting the rods, you should remove the air filter cover so that nothing interferes with the process. First, using a caliper, measure the distance between the rod tips. According to factory parameters, it should be 80 millimeters. To adjust the length of the rods, you need to loosen their clamps.
Checking the strainer should be carried out when there is fuel in the float chamber. This will help you see if the shutoff valve is closing completely. After examining the valve, you need to clean and dry it. Problems with loss of power and engine failures occur due to obstructed fuel supply. This is another reason to thoroughly flush the carburetor.
The tightness of the shut-off needle can be checked using a rubber bulb, while listening for air leaks. If they are present, it is time to change the needle.
How to properly adjust a Solex carburetor
There are still many representatives of VAZ classics driving along the roads. Many of these cars have Solex carburetors under the hood. This carburetor is more economical and is capable of producing a higher quality mixture of fuel and air. For smooth operation of the engine, this carburetor must be properly tuned and adjusted. The class of carburetor masters is gradually dying out, so many people have to do the carburetor adjustments themselves.
How to set the ideal settings yourself
To work, you will need the usual set of tools that are found in almost every garage. To eliminate fuel overflows, you need to correctly set the float in the chamber. This operation can be done using a special template. Experts recommend not using this template, since the number and thickness of gaskets in carburetors do not always match. Fans of various improvements often replace factory gaskets with better ones. It happens that the factory settings of the template do not suit everyone. Although Solex carburetors are the same, the fuel pump can deliver gasoline differently. A lot also depends on whether the return line is plugged, so specialists use a different method.
- The mixture quality adjusting screw is tightened by hand until the end;
- Next, unscrew it back five turns;
- Turn on the engine, remove the choke and use the mixture screw to bring the engine speed to 750 rpm;
- By turning the quality screw, we bring the engine speed to the maximum;
- Using the quantity screw, reduce the speed to 800 rpm;
- We tighten the quality screw a little until instability appears;
- We unscrew the same screw back one turn;
- We turn the quantity screw until the idle speed reaches 800 rpm (in winter they can be raised to 900).
It is worth remembering that adjusting the carburetor not only eliminates floating engine speeds. A well-tuned carburetor will consume a minimum amount of fuel at stable idle speeds.
Various problems may arise with this adjustment.
It happens that when unscrewing the quantity and quality screws, the engine practically does not react. This happens when a large stream of gasoline flows from the idle hole and the screw is unable to influence it. It is possible that the valve is poorly closed or the jet is deformed. It happens that when replacing jets, they mistakenly choose a larger diameter than required. The plug may be loose. It is worth conducting a thorough inspection of all carburetor elements, this will help avoid such problems. When cleaning, the jets must not be cleaned using abrasives.
If the solenoid valve malfunctions, unscrew it and check for deformation. The mounting hole may also be deformed. If the thread of the mounting hole is torn off, you will have to replace the carburetor cap with a new one. If no defects are found, simply lubricate the O-ring before screwing in the nozzle.
This is interesting: How to flush the engine when changing the oil
You can determine whether the carburetor needs adjustment by the engine's response to pressing the gas pedal. An engine receiving a balanced fuel mixture responds to pedal pressure without hesitation, in a split second. The speed should be smooth at idle. There should be no jerks or failures. If the engine runs smoothly at idle, but when you press the accelerator it begins to act up, you need to tighten the quality screw, enriching the mixture.
The quality screw directly affects CO emissions into the atmosphere. Drivers are familiar with the situation when, before going for a scheduled inspection, they need to tighten the quality screw. The emissions become smaller and the car easily passes inspection, after which the position of the quality screw returns to its place. Some people are perplexed why their neighbor’s car consumes less fuel, although both have identical models. It's all about the settings and adjustments of the quality screw.
If the car responds to pressing the gas pedal late, the problem is in the accelerator pump. You can replace it, or change only the spout. When it comes to the spout, the fuel mixture is supplied over-enriched. The problem is solved by replacing the spout. If you decide to install a spout of a different diameter, do not forget to select the appropriate jet for it.
Setting up a carburetor is a rather complicated procedure. Don't expect everything to work out the first time. It may take a couple of weeks to complete the full cycle of eliminating all deficiencies. It is better to listen to the engine, quickly respond to the slightest interruptions in its operation and carry out regular carburetor flushing. The main thing when washing is not to use nameless Chinese-made cleaning products. And if you refuel with high-quality fuel, the carburetor will thank you for years of trouble-free operation.
What do we have after proper adjustment of the carburetor unit of the “six”?
Checking the adjustments of the fuel mixture preparation unit is the same important maintenance step as monitoring the condition of the car battery . An integrated approach to setting up the carburetor guarantees not only a comfortable mode of movement, but also a lot of useful points:
- An increase in power and a confident increase in speed.
- No failures in the operation of the internal combustion engine in the low and medium speed sector.
- Improved dynamic characteristics - the car picks up speed faster and accelerates in a short time.
- Optimal engine response, which is expressed in the responsiveness of the gas pedal.
The listed qualities make it possible to effectively use the combustible mixture, which is necessary both in urban traffic jams and on country roads. Therefore, proper adjustment of the carburetor unit will help the car gain speed in a timely manner and complete the planned maneuver.
If some malfunctions occur in the engine (a hot engine does not start, the engine starts and stalls, unstable idle speed, etc.), when replacing the carburetor, after repairing it, it is necessary to adjust the idle speed.
Its goal is to achieve stable operation of the car engine at idle speed with a minimum crankshaft speed).
— tachometer To determine the crankshaft speed.
You can use the panel built into the instrument panel (on vehicles equipped with a tachometer). You can connect a separate device (tachometer, auto tester or multimeter operating in tachometer mode). It is better to use a separately connected device since the engine crankshaft rotation speed will be more accurately determined, and therefore the idle speed adjustment will be performed more efficiently.
Adjustment by ear is also possible, but it requires some experience in car repair.
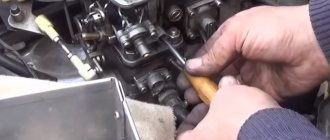
— slotted screwdriver To rotate the “quality” screw of the fuel mixture. Blade width 3 mm.
Preparatory work
1. Warm up the engine to operating temperature (85-90°).
2. Push in the carburetor air damper drive handle (“choke”) until it stops.
The air damper must be fully open.
carburetor air damper 2108, 21081, 21083 Solex is fully open
3. With the engine turned off, connect the tachometer (multimeter, auto tester).
If there is no device, then skip this point. The positive terminal of the device is to terminal “K” of the ignition coil, minus to the “ground” of the car (body, engine, minus battery).
procedure for connecting a tachometer (autotester)
Before connecting, read and follow the instructions for your device.
4. Start the engine, turn on the high beam headlights and the heater.
Adjusting engine idle speed
Recommended idle speed for engines equipped with Solex carburetors 2108, 21081, 21083 750 - 800 rpm . We achieve stable engine operation within the specified interval. We simply rotate the “amount” screw of the fuel mixture and set the crankshaft speed to 750 - 800 rpm.
adjusting screw for the “amount” of fuel mixture of the carburetor 2108, 21081, 21083 Solex
If it is not possible to set the required rotation speed using the “quantity” screw alone, then you will have to make adjustments by adjusting the “quality” screw of the fuel mixture. Perhaps there is still a plastic factory plug on it, it needs to be removed. We pierce it with an awl and pull it out using a metal hook or screw a self-tapping screw into it and pull it out. We carry out the adjustment in three steps; if we do not achieve the desired result, we repeat it once or twice more. Before carrying out it, it is advisable to check the correct setting of the ignition timing and the serviceability of the high-voltage wires. spark plugs, no “suction” of foreign air into the carburetor.
1. Using a slotted screwdriver, rotate the fuel mixture “quality” screw and achieve the maximum engine crankshaft speed.
We rotate both to the right and to the left until we find the desired position of the screw with the maximum frequency. We determine it by the tachometer or by ear.
screw “quality” of the fuel mixture of the 2108 Solex carburetor
2. Turn the fuel mixture “amount” screw and set it to 900 rpm.
By turning the screw (clockwise), we open the throttle valve of the first chamber slightly and the speed increases; by turning the screw (counterclockwise), we close the throttle valve and the speed drops. Therefore, again, we are looking for the desired position of the “quantity” screw at which the speed will correspond to this value (900 rpm).
3. Tighten the “quality” screw and set the required 800 rpm.
If necessary, repeat the adjustment.
If another carburetor is installed instead of the old one, or the “quality” screw has been changed, or the carburetor has been disassembled and assembled due to repairs, then before adjusting, screw the “quality” screw all the way (clockwise), and then turn it out 3 - 4 turns and start adjustment.
— After completing the adjustment, press the gas pedal; the engine should increase the crankshaft speed without interruption and not stall when it is released. If there is a “failure,” adjust again or slightly enrich the mixture by turning the mixture “quality” screw. It is allowed to increase the idle speed to 900 rpm.