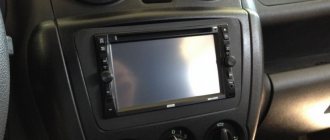
Output of linear outputs from the standard radio
For those who want to get good sound from a standard radio.
You will need a soldering station or a soldering iron with a thin tip, solder paste, 4 electrical capacitors with a nominal value of 10 microfarads 16 or more volts, 4 shielded wires with a bell at the end, very straight hands.
I’ll tell you right away that the process is not simple, and if you are unsure of holding the soldering iron in your hands, then it’s better not to repeat it.
1. We take out the radio and take it home.
2. We disassemble the radio and get to its circuit board. To do this, unscrew all the screws that we see. I think that you can handle it since you already know how to hold a soldering iron in your hands.
3. Here it is, the fee.
4. The arrows show the paths leading to the radio amplifier.
5. You need to solder to the tracks after the containers.
6. A positive signal travels along the tracks. Accordingly, we solder plus capacitances to them. I took 10 mF 50V. Simply because there was no 16V. And to the minus of the capacitance we solder our positive wires from the rulers. Attention: SMD open-frame containers are NOT SUITABLE, the container must have (+) and (-) We combine the ground wires from the rulers and solder them to the nearest ground. The closer the better. Look for it yourself, there is a lot of it, a simple call will help you. That's all. The only thing is that I filled the soldering points and the container with a glue gun to fix it.
7. I took the ruler wires from the old tail from the Sonevskaya radio tape recorder. I drilled a hole in the casing of our radio.
And I inserted a rubber seal into it so that the wires would not rub against the sharp edge.
Threaded the wires.
And only after that I soldered them to the containers.
Well, this is what happened.
The radio was assembled and tested on a Blaupunkt GTA 480 Amplifier. The sound is really different than from the built-in amplifier. Alas, I can’t test how good it is, because I’m too lazy to disassemble everything in the car and connect the standard head, but on the table I was only able to compare the sound from the standard output and from the new lines.
Conclusions:
Well. You can actually get very good sound from the stock radio (I don’t write “excellent”). To do this, you will have to follow the procedure described above, connect the line outputs to a good amplifier, replace the standard speakers, install a subwoofer and, of course, replace all the audio wires with wires with a larger cross-section (the larger the cross-section, the better). And I think the sound of the standard radio will seriously please you.
I have already pulled out rulers for many people using the method described above and everyone is happy.
Addition as the topic is discussed on the forum.
Thank you so much DEADOFF
I carried out all my manipulations with the old version of the radio. In the new version, the output of linear outputs looks slightly different.
I soldered the containers as suggested by DEADOFF. I’ll say right away that you have to do it VERY carefully if someone decides to do it themselves. I took a couple of photos to make it clearer.
Brief explanation of the DEADOFF photo
1. Place for soldering of electrolytic capacitors, they need to be soldered with the negative terminal to the board, and the positive terminal must be soldered to the central wires of the first pair of RCA wires. 2. Place where the screen is soldered for the first pair of RCA wires. 3. Carefully lift the capacitor to bridge the two capacitors of the second pair of RCA wires. 4. Place of soldering of electrolytic capacitors, they need to be soldered with the negative terminal to the board, and the positive terminal must be soldered to the central wires of the second pair of RCA wires. 5. Here you need to strip and solder the screen (braid) of the second pair of RCA wires.
I first filled the solder joints with KLT-30 and then secured it with glugan on top (I doubted the latter for a long time, after all, the temperature next to the amp is decent)
Donor tails (RCA female) were brought to me from the Mystery MPRO YM kit
In my opinion, I would have made it longer, but I used what they brought.
Output of linear outputs of the standard radio
I hope those who read this manual know how to remove the radio and have all the necessary tools. And for those who cannot disassemble it on their own and do not know how to solder, I strongly recommend not to try to solder, it is possible to kill the radio, it is better to ask a person with good soldering experience.
Having disassembled the radio, I spent half a day finding descriptions of the microcircuits on the Internet. After a description was found for the latest NXP chip, it immediately became clear that the DACs and operational amplifiers are located on the chip, and not, as usual, soldered on the board. And as I remember from the institute circuit design course, the signal after the opamps must be removed from the capacitor standing at its output. Having tucked in the oscilloscope, I saw running sinusoids, the amplitude of which varied from 0.1 to 1 V, depending on the position of the radio volume control knob. SO THEY ARE THE MOST LINEAR SIGNALS!!! All that remains is to solder to them and that’s it...
First, you need to prepare the necessary tools and materials. 1. Soldering iron 2. Wire cutters (side cutters) 3. Interconnect cable + thin wire for soldering to printed circuit board elements 4. Heat shrink tube and lighter 5. Clamps - ties 6. Block RCA connectors 7. Gun with silicone glue
We disassemble the radio, remove the back wall - the radiator, select a place for the connectors and drill holes. Next, we screw the connectors and prepare the wires, adding thin wires for easy soldering to the printed circuit board. We insulate all completed wire solderings with heat shrink.
After everything is prepared, choose a place to solder the wires. As I already said, you need to solder after the capacitors of the operational amplifiers at the output. Thus, we have 2 places, they call each other, i.e. between them there is just a path in some middle layer. I chose the second one, since there are elements sitting on the “ground” and it is very convenient to solder to them. There is no cleared “land” in the first place.
Solder the previously prepared wires. I’ll make a reservation right away, I soldered only the two front channels, I haven’t needed any more yet . All four outputs are soldered in the same way! The photo shows that the signal is taken in front of resistors connected in parallel, and the screen is soldered to the contact of a capacitor shorted to ground.
After soldering securely and neatly, you need to secure the wires. To do this, we use silicone glue and glue it directly to the printed circuit board. There is a platform on it with unsoldered elements and a microcircuit, so we glue it there.
For reliability, we secure the wires to the side wall with a clamp. After this, we screw the back wall - the radiator, do not forget to anoint the contact of the microcircuit and the radiator with thermal conductive paste!!! And solder to the RCA connectors.
Next we collect everything. And we admire how neatly everything turned out.
Let's go install the radio in the car. You just have to be more careful when you pull the interconnect cable, noise in the form of a squeak appears when you bring it close to the airbag wires.
Linear output of car radio
If you do not come across radio tape recorders, amplifiers and other sound-reproducing equipment every day, then you may well have a question - what is this “linear output” on the radio tape recorder, why is it needed and what is the importance of their number.
The line level output is intended for connecting external audio amplifiers. These can be acoustic amplifiers, or an active subwoofer - a linear output is used to transmit sound from the source (car radio) to the amplifier.
The term “line output” refers to an unbalanced type of audio signal transmission that uses one signal conductor and ground; in automotive electronics, RCA connectors (the so-called “bells”) are used. It also assumes that the signal level corresponds to the standard. In car radios this level is usually up to 2V; some devices (high class) have a signal level up to 4.5-5V. The level of the signal at the linear output in automotive electronics is of serious importance, because the car is a source of a huge amount of interference and the higher the level of the useful signal transmitted through the intercomponent cables, the less noise induced from the electronic systems of the car will be heard.
The higher the signal level at the linear output, the better; it’s not for nothing that all high-end car radios have a high-level linear output, and this is especially emphasized in the technical specifications.
How many linear outputs should a car radio have?
Indeed, if you choose a car radio, then in the technical specifications you can read about the number of linear outputs, which can be different, for example one pair, two pairs, three pairs. The more expensive the radio, the more linear outputs it usually has “on board”. How many should there be?
- A pair. Usually found in all even the most inexpensive radios. Most often used to connect a subwoofer. It’s good when a radio with one pair of linear outputs can control the level of this output (to adjust the subwoofer); if there is a built-in filter for the subwoofer (LPF), then this is generally excellent.
- Two pairs. Usually these are front and rear outputs for building a system with “front+sub” or “front+rear” amplification. Usually these are mid-price radio tape recorders; they already have the necessary settings for the subwoofer (see above); in general, it’s great when you can turn on the low-pass filter (HPF) on the front outputs.
- Three pairs are the best option for creating a full-fledged system with an amplifier on all channels (front + rear + sub) or even complex options with channel amplification if the radio has a built-in crossover or even a processor.
The more pairs of linear outputs a car radio has, the more sophisticated an audio system can be created. When purchasing, decide how much you need.
So when buying a car radio, decide which amplifiers you will connect to it in the future. If amplifiers are not planned, then having at least one line output in stock for connecting a subwoofer is still a good idea. What if you still want to install a sub?
How to connect a subwoofer to a standard radio, without line outputs
There is a desire to listen to your favorite performers while driving, there is a car radio, but, unfortunately, it does not give the desired effect, the music plays, but I would like something more powerful. This is why you need a subwoofer, but connecting a subwoofer is still accompanied by some difficulties. Like any other amplifier, you need to supply power to it, and also connect the cable through which the audio signal will be transmitted.
And here, if you are not an advanced radio amateur, you can reach a dead end, because in the car radio you do not find a single hole where you could connect the desired amplifier. A logical question arises: is it possible at all, and if possible, how to connect amplifier for standard radio?
1) Purchasing a new radio
The first method is good for those who are poorly versed in the radio business, but do not have any special financial restrictions. You just need to go to a car store and buy a new, more modern radio, and it is quite possible that all the issues will be resolved by themselves. This method is really not bad, but it requires some formalities. For example, your car must support the original head unit you purchase. Also, the radio must have a support function so that the connected subwoofer works and gives excellent sound. Well, the last important point is the cost of head units; with the current crisis, their price has jumped to the price of spaceships. But, as already written above, if money is not a problem, then everything is solved immediately, otherwise read on.
2) Contact radio amateurs
So, if you are not a millionaire, and also do not understand wires very well, then your best option would be to seek help from experienced radio amateurs.
How to mount a linear output on a standard radio
The presence of a radio in a car depends on its assembly. But, as practice shows, many drivers, when purchasing vehicles, prefer options with an already built-in audio system. It is of good quality and provides clear sounding music.
Process
Progress does not stand still, and new device models appear regularly. They are equipped with additional functions that improve acoustics. This system makes it possible to listen to music without distortion with a huge dynamic range. As a result, musical compositions sound bright, natural and authentic.
Linear output on the standard radio: features
In practice, it has been proven that an external power amplifier is the main additional device to the radio, which helps to reveal and improve the quality of sound diversity. This procedure can be carried out in several ways. The simplest and most inexpensive option is installing a subwoofer. It improves the sound quality of low-frequency musical compositions.
Another way is to replace the acoustics and install an amplifier. You can also carry out more radical manipulations. They involve installing a new crossover, surround sound processor, and more. But this is not the entire list. There are quite a few ways to help improve the musical picture in the car.
What all these methods have in common is that external devices are used. But you can also use a linear output for this purpose, which many radios have. In this case, the signal quality will be much higher and will be reproduced throughout the entire audio system.
Page 73: Subwoofer Output, Video Outputs
Attention! The text in this document was automatically recognized. To view the original page you can use the “Original” mode
Connectors AUX, RCA, Video, subwoofer output
Additional AUX connector
An additional AUX connector is located on the rear panel of the radio. Insert the RCA cable into
AUX IN connector. Connect the other end of the RCA cable to external audio equipment, such as a CD
player. Press and hold the Mode button to select AUX mode. Using the volume control
adjust the sound volume.
The RCA connector is located on the rear panel of the radio (see connection diagram). This output is intended
for connecting an amplifier, equalizer or other audio devices that connect to line
RCA outputs. (Red = Right, White = Left). Follow the operating instructions when
connecting this equipment.
Subwoofer output
The subwoofer output is located on the rear panel of the radio (see connection diagram). This exit
designed to connect a subwoofer that connects to the RCA line output. This is the way out
mono. Follow the operating instructions for your audio equipment when connecting. This function
can only be activated when playing discs. If you want to turn on the subwoofer
radio or AUX mode, turn it on in disc mode first.
The video output is located on the rear panel of the radio (see connection diagram). This output (yellow
designed to connect a car monitor
(s) or TV.
Check with your dealer to determine which TVs are suitable for installation in your vehicle. Thanks to
presence of 2 video connectors You can connect 2 monitors, they will play the same thing
image at the same time. Press “BAND/P/N” button to select PAL or NTSC mode.
I bought a 4-channel amplifier, but the radio has no RCA outputs at all (a bummer for me). There is NO money for a new radio and what should I do? I thought about it and made a homemade RCA adapter (connects to the outputs of the radio's speakers!) Many people may judge me... But it really works and there is not a single interference even when the car is running and when talking on the phone.
How to make a linear output on a standard radio?
If the radio is not equipped with linear outputs, then you should not be upset. After all, the situation can be easily corrected. To do this, you can use different methods. For example, unsolder the linear output on the device itself or use special attachments that will help achieve the required signals. If in the first case you use an additional preamplifier, the sound will improve significantly.
Speaking about these methods, they are divided into two main groups. The first category includes those devices with which no additional actions are performed. But the second one provides for them. But do not forget that any interference with the integrity of the head equipment leads to the loss of the opportunity to use the guarantees that are provided for the radio. Therefore, it is better to give preference to the first method.
Line output on the standard Toyota radio
Unsoldering linear outputs from a standard radio is not a complicated process, but it requires care and a responsible approach. Especially if you do it yourself. The first thing you need to start with is selecting a microcircuit. Its appearance is shown in the photo. Moreover, it is connected to the radiator.
Once the circuit has been determined, markings must be installed. Next, you can start searching for the datasheet. This will allow us to determine which wiring is already on the circuit, and which one can be used in our case. This information is extremely important, since a signal is received from the input.
Recently, set-top boxes that reduce the signal level have become especially popular. This design is quite simple and has no special features. Therefore, everyone can handle its preparation and setup. It is enough to use the appropriate scheme.
Soldering a linear output from the radio using a preamplifier is very similar to the previous one. The course of action is no different. Therefore it works the same way.
Wiring of linear outputs on the standard radio
Wiring of linear outputs involves carrying out several activities. First you need to remove the frame that is around the device. This must be done carefully, as it is easy to damage. Next, all the screws that are visible are unscrewed and removed. This will allow you to remove the face of the radio and disassemble it into two parts.
Having disassembled the device, you can see the processor and amplifier inside. Then everything becomes simpler. So, near the amplifier there is a sawing. She is responsible for the connection. Then you need to find the four legs that are at the input of the amplifier. Soldering is carried out to them, and rulers are drawn out.
You can use another method. It consists of using tracks on the board that go from the input to the amplifier. One is sent first to the resistor, then to the capacitor and amplifier. This configuration does not allow transmitting all the acoustics. But the situation can be improved. To do this you will need to solder a capacitor and resistor. This will allow you to get a much cleaner and more natural sound.
Output wiring on a Chevrolet: instructions
Another method of obtaining linear outputs requires the following actions:
- Removing the radio frame;
- Unscrewing screws;
- Removing the device. To do this, you need to disconnect the connectors and antenna;
- Disassembling the radio. To complete this step, you need to unscrew the screws, remove the cover located on top, and unscrew the screws that secure the CD drive. In this case, the device is lifted and the cable is disconnected from the board;
- Preparing RCA connectors;
- Soldering connectors and contacts. These elements are very small. To get the job done, you need to use a soldering iron that is equipped with a thin tip;
- Attaching the drive to the board.
The resulting line outputs allow you to get left and right channels that are located in front. In this case, the supplied signals are regulated by the volume and equalizer of the device. To get the rear channels, you need to use other resistor points.
How to make a line input in a car radio
Repeatedly, car radio customers are faced with such a disappointing circumstance as the lack of a line input . For some reason, modern manufacturers position the presence of a linear input as an additional option, although initially all car radios have this option. It is therefore not difficult to make a linear input.
You will need
- – soldering iron;
- - headphones;
- – solder;
- – connectors;
- – wires.
Instructions
1. If the car radio is standard, then it is acceptable that it has a built-in AUX input. To connect AUX - an external sound source, find the connection pinout. Find three contacts on the car radio connector that are responsible for the incoming signal to the left and right channels. 2. To make sure that you have disconnected exactly the right wires, turn on the radio and touch the entire wire with your finger individually. When you increase the volume, you will hear a characteristic hum in the speakers. Don’t be afraid that you will get an electric shock: the circuit is low-voltage, so your hands are in no danger. 3. Solder tulip-type connectors to the wires (this will allow you to later connect various devices to the car radio using adapters) or directly solder the headphone connector. 4. You can make a linear input in a slightly different way: open the car radio and look in its circuit for all the marks that are responsible for wiring the Line-in input. As usual, they are marked: Line GND, Line-R and Line-L. You can check whether you have correctly determined the “purpose” of a contact by touching each contact with your finger. 5. Often, printed circuit boards have pins provided for line input. Find these pins, solder wires and connectors to them to connect devices that support adapters. 6. You can also locate the audio signal inputs directly on the amplifier chip. However, first understand the essence of the work: from the source the signal goes to the amplifier and external outputs. Often all these devices are assembled on one board, but there are also cases when the amplifier is placed on a separate board. 7. Find capacitors on the car radio circuit and solder the wire needed to connect an external device next to these radio components. You can check the correctness of the wiring, again, by testing, that is, by touching all the wires with your finger.
Not every audio device allows direct connection of headphones. Some of them are equipped only with line outputs. You can connect headphones to them only through intermediate low-power amplifiers.
Instructions
1. Use any suitable plastic box as a housing for a homemade headphone amplifier. It should open easily and fit into your pocket. 2. Take two tulip plugs and a standard headphone jack. Solder short two-wire cords to the plugs. Attach the socket to the wall of the housing. 3. Buy special headphones with a built-in volume control. They are not much more expensive than ordinary ones, but they allow you not to install such a regulator on the amplifier. 4. Inside the case, secure a compartment for 2 AA batteries. 5. Take two different low-power low-frequency planar transistors. They must be identical; on the contrary, the sound volume in the headphones will vary. 6. If NPN transistors are used, connect the headphone jack's common terminal to the positive of the battery compartment, and the emitters of both transistors to its negative. If you use pnp transistors, do the opposite. Remember that in this amplifier the headphone jack's common contact is not connected to the common wire, but to the power bus. Do not attempt to apply the ring contacts of the tulips to the universal contact of this socket, as this will cause a short circuit. 7. Connect the collector of one transistor to the output of the socket corresponding to one stereo channel, and the collector of the other to its output corresponding to another stereo channel. 8. Attach the ring contacts of both tulip-type plugs to the point where the emitters of the transistors are connected to each other. Connect the pin contacts of these plugs to the bases of the transistors, but not directly, but through capacitors with a capacity of several tenths of a microfarad. 9. Connect between the base and the collector of one of the transistors a circuit consisting of a continuous resistor of 10 kiloohms and a variable resistor of 1 megaohm. Set the variable resistor to the highest value. Turn on the amplifier, apply the signal, and begin to slowly reduce the resistance. Reduce it until the wheezing disappears, then increase it slightly. 10. Turn off the power, unsolder the circuit, and then measure its resistance. Replace it with the nearest higher value continuous resistor from the standard series. Solder the same resistor between the base and collector of the second transistor. 11. In the future, it is easy to turn on and off the power of the amplifier, respectively, by connecting and disconnecting headphones from it. Video on the topic
The AUX input in car radios is most often installed to connect external audio devices as a media player or to use the speaker system as a headset. This is quite comfortable, considering that many mobile devices and portable players use the mini-jack connector.
You will need
- - plume;
- – wire with plug;
- – various details at your discretion to implement the design.
Instructions
1. Prepare the tools needed to install the AUX input in your car's radio. To do this, find an IDE cable ATA33 0 cores and a cord with a shielded mini-jack plug for connection. You can prefer any cable, but the above option is perfectly suitable for execution in this case - its thickness is perfectly suitable for the diameter, thereby eliminating the possibility of short circuits due to careless soldering. You can buy all the necessary accessories at radio equipment sales points in your city. For these purposes, be sure to choose wires made from high-quality materials, as there is a high risk of damaging the equipment. 2. Remove your radio from the car, removing the front panel in advance. Unscrew the screws holding it and disconnect it from the power source. Find the connection connector in the lower right corner of the device. Cut the cable you have chosen exactly in half, and then solder the cable in place with the mini-jack plugs. 3. It is best not to solder the connector, as there is a possibility of damaging the device. If you have not done this before, contact service centers, where experts who have repeatedly encountered making similar changes will do this for you. The best option would be to learn how to make such an input on an obscene radio. 4. Having completed the necessary operations, install your radio in the car in such a way that the AUX input do not interfere with other devices. 5. After this, without securing the panels, check the input by connecting to it a portable player or mobile phone with the appropriate connectors. Bring it to the front panel, then secure the location of the car radio with screws. Better than anyone, use self-tapping screws for these purposes. Helpful advice Do not perform these steps at home.
The car radio is the central element of a car audio system. There are car radios equipped with and without a linear output. Installation and connection of each of these devices has its own characteristics.
You will need
- – line input adapter;
- – electrical tape;
- – car radio with frame;
- – screwdriver.
Instructions
1. Connect the line-in adapter to the car radio . To do this, combine the input wires of the adapter with the wires of the car radio's speaker system. 2. Wrap the adapter body in foam to minimize the chance of it breaking into pieces while driving on bumpy roads. But here’s what’s more important: the adapter wrapped in foam rubber should fit comfortably behind the console, so use thin foam rubber (0.5-1 cm). 3. With the support of electrical tape, attach the line-in adapter to the amplifier wiring. The Remote input is used to turn on the amplifier. Combine the car radio and the Remote input, or install the amplifier power button in a place comfortable for you and connect the Remote input to the closing contact, and connect the 2nd contact to the power source. 4. Proceed to connect the power: it is recommended to use a separate wiring coming from the battery or cigarette lighter to the radio. Please note that if the wires are drawn from the battery, their diameter must be no less than the wiring at the output of the car radio. 5. Set the required signal output voltage value. Do not deviate from this indicator; otherwise, the sound quality will be low, and the volume control will be stepped. In the final conclusion, this will lead to untimely failure of the speakers. 6. Check that the signals are being sent correctly. For example, send fader/balance enabled audio to the speaker on the right. If the sound of the speaker corresponds to its location, it means that you connected the car radio correctly. 7. As usual, the radio is sold with a special frame: it is this that is attached to the console panel. Remove the frame from the car radio body, install it in the place provided for the radio and, depending on the thickness of the plastic, bend the metal tabs on the frame using a screwdriver. After this, connect the radio to the plugs and insert this device into the socket (a click will sound). Note! Carry out work related to installing the car radio and connecting this device with the negative terminal of the battery disconnected. Useful advice To dismantle the car radio, using the support of special plates, open the side petals of the frame and pull out the radio.
Standard car radios are not equipped with linear outputs. This makes it a little more difficult to connect amplifiers to them without a high-amplitude input. Some manufacturers of car accessories for connecting car amplifiers produce special matching devices - linear input adapters. The use of this device significantly simplifies the connection of the amplifier to the radio without linear outputs.
You will need
- screwdriver, wire cutters, insulating tape, line-in adapter.
Instructions
1. When starting to connect an amplifier to a car radio without linear outputs, purchase a linear input adapter for the amplifier. With its support, you will be able to match the output signal with the required value of the amplifier input signal. These values vary greatly among different manufacturers. Let's say the input voltage of SONY amplifiers is 8V, and the same parameter of the Kenwood amplifier is 0.8V. 2. Remove the car radio and connect the line-in adapter to the radio. To do this, connect the input wires of the adapter with the speaker wires of the radio according to the connection diagram. 3. Set the signal output voltage value according to the desired value for the amplifier. Be careful not to exceed this parameter, otherwise the volume adjustment will be stepwise, with a steep increase in sound strength for the entire volume increase step. In addition, the amplifier will not reach full power in a timely manner, and when you try to increase the volume, it will overload and produce a distorted wheezing sound. This is very detrimental to the speakers. 4. Attach the line-in adapter to the wiring harness with electrical tape support. Make sure it fits comfortably behind the console. In order to reduce possible rattling of the adapter body on the internal parts of the console, wrap it in one layer of 10 mm thick foam rubber. Foam rubber can be secured with the help of electrical tape. 5. Connect the line cable to the adapter outputs, observing the markings of the line outputs. 6. Connect the power wires to the amplifier - the lead wire for turning on the amplifier and the speaker wiring. 7. Connect the line wires to the amplifier according to their markings. 8. Do a test run and check that the signals are being supplied correctly. The sound of the entire speaker should match its location. Let's say, with the help of the Fader/balance knob, move the sound to the right side. In this case, only the right speakers should sound, then switch the sound to the front speaker. Now only the front right speaker will sound. If everything sounds where it should, the connections are made correctly. 9. Test the amplifier for normal input signal. To do this, set the volume on the radio to 70% of the maximum. With the help of the volume control on the amplifier, turn the volume to minimum. If there is no distortion, then the input signal is normal. 10. Reinstall the radio. 11. Adjust the amplifier's maximum volume using its built-in controls. The volume knob on the radio should be set to 70% of the maximum value. Note! Follow safety rules when working with a soldering iron! Helpful advice Please note: if the line input is connected directly to an amplifier (without a preamplifier), then you will not be able to adjust the sound volume and filter settings.