Wing repair
The cost of replacing the rear left or right wing is, on average, 3200–3300 rubles. You can do everything yourself, you just need to act carefully and have the necessary equipment on hand. So, if there is a defect on the rear wing, it is easy to repair it in this way:
- Raise the car on a jack.
- Squeeze out the affected element.
- Apply a tool with a flat but sharp end to the back of the dent on the fender. Using a heavy hammer to hit the flat part of the bit, smooth out the imperfection step by step.
- Do not hit the rear fender too hard - you risk stretching the iron, resulting in its deformation and an increase in area.
- Knock out the edges sequentially, as if walking along one line.
- Straighten the outside of the dent using a flat object.
It is not recommended to use aluminum tools for straightening - they are soft. It is better to use an iron object.
General information about the design of the plastic wing
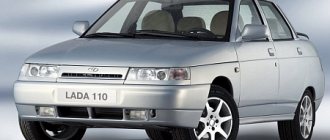
VAZ 2110 plastic wing
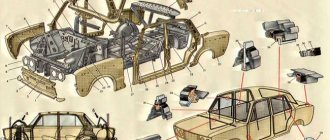
Objectively, it should be understood that the plastic fender of a car is part of the overall body, and not a separate, functional component of the car, as many car owners believe. Structural features of the plastic wing:
- due to slight deformation, plastic is a safer material than metal;
- there is no need to worry about corrosion problems, since they simply cannot exist a priori;
- labile cost;
- ease of installation;
VAZ 2110 plastic fenders
- long service life;
- there is no practical need to allocate financial resources for maintenance, since plastic does not require specific care, etc.
Note. It is always necessary to remember that the plastic wing is extremely easily deformed, so it is necessary to drive the car as carefully as possible. If there is even a slight touch, then 100% deformation will occur, although its degree depends on the force of the collision.
Cases when you may need to replace a car fender:
- car accident;
- decommissioning of the previous wing due to a number of circumstances;
- modernization and tuning of the car, etc.
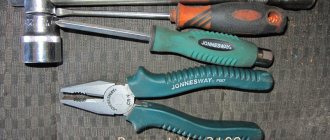
Required tools and materials
Before removing the front wing on a VAZ 2110, it is necessary to carry out preparatory work and prepare tools. During the factory assembly of the body, the wings were welded to the cross members and struts at points. If a non-original wing is being removed, you should check how the part is installed. If there are welding points, they must be drilled out and then cut out. Tools for work:
- chisel with a sharp and wide edge;
- semi-automatic welding;
- key for 8 and 13;
- Phillips and flat screwdriver;
- grinder and circles for stripping metal;
- sandpaper R-80;
- automotive primer;
- end cutters;
- putty, rubber spatula;
- auto enamel;
- anticorrosive based on bitumen or rubber-bitumen.
Before dismantling the part, it is necessary to prepare the car:
- Place the Lada on a flat surface with the handbrake.
- Drain the fuel as welding is involved in the repair.
- Disconnect or remove the battery.
Mounted body parts, sidelights, etc. are dismantled during the work. If you need to replace the original part after an accident, it is recommended to buy a replica from the manufacturer and take measurements. In half of the cases, spare parts from the manufacturer require additional adjustment.
Installation and recommendations
Before installing a new wing, it is necessary to clean all dirt and rust from the cavity, and it is also recommended to wash the area and blow it with compressed air. Apply primer to the seats to which the new wing will be attached. Craftsmen recommend using GF-073 class primer.
It is better to weld a new metal wing using spot or electric arc welding in pre-designated, stitched areas. The process of installing a new element step by step:
- Make holes with a diameter of 5 mm along the edge of the vertical flange below the headlight housing on the front panel.
- In the new wing, perforate holes in increments of 5-6 cm along the perimeter of the rack amplifier, the gutter, and the edges of the connection.
- Use clamps to secure the fender to the seats, install the doors and hood cover.
- Check the width of the gaps and the geometry of the outer part for distortion.
- Tack the wing by spot welding or soldering using L63 brass at the following points: three clamps to the frame
- windshield, front upper cross member, panel, strut reinforcement, sill.
- Check the quality of the gaps and the geometry of the mating parts.
- Weld using electric welding.
- Process welding seams, clean, prime. Treat with protection and paint at the final stage.
When the wing of a VAZ 2110 requires replacement
- The wings of the VAZ 2110 are susceptible to corrosion , as a result of which they rust and collapse. Mainly due to the fact that it is this part of the car that is exposed to moisture and other aggressive environmental factors, such as reagents and salt, which are sprinkled on roads during icy conditions.
This is interesting: Replacing the oil pan gasket
In these cases, the need to change the wing becomes obvious. To perform this procedure you will need the following tool :
- wrench with 8 and 13 mm head;
- extension cord and ratchet;
- flat and Phillips screwdriver;
- new left wing of VAZ 2110.
By the way, the price from the VAZ manufacturer for the original front left fender with article number 21100840301500 or the front right fender with article number 21100840301400 will be about 1,550 rubles. The rear left fender with article number 21100840401500 or the rear right fender with article number 21100840401400 costs about 3080 rubles.
The average cost is indicated for spring 2021 in Moscow and the region.
How to remove and install the wing on 2110, 2111, 2112
An article with photos and video materials for everyone who is faced with the need to replace the front wing on cars of the tenth LADA family.
1. Before you begin removing the front or rear wing from the VAZ 2110 , you need to disconnect the negative cable from the battery terminal.
2. After this, you need to remove the lock from the wheel where you want to remove the wing. (see here).
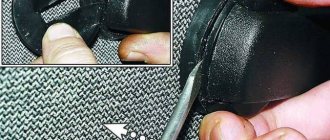
3. After this, you need to move the side turn signal towards the front of the car and remove it from the hole in the fender. The turn signal housing itself needs to be removed. We push the remaining socket with the lamp inward through the hole in the wing.
4. Unscrew the bolt for the side mounting of the buffer from the bottom on the corresponding side.
5. Now you need to loosen the five nuts securing the crankcase protection to the tens bumper from below.
6. After this, you can remove the radiator trim (see here) and loosen the two bolts securing the front buffer.
7. This will allow us to move the buffer in the direction we need to gain access to the bolt that is responsible for the front wing fastening. Unscrew this bolt completely.
8. After this, you can unscrew two more wing mounting bolts from below.
9. Unscrew the two rear fender mounting bolts through the wheel well.
10. Unscrew the four upper wing mounting bolts and remove the wing.
11. Install the wing in the reverse order of removal. In this case, it is recommended (especially when installing a new wing) to clean the surfaces mating with the wing on the body and install new insulating gaskets between the body and the upper wing flange and between the front pillar and the rear wing flange. If gaskets are not available, you can coat the mating surfaces with mastic.
12. Before final tightening of the fastening bolts, align the wing with the enlarged holes in order to align with the gaps and protrusion with the rest of the body panels. After installing the new fender, apply an anti-corrosion coating to the inner surface.
Front fender replacement video:
How to change the rear wing (instructions)
Replacing a rear wing is a rather labor-intensive process, but if you have the necessary tools, you can do it by following the instructions:
- We empty the trunk of unnecessary and flammable items, as well as the trunk mat.
- Unscrew and remove the bumper.
- We remove the headlights.
- We dismantle the fuel tank.
- Using a thin chisel, gently press out the rear wing, but try not to damage the car body.
- We drill out the rivets at the junction of the wing and the transverse frame.
- We remove the rear wing.
- Using wire cutters and a chisel, we get rid of the strips of metal that remain on the wing.
- We straighten and polish the edges of the wing.
- Prime with reactive primer.
- Prime with regular primer.
- We clean the welding points down to metal.
- We attach the new wing by welding.
- We paint the new wing in the body color.
Remove the front bumper and, if present, the wheel arch liner.
If the rear wing arch begins to rot
Rear right wing for VAZ 2110
Iron very quickly undergoes corrosion, which, as it grows, can harm the entire car. It is advisable to start repairs when the rust has not yet seeped into the solon, as the consequences will be much worse. The arch of the front or rear wing is most often affected by this problem. To fix this problem you need to do the following:
- Disconnect the ground so that any welding work can be carried out without difficulty.
- The damaged part must be cut off, and the remaining parts must be cleaned properly.
- To seal the resulting hole, you need to attach a patch on the “wrong” side. This must be done by welding.
Note: before this, you need to treat the damaged area with acid to get rid of corrosion. And in order to make it easier to process this part in the future, you need to drill a small hole in it (preferably from the inside).
- The patch must be cut from stainless steel to prevent rust from appearing in the future.
Note: to make it easier to cut out the patch, you need to take a piece of cardboard, place it on the damaged part and press it so that its dimensions are transferred to the cardboard. You will get a “fingerprint”. You need to cut a patch along it, slightly larger than it. Transfer it to the metal and cut it out.
- Now the edges of the patch need to be welded to the wing so that it holds well.
This is interesting: VAZ 2112 hydraulic compensators with 16 valves are knocking: causes and solution to the problem
Rear right wing for VAZ 2110
- Of course, all this will not look very nice, so you will need to clean it up.
- Now you need to remove everything inside the seams. To do this you need to use a special tool.
- Spray with zinc.
- You need to take sandpaper and smooth the entire surface. After this you need to degrease well. Remove the remaining zinc.
Note: it can be removed with a solution of baking soda and water.
- You need to wait a bit for the degreaser to evaporate.
- Cover with bauxite primer and allow to dry.
- After this, smooth the surface again with sandpaper.
- Now you need to make sure that the seams are not visible. Putty will help with this. First you need to apply it to the seams so that they fill. There is no need to level it completely right away, as air bubbles may appear. After this, you can apply putty to the entire area.
- All that remains is to paint.
Algorithm for removing the wing
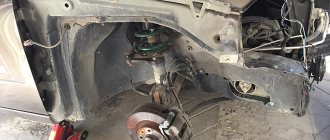
Dismantling the front and rear wings is slightly different, replacing the front wings of a VAZ 2110 in steps:
- Remove the front bumper and remove the hood cover.
- Disconnect the front door power window and remove the door.
- Disconnect and remove the headlights.
- Find the seam connecting the wing with the front strip, headlight trim, cut out the seam, retreating 3-4 mm from the edge towards the wing.
- Cut out the connection of the part with the front side pillar, retreating 3-5 mm from the bend line of the vertical amplifier.
- Drill weld spots where the drain gutter meets the splash guard.
- Detach the wing together with the groove from the splash panel and windshield frame.
- Bend the wing, cut out the horizontal connection.
- Remove the remaining pieces of metal with end cutters and a fine chisel.
The rough dismantling of the wing is completed. It is necessary to straighten the deformed edges of the front panels, A-pillar and mudguard, clean and sand them.
Removal of the rear wing is carried out using a grinder or reciprocating saw. The factory welding spots are drilled out, and the part is cut off with an angle grinder. The cut is cleaned and primed.
In some cases, a partial replacement of the rear wing is performed, depending on the damage. Both whole rear wings and parts of the element are sold on the market.
Painting the rear wing of a VAZ
Rear fender painting
If the car breaks down for any reason, it needs repairs. At the same time, if it is scratched, then it needs to be painted. After the repair, the wing will have to be painted in any case.
So, this must be done according to the following algorithm:
- First, you need to highlight the damaged parts with a marker so that you can pay the most attention to them during the painting process;
- Then - primer. It is necessary so that the paint adheres better to the car;
- The next step is to apply the first layer of base paint.
Note: you need to spray the paint in a thin layer, so the sprayer must be held approximately 20 cm from the wing.
- Leave for 5-7 minutes to dry.
- Next is the second layer of paint.
- Let it dry slightly again.
- Apply a third layer.
Note: You need to wait about 20 minutes before applying the polish. At the same time, if dust has slightly settled on the surface of the wing, it must be removed with a sticky cloth.
- Now you can start applying the varnish. The first layer is applied.
Note: Don't try to create a glossy finish with the first coat. This may cause the remaining varnish to bleed.
- Leave for 7-10 minutes to allow the varnish to dry slightly.
Note: after this you can check for tack (if it sticks a little, but does not rub off, then you can start applying another layer).
- Second coat of varnish. Leave to dry thoroughly.
- Wipe with a damp cloth.
- Polish the vases.
