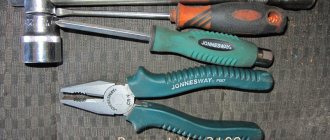
First, a few words about why you need to remove the steering wheel on a VAZ 2110? The reasons may be different, for example: re-upholstery of the steering wheel, repair or complete replacement of it due to a malfunction or unpresentable appearance. Remove the steering wheel on the "ten" It’s not difficult, all you need is a screwdriver, a 24mm head, and a few minutes of free time.
How to replace the steering wheel on a VAZ 2110-VAZ 2112?
Note! Before starting work, place the wheels so that they are clearly straight, this is done so that the steering wheel is installed correctly, if you want to install it exactly the same as before (For example, it stood straight), then in this case, when the protective pad is removed (see point 1 below) using a marker, make two marks, put one on the instrument panel and the other on the steering wheel (If a new steering wheel is being installed, then from the old one, move the mark to the new one, to the same place)!
- How to install power steering on a VAZ 2107
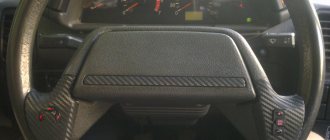
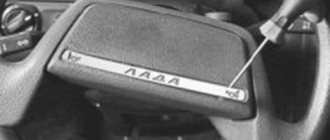
Removal: 1) First make sure that no current flows into the on-board network, this is done very easily, take a wrench and loosen the minus terminal and then remove it from the battery, as soon as the operation is completed, remove the steering column cover (see article: “ Replacing the casing on a VAZ 2109", they are all removed in the same way) and then proceed to remove the protective pad, to do this, pick up the flat central part of the steering wheel with a screwdriver (see photo below) and unscrew a couple of screws with a Phillips screwdriver that secure the protective pad and remove it from the steering wheel, as shown in the small photo.
2) Now special. you will need a head and a wrench to put this head on or an extension, use the wrench to unscrew the central nut securing the steering wheel, but don’t turn it out completely, make sure that the nut remains seated directly on the last thread, then take the steering wheel from its back with your hands , pull it towards you and jerk it off its seat, be careful with the nut, because if you unscrew it too much, it may fly off and injure you.
Note! If the nut is turned out correctly, then the steering wheel will only have to fall off its seat, then this nut is unscrewed completely and the steering wheel, together with the nut, is carefully removed from the steering shaft of the car!
3) But not in all cases it is possible to pull off the steering wheel, sometimes it sits so tightly that even two people cannot move it from the steering shaft. If this happens to you, then take a hammer and a drift made of soft metal, and also resort to help assistant, it is much more convenient for two people to do this work, your actions and the actions of the assistant: Apply a drift to the steering shaft and start hitting it with a hammer, and the second person at this time will have to pull the steering wheel towards himself, you can sharply pull it towards you, he should will be torn off the steering shaft by such actions.
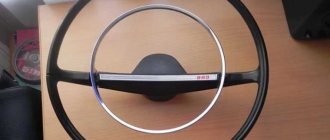
Note! The steering wheel in the rear part has a contact ring for the horn, as well as a turn-off pin. If the steering wheel you purchased does not have this ring or has no base at all, then in this case, move it all, the contact ring is secured with three screws (see . photo 1), by unscrewing which it will be possible to remove it (see photo 2), then you will need to remove the rotation pin from the base or just make sure that it does not get lost, if you only need a ring, the pin comes with a spring (see photo 3) and finally, grab the base and disconnect it from the steering wheel, having previously disconnected the wire block from the terminal (see photo 4)!
Installation: The steering wheel is installed in the reverse order of removal, during installation most often a problem occurs with the steering wheel fastening nut, it can simply fall, so that this does not happen and the nut in the head sits well, take the wire and expose it, and fix it with the metal part a nut to prevent it from falling, as shown in the photo below, after installing the steering wheel, make sure that there is no play in the back or front and make sure that it sits well.
Note! To prevent the strands of the wire that you insert into the head from falling, use them only to put the head on the nut, then pull the wire, remove the strands from the head and tighten the nut until it stops!
Additional video: Study the video instructions for replacing the steering wheel on the tenth family, which is posted below, it will be very useful to you and it contains a couple of important tips that we did not touch on in the article.
The reasons why the steering wheel needs to be removed from a VAZ-2110 car can be varied, for example, it needs to be reupholstered, repaired, replaced with a new one, and much more. It must be said right away that such work is not entirely easy, but, nevertheless, doing it yourself, without contacting a car service, is possible and even useful. After all, knowledge and skills are never superfluous. Before starting work, you must purchase all the required tools, and also strictly follow the instructions, otherwise you can damage the steering column, and then you will not be able to do without repairs at a service station.
- Steering column VAZ 2114 device
So how to remove the steering wheel on a VAZ-2110? In general, there are no particular difficulties here, even if the dismantling is carried out by a beginner. The point is rather that some drivers like to simplify or bypass certain actions during repair/replacement, and this is fraught with consequences.
So, let's begin.
Removing the steering column: step-by-step guide for VAZ 2110
1. Remove the wire with the negative terminal from the battery.
2. Pry off the cover of the horn switch (it is recommended to perform this action using a screwdriver). Then remove the cover by hand.
3. Using a Phillips screwdriver, remove the two self-tapping screws. Then completely remove the car signal cover.
4. Using the same Phillips screwdriver again, unscrew the three screws from the movable signal contact. Next, you need to remove the sound signal, having first disconnected the wire.
5. Attention: unscrew the steering wheel fastening nut with a 24mm socket, but not completely.
6. Pull the steering wheel in your direction and remove it using a rocking motion. Be careful, because the nut can break off very quickly. First, we advise you to protect your face and eyes from this. After the nut has loosened a little, unscrew it completely.
7. If the car’s steering wheel is attached tightly enough that it prevents you from removing it easily, ask a friend or neighbor to help. Apply blows through a soft metal drift to the end of the steering shaft of your car, at the moment when an assistant pulls the steering wheel upward.
8. If it becomes necessary to replace the slip ring in the steering wheel, first disconnect the wiring.
9. Then unscrew the three screws, using the same Phillips screwdriver, remove the ring.
10. Remove the ignition switch and steering column switch block (see mounting block).
11. Using a 13mm wrench, unscrew the bolt on the lower flange of the elastic coupling (which is located under the pedals).
12. Remove the two bolts that are located in the steering shaft bracket mount. When performing this action, be careful, because they have heads that are more serious than the bolts that you came across before. For easier execution, we recommend that when unscrewing them, apply not too strong blows in the tangential direction with a chisel.
13. Unscrew the two nuts from the rear mount using the thirteenth wrench.
14. Now you can remove the steering column, pulling it off the splines of the drive gear.
15. If necessary, replace the intermediate steering shaft on the removed part. During this step, unscrew the bolt nut using two thirteenth keys and remove the bolt from there.
16. Next, slide the shaft off the splines.
17. Using pliers, spread the locking ring (to better adjust the steering column tightening forces) and remove it.
18. And finally, the last thing: remove the lock lever from the splines, then place it in the desired direction. Read the article on how to adjust the steering column on a VAZ car correctly. To set it up, you only need to remove the facing casing.
After replacing the necessary parts, reassembling the steering column must be done in the reverse order of removal.
The removal of the steering column on a VAZ car is now complete. We hope our advice in car repair will help you.
Watch the video if there is a knock in the steering rack (its repair is in the second video):
In what cases is it necessary to remove the steering wheel, and what tools are required for this?
Despite the fact that the steering wheel is perhaps the most reliable element in VAZ cars, sometimes it needs repair or replacement, for example:
- when faults are noticed in the steering wheel;
- if the driver wants to replace the steering wheel with a new model;
- when the appearance of the old steering wheel no longer suits the owner and a new one is needed.
Malfunctions can occur due to the fact that the splines are worn out and backlash has occurred, and, as a result, the car reacts poorly to the driver’s actions. In this case, it is best to replace the steering wheel with a new one or a completely different model.
If the reason for the replacement is appearance, then you can either replace the steering wheel, or buy a cover for the existing one.
Also, sometimes the steering wheel must be removed if individual elements need to be repaired. For example, to work with the dashboard, or if the steering column needs to be repaired.
Steering wheel removal tools:
- flat and Phillips screwdrivers;
- socket head 24;
- extension;
- ratchet handle/knob.
When everything you need is at hand, you can start.
How to remove the steering wheel on a VAZ 2109
Removing the new steering wheel
Disconnect the negative cable terminal from the battery terminal. Use a screwdriver to pry off the cover of the signal switch...
...and remove it. Using a Phillips screwdriver, unscrew the two self-tapping screws......and remove the cover. Using a “24” socket, unscrew the steering wheel mounting nut, but not all the way.
Using a marker or felt-tip pen, mark the position of the steering wheel on the shaft.
While rocking, we pull towards ourselves, and the steering wheel comes off the splines.
In the event of a sudden break, the nut will protect the face from injury. After this, completely unscrew the nut.
If the steering wheel sits very tightly, an assistant pulls the steering wheel towards you, and strikes the end of the steering shaft through a soft metal drift. To replace the slip ring, use a Phillips screwdriver to unscrew three screws......and, having disconnected the wire connector, remove the ring.
We assemble and install the steering wheel in the reverse order, aligning the marks.
How to change the steering wheel on a VAZ 2109
Hi all! I’ll say right away that there will be a lot of letters!))) At the beginning of August, I decided to replace the ten-wheel steering wheel with the original brown one and at the same time change the plastic of the steering column, because the previous owner broke it to fit the 2110 steering wheel. If only I knew where this would lead me O_o.
According to the plan, I set aside 2 hours for all this, in a leisurely manner. But as usual, everything lasts for 2 weeks. At first everything seemed to be going well; I removed the casing and steering wheel. Then I installed a new casing, but forgot to install the rubber band for the ignition switch, and decided to immediately try on the steering wheel. The view was certainly amazing! But when I tried to twist it I realized that it rested directly on the casing. I thought maybe I messed up somewhere, but it didn’t seem to be anywhere. I started looking at everything and found... that the casing is not positioned correctly due to the fact that the ignition switch bracket is in the way.
Instructions
- To begin, dismantle the cover, under which are located the screws holding the signal cover.
- Then, using a Phillips screwdriver, you need to unscrew the steering signal cover.
- The next step, after the cover is removed and access to the steering wheel mount is gained, is to unscrew the nut that directly holds it all in place. To do this, use a 24mm screwdriver and a wrench. But before you start unscrewing the nut, you should turn the steering wheel to the right until it locks. This will make it easier to do.
- After the nut has been unscrewed, the steering wheel of the VAZ-2110 is dismantled. Before removing the steering wheel, its position must be set exactly in the center. To do this, you should set the steering wheel level, and then, guided by the factory mark, place yours on the steering column housing. You can, of course, do without marks, but thanks to them, the process of installing the steering wheel will become easier and faster.
- Next, you need to disconnect the signal power wire, after which you can remove the steering wheel.
- Taking the steering wheel with both hands, you need to remove it from the grooves (if it does not come off the first time, just apply a little force). To make the task easier, lightly hit the edges of the steering wheel and at the same time pull it towards you.
How to properly remove the steering wheel in a VAZ-2110
Despite the fact that almost every steering wheel installed by the manufacturer is a fairly high-quality mechanism, under certain circumstances it still has to be dismantled. You can carry out the procedure for removing the element yourself if the car owner has the skills to repair cars. But before you begin dismantling, you need to familiarize yourself with the rules that will help you figure out how to remove the steering wheel on a VAZ-2110 so as not to damage the integrity of the wheel.
Why do you have to remove the steering wheel?
The following reasons may prompt a car enthusiast to dismantle the steering wheel:
- a breakdown in the car system that controls the sound signal;
- increased steering play;
- the desire to modernize a standard, factory mechanism.
The owner can remove the car steering wheel for other reasons, but regardless of the reason for dismantling, it is important to carry out this process step by step and taking into account the recommendations of professionals.
Step-by-step instruction
In order not to damage the integrity of the steering wheel of the VAZ-2110, including the Bogdan modification, dismantling should be carried out in stages:
- First of all, you need to turn off the power to the car to prevent a short circuit. To do this, you need to disconnect the “negative” terminal from the battery, carrying out this activity slowly and carefully.
- We turn the steering wheel until it takes a middle position relative to the wheels of the car.
- Using keys of the appropriate size, unscrew the 7 fixing elements that hold the protective steering wheel cover.
- The lever responsible for blocking the control is disconnected from the power supply, the column is lowered and the upper part of the protective casing is removed.
- Using a screwdriver, which must be carefully inserted under the upper part of the decorative steering wheel trim, remove it and unscrew the two fasteners. The latter attach a button that produces a sound signal. The unscrewed button is carefully removed from the socket.
- Using a socket of the appropriate size, you must carefully unscrew the steering wheel lock, and before starting the process, use a mark to fix the correct location of the steering wheel. It would not be amiss to note the correct position of the turn signals. It is important to dismantle the steering wheel with extreme caution, taking into account that when working, the part can cause injury, since the fit of the element is quite rigid.
To avoid injury, experts recommend not completely unscrewing the fixing nut, but waiting until the wheel comes off the main shaft, and then completely removing the fixing fasteners.
What else is worth knowing
To simplify the process of removing the steering wheel, especially if the element cannot be removed from its permanent place for a long time, you can hit the area a little so that the pressure is applied to the edge of the steering wheel.
It is best to use an assistant when performing this work, who will begin to pull out the part while the car owner lightly taps on it. After the cause of the breakdown has been eliminated, you need to reassemble the steering wheel in the reverse order. Before assembling the structure, the switch should be turned so that the hub pin engages with the connecting groove. A correctly rotated wheel will help automatically return the switch to the correct position, thereby simplifying the installation of the entire structure.
The information provided, we hope, will help simplify both the removal and assembly of the steering wheel on the VAZ-2110, so that the car owner can do all the work himself. And if difficulties still arise during the process, you can watch an additional video with instructions.
All about the VAZ steering wheel
Replacing the steering wheel of a VAZ 2110
First of all, you need to understand this important truth: the safest steering wheel is the one that was initially installed on the vehicle by the manufacturer. It was developed specifically for a specific car model, passed the necessary tests and is in accordance with current regulations. However, the design of the standard VAZ 2110 steering wheel is not to the taste of many and leaves much to be desired: the rim is very thin, there is no comfort and convenience when hands touch its surface, it is smooth, cold to the touch in winter and slips in the hands in summer. Therefore, car owners quite often think about replacing the standard steering wheel with a steering wheel from a different manufacturer, purchased in a specialized store. Also, the need to replace the steering wheel may arise due to the appearance of abrasions on the top, if there is a need to repair the sound signal.
Note. It should be remembered that, despite the large assortment of steering wheel models offered, quite often they are questionable in terms of safety and quality.
VAZ 2110 steering wheel removal
It should also be remembered that, according to the current rules, replacing the steering wheel of a vehicle is actually considered making changes to its design.
Of course, you can put different covers and leather, rubber or fur braids on the wheel, but it’s still not always possible to get a comfortable steering wheel this way.
Choosing a steering wheel is a responsible matter
Sports steering wheel VAZ 2110
So:
- In the process of choosing a suitable steering wheel, you should take into account that a small steering wheel on a car without a VAZ power steering or rack will be much heavier, and a steering wheel with a larger diameter will be much more convenient to turn.
Note. The height of the driver should also be taken into account; for example, drivers with long legs may rest their knees on the large steering wheel while shifting the throttle or shifting the clutch.
Note. This is very important, since the further ease of use of the selected steering wheel will depend on this.
Replacing a car steering wheel with a steering wheel with a modified design may lead to some changes regarding the ergonomics of the driver's workplace. In addition, the force on the steering wheel also changes, which to some extent causes violations of passive safety in the car.
Comfort steering wheel for VAZ 2110
Replacing a VAZ steering wheel
Steering wheel play VAZ 2110
For each steering wheel, factory standards apply, according to which the permissible force on them and the resistance that the structure itself can withstand are determined . That is why, if you plan to replace the steering wheel, it is recommended to give preference to a traditional steering wheel with additional braiding made of materials that provide higher reliability of contact with the surface of the steering wheel rim. The procedure will require the following materials and tools:
- Phillips screwdriver;
- Head “24”;
- New steering wheel;
- A piece of wire or wire;
- Chalk, marker or something else for marking.
Removing the steering wheel
Replacing a steering wheel is not as difficult as it seems at first glance. In the process of replacing the steering wheel, it is first removed. This procedure is carried out in the following order:
Note. Before carrying out work, do not forget to remove the key from the ignition switch.
- First, the car must be installed on an inspection ditch or lift;
- Then the hood of the car is lifted and the terminal of the “negative” wire is disconnected from the battery terminal;
Note. The disconnection of the terminal is due to the fact that there are electrical connections in the steering wheel. By turning off the power, you can prevent short circuits and unwanted connections between electrical wires.
- After this, the car’s wheels are turned to the left or right;
Note. The steering wheel is turned until the device is activated, which locks the steering shaft.
- Markings are applied to the steering wheel and dashboard;
- Then the seven screws securing the steering column casings are unscrewed and the lower steering column casing is removed;
- By unlocking the steering column adjustment lever, the column moves down. After this, moving up reveals the upper steering column casing;
Steering wheel disassembly
- Using a screwdriver, pry up the cover plate of the signal switch and remove it;
- Using a Phillips screwdriver, unscrew the two screws that hold the horn button and remove the cover;
- Using a 24mm socket, the nut that secures the steering wheel to several threaded screws is unscrewed so that it can move;
- With rocking, the steering wheel is pulled along the shaft splines.
Note. If the steering wheel cannot be moved by hand, an assistant may be required. One needs to pull the steering wheel towards himself, and the second one needs to strike the end of the steering shaft with a hammer through a drift made of soft material.
- Before finally removing the steering wheel, you should remember, or better yet, mark its position relative to the shaft, as well as the position of the turn signal switch in relation to the plastic ring;
- After unscrewing the nut, the steering wheel is removed;
- After aligning the two wheels, the mark is transferred from the removed steering wheel to the new one that is planned to be installed.
Installation of a new steering wheel
Installation
Installing a new steering wheel is performed in the reverse order of removal:
- During the installation process, the steering column switch is set to the neutral position, after which installation can be carried out.
Note. To prevent the nut that secures the steering wheel from falling out of the head during installation on the shaft, a wire or several strands of wire of the required diameter are inserted between the head and the nut.
- After tightening the nut, the head is removed and the wire is removed, after which the nut is tightened.
- Also, when installing the steering wheel, you should turn the turn signal switch ring so that the pin on the hub fits into the groove of the ring (the ring returns the turn signal switch to its initial position when the car exits a turn).
- Then the negative wire is connected to the battery, the functionality of the sound signal and the steering column switch is checked.
Examination
Checking the newly installed VAZ 2110 steering wheel
- After all the necessary work has been carried out, it is necessary to check the correctness of its implementation. To do this, the wheels are installed in a level position. If, in this position of the wheels, the steering wheel is not skewed and is in a strict central position, without shifting to the side, then the installation was carried out correctly.
- In the case when the steering wheel spokes are located asymmetrically while the vehicle is moving directly on a flat horizontal platform, it is necessary to stop the car in this position, remove the steering wheel and install it correctly, then again check the accuracy of the installation while driving.
Checking the installation is a mandatory procedure, because there are cases when the steering wheel falls off while the car is moving.
- During the first week after replacing the steering wheel, it is not recommended to drive at high speed while getting used to the new steering wheel; this is especially important to consider in parking lots. This is also necessary in order to learn how to well determine the angle of rotation and the maneuverable response of the machine.
- Before you decide to replace the steering wheel, you should think carefully about whether it is necessary. Currently, many technologies and materials are used, there are various companies offering a variety of services in order to improve the car and make it more convenient and comfortable.
VAZ steering wheel tuning
Such a service will cost no more than a complete replacement of the steering wheel. After all, the replacement procedure will require not only the purchase of a new product, you will also have to spend a sufficient amount of time and effort to complete all the steps. A huge advantage of such products is that after putting them on you will not have to get used to the new steering wheel and change your driving style, as well as give up speed and drive. Here is a video about tuning the interior and steering wheel of a VAZ. And here is a photo of the tuning at the top. Still, doing the replacement yourself is welcome. If you do everything as required by the instructions, there will be no problems, and the price of the car will increase noticeably, because its appearance will improve much.
Add a commentAdd a comment We advise you to read Steering wheel play on a VAZ 2109: how to remove Play in the VAZ 2109 steering wheel and its eliminationVAZ 2109 steering wheel turns hard: how to fixVAZ 2109: power steering - how to installumelyeruki.info2110Removing and installing the VAZ 2110 steering wheel
Hello. Today we’ll figure out how to remove the steering wheel on a VAZ 2110.
Tools:
- flat screwdriver
- crosshead screwdriver
- twenty four head
- knob
- extension
- torque wrench (optional)
Dismantling and replacement
We have already decided on the reasons and available steering wheel options for the “ten”. Therefore, it’s time to get rid of the old device and install a new steering wheel in its place.
- Disconnect the negative terminal from the battery. This way you can avoid a possible short circuit in the steering wheel wiring.
- Check if your wheels are level. Place it as level as possible in order to simplify the reassembly process for yourself.
- Unscrew the seven fasteners that hold the steering column housing in place, and then remove the steering column lower housing.
- Unlock the column position adjustment lever.
- Lower the column down.
- Moving it gradually upward, remove the upper casing.
- There is a decorative trim on the steering wheel. You need to pry it off with a flat screwdriver.
- You will see two fasteners that hold the signal button.
- Unscrew them and remove the button.
- Use a socket wrench or socket to remove the retaining nut from the steering wheel. Do not unscrew it all the way, which will allow you to safely remove the element. It should be recalled that there is a hard landing here due to the associated qualities. If you completely remove the fasteners, you risk severely damaging yourself or the car itself with the steering wheel being removed.
- Before removing the steering wheel, be sure to apply the appropriate marks. You need to mark the location of the steering wheel relative to the shaft and the turn signal switch.
- Now apply several gentle but firm blows with your palm to the steering wheel in the direction away from the dashboard.
- After this, the device will be able to come out of the slots.
- Next, unscrew the fastening nut.
