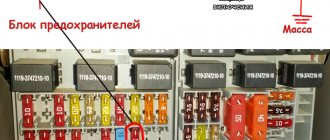
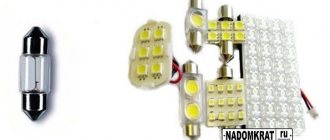
Today I’ll tell you a story about LEDs in dimensions. =) We all know that when LEDs are installed instead of conventional incandescent lamps, BSK begins to complain about faulty lamps. The relay in the fuse block is responsible for this heartfelt cry of the BSK; it is the largest in size, you won’t miss it. =) I found on the Internet that you can re-solder the original relay a little, and BSK will not swear. I was sorry to destroy the factory one, so I bought another one. I bought it and bought it... And when I came home and took it apart, at first I was a little upset... The guts of the original relay look like this:
And the guts of the one bought like this:
“And what is there to solder so that nothing gets damaged?” — I thought... Then, for the sake of experiment, I plugged the purchased diodes into the dimensions, changed the relay and tested everything. Oh miracle! BSK is silent! O_O I thought the relay was not working, reached into the trunk and pulled off the block from the rear lights - BSK screamed about the lamps being faulty! =) So the relay is working. Externally, they are also slightly different. This is what a native relay looks like:
And this is what I bought:
So, quite by accident, I acquired a very useful device for me. White dimensions are my childhood dream! =D
Also, about a month ago I replaced my tweeters:
Someone may not have understood, but another immediately determined that these were the legendary Volgov signals! They blow great! Now I signal to everyone I recognize! =D
That's all! Thank you for your attention! =)
Issue price: 250 ₽
Dimensions in turn signals and traffic rules
The transfer of dimensions to the direction indicators refers to a change in the design of the car, for which Article 12.4 Part 1 of the Code of Administrative Offenses of Russia provides for penalties. This is especially true when the color of the side lights is different from white. Of course, the subjective opinion of the inspector is not enough to impose a fine. Color discrepancies must be proven using a spectrometer. But in practice, it is quite difficult to appeal a decision, because courts often make decisions solely on the basis of the words of the Ministry of Internal Affairs officers who compiled the protocol. Before you make the dimensions in the turn signals of the VAZ 2114, pay attention to one more point: yellow dimensions are less noticeable and can mislead other drivers, so such tuning is not entirely safe.
Dimensions in turn signals using a relay
You can set the front turn lamps to work in headlight mode without losing their function. To do this, install a pair of relays that will break the power supply circuit for the lamps when the turn signal is turned on. Thus, when you turn on the headlights, the turn signal lamps will simply light up, and if you turn on the turn signal, they will blink in antiphase with the rear turns (when voltage is applied, the rear lamps light up, and the front lamps go out due to the opening of the relay contacts). This solution has one problem - the turn lamps will not light up if the side lights are turned off. To solve the problem, you need to add a couple more relays that will switch the power to the turn signal lamps to the standard circuit when the side lights turn off.
The disadvantage of this method is that it reduces the reliability of light signals due to an increase in the number of contact groups in the power circuit. To increase reliability and reduce the number of wires and contacts, you can use semiconductor circuits for turning on turn lamps. It is very difficult to assemble such a circuit on your own without special knowledge and experience. Therefore, it is better to purchase a new one or ask for help from a specialist. Now you know how to make dimensions in the turn signals of a VAZ 2114. Whether you put this knowledge into practice and whether you experience difficulties when passing a technical inspection or when meeting with the traffic police is up to you.
What kind of light bulbs are in the dimensions of the VAZ 2114
One of the most problematic places in domestic cars is the rear lights of the VAZ 2114. In most cases, the problem lies in low-quality, unreliable rear light circuit boards. As a result, contact with incandescent lamps disappears or is lost over time.
Often the problem is solved by using brute force, by striking the body or base of the lamp. However, such actions do not completely eliminate the problem; periodic failures in the operation of the turn signal, side lights or brake lights occur.
Design of the rear lights of the VAZ 2114
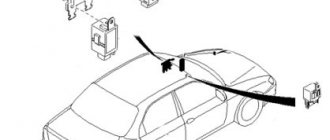
In order to carry out repairs, diagnose and eliminate emerging problems, it is necessary to understand the design and diagram of the rear lights of the VAZ 2114. The rear light design consists of three main elements: - the rear cover; — boards with fasteners, connections for connecting light bulbs; — external decorative cover, light diffuser.
Wiring diagram for components (lamps): 1. direction indicators; 2. overall glow; 3. signaling (brake lights); 4. foglights; 5. designations for reversing.
Causes of breakdowns
The most common reasons for node failure:
- the narrowest point in the entire structure is the elastic board;
- in second place, banal burnout or mechanical damage to light bulbs;
- the third reason is a problem with the fuse or relay;
- oxidation of contacts;
- broken wiring.
First of all, it makes sense to check those elements that do not require removing the entire headlight (for example, fuses, relays). Then check the quality of the connections, the presence of oxidation and the voltage supply level to the illuminator. The last step is to disassemble the taillight, remove and inspect the board.
Location and performance check of the DZH
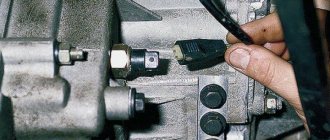
You can easily find out where the reverse sensor is located by looking up at the suspension of the fourteenth. It is located on the gearbox; there are two meters in total: the one we need and the one that signals the speed of movement. If it is not possible to get under the bottom of the car, you can get to the reverse sensor by opening the hood. But the first option is more convenient.
Performance diagnostics:
- To make sure that the auxiliary gearbox is faulty, you need to turn the wheels to the left, looking from the driver’s side: on the side of the gearbox there is a protection with contacts inside.
- We remove the protection, look at the device and the two contacts that go to it, close them on the frog and start the fourteenth, putting it in reverse gear. If everything is fine with wires, contacts and lamps, then the white lights light up.
- The lights do not light up - with a tester we measure the voltage on the ground and the wire (orange) leading from the frog; if there is voltage, then you should check the board of the white lights and the contacts to it. There is a possibility that the contact between the fuse block and the sensor contacts has failed; you should find it and measure the voltage in it.
Reasons for refusal:
- Oxidation of rear light contacts
- The sensor may become loose, it needs to be screwed in deeper
- No contact with transmission wiring
- No contact between plug and fuse box
- Any fuse can blow and disrupt the contact circuit.
It also happens that the DZH is normal, and the contacts are safe and sound, but the reversing lights do not light up. The lamps themselves may become covered (elementally burn out), or the contact may be lost (for the same lamps).
Replacing the rear lights of a VAZ 2114
In order to remove the rear lighting equipment you will need: - a key to “8”; - a convenient Phillips screwdriver.
All work consists of seven simple steps:
- The first step is to open the trunk of your car. If it is filled with things that may interfere with the work process, free up the interior space.
- In order to gain unhindered access to the rear light housing, it is necessary to remove the decorative fabric trim. It is attached using several self-tapping screws, which can be easily unscrewed with a screwdriver. We remove the casing so that it does not interfere with the future process. On more modern VAZ 2114 models, the trim is attached using regular fabric Velcro.
- We feel for the contact chip that is attached to the headlight circuit board and carefully pull it out of the connector. In this case, do not shake the chip from side to side; carry out all manipulations extremely carefully.
- Now is the time to remove and remove the board itself. To do this, press on the special plastic clamp and pull the product out of the headlight housing.
- At this stage we will unscrew the mountings of the rear lights. Using an “8” wrench, we will need to unscrew one nut from the four mounting studs, which are located in the corners of each lamp.
- All that remains is to disconnect the device body from the car body. To do this, grab the headlight with both hands and pull it towards you.
- The reverse connection of the rear lights on the VAZ 2114 is carried out in a similar way, as well as the removal process.
Conclusion
In order to get rid of the annoying VAZ sore with rear lights, there are two solutions. The first is to periodically check, modify, repair or change the board. The second is to replace the two tail lights (assemblies) with more reliable, alternative products. There are several types of them on the auto market now.
In the VAZ 2114, as in any other car, the dimensions (another name for side lights or parking lights) are lighting fixtures that are located on the front and rear parts of the car (on the sides). They serve to indicate the dimensions of a particular vehicle in conditions of insufficient visibility. Another purpose of side lights is parking lighting.
Removing the backplane board
First you need to remove the rear lights on the VAZ 2114, and for this you will need:
- Open rear trunk
- Remove unnecessary things
- Remove decorative trim
- Unscrew the plastic casing
- Take out the back panel
Now you have access to the socket and lamp of the rear license plate lamp, which also needs to be removed. The frog mounting pins are removed and the flashlight is already in your hands. The main thing is not to confuse it with the speed sensor, which is also located on the gearbox.
What lamps are in the dimensions of the VAZ 2114
The standard equipment of VAZ 2114 cars includes installation of the following lamps in the dimensions and front/rear headlights:
Data-lazy-type=”image” data-src=”https://vazremont.com/wp-content/uploads/2017/10/foto-3.jpeg” alt=”Lamps in the dimensions of VAZ 2114″ w >
Recently, users are increasingly replacing standard light bulbs in the dimensions of the VAZ 2114 with LED ones, since they have a much longer resource, consume less energy and shine with a beautiful color. In order for the diodes to produce spectacular side lights with a bluish tint, weak 1-5 diode lamps are not suitable. It is better to use 12-15 diodes.
They will give a bright white glow in the daytime, and in the dark this glow will be blue-white. It is advisable to replace all side lights, or at least the front or rear lights on both sides, with such lamps at the same time. In this case, the car looks organic, and the difference in the shades of the glow of the dimensions will not mislead other road users.
How to replace rear lamps on a VAZ 2114: let's find out together
Any car, according to today's standards of traffic regulations, must be equipped with a certain set of lights of various colors and sizes. This includes brake lights, low beam and high beam headlights. But the dimensions of the VAZ 2114 are of most interest:
- Front right and left;
- Likewise the rear ones.
Rear marker lights
Engineers positioned them so that they can be seen from any side, that is, from each side of the car. Their purpose is to notify drivers about the presence of a car in a particular place with constantly burning yellow lights. In addition, side lights must be turned on along with low beam headlights when driving according to today's traffic rules. Accordingly, their absence entails the imposition of a fine, so it is necessary to monitor the condition of the dimensions regularly, and repair breakdowns in a timely manner. Let's figure out why the dimensions of the VAZ 2114 do not work and how this issue can be resolved in any case.
Reasons for failure of side light bulbs
There may be several reasons why a particular light bulb of the VAZ 2114 dimensions stopped lighting, namely:
- open circuit (no voltage at the headlights);
- the side light bulb has failed for some reason;
- the corresponding fuse has blown;
- the fuse box has failed;
- The lights button is broken.
Data-lazy-type=”image” data-src=”https://vazremont.com/wp-content/uploads/2017/10/foto-2-2.jpg” alt=”VAZ 2114 fuses″ w >
Most often, the cause of failure is a malfunction of the light bulb itself. Fixing such a malfunction is quite simple; it is important to know exactly how to do it.
Removing and replacing side lamps in the rear light
The replacement process involves sequentially performing the following steps:
- the trunk opens;
- to gain access to the headlight, remove the carpet covering it from the inside;
- the board contacts are disconnected;
- the bar is removed (all the rear light bulbs are on it).
Data-lazy-type=”image” data-src=”https://vazremont.com/wp-content/uploads/2017/10/foto-5.jpeg” alt=”Removing the side lamp” w >
A special latch is provided to secure the board. To remove the board, you need to unclip it.
Replaced with a new side light bulb (the side light bulbs on the VAZ 2114 have the smallest size, so it will be difficult to confuse them); The board with the new light bulb is installed in its original place.
If replacing the light bulb in the front/rear marker does not produce results and the side lights still do not work, then you need to check the appropriate fuses or look for other causes of the malfunction.
Other malfunctions and their elimination (rear and front dimensions of the VAZ 2114)
Quite often the cause of a non-working side light is a blown fuse. You can fix the problem by replacing the fuse that seems suspicious with a new one. If the situation is corrected, then the cause of the breakdown was precisely this element, and if not, then it will be necessary to exclude such a thing as a broken circuit.
Power supply to the side lights of the VAZ 2114 comes together with the headlights. If the headlights (front or rear) do not light up, then most likely there is an open circuit. To identify and eliminate such malfunctions, you will need to contact a specialist who has special equipment and appropriate skills. .jpeg" alt="Replacing the side lamp of a VAZ 2114″ w >
It is worthwhile to dwell on how to check the button for turning on the side lights. To understand whether this was the cause of the malfunction, you should remove the button from the panel and then short-circuit the wires. If the lamps light up, it is the button that is causing the breakdown and will need to be replaced.
From the above information it is clear that almost any reason for the breakdown of dimensions on the VAZ 2114 is quite simple to eliminate. It is important to do this in a timely manner, since not only the safety of the driver and passengers, but also the general situation on the road while driving depends on the serviceability of these lights. The lack of clearance may confuse drivers of other vehicles and, as a result, create an emergency situation.
When should the side lights be turned on?
The driver is required to turn on the lights whenever there is poor visibility on the road, as well as when driving through a tunnel.
Conditions for poor visibility include:
- heavy rain/snow;
- fog;
- dusk/predawn.
It is very important to turn on your side lights when driving in fog. At the slightest sign of its appearance (especially in the dark), you need to turn on the dimensions, indicating the boundaries of your own vehicle.
If you are forced to stop on the side of the road in conditions of insufficient visibility, you should definitely turn on the side lights, and in the dark, also turn on the emergency lights. Such actions will protect you and help other road users not to get into a situation where a car suddenly appears out of the fog/darkness in front of them.
Today we will talk about the rear optics on the VAZ 2114 and, in particular, we will discuss the causes of the malfunction and ways to eliminate breakdowns of the reverse lights.
Replacing the sensor
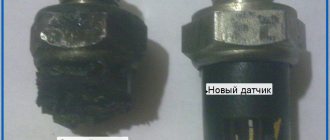
To replace the sensor you will need: a new reverse sensor, an overpass, transmission oil, as well as empty containers and rags. The fact is that when you unscrew the old ESD, oil will flow out of the hole.
- Drive the car into the pit and place it on.
- Remove the engine crankcase protection.
- Remove the contacts from the DZH.
- Carefully clean the work area from dirt and dust.
- Bring the container prepared for the oil to the reverse sensor and unscrew it.
- Try to quickly remove the old ESD and install a new one in its place, then quickly tighten it until it stops.
- Connect the power wires to the new sensor.
- Wipe off all remaining oil using a rag.
- (add oil if necessary) and make sure the new reverse sensor is working.
The fact that the car is moving backwards is signaled by white lamps, which are located at the rear of the car. If the car's reverse lights are not on, it will create an emergency situation - road users will not be able to predict its (that is, your) maneuvers. And parking in the dark will become a very difficult task - you will hardly be able to see anything without lighting.
This procedure is carried out quite simply. Since you need to get under the car, it is strongly recommended to drive it into a pit. In this case, the device will be perfectly visible.
Therefore, it is worth performing the procedure yourself. The main thing here is not to waste time installing a new device. If you miss the right moment, oil may pour out of the hole directly onto your clothes. It is better to prepare a basin in advance.
The step-by-step replacement plan should look like this:
- The sensor contacts are released from protection and then disconnected.
- The device is unscrewed with a 22mm wrench. If the tool turns out to be powerless (and this is possible due to the proximity of oil), then you need to arm yourself with a hammer and chisel. True, you should be extremely careful here so as not to splash too much.
- Immediately after removing the faulty sensor, you need to screw in a new one. The reason for such efficiency has already been explained above. By the way, the box should be wiped clean of oil if it has leaked.
- Contacts and protection are returned to their place.
- If necessary, add oil.
After replacement, you should check the device for functionality: turn on the ignition and reverse gear. In this case, there is no need to start the car.
Breakdowns
If the rear headlight unit fails, it is often due to a broken bulb from a particular light, or a problem with the fuses.
A rarer type of failure is a broken wiring.
It should be understood that each element of the rear optics plays its own irreplaceable role, therefore it is necessary to maintain the required level of performance of the optics and promptly respond to emerging malfunctions.
Before long trips, be sure to make sure that all the lamps in your car are working properly. In the event of an accident caused by non-functioning taillights, do not count on insurance. She won't act.
Price issue
If the price of a VAZ 2114 reverse sensor varies between 100-300 rubles, and you can install it yourself, then the problem in the wiring or with the headlight board will not be so easy for you.
Before purchasing wiring components, clean the contacts and spray with WD-40, this should help. Because the purchased wires also need to be installed wisely, and this is electronics - a delicate matter - available to craftsmen in the service for a good fee.
As for the headlight circuit board, this is also a controversial issue, requiring investment both in the part itself and in the work of a professional who will take care of it. Burnt out light bulbs in a headlight are the cheapest consumables; one light bulb costs 20-50 rubles.
Reversing lights
Lamps, which are a light-signal element that notifies you when you are reversing, can significantly increase the level of safety on the road.
The turning on of the rear lights indicates that the car is moving backwards, so you should be careful. Non-working lights can easily lead to accidents and collisions, for which you will ultimately be the culprit.
What is this?
3X headlights are white lighting fixtures. They turn on when shifting into reverse gear.
The main function is to ensure safety while driving. They signal other drivers about your maneuvers and illuminate the road when parking in the dark.
How to search for this device
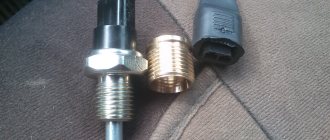
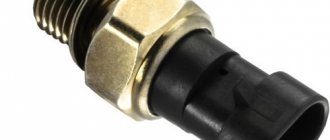
It is not difficult to find the place where the reverse sensor is located. Two devices are installed at the checkpoint, one of them will be the DZH. It is installed at the bottom of the gearbox. This can be clearly seen in the figure below.
Location of the household farm
You can get good access to it when the machine is on an overpass, a lift or above an inspection hole.
The purpose of this device is that when reverse gear is engaged, it should light up a white light in the lamps. The lack of lighting does not mean that it is him. There can be many reasons for this. For example, a light bulb or fuse has burned out, or a wire has come off.
Why don't FZH work?
There are several reasons why FZHs can fail. Let's try to understand them.
Replace the burnt out bulb with a new one, check the condition of the contacts
Check, replace if necessary. A fuse can lead to loss of functionality of the entire contact circuit
There is no ground on the board
The board is located under the lamp. Simple repair to fix the problem
The contacts have oxidized and become coated
Cleaning contacts is not difficult
You will have to diagnose the condition of the circuit, check the integrity of the wiring using a tester and a visual method
The contact on the headlight film has burned out
You will need to clean the contacts and replace the elements if necessary.
There is a breakdown in the gearbox mechanism
In such a situation, the issue of gearbox malfunction will have to be resolved.
The frog (sensor) has failed
Check the condition of the reverse sensor, replace the device if necessary
There are a lot of reasons for the failure of the FZH, so the driver must know exactly how to eliminate this or that type of breakdown.
Removing the rear light board
To remove the board, you will need to perform a few simple manipulations:
- Open the trunk;
- Remove everything unnecessary from the space so that it does not interfere with your work;
- Remove decorative trim;
- Remove the plastic casing;
- Remove the back panel;
- Having gained access to the socket and the license plate lamp, you can remove the devices;
- Remove the reversing sensor mounting studs and the headlight itself.
Many people confuse the reverse sensor with the speed sensor, since these devices are located in close proximity to each other.
Checking the functionality of the sensor
If the taillights do not turn on, the culprit may be the reverse sensor, that is, a frog in the people.
Remove the contacts from the sensor and clamp them together, then turn on the ignition. If the light appears, the sensor needs to be replaced. If there is still no light, the integrity of the circuit is broken, but everything is fine with the frog itself.
Replacing the sensor is quite simple:
- Place the car on a pit or overpass;
- Apply the handbrake;
- Remove the protection from the bottom, opening access to the gearbox;
- Remove the contacts from the old sensor;
- Place an empty container under the sensor and remove the frog. The container is needed because when the device is removed, oil will leak out of the gearbox;
- Remove the old frog, insert a new one in its place;
- Let the car sit for a while;
- Check the oil level inside the gearbox;
- If necessary, add oil to the required level;
- Reassemble.
Such repairs can be done with your own hands, and the cost will be approximately 250 rubles. This is exactly how much a new sensor for a VAZ 2114 costs now.
Problem with the light bulb
It is not uncommon for taillights to stop functioning normally due to the failure of the bulb itself.
- To replace it, you need to disconnect the block with wires and remove the contact panel from the flashlight. Here you just need to squeeze the side latches to remove the plastic panel;
- Apply a little pressure on the cartridge and unscrew it counterclockwise;
- Check the condition of the contacts and wiring;
- Screw in a new light bulb that matches the previously installed one;
- If necessary, before screwing in the new lamp, clean the contacts and test the wiring with a tester. There may be a break in the circuit, so a new light bulb will not work.
Fuse problems
Quite often, taillights fail to work due to a blown fuse. It is advisable for all VAZ 2114 owners to know where this fuse is located and how to replace it.
The required fuse is located in the corresponding fuse block - on the left under the steering wheel. You can remove it with one movement of your hand; you don’t have to twist or tighten anything.
Make sure by visual inspection that the middle part is intact. But viewing a burnt-out jumper this way is not always convenient. It is better to turn on the side lights without removing the fuse. Arm yourself with a voltage tester. If one end lights up and the other doesn't, then the fuse has actually failed.
If a fuse breaks, you should check the condition of all wiring, as it can lead to more serious problems in the car.
To change the fuse, remove it from the block using tweezers, then install a new device in place of the old device.
In order to avoid problems with rear optics and reversing lights in particular, we recommend that you think about the issue of tuning and improving this unit. Today there are many options for changing the appearance of the car, which at the same time increase the reliability and efficiency of the entire rear headlight system.
About the signs of a DZH malfunction and its search
To locate the device, just look at the suspension of the 14th VAZ model. There, at the checkpoint there should be two sensors - the one in question and the one indicating the speed of movement. A more labor-intensive way to get the device is to access it through the open hood.
Before diagnosing its performance, possible causes of failure should be taken into account.
These may include the following:
- oxidation of contacts;
- lack of contact with the transmission wiring;
- lack of contact with the fuse console;
- failure of one of the fuses (for example, F16);
- sensor looseness;
- broken wires;
- bulb malfunction.
The last point should not be discounted, since the lamp can also fail. It’s trivial to burn out, in other words. In this case, the reverse sensor 2114 itself will work properly. To find out the truth, you need to take matters into your own hands.
It is safe to say that there can only be one sign when the rear sensor does not work, this is the absence of lighting when driving the car in reverse. But there are quite a few culprits for this. It could be:
- Fuse F16 (15A) has blown;
- Oxidation of contacts in flashlights;
- Poor contact of the connector with the fuse block;
- Broken wires;
- The sensor output terminals have oxidized;
- The light bulb has burned out.
Often the culprit of such problems is the light bulb socket, where oxidation of the contacts occurs due to poor sealing of the lamp.
In order for the frog to be replaced, you need to prepare:
- New DZH;
- Adding oil to the gearbox;
- Key to "22";
- Rags for cleaning dirt from the installation site;
- Empty containers for transmission oil, since in the case when the VAZ 2114 reverse frog is changed, a small amount may spill out of the installation hole.
The machine must be installed on an inspection hole, on a lift or overpass. tighten. To make the work easier, you need to remove the engine crankcase protection. After this, you need to proceed as follows:
- Determine where the VAZ 2114 reverse sensor is located and remove the connector with wires from it;
- Clean the installation site of the DZH from dirt with a rag or other means;
- Using the key “22” they begin to unscrew the device. In some cases this can be difficult to do. Over a long period of use, it can “stick” to the body of the box. A socket wrench for “22” helps out. If this does not help, there is still hope for the “old-fashioned method” - using a small chisel and hammer;
- After the DZH has been moved from its place, an empty box is placed under its installation location, the spilled transmission oil is collected, and the device is removed.
Installation is carried out in the reverse order, having previously wiped the plane of the box where the DZH will be installed. Before installing a new product, it will be useful to perform a functional test. It's easy to do. You need to connect the measuring device to its terminals, and use your fingers to press the protruding rod several times. The device should show it turning on and off.
Check the oil level in the gearbox and add it if necessary. After checking the functionality of the system, the engine protection is put in place. The work is now complete.
