Characteristics of standard Lada Vesta wheels
The standard characteristics of the wheels, which are produced at AvtoVAZ and come with the Vesta, are very similar to the sizes of other Lada cars. However, installing them is not recommended.
Standard parameters of disks 185/65/R15 88 N. Explanation:
- Wheel width – 185 mm;
- Wheel profile – 120.25mm;
- Disc radius – 15;
- 88 is a number indicating the carrying capacity, which is equal to 560 kg;
- Speed index – H (210 km/h)
These characteristics are installed on the standard equipment of the car.
Despite the fact that many people are not satisfied with the wheel design, it is very practical and does not catch the eye. The choice of such discs is not a decision of one person, but of a team of specialists. The model is presented in a neutral form without a complex structure. The wheels do not stand out from the crowd of cars. Standard wheels on Lada Vesta Cross have the following characteristics:
- Radius R17;
- Drilling 4×100;
- The diameter of the central hole is 60.10;
- Fasteners (Bolt 12*1.5);
- Disc width 6.5J x 17;
- Departure ET41;
The characteristics described above differ from other older AvtoVAZ car models. This is due to the fact that a large number of foreigners come to drive the company and implement technologies developed at the Nissan plant.
As you can see from the table above, the manufacturer of the Lada Vesta car adheres to factory standards in its recommendations. However, this fact does not mean that you cannot install wheels of larger diameter on your car.
If you suddenly decide to replace the standard car wheels with better and more beautiful ones, you will definitely have to familiarize yourself with the parameters of the approved wheels. Thus, the diameter of the central hole should be 60.1 millimeters, the standard disc bolt pattern on the Lada Vesta is 4x100, the bolts used for fastening are M12x1.5, the recommended disc width is 6 inches, and its offset is 50 millimeters.
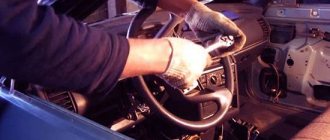
There was nothing “useful” about part 1 of installing the covers. In this part everything will be much better, let's go). The process of installing the covers begins with removing the armrest of the driver's seat (if you don't have one, skip this step).
At the back of the armrest, we bend the factory upholstery a little and there is a zipper there, unfasten it and remove it a little. IMPORTANT - the armrest must be in the down position. Now we take Torx T40, there will be one bolt - unscrew it, don’t be afraid.
As soon as we have removed the bolt, we raise the armrest to the highest possible position “all the way” and begin to remove it, pulling it from side to side.
Start. Removing the front seat
Seat bolts and wires
That’s it, now you can safely remove the seat (I vacuumed it in one go, since that’s the case here :D). I vacuumed with a Soviet car vacuum cleaner, which I got from my grandfather (I will attach a photo later). The front passenger seat is removed in the same way and is no different. It’s more convenient to start putting on the covers from the bottom of the seat, just take them and pull them on.
Plastic inserts
Plastic inserts 2
Where there are plastic inserts, we simply insert the covers into them carefully (I did not remove these inserts). We pull the hooks from below and hook them under the seat from below.
Attaching covers to the seat
The lower part of the seat is ready. There is nothing complicated at the top either. We take the cover, pull it on top, push it between the seats and also pull them, where there are ropes we pull and tie.
Headrest 1
Headrest 2
Finished front seat
The driver's seat is ready! There is no point in describing the process for the passenger one; it is similar and not fundamentally different. Let’s move on to the rear seats, where a number of nuances also await us. We remove the head restraints by pressing a special “button” located next to each of them and remove them one by one.
Removing the rear sofa
We begin removal from the bottom cushion; there is a fastener on each side (visible in the photo above).
Fastening on which the lower cushion is held in front
You need to carefully grab and pull straight vertically upward, they should snap off.
Mount 1
Mount 2
Mount 3
Rear seat bottom cushion
This is the largest element, everything is tightened very simply and simply, you just need to pull it tightly and tie it tightly with ropes.
Rear seat belt attachment
Removal and installation of Lada Vesta seats
On early VAZ models, the driver and passenger seats were removed and replaced so that more comfortable seats could be installed. To properly disassemble the seats on Vesta, you need to prepare the work area by spreading a cloth on the ground or floor on which you will place the chairs, which will protect the mechanisms from dust.
It is better to disassemble the structure in winter in a heated garage. Another secret to a small repair is that the levers hidden in the seat pockets must be removed carefully, trying not to damage the upholstery: to do this, press on the upholstery and press the latch - it will release the lever.
Rear sofa
Dismantling (removing) the rear seat of a Lada Vesta car is carried out in the following order:
- Raise the rear seat until you hear a characteristic click—the hinges are disengaged. Press down on this cushion and push it towards the trunk.
- Lift it again until it clicks - now the second loop is disengaged.
- Remove the seat belt fastenings on the right and left under the backrests, and remove the backrest fastenings from below. The latch on the right and left above the back of the rear seat concept is up and push it a little.
- Remove the remaining bolts and remove the backrest. The sofa is dismantled.
Front seat of Lada Vesta
To disassemble the front driver and passenger seats, you must perform the following steps:
- Move the chair all the way back. You will see fastening bolts on the slide - unscrew them.
- Move it forward as far as possible and remove two more bolts from the back. If heating is installed, disconnect the power and remove the seat.
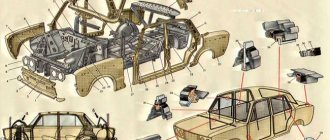
Body painting
Comparing cars should start with this parameter, because the protective coating ensures the stability of body parts during constant contact with the external environment and other aggressive factors. The thickness of the paint layer tells you whether the car's finish is good or not.
The Vesta modification of the SV Cross is slightly inferior to the Kia Rio in this indicator. The layer that the Lada has is from 120 to 135 micrometers, versus 138-174 for the Korean. Therefore, here the last one gets an extra point.
On the other hand, Vesta is doing well with her palette. The buyer of SV Cross can choose one of 10 shades, and soon there will be even more options.
The quality of paint application is equal in both cases, and therefore Vesta Cross and Kia Rio look quite presentable. Even hard-to-reach and inconspicuous places are finished very carefully.
Step-by-step instructions for dismantling
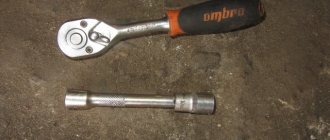
Before starting work, we prepare the necessary tools. To remove the seats we will need:
- flat and Phillips screwdrivers;
- key to 10;
- pliers;
- repair kit (depending on the situation).
It is better to work with gloves so as not to accidentally injure your hand on sharp metal corners.
The procedure is as follows:
- Unfasten the rear seat upholstery buttons on the trunk side.
- Pull back the loop and remove the latch near the headrest.
To get to the latch, you need to pull the loop near the headrest
- We pull out the hooks on the back from the metal brackets that are on the body.
Remove the hooks that hold the seats to the body
- The armrest mounting frame is fixed with three screws; we unscrew them for further dismantling.
- To remove the armrest itself, use a 10mm wrench and unscrew the nuts.
Use a 10mm wrench to remove the armrest fastening nut.
- The mounting pad is secured with two latches; we press them out with a flat-head screwdriver.
To remove the mounting pad, press the two latches
- Unscrew the fastening bolt and pull out the seat cushion lock.
After unscrewing the mounting bolt, the lock can be easily removed
- Dismantling ends by unscrewing the last two nuts with a 10mm wrench, after which the base of the lock is removed.
We recommend: Is it possible to mix antifreeze with antifreeze?
Why you should look for alternative options
Many car enthusiasts have problems when purchasing winter tires and wheels. AvtoVAZ installed a “non-standard” wheel with a 43 offset in its cross-country model.
If you replace it, the warranty on the car will expire. However, replacing an official wheel costs about 8 thousand rubles. Labor to replace the wheel may add to the cost.
Without listening to manufacturers, car owners install wheels with a 15 and 16 inch radius on their cars, since official wheels cost 2-3 times more.
How to put covers on a Lada Vesta without removing the front seats
Standard set of covers:
- front and rear headrests (2 pieces each, plus one small one);
- front backrests (2 pcs.);
- base (2 pcs.);
- backrest is composite (2 pcs.);
- rear sofa (1 piece).
Before you start putting on the covers, remove the seat pad and the plastic handle for the lumbar support.
- To do this, we press the casing at the location of the handle, and use pliers to squeeze the metal bracket out of the core.
- Pull the cover carefully without damaging the fabric.
- We put the braid under the bottom of the chair, pull it through, and tie it in a knot. We first move the chair forward (backward) all the way for convenience.
- We put the covers on the backrests, tuck the material under the plastic clamps of the headrests. You can remove them with a flat screwdriver or by hand.
- We insert the braid into the gap between the back and the base, pull it tight, and tie the thread.
By analogy, we put covers on the passenger seat.
Salon
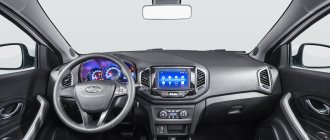
The interior design of the Vesta modification SV Cross looks quite stylish. Against this background, Rio doesn't look so good - its interior is downright boring.
Compared to the Lada, the Kia car is more comfortable. Its seats perfectly support the backs of passengers, the only problem is that the seats themselves are a bit short, although they are quite soft. In Vesta, on the contrary, they are excessively rigid, but on the other hand, passengers on the rear sofa are given noticeably more space.
Kia Rio and SV Cross have a common drawback - a low ceiling. Therefore, if a tall person can straighten up, he will cling to the roof with the top of his head.
The good quality of the Kia's interior trim and equipment gives it an edge. Vesta has a lot of disadvantages:
- harsh steering wheel;
- tight buttons;
- Difficult to read instrument dials.
At the same time, the SV Cross steering wheel is easily adjustable both in height and reach. The Korean has more limited functionality.
Vesta has more seat upholstery options. With an overall black color, gray or orange inserts are offered. Here the comparison result is disappointing for Kia - the black tint is diluted only by red. The quality of textiles on the Lada is lower than on its Korean competitor.
conclusions
As you can see, there is nothing difficult in the process of removing the rear seat of a Lada Vesta, and it is carried out quickly and in one pair of hands. Installation, like dismantling, can be done independently in your garage or even on the street
Car seat covers are not just about protecting car seats. This is also an element of the car’s interior, and quite an important one. The appearance of the seats radically changes the appearance of the interior as a whole, depending on the covers. Some people select covers to match the color of the car, others to match the color of the interior, while others, on the contrary, contrast the color of the covers and the car.
What can happen if you ignore the operating rules?
Dry cleaning the seats of your car is expensive, but a dirty velor interior scares off passengers? Are you wondering: how to keep your car interior in its original condition? Then eco-leather covers are your option!
| This is what a Lada Vesta seat looks like in an eco-leather cover |
Each car manufacturer will force owners to use only those sizes that are specified in the operating rules. Based on these dimensions, the car can be considered safe on the road.
Using these characteristics, the machine underwent certification and safety tests. The manufacturer is not responsible for changing wheels.
| Modification | Tire sizes based on load capacity and speed | Technical data of the wheels used | |||||
| car | Dia,mm | PCD,mm | Number of fasteners | Rim width, inches | Rim offset (ET), mm | Air pressure in tires, different parts of the car | |
| Equipment from the factory | |||||||
| "SE and SW" | 185/65R 15 88H | 60.1 | 100 | 4 | 6J | 50 | 0,22/0,22(2,2/2,2) |
| 195/55R 16 91H | |||||||
| "SW Cross" | 205/50R 17 89V | 6 1/2J | 43 | ||||
| 205/50R 17 93W | |||||||
| What the manufacturer allows you to install | |||||||
| "SE and SW" | 185/65R 15 88H,T | 60.1 | 100 | 4 | 5J, 5 1/2J,6J, 6 ½J | 50 | 0,22/0,22(2,2/2,2) |
| 195/55R 16 87 91T, H | |||||||
| "SW Cross" | 205/50R 17 89H, V | 5 1/2J, 6J, 6 1/2J | 43 | ||||
| 205/50R 17 93W |
Despite the fact that the car manufacturer has approved only the above-mentioned wheels, online stores sell other models with similar characteristics and assure that they are suitable for the Lada Vesta St. Cross:
- 5 x 17 4*100 ET43 Dia60.1;
- 6 x 15 4*100 ET36 Dia60.1;
- 5 x 16 4*100 ET41 Dia60.1;
By neglecting the operating rules and installing wheels of other models, the owner risks getting into an accident or encountering other problems on the road. If official models have passed the manufacturer's full test, then other discs may behave completely unpredictably along the way.
Also, the owner of a car may receive a fine from a traffic police officer for having a product installed on his car that does not meet road safety rules. If the car does not meet factory requirements, the owner may be refused repairs to the wheels, chassis, transmission and suspension under warranty.
What types of covers are there for Vesta?
Cases are different. There are “shirts” that usually cover only the front seats. There are covers that completely cover all seats.
Car covers come in different materials. And at different prices. From two or three thousand in the nearest market to several tens of thousands. There is also a complete refurbishment of the interior, but that’s a slightly different conversation.
Covers are made from leather, faux leather, synthetic fabric, velor, vinyl, Alcantara and even sheepskin.
Synthetic fabric covers are very comfortable and inexpensive. Easy to remove, wash and put back in place. But there are some disadvantages: they look simple, they slip in the heat, and they don’t absorb moisture well.
Velor covers are pleasant to the touch, beautiful, and do not heat up or cool down very much. It’s quite comfortable with them, but...there are also disadvantages. They wear out, velor is short-lived. Such covers often have to be replaced.
Vinyl covers are cheap, bright, but very uncomfortable. They overheat greatly and become tanned in the cold. No comfort.
Alcantara is artificial suede. Usually quite good quality. Doesn't overheat too much in the sun, holds heat well, and is ideal in winter. Pleasant to the touch. The downside is the high price. Appearance is not for everyone.
The leather on the seats is gorgeous. The most respectable appearance. Leather interiors are typical for expensive cars. Easy to wash and wipe clean. There are also disadvantages - exorbitant price and instability to scratches.
One of the newest types is eco-leather covers. Good eco-leather has better properties than leather. The price varies greatly, depending on the quality, density and thickness of the material. In essence, eco-leather is the same leatherette, but new production technologies put it on the same level as the most expensive materials.
Eco-leather allows air and steam to pass through, but does not allow water to pass through. The breathability of eco-leather is tens of times higher than that of genuine leather. The material “breathes”. These properties make it unique for the production of cases. Eco-leather is polyurethane on a cotton base. Do not confuse it with the old leatherette - PVC on fabric. Advantages of eco-leather: fairly affordable prices, does not cause allergies, pleasant to the touch, constant elasticity at plus and minus temperatures, a huge selection of colors, odorless, quite resistant to aggressive influences (cigarette ashes, liquids). Eco-leather is easy to care for - just wipe with a damp cloth.
Luggage compartment
The Lada Vesta's storage compartment is more than fine - its volume is 480 liters. For comparison, Kia has a similar parameter, only 390 hp.
The domestic car also boasts better functionality - in the trunk there is a special organizer for small items and three more nets. All this allows you to securely secure and sort things.
Moreover:
- the floor panel is easily removable, and underneath there is another additional compartment with a capacity of 95 liters;
- the rear sofa folds down and there is space for very large items (free space increases to 825 l);
- The Lada has wide handrails on the tailgate, which is convenient, while the Kia has only one stubby handle.
How to remove the door trim of a Lada Vesta
The inner door trim is made of cast or prefabricated plastic panels of ergonomic shape that enhance the interior of the car. These "door cards" in a car, to be clear, play the same role as the wall cladding in a house. It is not surprising that they are one of the favorite tuning options, because each car owner has his own ideas about beauty and comfort. Sometimes it is necessary to install additional equipment under them, heat and sound insulation, remove dents, speakers, replace window regulators and other things. Let's look at how to remove the trim of a Lada Vesta. To do this, first prepare the tool:
- Plastic mounting blades;
- Sprocket wrench TORX 20;
- A thin flat-head screwdriver with the blade wrapped in cloth. Dismantling of plastic cards occurs in the following sequence:
- In the lower front corner of the front window, a triangle is hooked (in the area of the upper corner), covering the mirror mount. The triangle is attached to the corner of the window with clips, and if a tweeter speaker is found underneath it, disconnect it. It is better to dismantle plastic elements with a spatula to avoid damage;
- There is a screw under the door mat in the door handle. We unscrew it with a TORX 20 key. For rear doors, these two points of our instructions are not relevant;
- Next comes the dismantling of the control panel for power windows and mirrors. It is pryed off with a plastic spatula or a screwdriver wrapped in cloth. Accuracy and slowness are very important here;
- After removing the specified panel, the terminals are disconnected;
- Behind the removed control panel there is a bolt that presses the plastic card to the door. He also gets out;
- Next, a plug is pryed off from the end of the door with a spatula or screwdriver, behind which another screw is found. To unscrew it, take a TORX 20 key;
- We do the same with three more clamping screws along the bottom edge of the door;
- Now the trim can be removed, which requires prying off four clips with a spatula, moving the spatula along both sides of the door from bottom to top.
We looked at how to remove the inner trim of the front doors. Those who are interested in how to remove the back door of a Lada Vesta, or rather its plastic card, should be guided by the following sequence:
- Use spatulas to remove the window handles;
- They also use the spatulas to snap off the trim on the door handle;
- The bolts holding the door handle are unscrewed;
- Use a TORX 20 key to unscrew the clamping screw at the bottom of the door card;
- The door card is pryed off with mounting blades and snaps off.
Engine and transmission
Kia comes with quite good petrol units. The weakest of them is 100 horsepower. The more powerful one has 123 hp. With.
The cross is equipped with settings for 106 and a maximum of 122 hp. With. As you can easily see, there is no significant difference.
Rio accelerates to hundreds in 10 and 13 minutes, respectively, Vesta in 11 and 13.
When buying a Kia, you have the opportunity to choose an automatic transmission with 6 positions; the Cross may also have a five-speed robot, but it has not proven itself very well on older VAZ models. Drivers, in particular, complained that the transmission responded with a certain delay. For lovers of dynamics, we recommend choosing a manual transmission - it is much more successful and works well.
Purchase and replacement of rear seat latches Lada Vesta
The luggage compartment of the car is spacious, but sometimes it is not enough to transport oversized cargo. The owners remove the back and dismantle the sofa.
During frequent installation and dismantling, the mountings for fixing the pillow wear out. The material is plastic and will crack if not handled carefully.
| Name / catalog article | Price in rubles |
| Latch 8450006696 (old model) | From 150 |
| 8450030620 (new sample) | From 190 |
| Analogs from General Motors A2656521 | From 170 |
*prices are as of March 1, 2019.
Conclusion
The process of dismantling the front seats and rear sofa is simple. If you follow the described recommendations, installing the covers will take no more than half an hour.
How effective the covers are is up to you to decide individually. Don’t forget that every time you get into the car you rub down the seats, subsequently holes and scuffs form. The service life of the seat is reduced by a third. When selling a car, worn out (damaged) seats serve as the basis for a discount on the price of the car.
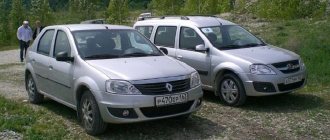
How to remove the rear seats on a Renault Logan? &
To do this, use a screwdriver to pry the piston of the lower fastening and remove it.
Renault Logan 2. Remove the rear seat (part 2)
The dismantling process for repair occurs in several stages and is shown in detail in numerous videos:
The main advantages of Renault Logan with automatic transmission, according to car enthusiasts:
Check that the cargo is securely secured in the cabin.
Next, we remove the clamps that hold the seat cushion in place, but if they do not give in the first time, you should treat the areas a little with the help of WD; you should process the connections carefully, without staining the seat upholstery.
Once everything is done, try to lightly rock the seat from side to side. From such movements they will easily return to working condition and let go of the pillow.
We pull the pillow by its base. We unscrew the two fastening bolts located on the sides and take it out of the cabin. A similar element of the rear seat is best removed with an assistant. Remember that these three screws are located on both the left and right sides. After this, using a thin screwdriver, pry up the large piston located at the bottom of the mudguard and remove it.
Advice
Disconnect the clips from the bottom of the mudguard from the top of the body and the front bumper. Carefully remove the lower parts of the mudguards on both sides. To do this, use a screwdriver to pry the piston of the lower fastening and remove it.
After this, find the nut made of plastic that secures the top to the car body. Now calmly remove the mudguards and set them aside. Locate the screws that secure the trim to the radiator frame. Remember that the front bumper and radiator trim are one piece. After this, unscrew the four screws and remove the bumper.
If they remain in place, then be careful not to make sudden movements when disconnecting the bumper. When carrying out further work with the removed part, it is better to disconnect the headlights to avoid their breakage.
Related video Tip 4: The main reason is ease of use and safety. His design is a combination of workaday life and shabby simplicity.
Renault Logan 2. Remove the rear seat (part 2)
But once you get inside and take off, you begin to be more and more amazed at his abilities. Women like the kick-down mode, which allows you to instantly engage a lower gear and hold it for quite a long time.
In this case, the car drives at an acceptable speed in traffic, although it is a little noisy. The automatic transmission handle attracts motorists with the pleasant texture of the material. Of course, the main advantage of Renault Logan with an automatic transmission is that it is easy and convenient to handle. The car is quite powerful and you can see this not only on the highway, but also in the city.
The engine runs quietly, uses oil sparingly, and the tank is filled with familiar gasoline. The machine is equipped with a manual control mode, but it is almost never used. The automatic transmission works smoothly.
Next, we remove the clamps that hold the seat cushion in place, but if they do not give in the first time, you should treat the areas a little with the help of WD; you should process the connections carefully, without staining the seat upholstery.
Once everything is done, try to lightly rock the seat from side to side.
Folding out the seats
From such movements they will easily return to working condition and let go of the pillow. We pull the pillow by its base. We unscrew the two fastening bolts located on the sides and take it out of the cabin. So washing is only done by hand. The next photo shows what the 5-year-old trim was hiding, although I haven’t started cleaning it yet, I just threw it in the bathtub.
Parts and consumables:
All actions will be in reverse order. The only thing I changed were the metal rings. Putting them back on is terribly inconvenient, especially when there are easier options. I used nylon zip ties.
Just remember to turn them upside down, otherwise they will prick later.
Tools:
The same applies to the front seats. When you start, you will see for yourself where such rings are and what can interfere.
Adjusting the position of the backrests of the front seats is easy to do. There is a black clip in the middle, we pull it out and the twister is removed.
How to properly fold and repair seats
If you need to remove the front seats in a car yourself, then the car owner does not have any difficulties. For example, in Renault Logan models of the first and second generation, direct adjustment of the backrest yourself, as well as adjustment of the backrest angle according to the type of tilt and minor repair work are similar; now on the Internet there are many video instructions on how to do this.
I would like to note that in Renault Logan there is a special elevator near the seat.
And now, in addition to a special elevator, some models are equipped with heating, which may also fail at some point due to improper operation, then a replacement will need to be made, and the driver or front passenger seat will need to be removed. Many people are interested in how to remove the seat correctly. This is what we will talk about in this article.
So, the seat frame is held on by bolts that are attached to the car body. The process of removing the seat for repairs is carried out in several stages, below we provide detailed instructions on how to remove the seat in a representative of the French automobile industry Renault Logan:
- First you need to unscrew the bolts that secure the chair to the base.
- If you need to replace the heating system, then the seat backrest needs to be separated from the cushion.
- If heating elements are replaced with new ones, then when purchasing them, be sure to check them with the catalog serial number of the original part, otherwise they may not fit.
- After the repair has been carried out, you need to remove the upholstery from the chair to replace the heating threads, which, in fact, failed.
- Soft upholstery is almost always secured with rubber bands to a special pillow frame, as well as with special metal hooks, which will also need to be removed. When removing the upholstery yourself, you need to be extremely careful so as not to damage the upholstery fabric.
- Carefully disconnect the electrical wiring located in the upholstery directly under the seats from the existing heating elements.
- After this, you can safely replace the broken heating element with a new part.
- You need to assemble the chair in the reverse order, so to speak, as indicated in the instructions.
Now that you understand how to remove the front or other seat in a Renault Logan car, you need to figure out how to remove the rear seat.
The 1st generation model never had the necessary ability to recline the back of the rear row of seats, since they were tightly screwed to the frame itself, and they could only be completely removed.
Renault Duster on gas
Renault Duster trunk volume
So, to remove the entire rear seat, use the following instructions:
- Armed with a screwdriver, you should remove the clamps of the cushion of the immediate rear row of seats; to do this, you need to move it forward a little and you will see that the clamp is located in the lowest area of the entire chair.
- Immediately after the locking device is removed, remove the lower part of the seat and pull it out of the car.
- Again, using a screwdriver, you need to unscrew a couple of bolts that are located on the right and, accordingly, the left side of the back of the rear seat directly.
- Then we move the seat belts to the side and remove the seat back; it must be removed from the locking device at the very bottom.
- Due to the fact that the backrest design is very massive, it is advisable to resort to outside help.