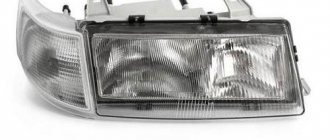
Car headlights, due to the peculiarities of their location, are constantly exposed to the mechanical action of dirt, small stones, and gravel, which fly out from under the wheels of the vehicle ahead. This leads to them becoming cloudy, losing their reflective ability. There are several proven methods to help solve this problem using folk remedies.
Toothpaste
Simple toothpaste has long established itself as an excellent remedy that copes with the problem of cloudy headlights better than many professional polishing products.
Before you start work, you need to prepare everything you need:
- a tube of toothpaste;
- White Spirit;
- water;
- clean towels;
- Sander;
- brush;
- scotch.
When all the materials and tools are ready, we begin the process of processing car headlights.
Step-by-step instruction:
- We clean the outer surface of the headlights from all dirt and wipe them dry.
- Cover the outline with tape.
- Using white spirit, degrease the work area.
- Squeeze out a small amount of toothpaste and rub it over the outer area of the headlights using a towel or sanding machine.
- When using a mechanical tool, we monitor the temperature so as not to damage the glass.
- We wash off the remaining paste, carefully remove the tape and brush off the remaining residue with a brush.
This is the easiest and cheapest way to clean and polish headlights with minor defects.
Methods for cleaning headlights and necessary tools
Cleaning headlights can be chemical or mechanical. In the first case, various substances are used to either dissolve contaminants or significantly reduce their adhesion to the glass surface.
It should always be remembered that if the deflector is glass, then a much wider range of detergents can be used, while caps made of polycarbonate or other plastic can be irreparably clouded by the most unexpected cleaning agent.
When mechanically cleaning, you also need to remember the different hardness of glass and plastic parts:
- The former are much more difficult to scratch unless you use very coarse abrasives.
- The latter cannot withstand even just wiping with a rag, since any fine abrasive and dust will leave a network of scratches that can only be removed by deep polishing.
Tools and consumables you will need:
- detergents depending on the chosen cleaning method;
- technical rags that do not release fibers during use;
- masking tape and electrical tape, which are best checked to see if traces of glue can be easily removed from the surface;
- wire, nylon fishing line and magnets for penetration into hard-to-reach places;
- vegetable oil;
- a set of tools for assembly and disassembly operations;
- industrial adjustable hair dryer for softening sealant;
- toothpaste as a cleaning and polishing agent;
- knives of various configurations and sharpness.
Of course, the main cleaning agent will be plain water.
Micellar liquid without alcohol
If your car's headlights become cloudy over time, and you want to return them to their original shine, just use a micellar liquid. It is excellent for processing plastic and glass. Yes, this is a women's facial makeup remover. But can this fact prevent her from removing the remnants of “makeup”, consisting of road pollution, from the headlights of your car?
The name of the manufacturer of this miracle liquid does not matter (a well-known brand or not), the main thing is that it does not contain alcohol. Simply wipe the surface with a soft cloth pre-moistened in micellar water.
How to clean the inside of a headlight without disassembling it? Magnet to the rescue!
The complex design of the optics, oddly enough, is not the main obstacle to cleaning it with Mister Muscle. The main disadvantage of the first method is that no one is immune from damage to the reflector. Under a certain set of circumstances, chrome literally “peels” off the plastic, causing the product to lose its former aperture ratio. The puzzling thing is that this can happen not even through the fault of the detergent: there have been precedents when chrome peeled off from the slightest exposure to ordinary tap water. Therefore, if you have not found experienced confirmation of washing the headlights of a certain car on the vastness of forums and social networks, do not take risks.
Use an alternative. Cleaning headlights from the inside with a magnet requires a minimum of disassembling the product, does not harm the reflector, does not require long-term drying and is relevant for almost any car. The only thing, keep in mind that the magnet inserted inside the headlight must be securely fastened, otherwise complete disassembly of the product will become inevitable. We will now tell you how to do this.
First you need to prepare the components:
- Microfiber towel.
- Two magnets. There is no specific requirement for these components: who takes magnets from the refrigerator, who buys neodymium products... The only note is that do not buy large magnets - 12x3 or 15x4 mm tablets with an attractive force of up to 3 kg are quite enough.
- Glass cleaner or micellar water from a woman's cosmetic bag.
- Wire.
- Insulating tape.
- Scissors.
The essence of the technique is that one magnet is inserted inside the headlight, the second is located outside the product, right on the glass. All that remains is to connect the two magnets, and then smoothly move what is located outside along the glass, periodically wetting the rag in the cleaning liquid.
The main difficulty is preparing the internal magnet for work. Let us repeat that the main condition is that the product should not remain uncontrolled inside the optical device. For reliable fixation, a magnet wrapped in microfiber is attached to a wire:
- Strip the end of the wire from insulation.
- Wrap the magnet in microfiber and place a bare piece of wire on the side.
- Wrap the structure with electrical tape, leaving a small piece of bare wire and a piece of microfiber that will be in contact with the glass.
- Bend the open end of the wire and additionally wrap it with insulation. This will reduce the risk of wire detachment from the microfiber to zero.
The opposite magnet is similarly placed in a rag, and the end, for convenience, is wrapped with insulation. In general, on the vast forums there are various systems for attaching a magnet placed inside the headlight. For example, sew microfiber thread with a magnet wrapped inside, etc. We have provided the most convenient method of fixation. The practicality is that the wire can be bent to direct the magnet to the desired location on the optical device.
Sandpaper
If the damage to the outer surface of the headlights is deep enough, then it is better to correct them using sandpaper. This refers to abrasive sandpapers of various grain sizes. Sheets of sandpaper with grits ranging from P600 to P2000 are required.
Sequence of work:
- soak the working material in water for 10 minutes;
- remove the minimum layer of the headlight surface with the coarsest paper P600;
- constantly moisten with water to prevent excessive heating;
- the erased material in the form of a pulp is regularly removed;
- the final stage of grouting will be processing with P2000 sandpaper;
- final polishing is carried out with a soft cloth using a special polishing agent.
The above methods are the most popular among those available at home. They really help to significantly improve the condition of car headlights.
Methods for restoring a mirror surface
How to clean a lambda probe at home
Experienced drivers who want to save money on buying new expensive headlights have long tried many methods in an attempt to restore the reflective properties of the reflector. The real result is achieved by applying the following materials:
- metallized tape used in construction for gluing joints of foil insulation;
- self-adhesive films with a mirror coating like Oracal;
- aluminum foil with epoxy glue;
- special paint for reflectors.
Pasting reflective material
This restoration method allows the reflectors to return their mirror properties for another 1–2 years of operation. The specific period depends on the purchased material, the quality of the work and the power of the car light bulb.
The gluing technology is approximately the same for all of the listed materials - tape, foil and film. It is proposed to consider it using the example of metallized tape:
- Prepare a tool - scissors, a flat-head screwdriver, a stationery knife.
- When cutting strips of tape to the desired length, cover the flatter, larger areas first. Make sure that the material sticks tightly without air bubbles.
- Cut out the curly elements and glue the remaining areas. Avoid the formation of unevenness and folds.
Film and foil are applied in the same way, only the latter is attached to epoxy glue, which takes a long time to dry and set.
This option is well suited for reflectors with heavily damaged coating; restoration work will take approximately 1 hour. What is the disadvantage of this method: such a reflector in the headlight will heat up and begin to release chemical vapors from the adhesive base. Car enthusiasts have noticed that after 2–3 months, the glass of the light fixture loses its transparency due to the above-mentioned secretions.
The second disadvantage is the fragility of the mirror layer. When high-power lamps work, the foil quickly becomes cloudy and loses its reflective properties. Although, compared to the destroyed chrome coating, the headlight shines well.
Reflector painting
Painting headlights from the inside allows you to create a more reliable and durable reflective layer on a damaged reflector
Here it is important to choose high-quality aerosol paint in a can - the so-called white chrome. The application technology looks like this:
- Degrease the plastic part, dry it and apply the first layer of protective varnish (also sold in aerosol cans).
- Dry the element and apply mirror paint with light, gentle movements. Be sure to shake the can well before use.
- After taking a 5-10 minute break to dry, apply a second coat of paint.
- Dry the part completely (you can use an infrared heater).
Chrome plating paint lasts quite a long time, but achieving a perfectly mirror-like surface is very difficult. Therefore, garage craftsmen often practice a more labor-intensive but effective method - restoring the headlight reflector using aluminum powder:
- Black nail polish is applied to the grease-free surface of the reflector. Here the uniformity and quality of application of the composition plays an important role.
- Dry the part for 10 minutes.
- Grabbing aluminum powder (in common parlance - silver powder) with your finger, carefully rub it into the painted surface, especially in the corners.
The color of the surface changes as the aluminum powder is rubbed in. When there are no black spots left, wipe off the excess silver and polish the reflector with a cotton swab. This completes the restoration procedure.
You can also purchase a kit for chemical metallization of surfaces at auto stores and return your headlight to a real new mirror. But the use of such reagents is difficult in a garage; professional equipment is required - a spray gun and a mixing manifold. Application with hand sprayers will not give the expected result.
Removing plaque from the surface of headlights
Polishing headlights with toothpaste. advice, reviews
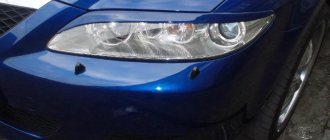
At times, a yellow coating appears on the outside of the headlight, causing the light to become dim. Among the huge range of cosmetics for cars, there are a considerable number of products designed to combat this plaque. But the most affordable and effective of them is regular toothpaste. To clean, apply a little paste to a toothbrush or towel and polish the yellowed area in a circular motion. Finally, rinse the headlight with clean water. In case of heavy contamination, repeat the procedure.
You can remove the plaque in another way. To do this you will need an abrasive polish and a foam sponge. It is not recommended to use a brightly colored sponge to avoid unwanted marks on the surface of the lens. Clean the headlights and wipe them dry. Apply polish to the sponge. Polish the surface with light movements along and across. There is no need to make circular movements. As soon as the cloudy coating disappears from the surface, remove the remaining polish using a damp cloth.
As soon as it shines, wipe with microfiber. Polishing will give the headlights a pleasant shine and protect them from environmental influences.
Knowing how to clean headlights, you can save on service station services. And for those who like to tinker with the car, this will also be a pleasant pastime. If you still cannot get rid of the contamination, you should contact experienced specialists at a car repair shop.
Cleaning the outside of the headlight
This operation is easier the more often it is performed. You cannot allow the headlight glass to develop until a cloudy yellow coating appears that is firmly attached to the surface, but you can deal with it.
Glass washing
First, you need to wash the headlight as thoroughly as possible from dirt and grease deposits. An ordinary car shampoo, specially designed to be harmless to glass and paintwork, will help.
For greater effectiveness, it is applied to the glass in maximum concentration and left for about half an hour. After which it is washed off with a rag and plenty of water.
The dull outer layer can be refreshed using regular toothpaste, which is generally intended for this, only for teeth. It contains a fine abrasive capable of polishing.
How to clean plaque with toothpaste
The paste is applied to a sponge or napkin, and then rubbed in a circular motion. It works slowly, so the procedure will require diligence and patience.
If you have a small-sized polishing machine or appropriate attachments for the drill, the process can be accelerated, but there is a danger of “digging holes”, making the surface uneven and glare.
The main thing here is not to abuse the speed and pressure on the glass, especially plastic, which easily overheats. Although ordinary glass does not tolerate local overheating, which can cause it to crack.
Periodically, the paste should be washed off and the current result assessed.
Removing sealant, glue or varnish with sunflower oil
It is very difficult to remove substances with good adhesion that accidentally get on glass.
Ordinary vegetable oil can help, the effect of which is to soften, relatively speaking, the sealant, penetrate under its layer and weaken adhesion to the surface.
After which the layer can be easily removed mechanically, with a rag or a soft scraper. The freed area is washed with detergent or degreased with alcohol solutions. For example, included in household glass cleaners.
How to wash and polish car headlights
It is very important to choose a high-quality car headlight cleaner. No less important than investing in washing something without which you can’t even pull a fish out of a pond is labor... Over time, the transparent plastic covering the headlight bulb becomes cloudy
Scratched, rubbed and dirty “eyes” of a car not only cause inconvenience to the driver, but also spoil the overall impression of the vehicle. At the same time, we often do not abandon worn-out headlights, but try to breathe new life into them, trying to restore their transparency and shine. But this is all an illusion that has a short-term effect. In addition, worn headlights are unsafe
Over time, the clear plastic covering the headlight bulb becomes cloudy. Scratched, rubbed and dirty “eyes” of a car not only cause inconvenience to the driver, but also spoil the overall impression of the vehicle. At the same time, we often do not abandon worn-out headlights, but try to breathe new life into them, trying to restore their transparency and shine. But this is all an illusion that has a short-term effect. In addition, worn headlights are unsafe.
How to care for plastic headlights
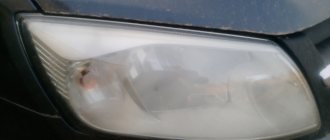
In fact, plastic headlights have a porous structure. When heated, the pores expand slightly. So, at high daytime temperatures, the plastic heats up, and road debris gets packed into the pores that form on the surface of the headlights. Over time, lenses undergo changes. They oxidize under the influence of ultraviolet rays, dust, exhaust fumes, smog and harsh chemicals. The lenses become covered with a coating (so-called fog) and turn yellow. This is unaesthetic and also unsafe. Fog on the lenses reduces visibility on the road at night.
We have 2 good news for you:
1) worn out lenses can be restored to transparency, but you will have to spend a little money to do this;
2) cleaning products are inexpensive.
How to clean headlights
Let's start cleaning. Take the necessary attributes for washing glass - detergent and a rag. The latter can be made of microfiber or regular cotton fabric - even an old T-shirt will do. Before starting work, check the headlight washer system. Spray the cleaning product onto the surface of the car eyes, and then wipe with a soft cloth using gentle circular movements. Cleanse until you notice the results of your efforts.
Using the polishing method, you can always improve the appearance of plastic headlights that have undergone an oxidation process. How? There are several ways:
- use of chemicals.
The top layer of plastic contains ultraviolet polymers that prevent aging of the lens. It will need to be replaced after sanding. Achieve results with a varnish containing UV polymers. As an option, apply a special UV coating to the restored lenses.
There is a very simple way to preserve the newness of restored headlights. If possible, leave the vehicle in a garage or in the shade, avoid overheating in direct sunlight. The restoration procedure - cleaning, waxing and polishing - must be repeated at least once every three months.
You can also use special restoration kits. Ask headlight cleaning experts (at a car dealership, for example) which one they recommend. You should not use kits that include support plates and grinding elements. Yes, they save time. But if you haven't used them before, you may unintentionally damage the surface of the headlights. Polishing speed also plays a role. Incorrect use will lead to irreversible negative consequences in the form of burns and knots on the plastic surface of the lenses. Who can accidentally damage the paintwork of a vehicle? To protect the paint from damage, use a special artist's tape, which is usually included in the kits.
Follow these simple steps to keep your car looking its best.
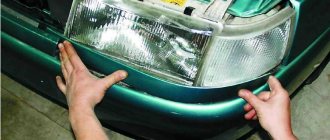
When using a car for a long time, the headlights become dirty just like any other part. Moreover, pollution can be not only external, remaining, for example, after an off-road trip, but also internal. If dust gets inside the headlight, there is a high probability that its housing is leaking. Perhaps, when installing new lamps, you did not glue the glass firmly enough. And sometimes this happens at the factory. Be that as it may, the optical device requires thorough cleaning from all sides, including the inside. Of course, the easiest way to do this is to completely disassemble the headlight. But if the headlight is initially one-piece, or you are afraid of damaging its insides, use our recommendations to wash and clean it without disassembling it.
How and with what to polish headlights with your own hands at home
Any car owner treats his vehicle with care and caution. This is why many motorists are trying to find a lot of ways to care for their car. Most often they are interested in how to polish headlights at home. For this purpose, both cheap improvised and rather expensive purchased means can be used. The result of such actions is not only an aesthetic function, but also increases the degree of traffic safety, since headlights are an indispensable device at night.
How long will headlight polishing last?
The length of time the headlights remain presentable depends on many factors. This is influenced by the quality of polishing, the operating conditions of the car, how carefully the maintenance is carried out, even the climate and quality of the road surface make themselves felt.
The durability of polishing depends on operating conditions.
Inside
After internal polishing, the surface will retain its appearance for at least 3 years. From the inside, few factors affect the ceiling. To extend this period as much as possible, you should adhere to the following recommendations:
- High quality installation. It is important that after installing the headlight, there are no gaps left through which dust and dirt can get inside.
- Weather protection. The car should not be left under direct influence of the sun. It is advisable that the vehicle is in a garage, or at least that the headlights are covered.
- Use of appropriate lamps. The instructions for each car contain recommendations on lamps that can be used. It is not worth installing lighting with heating; the increased temperature will damage the structure of the lampshade.
Headlights with additional varnish coating.