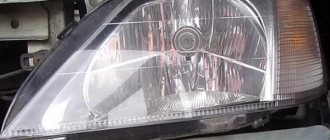
Headlight lenses are faded - solves the problem by polishing or replacing
Dull headlight lenses are one of the serious problems for motorists. Yellow glass or a dark inner side are troubles that indicate a malfunction of the optics mechanism itself or a too long service life. Yellowed and scratched glass can be polished if it is smooth using the following options:
- buy a special polish for car glass, do not skimp on this product, otherwise it will not help remove microcracks and various other minor problems;
- prepare the headlight in a garage or other dry place for polishing, wash it and wipe it dry (it is not necessary to remove the optical device);
- Next, apply the required amount of polishing paste to the glass and rub it with a soft cloth over the entire surface; you can first polish a small area;
- then rub the polish into the glass surface with quick circular movements and watch for changes in the appearance of the headlight; the procedure can take quite a long time.
It is often recommended to use expensive toothpaste as a polishing material. In fact, this does not always work, so it is better to buy special products for such cases. Moreover, you can significantly delay the very expensive replacement of headlights by carrying out this operation correctly. Cloudy glass is one of the first causes of reduced light intensity in your car.
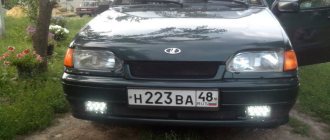
How to improve light on the Volga
If we have carried out all the described measures, and the light still does not satisfy us, we can additionally perform the following actions.
Replacing optics with headlights for halogen lamps
As mentioned above, simply installing halogens in old optics is a useless step. Firstly, the reflector will fail very quickly, and secondly, lamps of type E2 and H4 have different shapes, and the filament is located at a different point. Accordingly, the design of the headlight diffuser is also different. That is, an old headlight with a halogen lamp will simply shine in an unknown direction. It is imperative to install optical elements marked H4.
No further actions are required. Many on the forums write about the mandatory replacement of wires with thicker ones, since the lamps are more powerful... This is a misconception. Standard halogen lamps have exactly the same 55/60 W power, that is, the total power of the lamps on high beam does not exceed 120 W.
Unloading the central light switch
This is indeed a very useful improvement. And in the case of cars like GAZ 20 and GAZ 21, this is not only useful, but also necessary, since if the central transmission unit fails, you will look for a new original one for a long time and will not find it cheap.
This alteration is not complicated, does not require large investments and does not require special skills.
We need:
- normally open relay 4-pin 30A - 2 pcs;
- wire with a cross section of 1.5 mm - about two meters;
- terminal block (without tails) for the relay; It’s better to take bare blocks without wires, crimp the terminals yourself and insert them into the blocks, this way you will get rid of extra twists - 2 pieces;
- male terminals - a handful;
- screw terminals “rings” - a smaller handful;
- wire cutters;
- pliers;
- slotted screwdriver;
- terminal crimping tool, if available; If this is not the case, you can make do with pliers, it’s just not as convenient.
There are several diagrams on the Internet of how you can embed a relay into the head light circuits, but we will follow the path that is as rational as possible and does not require intervention in the main harnesses. In addition, we will keep the standard thermal fuse for the headlight circuit, located under the dashboard, in operation, and we will get rid of the need to install hanging additional fuses.
- As with all other electrical work, disconnect the battery.
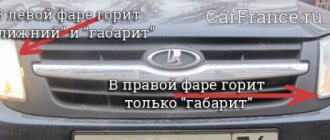
- Next, look at the left headlight connection block on the front mudguard. We identify on it the supply wires coming from the central station. They are clearly visible, they do not go into the wings to the headlights, but into a common harness. The wires have different colors, we check the diagram and determine which one goes to the near one, which one goes to the far one, and which one goes to the dimensions. Perhaps the wires will have a color different from the one indicated (consequences of repairs or simply the evil irony of the manufacturer), then we determine the required wire experimentally (disconnect one, isolate it, connect the power and check which light is missing: dimensions, high or low).
- We mark the supply wires and the tails from the headlights connected to them.
- We attach the relay to the front mudguard so that the supply wires reach them. The location is good, moisture does not get here and access is convenient.
- Contact 85
is connected to the high beam lead wire. - We perform similar actions for the relay that will control the neighbor.
- Contact 87
of the high beam relay is connected to
87
of the low beam relay and pull the wire under the dashboard into the passenger compartment. We connect it to the output contact of the thermal fuse or screw it to the input contact of the DSP. - Contacts 86
of both relays are connected to the housing. - Contact 30
of the low beam relay is connected to the contact of the distribution block, which previously received the low beam supply wire from the central station. - We repeat the procedure for the high beam relay.
- We check the reliability of all connections, check the markings we have applied, connect the battery and test our modification.
That's all the action. By and large, you don't even need a diagram.
Some recommend using 4 relays, that is, one for each lamp filament. There is a certain logic in this, so in the event of a sudden relay failure while driving, you will not be left in complete darkness, since at least one headlight will continue to illuminate your path. But in practice such a situation is unlikely.
There is one more problem that affects the light, typical for GAZ 20 and GAZ 21. This is the weak standard generator of these cars, which does not pull out the heater, headlights, wipers and receiver that are turned on at the same time. But installing a modern alternator is a topic for a separate article. Look after your cars, service them on time and drive with pleasure.
Or maybe just change the light bulb to a powerful one?
One of the options for solving the problem of poor light on domestic cars is to install high-quality lamps. And if cars of foreign origin have quite good light bulbs installed from the factory, then our cars are equipped with something cheaper. Almost every buyer has to face this problem. Choose one of the following options:
- Philips X-Treme Vision +130% - a chic version of white light for halogen headlights, there are different bases and beam color variations, the durability is quite long, the light is excellent;
- Osram Night Breaker Unlimited is a new series of light bulbs from Osram, the only problem of which is that the lifespan is too short, the light from the headlights is simply magnificent, all other things being equal;
- KOITO - Japanese lamps that produce the best options for brightness and lighting efficiency; such lamps will help solve problems with low-quality light;
- Philips +30% Dutch origin in cardboard packaging is a discontinued series that shines no worse than the notorious X-Treme Vision, while being much cheaper.
So the quality of light turns out to be quite dependent on the light bulb. And if your car has Osram Standard lamps (which is not the worst option), then how can you count on optimal lighting quality. The best thing to do is go to the store, buy efficient and high quality bulbs, making a really good light in your car. But it will cost some money.
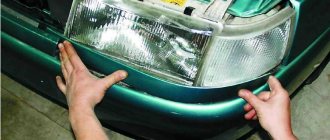
Changing headlight bulbs
Over time, the performance of the bulbs used in headlights can deteriorate, resulting in reduced lighting efficiency. Solving this problem will not be difficult. You just need to purchase new light bulbs and replace them in the headlights yourself. On most cars, this work is not difficult. In this case, it is not necessary to remove the headlight itself; you just need to disconnect the power wire from the lamp and, by turning the socket 90 degrees, easily remove it from the socket and replace the dimmed light bulb.
Remember that it is recommended to carry out all work with clean gloves, and you should not touch the light bulb with dirty hands. Tiny droplets of grease may fall onto the glass, which will subsequently disintegrate during headlight operation, leading to mechanical damage to the light bulb.
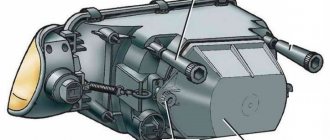
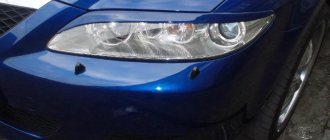
Problems with the reflector - causes and solutions
Halogen headlights, installed on the vast majority of cars in our country, have a reflector in their design. This is a piece with a fully reflective shiny metallic finish. Very often, the headlights in a car dim due to the burnout of this very reflector. The reasons for such burnout may be the installation of headlights with a higher operating temperature than standard ones. For example, you should not install 100-watt lamps in cars that have 50/55-watt options. This will cause the reflector to burn out.
You can restore it using several methods:
- replacing with a new one is one of the easiest ways, but even to do this work you need to know how to properly disassemble the headlight on your car;
- gluing the working part with metallized tape from one of the well-known manufacturers is not the best option, but a temporary solution to the problem;
- glue the working part with metal foil - it is very important that the foil lies as evenly as possible, nothing prevents it from reflecting light, there is no refraction;
- painting with chrome paint is not the best option, since no paint will give the desired reflection, but in general you can partially solve the problem or drive around with restored headlights for a while;
- purchase and install mirror film, which is sold in various stores, but you need to choose the highest quality material.
Each case has its own problems. For example, matte paint with a chrome tint will cause the color to be completely absorbed rather than reflected. Pay attention to the quality of disassembly and assembly of the headlight. If certain leaky areas remain, water will get inside and condensation will form. This combination of factors will quickly destroy the headlight and force you to buy a new one. Sometimes the best solution is to purchase a new reflector and have it replaced at a service center.
What can't you do?
Some car enthusiasts, caring only about their own comfort, install xenon lamps in ordinary headlights. However, as a result, illumination improves only slightly, and drivers of oncoming cars suffer. Such light scatters randomly and hits in all directions.
These actions are considered modifications to the design of the vehicle. This makes it impossible to legally pass a technical inspection; traffic police officers have an extra way to stop.
Installing homemade xenon is an amateurish solution to the problem, which will bring nothing but problems. Remember how annoying it is when such xenon “fireflies” catch up with you, blinding you through the rear-view mirrors. It's even worse when they move towards you. The conclusion is simple: do not cause discomfort to other road users. After all, not only their safety, but also your safety depends on this.
Problems with the generator - the light dims due to lack of voltage
Many car owners drive with poor lighting and do not even suspect that the culprit is not the lamps or the headlights themselves, but the electrical circuit in the car. The first step is to check the generator, which produces a certain voltage during the trip and is the main source of electricity after the engine has been started. If the generator does not work well and does not produce the required voltage, the following troubles are possible:
- all elements of electricity consumption will not work very well, many may not turn on at all due to the lack of normal network operating conditions in the car;
- instead of the required 12V, 8-9V is supplied to the headlights at a constant network load, this can be checked by turning on the headlights with the engine off (if the light is normal, the generator is to blame);
- Also, if the generator malfunctions, fuel consumption increases, since the computer increases engine speed in order to obtain a more or less normal voltage in the network;
- Also, the poor quality of the generator is due to the fact that when you press the gas pedal, all lighting elements, as well as fans and other electrical appliances, begin to work better.
If your car has a non-original generator, the most logical solution would be to install a factory version of this device. Often, for various modifications, the plant offers a more powerful version of the generator. This is an excellent solution, but remember that it may somewhat spoil the impression of the machine. In particular, fuel consumption may increase. Otherwise, only native generators can seriously change the situation.
A bad generator in winter is a real problem
Particularly serious problems occur with the device for providing electricity in the car in winter. This is due to the increased load on the device. Often, only music from electrical devices works in the car. At night, the headlights also turn on. The fan can also work in the rain. But in winter, heated windows, high fan speeds, constant light, heated seats and air conditioning are activated to reduce window fogging. All this heavily loads the generator and shows all its problems.
The best light
The first thing that comes to mind for any fan of garage tuning when mentioning headlights is “xenon”! Let it be known to you, this is one of the most dangerous improvements - it’s not for nothing that all traffic regulations in the world (including Ukrainian ones) prohibit any interference with standard lighting equipment.
Better headlights mean a longer beam and better illumination of the road surface, i.e. a brighter and more uniform light pattern.
The gas-discharge headlight lamps themselves are, of course, good, but they can only be installed in “their own” optics intended for them - otherwise the beam of light turns out to be such that it blinds everyone in front. Due to the inconsistency between the focusing of the xenon lamp and the optical element originally intended for halogen lamps, the innovative driver himself does not always receive better light than he had from the factory.
But there is an effective and correct way to improve the headlight. First of all, make sure that the headlight reflector is in good condition (if not, replace it) and install halogens in the headlight of the standard size, but with increased light output. In the catalogs of well-known manufacturers they are designated as +30%, +50%, +100%. Avoid no name products, since little-known manufacturers increase light output by simply increasing power consumption, which is unacceptable.
Installing new headlights is a panacea, but not always
Often, having suffered fairly with poor-quality light, car owners decide to simply change the headlights to new ones. But don't think that this step will solve all your problems. For example, the problem may be due to incorrect connection of the equipment. First of all, this situation affects the quality of light from the bulbs. The lamps do not receive the required voltage and produce poor light. The following situation is quite possible:
- you select new factory-type headlights, pay a lot of money for their purchase, joyfully realize the impending improvement of headlights and solutions to problems;
- after this, the purchase is installed, all electrical contacts are connected and joyful anticipation of completely changed lighting characteristics;
- but in reality the light may remain the same, and you have not checked all the features and guesses about the operation of your car without looking at the electrical aspects;
- This is followed by disappointment and understanding of the unnecessary costs of purchasing new headlights (even for a domestic car, such costs will be quite serious).
So don’t rush into making serious investments; it’s better to try to correct the situation on your own or replace the light bulbs with more efficient ones. Most likely, you can get more efficiency from your optical equipment without purchasing new headlight sources. However, such a step is not excluded in very advanced cases. We invite you to watch a video describing methods for improving headlights with your own hands for cars older than 10 years:
How to adjust headlights yourself
You can adjust the light flow yourself, but you need to know some of the features of lighting equipment and how to configure it.
Types of headlights
The factory equipment may consist of lighting devices of the following design:
The headlight fogs up from the inside, what to do + video
- Halogen headlights. The most common optics option installed by manufacturers. Can be used for low and high beam lighting modes. The light flow power parameters range from 1500 to 2100 lumens with a service life in the range of 500-1500 hours.
- Xenon light. Such elements are characterized by an improved design and improved focusing. Xenon is available only on low beam, or on low beam and high beam (the so-called bi-xenon). Power up to 3200 lumens and service life up to 4000 hours.
- LED models. The most modern option with the ability to supply a light stream of 6000 lumens in a wide range of color temperatures of the light beam. Durability of work – from 5000 to 10000 hours.
You can independently change the lamps in the optics for products of a different type only if you have a document confirming the compliance of the LEDs or xenon with the design provided by the car manufacturer. Therefore, unauthorized placement of LED lamps in fog lamps, which affects the functioning of optical devices, entails liability in accordance with clause 3 of Art. 12.5 Code of Administrative Offenses of the Russian Federation.
Settings Features
Before starting the procedure, it is important to check and install the shock absorbers and tire inflation parameters in the normal position, and evenly distribute the existing load in the car. Correct adjustments can only be made if the following condition is met: a flat vertical wall is required with space for a vehicle at a distance of 7.5 m from it
Markings are done with adhesive tape or chalk
Correct adjustment can only be made if the following condition is met: a flat vertical wall is required with space for a vehicle at a distance of 7.5 m from it. Markings are done with adhesive tape or chalk.
Experienced drivers usually use one of the following two adjustment methods:
№1
The machine is adjusted as close as possible to the vertical surface, on which its center points and similar marks for lamps are applied. The distance between them, as well as from the surface of the earth to the lamp, is determined.
An additional line is drawn below 5.5 cm from the first (secant line). After this, the car is driven back to 7.5 m, a line is drawn on the wall between the points from the center of the display of the switched-on light bulbs.
Next – 3 vertical lines through the centers of the headlights and the middle of the distance between them (the axis of the car).
Now is the time to start setting things up. It is necessary that the angle of inclination of the optics ideally coincides with the horizontal markings. The location where the light begins to rise is adjusted until it coincides with the intersecting lines.
How to properly wash a car engine with your own hands
Adjusting bolts under the hood at the rear of the headlights will be needed to adjust the optimal beam of light
It is important that the beam of light is located just below the center mark of the headlights
№2
The main difference from the previous method is that the car will need to be driven 10 m away from the wall. In this case, the center points of the lamps are marked both in close proximity to the wall and at the specified distance. The markings are connected horizontally, after which two parallel lines are drawn - 22 cm higher and 12 cm lower.
Next, at the zero indicator, is the illumination width regulator. For the light spot from the headlights, the middle line will serve as the upper boundary of the main headlights, and the highest - the fog ones.
The intersection of the light streams should be 12 cm below the center of the lamps.
Features of adjusting fog lights
The key feature of this adjustment method is that the tank must be fully refilled and an additional load of 70 kg on the car is required. Lines are drawn on the wall: the lower one - along the distance from the ground to the fog lights and the upper one - the same size, multiplied by two.
A mark is made to the central axis of the vehicle, thereby creating a drawing with two points of the centers of optical devices and restrictions on the upper and lower limits of light.
In order to set the focus of radiation at the intersection marks of the headlights, adjusting bolts are used in the foglight mount.
Let's sum it up
If you have ever encountered very bad light in a car, then you understand all the disadvantages of this situation. This is a rather difficult moment, which will always be an important point for all drivers. Operating a car on wet asphalt can be a very unpleasant experience when the road is poorly lit. In any case, the driver receives only negative emotions in this situation and does not ensure the safety of himself and the people around him. So such unpleasant effects are unacceptable. The headlight should work at least as well as when the car left the factory. Ideally, it should work better.
Check your car's electrical systems, the voltage supplied by the generator and other important features. This will help you understand the characteristics of poor electrical appliances much better. Also think about possibly replacing the light bulbs with brighter ones. The fact is that in modern traffic with bright light, dim light bulbs cope very poorly with their tasks. It will be much better to use the possibilities of inexpensive headlight modifications than to drive with dim low and high beams. So take advantage of the tips given above, get better road lighting and increase safety. Have you improved the headlights in your car in any way?
Installation of high power lamps
This is quite logical - the more powerful the lamps installed on the car, the better the lighting will be. But you shouldn’t change them thoughtlessly. This is not as simple as it might seem at first glance. It is imperative to take into account the optical capabilities of your car; they may be limited for such light.
In this case, there is a risk of rapid burnout of the reflector, melting of some elements and other troubles. In addition, it is worth considering the negative impact of such a stream of light on oncoming drivers.
There is also a way out: instead of devices with increased power, you can install lamps with higher light output. Of course, their cost is higher than average, but believe me, the effect is worth it! And this method is much better than the previous one.