- Causes of valve failure
- What is needed for replacement
- Replacing valves
- Which valves to choose
- Useful video
Many owners of VAZ cars (and the 14th is no exception) over time encounter problems such as valve wear or burnout. When faced with it, you can go in two ways - contact a service center or do the repair yourself. We will talk about how to replace VAZ 2114 valves, as well as what is needed for this, in today’s article.
VAZ 2114 valve set
Causes of valve failure
The main reasons why valves break or quickly burn out are:
- regular use of low quality fuel;
- installation of spark plugs with the wrong heat rating in the cylinder head;
- frequent driving at the maximum permissible engine speed;
- using a propane mixture as fuel without corresponding flashing of the electronic control unit;
- operation of a car with regular engine detonation.
Poor fuel quality
In addition to the above reasons, valve failure can be caused by another one, which is typical only for 16-valve engines and impossible for 8-valve engines - their impact on the pistons in the event of a timing belt break.
Causes of parts failure and their consequences
A characteristic feature of the guide elements is that they do not fail at once, but wear out gradually. The lifespan of parts on budget cars ranges from 180 to 300 thousand km, and on more expensive foreign cars it can reach 1 million km. The wear process is influenced by several factors that can accelerate it:
- the quality of the motor oil used and the timeliness of its replacement;
- temperature conditions of the power unit, the more often the engine overheats, the faster the rubbing surfaces wear out;
- the quality of the fuel and combustible mixture, whose vapors penetrate into any leaks and contribute to the process of slow destruction of parts.
Carbon deposits on the rod destroy the bushing quite quickly
Note. The working life of all elements of the gas distribution mechanism is also affected by the serviceability of the power supply and ignition system. When, as a result of a malfunction, pops occur in the fuel or exhaust manifold, the lubricant between the valve-bushing pair is washed off with unburned gasoline, which is why the mechanism runs “dry” for several seconds.
A worn part is characterized by a “broken” internal hole, as a result of which the valve stem begins to move too freely in it, and then play appears. The rod warps during operation, and the plate does not fit well with the seat, the tightness of the interface is gradually lost. Gases escape from the combustion chamber into the mechanism, and oil enters from above, resulting in the formation of carbon deposits. It also accelerates wear, quickly rendering the part completely unusable.
What is needed for replacement
If, during checking the condition of the timing belt, it turned out that replacing the VAZ 2114 valve is still necessary, then to carry out the operation itself you will need:
- a set of new valves (exhaust and intake);
- valve seats;
- guide bushings;
- Screwdriver Set;
- set of sockets and keys;
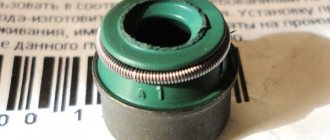
- valve stem seals;
- valve desiccant;
- oil seal remover.
Valves VAZ 2114
In some cases, it may also be necessary to purchase and install new fasteners (if they are found to be damaged).
Why are guide bushings needed?
At the beginning and middle of the last century, car cylinder heads were made of cast iron, and the valves were simply inserted into precisely drilled holes. But subsequently, manufacturers abandoned cast iron heads due to their heavy weight and insufficient removal of excess heat, and they were replaced by lightweight cylinder heads made of aluminum alloys. These metals have excellent thermal conductivity, but have little resistance to wear from friction.
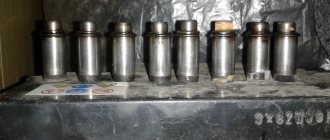
To solve the problem, a guide sleeve was invented - an intermediary between the soft alloy of the cylinder head and the steel valve stem, which constantly moves up and down during operation. Made of cast iron or special bronze, it is securely pressed into the cylinder head body, and the valve is inserted inside with minimal clearance.
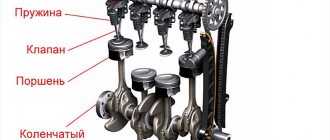
The engine diagram shows the location of the guide bushings
The bushing itself is a hollow cylinder, made exactly to size for a specific car model. The outer surface is polished and smooth to the touch, and the inner surface has a spiral-shaped groove in the form of a thread. Motor oil moves along it, lubricating the valve axis and reducing friction. A shallow recess is made in the upper part of the guide part, into which a retaining ring is inserted.
On the left is the bushing for the exhaust valve, on the right is for the intake valve
Important point. The guide elements for the intake and exhaust groups of valves differ in design, although they may look the same in appearance (for example, parts for Russian VAZ 2108-09 cars). The difference is this: in the bushing for the exhaust tract, the oil groove is made along the entire length of the hole, and for the intake tract - only halfway. But products for the “classic” VAZ 2106 also differ in size; with the same diameter, the exhaust elements are longer than the inlet elements.
Bronze bushings for VAZ 2109 all look the same
Bushings perform the following functions:
- as the name implies, they direct the movement of the valve so that its plate is clearly aligned with the seat and fits tightly to it;
- take on the load from the friction force that occurs during the translational and reciprocal movement of the valve stem;
- the valve cup gets very hot in the combustion chamber, and the bushing transfers this heat to the aluminum alloy of the cylinder head;
- Thanks to a special groove, the part provides lubrication of rubbing surfaces.
Cast iron parts of VAZ 2106 - intake bushings are shorter than exhaust bushings
When the element is pressed into the cylinder head hole, its upper part of smaller diameter protrudes several millimeters above the surface. This is necessary to install an oil seal on it (also known as a valve seal), which prevents lubricant from the upper part of the engine from entering the combustion chamber through the inner hole of the bushing.
This is what the protruding part looks like where the oil seal is put on
Replacing valves
Before changing the valves on a VAZ 2114, you should disconnect the ground terminal from the battery. This must be done even if during the repair the car’s electrics themselves are not affected, since even tampering with the mechanical units does not exclude a short circuit in the on-board network connected to the battery.
Also, before starting repairs, you need to wait until the car engine has cooled down (if it has recently been running).
This is followed by:
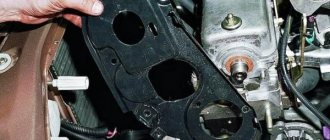
- Unscrew the fasteners and remove the gas distribution mechanism casing.
- Remove the timing belt.
- Carefully remove the camshaft gear from the pulley (if it is difficult to remove, you can push it slightly using a pry bar or a large screwdriver).
- Unscrew the fasteners of the valve compartment cover of the gas distribution mechanism.
- Unscrew the mounting bolts (10 in total) securing the block head. Depending on when the car was produced, they can be either hex or TORX.
- Remove the cylinder head.
- Remove the camshaft.
- Remove the valve seals using a suitable puller.
- Perform the valve desiccation procedure.
- Remove the valve discs and their springs.
- Remove the valves from their seats.
Removing the timing case
Removing the camshaft gear
Remove the cover
Dismantling the camshaft VAZ 2114
We remove the oil seals of the VAZ 2114
Depressurization of VAZ 2114 valves
Removing valve springs and discs
At this point, the procedure for dismantling the old valves can be considered complete, after which you should begin installing new ones.
Installation of new valves VAZ 2114
This is done as follows:
- Install new guide bushings (bronze is recommended).
- Replace the valve seats with new ones.
- Grind new valves to the seat.
- Install new valves in their seats.
- Reinstall the cylinder head.
- Perform final assembly of the cylinder head and gas distribution mechanism in the same order as disassembly, but in reverse order.
You can check the quality of valve lapping using kerosene or other liquid with a good penetration coefficient. If you pour it into the chamber of an installed valve, then even the slightest leaks can be easily seen from the smudges, indicating a lack of tightness. If no traces of liquid are visible on the back of the valve head, then the grinding has been carried out correctly.
Repair of injectors VAZ 2114/2115
Repairing injectors involves carrying out a number of works at once:
- cleaning;
- purging;
- replacement of rubber seals.
After the products have been removed from the fuel rail, you need to take a good look at each of the four nozzles. If there are visible signs of leakage on the body, repair will not be practical. You will have to immediately replace the nozzle with a new one. The differences in flushing and cleaning procedures for 8-valve and 16-valve engines are not significant. Therefore, you can be guided by the same scheme.
Video: the easiest way
If the body is clean and there are no deformations or cracks on it, then repair work is allowed. To do this, you will need to remove the seal from the body and the sprayer. It is recommended to leave these parts in acetone or solvent for 1.5–2 hours. While the parts are being washed, you can use a vacuum cleaner to clean the fuel rail. Next, you need to carefully clean the place where the injectors fit into the ramp using a toothpick or a needle.
After this, you can start purging the nozzle from the inside. You will need a roll of electrical tape, an aerosol can for cleaning carburetors and a syringe. An aerosol cleaning liquid is supplied through a thin syringe into the nozzle cavity. It is better to wrap the joint between the syringe and the tube of the canister for sealing with electrical tape. It is recommended to repeat washing the nozzle from the inside three times. Afterwards the product must dry. As soon as the body itself, as well as the seal and sprayer dry after washing, you can assemble the nozzle and install it on the ramp.
A cheap product will perfectly remove dirt and deposits from the nozzle
Before installation, each nozzle is tested for resistance. The tester readings should be in the range of 11–15 ohms.
There is also a simple way to clean the injectors, without dismantling the fuel rail. However, it is only appropriate in cases where the injectors have not yet exhausted their entire service life (120–150 thousand kilometers). The use of cleaning additives in gasoline is allowed. In this case, all elements of the fuel system will be cleaned, but its closed nature does not allow removing dirt and sediment from low-quality gasoline.
The liquid is poured into the gas tank and, together with fuel, cleans all elements of the system
Replacing rubber rings and seals on injectors
Usually, when washing or repairing injectors, car enthusiasts immediately change all rubber elements. This is due to high wear rates. The cost of rings and seals is very low, but after replacement you can immediately observe the stability of the motor.
Rings and seals can be removed with one movement of the hand. However, installing new ones will require care, as it is easy to damage the rubber. The plastic element is first lubricated with gasoline, and then pulled in place of the old seal.
Spare parts for VAZ injectors can be purchased at a minimal price
Almost every driver can clean or replace the injectors on VAZ 2114/2115 cars on their own. Difficulties can arise only in the process of unscrewing the fuel rail or reconnecting the wires to the injector contacts. However, if each stage of work is carefully carried out, even a beginner can independently maintain this element of the fuel system.
Which valves to choose
When choosing new valves for the 14th, you should give preference to proven models - this will help avoid their rapid failure and a new replacement procedure. So, according to reviews from many car enthusiasts, a good option is to purchase “original” valves with catalog numbers 2108-1007010 (intake) and 2108-1007012 (exhaust). They are distinguished by high quality workmanship, durability and an affordable price (around 350 rubles for 1 piece).
Good analogues include the following intake valves:
- AMP PLAD005-S-0-D, made in Poland. They have quality comparable to the original, but are cheaper;
- Freccia R4387/SNT, made in Italy. The cost and service life are close to original valves;
- Master-sport 08IN-SET/4/-MS, made in Russia. They have higher quality workmanship and an increased service life, but cost almost 2 times more than the original.
Set of new valves VAZ 2114
As for exhaust valves, there is more choice on the market, since the demand for them is higher (due to faster wear). Among the good options that have quality close to the original and approximately the same cost, we can note:
- Osvat 0504 (Italy);
- Ae V91180 (Italy);
- Kolbenschmidt 17092 (Germany);
- AMP PLAD004-A-0-D (Poland);
- Master-sport 08EX-SET/4/-MS (Russia).
Exhaust valves VAZ 2114
In conclusion, it is worth noting that replacing valves with your own hands is a procedure that any experienced driver can do. The most important thing that should not be forgotten is the need to strictly follow the algorithms of action during the processes of disassembling and assembling the engine, which were described in this article.
Where is the timing belt located?
Monitoring the condition of the timing belt and its serviceability is quite simple, because this part immediately catches your eye after opening the hood. Its surface is toothed, it passes through the crankshaft and camshaft, and is a connecting link for the following elements:
Since the belt performs several tasks simultaneously, it can quickly fail, so you should pay very close attention to its appearance.
If it is noticed that this element often “slips” from its main place or begins to tear, it needs to be replaced as soon as possible. A broken belt in a VAZ-2114 will be indicated by an injector in the form of a light that lights up on the dashboard, while other models may simply stall on the way, and the driver will not be able to start the car on his own. However, not only a broken belt becomes the reason for replacing the valves; quite often the valves have to be changed due to a violation of the clearance in the motor chain. If the car owner notices that the valves are not positioned as usual, then the car is under no circumstances allowed to be operated until the valve guides are completely replaced. It’s really possible to do this kind of work yourself, despite the lengthy process. Every car enthusiast can handle it if he follows the instructions provided by professionals in their field.
Step-by-step valve replacement
- First of all, you need to remove the cylinder head from the car:
- the battery is de-energized and removed;
- Coolant and engine oil are drained into separate containers;
- vacuum hoses, cylinder head gaskets, cooling systems are completely removed from the car;
- the cylinder head cover is removed, the timing belt and casing are removed;
- Using a key, the fasteners that secure the cylinder head are unscrewed.
- After removing the cylinder head, you can begin replacing the valves. But before you start, you need to prepare a special tool called a puller. Of course, you can use improvised tools, for example, a chisel and a hammer, but this will complicate the work a little:
- the camshaft and gas camshaft are removed from the cylinder head;
- using a removable device or a hammer with a chisel, the studs are secured to the gas distribution shaft;
- a stand is placed under the “plate” of the valves, and the “crackers” are removed;
- the seals are removed. To make it more convenient to remove the camshaft oil seals, experts recommend using a clamp to press the oil seal, but not very hard, and carefully turn it in different directions;
- the springs and the “plate”, which is located under them, are removed.
- We remove the valves that have become unusable.
At this point, the valve replacement process can be considered complete, and assembly should be performed in the reverse order.
