AutoNews / Reviews / Tests
Replacing the Windshield Sealant of a VAZ 2110
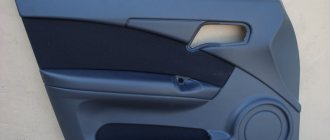
We are improving the seals on the doors of the VAZ 2110.
Already on the new cars of the VAZ 2110 series, buyers noted the insufficient effectiveness of sound insulation and wind protection by rubber on the doors. Therefore, there is no need to talk about used cars.
Over time, creaking and rustling noises arise, and the driver and passengers experience discomfort from the cold that comes through worn-out seals. Plus, loose fitting of the doors leads to the appearance of water inside the cabin during snow or rain.
It would seem that such an insignificant element as a seal, but how many problems it can cause in case of wear or mechanical damage.
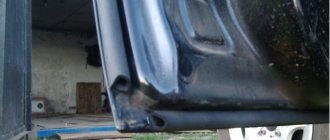
The seals at the bottom of the doors, near the thresholds, are subject to greater wear. Therefore, every client of a used VAZ 2110 or the owner of a rather old car must first replace these rubber bands.
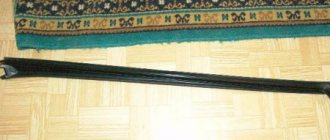
The appearance of the gum
What to choose?
Sometimes you are amazed at the imagination and thoughts of those who try to save money on car repairs. If we talk about rubber seals, some recommend using drip tubes instead, while others use a different method, inserting window seals.
Do not follow such advice under any circumstances. They won't lead to anything good.
There are several truly correct and effective options, which we will introduce you to using the table.
Ready-made kits from the manufacturer
They are provided directly for the VAZ 2110 model. These are mass-produced rubber bands that are perfectly suitable for the doors of the 10. Their design is double-circuit, which allows you to install additional seals as needed.
Measuring rubber bands for VAZ
In stores you can purchase ready-made or soldered seals for each door. Or a solid tape, from which they will cut a piece for you according to the required meter
Seals from Priora
Experts believe that these are the most effective and reliable seals. This is explained by the three-chamber design with a metal fixing strip and the highest quality. These elastic bands do not wrinkle and keep their shape perfectly.
Rubber bands from GAZelle
A frequently encountered option that has similar properties to standard elements for the 10. The cost is approximately the same
When choosing the length of the required piece of seal, measure the internal length of the installed rubber bands on both doors separately. Take it with a reserve, because you can always cut off the excess.
The fixing parts should be caps and high-quality, effective glue. When purchasing the rubber itself, they will tell you which glue is best to use.
Read also:
To make the car more noticeable, you can tuning the optics. This article will not talk about LED optics, but about tinting the optics. It’s easy to make the front optics black or match the color of the car, but you should start by tinting the turn indicators.
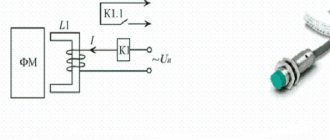
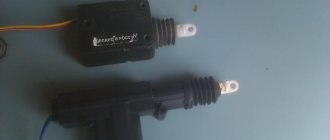
An update for music lovers who don’t want to part with music even for a minute. Basic knowledge of electronics will help you add another option to your car - automatically turning off the radio when arming.
Reworking the air ducts of the VAZ 2110 - for those who want to diversify the air duct grilles of the VAZ 2110.
The old seals were cracked, dried out and torn in places.
Replaced:
-Door seals -Trunk seals (250 RUR) -Upper drain seals. -Glass seals: Velvet seals (from Priora2) (600 RUR)
External glass seals for car doors perform a number of functions, for example, they press the glass around the perimeter, protect against water getting inside the door, and also reduce wind noise.
Removal
When you have obtained the required number of seals for yourself, you can begin to work.
First, the old rubber elements are removed, after which the installation of new parts begins.
Let's tell you more about the dismantling procedure.
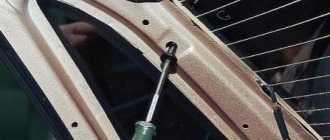
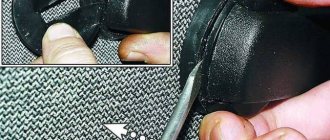
- Remove the plastic trim panels installed on your vehicle's door sills. To do this you will need a sealed screwdriver. Remove carefully, being careful not to destroy the plastic caps. But it’s better to purchase new ones in advance if you can’t carefully dismantle the threshold.
- Now remove the old pieces of rubber from the seats. Simply tear off the sections that are torn off by hand.
- Remains of rubber can be cleaned with any available equipment. Just be careful with sharpened objects so as not to destroy the metal and paint layer.
- Very small residues and traces of adhesive can be removed using solvents. Make sure that the solvent you choose will not damage your paintwork.
- Walk along the doorway with a vacuum cleaner, remove all dust and dirt. Be especially careful when removing the lower part. If wet cleaning was used, wait until everything is completely dry.
Necessary tool
To ensure that the replacement of the VAZ 2110 windshield goes smoothly, you should get a gluing kit. When purchased through an online store, the TEROSON PU kit will cost approximately 1,150 rubles, but it will quickly pay for itself. Its composition:
- adhesive-sealant 8596;
- cartridge nozzle;
- primer;
- applicator;
- surface cleaning cloth;
- cutting string;
- instructions for use.
In addition, you need to have other devices on hand:
- a set of flat screwdrivers and spatulas;
- several stationery knives;
- solvent for nitro paint;
- new consumable.
With an assistant, changing a part is easier and faster.
Price is not a guarantee of quality! But you shouldn’t take the cheapest materials either: fakes are not uncommon.
How to choose material
Finding a quality product at a low price is an art. There are several simple rules that will help distinguish an original product from a fake:
- Clear markings. A vague name, type, or manufacturer should raise doubts about the quality.
- Smooth surface. Small cracks, chips, and bumps are not the norm. Carefully inspect the consumable: if you find a defect, ask for another one.
- Reflection. It should be clear, even, and not blurry.
The manufacturer installs a spare part on the VAZ 2110 with dimensions of 1400×662 mm. Dimensions are similar for the 2111 model and VAZ 2112.
Auto glass of the wrong size will lead to rapid breakage. Take your choice more seriously!
The modern market is rich in a variety of goods. You can find a lobovushka for 1000 rubles, or for 3000. It all depends on the quality and the reputation of the company.
Additional seal
If you have completely replaced old rubber bands with new ones in all doors, then no additional insulation is needed. But in cases where you do not want or do not have the opportunity to do this immediately, and the old rubber bands have become crushed and worn out, you can install additional VAZ 2110 door seals as a temporary measure.
It could be a thin tube for thermal insulation. These are used in refrigeration equipment, etc. The material is a bit like black foam rubber, but denser. You may come across advice - to use meter seals for windshields in this capacity, but this is impractical. Firstly, it is quite difficult to find one, it is much more expensive, and is not easy to install - it is difficult to achieve a high-quality tight fit. seal
However, regardless of the material chosen, its installation is no different.
As a rule, additional insulation of doors is carried out only in their top and rear parts. If there is a strong need - and in the front part, you just need to be especially careful in the area of the hinges so that the material does not interfere with the normal closing of the doors, otherwise some on the forums complain that after such actions problems arose with closing the doors.
It is irrational to install anything additional in the threshold area. Dirt and water will accumulate there faster, and then corrosion, rust, holes...
The additional seal is simply glued to the body (not to the door), close to the existing one. When choosing a glue, make sure that it does not react with the paint surface of the car.
After gluing, close the doors and check whether the seal is coming out. If necessary, it is carefully trimmed.
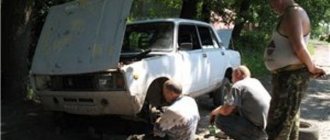
How to remove and install
We have everything we need, we can get to work. We remove everything unnecessary: wipers, trims, etc. Accessories will interfere with the dismantling of damaged material.
Windshield
We start removing the windshield from the top. From any angle, carefully squeeze it out along with the rubber bands. From inside the passenger compartment we pry up the seal with a screwdriver - this makes it easier to dismantle the front glass on the VAZ 2110.
We work with gloves! If the glass shatters, you will need to remove the shards manually. Take precautions!
We clean the grooves from dirt and small fragments. We put a rubber seal on the new glass. If it has dried out and cracked in places, it is better to buy another one.
To make putting on the elastic easier, apply lubricant to it. We put a strong nylon cord inside the seal. Before this, we treat the rope and the lower groove of the car with a soap solution. We put it on, pull out the ends of the cord in the center of the bottom of the material.
To supply the spare part, you will need the help of an outsider. One person places the material in the bottom groove and holds it, while the other carefully inserts it around the entire perimeter, releasing the cord.
At bends, be especially careful when pulling the rope out: it doesn’t glide well and may break. On the side parts, press harder from the outside.
It is advisable to fix the seal with adhesive sealant. We glue the consumable with tape to the roof and sides of the car. To properly glue a windshield with your own hands, the glue must be applied evenly.
Rear window
The procedure is generally simple, but replacing the rear window of a VAZ 2110 requires some skill. To remove the rear window on a VAZ 2110, you need an extra pair of hands; it’s almost impossible to do it alone.
It is also advisable for two people to install car windows; it is better to be on the safe side than to damage a freshly purchased part.
Side windows
It is not necessary to change the side windows of the VAZ 2010 so often, because they are almost never hit by oncoming stones. The manipulation is carried out in the same way. The dimensions of the part are 858x528 mm.
Installation
This work, in principle, is not too difficult; it can be done even without special training. Just take into account that the installation of the seal and the simultaneous modification of wind and noise insulation must be carried out carefully and meticulously, then you will ensure greater interior comfort for several years to come.
The installation is carried out according to the following algorithm:
- Even if you have previously measured the seal seat, do it again, following the popular wisdom that it is better to measure seven times;
- Cut the seal to the required length with a small margin (a couple of centimeters). Of course, if you bought a ready-made “ten” set of rubber bands, then ignore these two points;
- Inside the seal, insert the polymer or silicone tube that you have. Accordingly, its length should also correspond to the elastic band. This tube is designed to give elasticity to the entire insulating structure and create a better fit of the rubber bands, thereby protecting the interior from unnecessary additional “ventilation” and unnecessary sounds;
- Glue the side curly seal at the bottom;
- A solid rubber band can be worn anywhere. And for measuring, it is best to choose a starting point between the door awnings (or about 30 cm from the bottom of the threshold). Whether you move the installation up or down does not matter;
- It is necessary to push the figured profile all the way down. This is done only with the help of a rubber or wooden mallet (hammer);
- When you walk around the entire perimeter, you will probably find that there is a lot of material. The insert element (tube) must be cut exactly end-to-end, and the seal must be cut in such a way that there is slight deformation of the adjacent areas. Thus, there will be no “siphoning” through the joint;
- Install the piston, remount the plastic sill trim;
- Carefully and tightly glue the second contour along the edge of the door. Let it dry.
Conclusion
You can replace the windshield yourself - it will be cheaper than at a car service center. So if you don’t want to spend extra money, but have some time to spare, go for it.
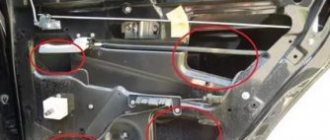
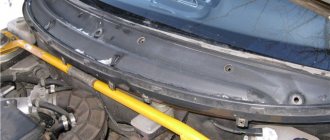
The drawing is not mine, but I’ll explain. Look at the picture where there are green and red arrows. You coat the profiles with silicone/vd, whoever uses what, I did it first.
You open the doors, bend the seal on the roof and push the profile marked with a green arrow along the entire length of the glass. From the side of the roof it will turn out a little hunchbacked, just press it down carefully. First you should make sure that the part of the profile (green arrow) that will be under the glass is not too large. If it is too much, it will not allow the profile to fit properly onto the glass and then you will not be able to reach the roof level with an elastic band.