Which parts to choose
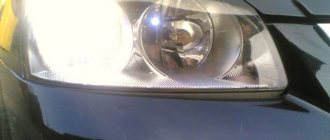
Granta, whose lamps are easy to find in any auto parts store, is equipped with modern optics that illuminate the road surface in accordance with all GOST requirements.
When choosing lamps, it is important to observe the following parameters:
- designation of the base;
- voltage;
- power.
Installation of parts that do not meet the requirements often leads to melting of the base, transparent cover or headlight housing.
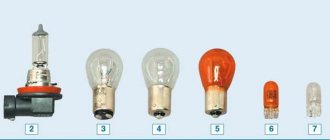
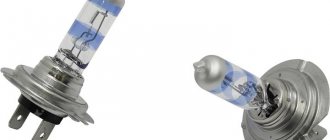
Lamps used on Grant:
- low/high beam – H4 55/60W 12V;
- direction indicator block – PY21W 12V/21W;
- running light/marker – P21 5/21W 12V.
A special feature of the H4 format is a combined bulb for near and far illumination. Each type of light has its own thread. If one of them burns out, the second continues to work.
The factory in Grant comes with lighting elements from Philips or Osram, depending on the batch.
The following options are suitable as a replacement:
- Bosch;
- Philips;
- Osram;
- MTF;
- Koito.
Japanese Koito and Korean MTF are expensive, so owners rarely choose them to replace the original ones.
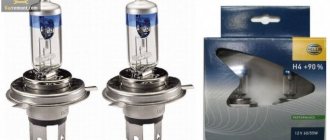
Philips X-treme Vision
According to test results from independent experts, these consumables have one of the best indicators of brightness and illumination in the dark.
The manufacturer indicates the following features:
- light temperature corresponds to 3500K;
- increase in the lighting area of Grants up to 45 meters in comparison with standard lamps;
- service life up to 450 hours.
The packaging with two parts included is produced in Poland. During installation, car enthusiasts note a significant improvement in low beam and sufficient brightness in rainy weather. The disadvantages include a short service life. On average, such parts work in Grant from 1 to 2 years.
Philips LongLife EcoVision
Lamps are supplied from factories in Poland and Germany. A distinctive feature is an increased service life of up to 1500 hours, which equates to 4-5 years of operation or 100,000 km.
Characteristics for low and high beam:
- quartz flask with increased strength indicators;
- thread resistant to shock and vibration;
- powerful luminous flux due to increased gas pressure in the bulb.
The lamps do not differ in lighting quality from the original ones, but they work much longer and are also not afraid of shocks.
Bosch Pure Light
You can purchase such lamps for Granta in a package of one piece. This is convenient for owners who have one lamp burnt out and do not want to pay for both.
Peculiarities:
- the manufacturer promises an increase in light spot of up to 90%;
- The item comes with a silver plated cartridge and a blue bulb to provide white light.
The lamps show themselves in Grants optics on the positive side and last about 2-3 years. Drivers often choose Bosch for its reasonable price and good workmanship. Country of origin: Germany, Poland.
Osram Original Line
The cost of the part is comparable to the prices of lamps from Bosch. The manufacturer promises car owners the following features:
- improving the length of the light beam, increasing visibility on the roadside;
- pressure in the flask provides a power increase of up to 130%.
Lamps are supplied individually. The production plant is located in Germany. The part has a good service life of 500 hours and is inexpensive. These lamps are factory installed on many makes of cars.
This is interesting: How does a manual clutch work?
Each lensed headlight includes the following main components:
Bulb: Every headlight needs a bulb. This type of headlight can use halogen, xenon (HID) and LED bulbs as the light source. Lens headlight bulbs can be much brighter than reflector headlight bulbs.
Reflector: Just like the classic headlight type, the lenses also have a component called a reflector. This is exactly the function it performs. The only difference is that it uses an ellipse-shaped reflector instead of a parabolic one. The difference in shape causes the light emitted by the lens lamp to be focused to a narrow point near the front of the reflector where it meets the shutter, or correction screen as it is also called.
Screen: This is one of the most important components in this type of system, and is an element that classic reflector housings simply do not have. The component interrupts the light beam from below, causing it to abruptly turn off, thereby effectively directing the beam onto the road rather than allowing it to blind other vehicle occupants. In some vehicles, this light shutter can be raised and lowered to switch between low and high beams.
Lens (lens): This is the last component you will find in your headlights. It is designed to uniformly distribute the already formed beam of light, directed by an elliptical reflector and shutter. Some lenses also have a feature that further softens the boundary between the light and the unlit part of the road.
Diagram showing the operation of lensed headlights:
All lens-equipped headlights have the same basic design, but may use several different types of bulbs. Here are the main types that motorists most often encounter on the road (a brief explanation of each type):
Halogen: The first generation of headlights used halogen bulbs, the same as conventional lighting fixtures of the past and present. These headlights typically produce a more uniform beam of light than reflector headlights, which is a plus. But at the same time they have a sharper boundary between light and darkness - this is bad, even despite the use of older technology of less bright halogen lamps.
Xenon: The second type of headlights with lenses that came a little later is the xenon HID bulbs. They are available and quite common today.
They are much brighter than traditional halogen lamps and last longer. It's worth remembering that while xenon is better than halogen, putting HID bulbs in a lens housing designed for halogen is a bad idea. Not only can the reflector quickly fade, but the traffic police will not praise you for such experiments.
LED: The newest type of light source in headlights. They are very energy efficient and last much longer than halogen or xenon bulbs. If they have never been damaged, LED headlights may even outlive the vehicle in which they are installed.
Halo, or “angel eyes”: you've seen these glowing lens frames in the headlights of BMW and other manufacturers. Looks beautiful. A distinctive feature that has become the hallmark of lensed headlights. Despite this, halos themselves do not use lens technology, but are closely related to them.
In fact, these rings are created using about half a dozen different technologies, such as cold cathode fluorescent (CCFL) lamps, LEDs, and even incandescent lamps.
The main reasons for LBS burnout on Grant
Most often, Granta owners complain about the fairly frequent failure of low beam lamps. Indeed, they most often require changing names, which is understandable: after all, they work almost constantly.
If previously car owners turned on the lights at night and in inclement weather, now, according to the rules, they must always be on while driving. Lamps do not last forever, and if a cheaper analogue is purchased to replace the fairly good standard OSRAM light bulbs, the problem may become a regular one.
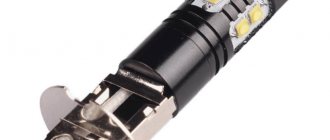
LED lamps for Lada Granta SMD 2835
The second common reason for bulbs burning out in front and rear headlights is moisture getting inside. The culprit is usually cracked or poorly fitting rubber seals located between the headlight housing and the glass. The presence of a problem is indicated by periodic fogging of the headlight from the inside.
Halogen lamps may not light due to improper installation. During this procedure, you must avoid touching the glass surface with your fingers.
Traces of grease significantly reduce the life of the light bulb. In addition, although in rare cases, the lamps do not light up due to too high voltage supplied by the car's alternator or poor terminal contact.
LED halogen lamps on Lada Granta H4 (prohibited for use)
In general, as you were able to notice, there may be more than enough reasons why the low beam on the Lada Granta stopped working. Let's now figure out in what cases you will need to replace the lamps, and in which cases you should contact a specialist.
When replacement is required
Replacing low beam lamps on a Grant may be necessary if they burn out. But, if such a malfunction occurs very often, or along with the low beam, any other part directly related to the electrical system disappears or stops working, then in this case it is better to contact a specialist.
The process of replacing low beam lamps on a Lada Granta
In most cases, the problem lies in the car's wiring or insufficient voltage supplied by the battery. It will be extremely difficult to find the cause on your own without the proper skills.
Tips for using the car
It is important to prevent serious problems from occurring on your Grant; we suggest following generally accepted rules.
- Systematic inspection. The performance of the light elements should be checked before each trip. Inspect the area under the hood at least once every 4 weeks. Close attention should be paid to firmly fixing wires and connections. Often problems occur due to loose wiring in the car that rubs against moving parts.
- Checking the status of devices. When you hear extraneous sounds when you turn on the lights (for example, relay clicks), it means that the steering column switch or button is not working well. It’s better to deal with the problem right away, without waiting for the unit to fail.
Attention! You cannot drive a car with broken headlight glasses, as moisture and debris will begin to get inside, and, accordingly, the internal elements will deteriorate.
- Use of quality spare parts. When choosing light bulbs, you should not rush to extremely high power, this will not significantly increase the brightness of the light, but the wiring and other parts of the system will be subject to stress. Sometimes this leads to short circuits. But there is no point in saving on quality, because low cost indicates low reliability, which can provoke frequent replacement of the device.
- Lean renovation. When carrying out work on your own, it is important not to disturb connections, wiring and other elements.
It is quite possible to carry out work related to replacing light bulbs, eliminating minor nuances, and adjusting light without the involvement of specialists. In addition, you will save money and perform quality repairs, because you are doing this exclusively for yourself. Listen to the car and correct any problems that arise in a timely manner.
This is interesting: How should a pedestrian move along the side of the road?
Features of choosing LBS
Standard low beam lamps that are installed on the Lada Granta 60/55 H4: where 60/55 is the power of the low beam (55) and high beam (60) in watts. H4 is the type of base. Therefore, please note that this lamp is used for both low and high beam headlights.
In addition, the low beam lamps on the Lada Granta differ in many respects. The most popular of which are:
- Philips X-treme Vision (the brightest, give white light) Features declared by the manufacturer: bright white light, increase the lighting area in front of the car by 45 m, high-quality quartz glass. One of the highest brightness levels and incredible comfort in the dark.
- Philips LongLife EcoVision (inexpensive, extended service life) Features: high-strength quartz glass, resistant to temperature changes and vibration, high internal pressure - powerful light.
- Bosch Pure Light (extended service life) Features stated by the manufacturer: up to 90% more light, exclusive design with silver plating and blue sector.
- Osram Original Line (good illumination area) Features: OEM quality, improved visibility up to 130%.
Useful tips
According to traffic rules, it is prohibited to drive a car without a driver's headlight.
Therefore, if the low beam on the driver’s side burns out, it is necessary to move the working lamp from the right headlight to the left.
The low beam may not work not only because of a burnt-out lamp, it may also be working properly. The fuse may have blown or the headlight relay may have broken.
- About the author:
- Latest articles:
I'm just sick of cars. I try to study in detail every car I have owned. I enjoy driving at night on city streets. I try to do my own repairs on my cars!
- Tell me where is the fuse for the windshield wipers of the Lada Priora - 09/07/2020
- What are the best front brake pads for Lada Priora with ABS - 08/29/2020
- What kind of bulbs are in the low beam headlights on a Priora - 08/26/2020
- Next article How to reset the service interval on Renault Megane 2 (Service due now)
- Previous article How to beautifully hide the wires from the Lada Granta cigarette lighter splitter
Tags: Lada Granta
Is it worth replacing a working running light bulb?
But such lamps have more than enough disadvantages!
- Including dim light with a yellow tint, which does not have the best effect on visibility in front of the car.
- And, of course, it is important to remember about the service life of such lamps, which will turn out to be very short.
All this forces people to change the running light bulbs in their cars almost immediately after purchase.
In principle, replacement may also apply to new incandescent lamps if the old ones fail. But, nothing prevents you from using LED lamps. Pay attention only to the base, which must correspond to the connector that is supposed to be in the car.
But, in this case, you also need to remember that simply replacing an incandescent or halogen lamp will not be enough, since you need to tear off the base from the diode in order to redirect the antennae to the desired connectors. Naturally, before the procedure you will need to check the correct polarity.
Review of the standard DRL lamp
The standard lamp is called W21/5W.
When it is turned on, a 21 W filament starts up, and when the headlights are turned on, these lights go out and the side light based on a 5 W filament starts working.
Reasons for a non-working headlight
Often, replacing low beam lamps on a Lada Granta sedan or liftback is carried out in the event of a burnout of the filaments.
But we note that the headlight may not work due to a blown fuse or damage to the wiring that powers it.
Therefore, if you detect inoperative headlights on the Lada Granta, you should check the corresponding fusible elements in the safety block, as well as the integrity of the wiring.
Even if the lamps are in good working order, they must be changed every 3-4 years of vehicle operation. This is due to the fact that the bulb of the element gradually becomes cloudy, due to which the intensity of the glow decreases.
How to change lamps
To replace a burnt-out part in a headlight yourself, you don’t need complex tools. Before starting work, you should thoroughly wipe the headlights, disconnect the battery and prepare new spare parts.
When installing a new lamp, be careful not to touch the glass bulb. The contaminated part overheats and burns out before its service life. For protection, it is best to use cloth gloves.
Replacing the Granta part in the main lighting module
To change a spare part, you need to choose calm, dry weather or use a garage.
Replacing a low beam lamp on a Grant:
- Open the hood.
- Remove the battery terminal.
- Disconnect the power supply.
- Carefully remove the cap from the body by pulling the three special ebbs.
- Bend back the two springs securing the skirt.
- Remove the burnt part.
- Install a new one without touching the flask with your hands or parts of the Grant.
- Connect the connector and install the plug in place.
When replacing, drivers are often in a hurry and forget to fasten the latches in the cartridge. In this case, the lamp will hang on uneven surfaces and quickly burn out.
DRL
Dismantling of the part is also carried out from the engine compartment. Replacing Lada Granta DRL lamps step by step:
- Disconnect the battery terminal.
- Find the connector located opposite the DRL unit.
- Rotate the chip counterclockwise 90°.
- Pull towards you and remove the lamp.
- Install the new part into the contact area and screw the chip into place.
Regular light bulbs are resistant to finger touches, so the use of gloves is not necessary. Daytime running lights turn on automatically when you turn the ignition key and dim when you turn on the Granta's main light.
Drivers often install LED DRLs on Granta. In this case, the brightness increases and the car is easier to notice on the road in sunny weather. When installing a diode, it is important to observe polarity and select the appropriate part size.
Fog lights
There are several ways to replace light bulbs in foglights with your own hands:
- bumper removal;
- bending the corner to access the lantern;
- unscrewing the fender liner.
Installing fog lights on a Lada Granta involves removing the bumper and cutting out additional holes. However, to gain access to the lamps, you can get by by bending the fender liner.
The protective fender liner in the front part is secured with four screws, which are unscrewed using a shaped screwdriver. To facilitate access, the wheel is turned towards the engine or removed. If the lamps have not been changed for a long time, the bolts may become sour and will require great effort to unscrew.
PTF Grants use parts with the designation H11 55W, 12V. To dismantle you should:
- Unscrew the locker bolts and carefully bend it.
- Put your hand into the hole and disconnect the connector.
- Turn the part counterclockwise and pull it towards you.
- Install a new consumable.
- Connect the connector.
If, when unscrewing the screws, the caps are damaged or there are traces of corrosion on the threads, they must be replaced with new ones and lubricated with graphite or copper grease before screwing in.
The Granta's optics, operating in normal mode, perfectly illuminate the road and meet all the declared characteristics. After replacing the parts yourself, you should check the angle of the beam so as not to blind oncoming drivers.
DRL lamp replacement process
In order to correctly replace lamps for Lada Granta running lights, it is necessary to take into account not only technical, but also legal requirements.
Installation Requirements
A common disadvantage of DRLs is the fact that they are not described in the law as a single vehicle lighting device. Against this background, various frictions may arise between car owners and inspectors. However, there are a number of regulatory requirements according to which they are manufactured and installed. So, in order to replace the running light lamps, the following technical conditions must be met:
- Placement is only in front of the car.
- The height from the road surface is from 0.25 to 1.5 meters.
- The distance between the internal parts of the headlights is at least 60 cm.
- The area of the luminous surface should fit within a frame of 40 to 200 cm 3 .
The power of the running lights must be sufficient so that the dimensions of the vehicle are visible from a distance of at least 200 meters.
Step-by-step instruction
The procedure for replacing running light bulbs on a Lada Granta car comes down to the following basic steps:
- Turn off the ignition system, disconnect the on-board power supply, disconnecting the battery terminals.
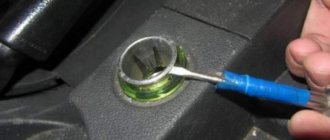
- To change the light bulb in the right headlight, you need to remove the decorative engine cover and unscrew the oil filler plug.
- Having reached the running light bulb, you need to turn its socket counterclockwise and remove it by pulling it towards you.
- Install a new light bulb by performing all steps in reverse order.
Important! If you need to make a replacement on the left side of the Lada Granta optics, you must first remove the air filter housing, also disconnecting the sensor and all conductors and pipes suitable for it.
Features of installation of LED DRLs
Installing LED lamps in running lights has many advantages. However, at the same time, their replacement is associated with a number of features that simply cannot be ignored:
- You need to install LED elements on both headlights of the Lada Granta at once.
- It is necessary to check the polarity using a tester, without which, when turned on, the LEDs will immediately burn out and the fuse will deteriorate.
- Not all diode lamps immediately fit into standard sockets - you often have to open the base to align the contacts.
Note! Replacing the standard lamps in the running lights with LEDs in the Lada Granta, due to the low power consumption of the latter, will trigger the “DRL malfunction” light on the panel unit. In some cases, an audible alarm may even sound. Installing a European version of the dashboard will help fix the problem.
Type of lamps used on Lada Granta
The Lada Granta uses halogen double-filament lamps with an H4 socket. One such lamp, thanks to the presence of two filaments, allows the headlight to operate in two lighting modes - low and high beam.
At the same time, the characteristics must indicate the luminous power of each thread.
For lamps intended for use on Granta, the high beam filament power should be 60 W, and the low beam filament power should be 55 W.
The disadvantage of such lighting elements is the fact that if at least one filament burns out, the lamp will have to be completely replaced, although the second filament remains working. But at the same time, the two-strand layout makes the replacement process easier.
The thread responsible for the low beam operating mode usually burns out. This happens due to the fact that this mode is used much more often and for longer than high beam.
Lamps for increased visual comfort
Selecting and replacing low beam lamps on the Lada Granta
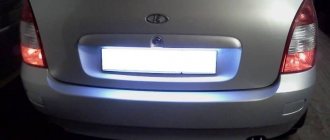
Although the standard lamps with a yellowish dull tint in the running light system may still remain in good working order, many Lada Granta owners strive to immediately replace them with halogen ones with bright white light. The reason for this is to increase visual comfort. It is also noted that this can emphasize the exterior profile of the car.
Comparison of DRL lamps - the photo shows a standard (installed from the manufacturer) and a luxury lamp
Halogen bulbs from the following manufacturers are very popular among car enthusiasts:
- Philips.
- Lighthouse.
- OSRAM.
- IPF.
- General Electric and some others.
Like other modifications, halogen lamps for DRLs still have the same characteristic number of disadvantages. First of all, this is increased heating and, because of this, the shelf life decreases with increasing power. For this reason, when choosing such sources for the Lada Granata, you should take into account that they can be produced in two versions:
The first option meets all legal requirements, but at the same time has average durability. The second one is more economical and, although it does not shine as brightly, it lasts longer.
We provide access
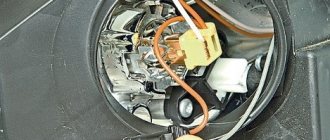
The peculiarity of the work on replacing lighting elements on a Lada Granta is that the bulbs are removed from the inside of the headlight (under the hood on the engine side), and the space where they are located is limited.
To improve the convenience of work, you can remove some elements from the power unit to make it easier to get to the light sources.
So, to improve access to the left lamp (on the driver's side), you can unscrew the fastening of the air filter housing and move it to the side.
As for the right headlight, you can remove the engine protective cover from this side by unscrewing the oil filler cap and pulling out the clips. In this case, after removing the engine lining, the oil filler cap must be replaced.
Please note that it is not necessary to remove these elements from the engine. If you have the skill and the driver has already carried out the replacement and knows the specifics of the work, then it is quite possible to carry out this operation without removing any elements from the engine.
Changing the lamps in the Lada Granta headlight
December 14, 2015
We show the replacement of lamps on the left headlight unit (for clarity, we removed it from the car). We change the lamps in the right headlight in the same way.
Disconnect the wire terminal from the negative terminal of the battery.
To replace the headlight lamp, press the lock...To replace the headlight lamp, press the lock...To replace the headlight lamp, press the lock... ...and remove the cover from the headlight housing...and remove the cover from the headlight housing...and remove cover from the headlamp housing. Disconnect the wiring harness block from the lamp terminals. Disconnect the wiring harness block from the lamp terminals. Disconnect the wiring harness block from the lamp terminals. Remove the rubber cover. By pressing on the ends of the spring clamp, we disengage them from the hooks of the reflector... By pressing on the ends of the spring clamp, we disengage them from the hooks of the reflector... By pressing on the ends of the spring clamp, we disengage them from the hooks of the reflector... ... and remove the clamp from the lamp.... and remove the retainer from the lamp... and remove the retainer from the lamp. We remove the lamp from the headlight housing. We remove the lamp from the headlight housing. We remove the lamp from the headlight housing.
Attention! The headlight lamp is halogen. You should not touch its glass bulb with your fingers, as traces from them will lead to darkening of the lamp when heated
You can remove dirt from the flask with a clean rag soaked in alcohol.
We install the new H4 lamp in the reverse order.
To replace the turn signal lamp, press the socket and turn it counterclockwise (clockwise in the right headlight), remove the socket with the lamp from the headlight housing. To replace the turn signal lamp, press the socket and turn it counterclockwise clockwise (clockwise in the right headlight), remove the lamp socket from the headlight housing. To replace the turn signal lamp, press the socket and turn it counterclockwise (clockwise in the right headlight) , remove the socket with the lamp from the headlight housing.
Pressing the lamp, turn it all the way counterclockwise and remove the lamp from the socket.
We install the new PY21W lamp in the reverse order.
To replace the daytime running light lamp and side light in the left headlight, move the air filter housing to the side, releasing its rubber clamps. To replace the lamp in the right headlight unit, this is not necessary.
By turning the lamp socket counterclockwise, we remove the lamp socket from the headlight housing. By turning the lamp socket counterclockwise, we remove the lamp socket from the headlamp housing. By turning the lamp socket counterclockwise, we remove the lamp socket from the headlamp housing . Pulling the lamp, we take it out of the socket. Pulling the lamp, we take it out of the socket. Pulling the lamp, we take it out of the socket.
We install the new W21/5W lamp in the reverse order.
[Maintenance of Lada Granta for 45 thousand.
km run]
Changing the lamps in the Lada Granta headlight Changing the lamps in the Lada Granta headlight Is there an error in the text? Select it with your mouse! And press: Ctrl + Enter
What does the market offer?
Below are some options for halogen lamps of different price categories that can be installed on the Grant:
- PHILIPS H4 COLORVISION. A set from a German manufacturer, characterized by bright light and the ability to choose the color of the glow (blue, green, yellow). Price – about $35.
- OSRAM COLOR BLUE HYPER. Halogen lighting elements made in Germany, with a declared color temperature of 5000K. The flask is painted blue. Price – about 17$.
- MTF LIGHT STANDARD. Korean light bulbs with a transparent bulb, the color temperature of which is 2900K, which allows them to be used in headlights with plastic housings. They will cost only $6.
- KOITO DENSO VWHITE. Products made in Japan, with transparent bulbs and a color temperature of 3700K. Features high light intensity. Price – about 28$;
- EVO VISTAS. Halogen lamps from China have a completely transparent body, their light color temperature is 3200K. Will cost $25.
- LIGHTHOUSE ULTRA. Budget option made in China. The base is transparent, the characteristics of the products are fully suitable for installation on Granta. Cost – $4.
And these are just a few types of halogen lamps. In general, the range of such lighting equipment is very extensive and allows any car owner to find a suitable option both in terms of price and quality of work.
Nuances of the work, possible problems
Finally, about some nuances of the replacement. In general, the operation is not difficult, but sometimes problems arise.
When installing halogen lamps, please note that touching the bulb with your hands is not allowed. During installation/dismantling, the element should only be held by the base.
If you touch the bulb, fingerprints will remain on its surface, which will lead to darkening of the glass and rapid failure of the element.
Therefore, during the replacement process, you should wear clean gloves. If you accidentally touched the flask with your fingers, any remaining traces of contact should be removed. And for this, clean rags and alcohol come in handy.
Work should be carried out at positive temperatures. Some car enthusiasts who carried out replacements in cold weather simply broke the cover latch. This happens because plastic hardens in the cold, becomes brittle and breaks easily.
POPULAR WITH READERS: How to replace brake pads on a VAZ 2110, step-by-step guide
Another problem that Lada Granta car owners face when replacing is the sticking of the rubber boot to the headlight housing.
In this case, you can’t do anything special and all that remains is to apply force, but everything must be done carefully so as not to tear the rubber element and also not to damage the lamp.
If the low beam lamp on the driver's side has burned out (further operation of the car is prohibited by traffic rules, and this will result in a fine), and there is no replacement element, then you can swap the tabs with the headlights. After this you can continue moving.
Dismantling
To disassemble, remove and repair or replace the generator, you will need to do the following.
- Drive onto an inspection hole or overpass to have access to the bottom and engine compartment.
- Remove the battery, otherwise it will not allow you to get to the nut that holds the generator you are looking for.
- Next, the same nut and adjustment bar are removed. Here you will need a 17 mm wrench. Use an extension cord. This will make the task easier; you will have to apply less force to unscrew the fastener.
- In the engine compartment, remove the shield that performs dirt protection functions.
- Now the drive belt is removed and the wires are disconnected.
- Be sure to remove the protective cap and use a 10mm wrench to unscrew the nut that holds the tip and positive cable of your battery.
- There is another nut on the fixing bracket, which will also have to be unscrewed.
- That's it, you can remove the generator. Just remember to pull out the long bolt first.
- When removing, keep an eye on the buffer sleeve. It won't be good if you lose it.
This completes the procedure for removing the generator. You can proceed with partial repairs or complete replacement of the unit.
Belt
Often, the solution to a poorly functioning alternator is simply adjusting the belt.
- For the device to work effectively, it is necessary to ensure normal deflection of the belt;
- The deflection size should be 6-10 millimeters with a force of 98 N or 10 kgf;
- To adjust or replace the belt, you need to move the generator slightly to the side, towards the cylinder block;
- By rotating the adjusting bolt, you can adjust the belt tension.
If this measure does not help, you will have to pay attention to the voltage regulator and brushes. https://www.youtube.com/embed/oK5FpoIF6i8
https://youtube.com/watch?v=oK5FpoIF6i8
Brushes and regulator
It is not recommended to repair the generator brushes, as well as the voltage regulator if they are worn out.
Experienced specialists advise purchasing a complete unit that includes both elements. Replacement is completed in a matter of minutes.
But we will definitely tell you how you can change the brushes on your car’s generator with your own hands.
- Disconnect the negative terminal from the battery and remove the battery.
- Remove the generator following the instructions above.
- You can replace the brushes without removing the generator, but this causes certain difficulties. It is much easier to remove the unit.
- Remove the cover, which is the protective casing of the generator.
- The wires and the generator itself are disconnected from the brushes. To do this, simply unscrew a couple of bolts.
- On the right side of the dismantled device there is a nut that can be unscrewed by 13 millimeters with a spanner.
- Now lift the voltage regulator lever, which will allow you to get to the brushes.
- Using new brushes, install them in place of the old ones and reassemble the assembly in reverse order.
When reassembling, proceed as carefully as possible so as not to damage the repaired generator with your own hands.
Quite often, the cause of failure is not the generator itself, but its relay.
There may be several reasons for replacing the relay.