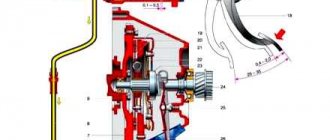
Purpose and principle of operation
This sealing collar began to be used in the very first cars and, due to the simplicity of its design, is used in the modern automotive industry to this day. During operation, the oil seal practically does not touch the surface of the rotating surface; the gap between the parts is sealed due to the vacuum created by special notches on the end of the sealing collar.
Replacing the front crankshaft oil seal on a VAZ 2109
Diagnostics
Reasons for failure of crankshaft oil seals
Since oil drips are the first and main sign of wear on the crankshaft seals, they also tell us that the tightness of the engine lubrication system is compromised. Therefore, at the beginning of troubleshooting, we will have to make sure that it is the sealing collars that are causing the oil leak:
- First, we check the oil level in the engine (there is no need to rely entirely on sensors), top up if necessary and check every day until we find out the cause of the leaks;
- We check the crankcase ventilation system in the engine (clogged ventilation contributes to the accumulation of crankcase gases which, in turn, push oil through the sealing cuffs);
- Check the oil pipe hoses for kinks;
- We check the pressure in the lubrication system.
As a rule, replacing the crankshaft oil seal on a VAZ 2109 is a rather labor-intensive procedure, however, it can be done with your own hands. Therefore, before replacing the crankshaft oil seal of the VAZ 2109, we need to know the reasons why it fails in order to delay this unpleasant moment as long as possible. There are several reasons for the destruction of oil seals:
- First of all, this is, of course, its natural wear and aging (coarsening) of rubber;
- Due to improper installation and, as a rule, internal stresses, cracks appear on the working surface of the cuff;
- Mechanical damage;
- Poor quality tires (fake).
Advice! When purchasing new oil seals, check their working surface, namely the edge, for its sharpness - the sharper it is, the longer the seal will work. In this case, the edge should be smooth and elastic.
Replacing crankshaft oil seals on a VAZ 2109
It should be noted that most often the front radial crankshaft cuff is the first to fail, since it is more exposed to the external environment (dust, sand, dirt) and vibration loads from the car engine. And although the rear oil seal is in more favorable conditions, it is advisable to change the oil seals as a set, since their working life is almost the same.
Signs of wear of the crankshaft seals and its consequences
Replacing the front crankshaft oil seal of a VAZ 2109 is relevant if oil leaks appear on the front cover of the engine block, in the area of the crankshaft pulley, which become more and more progressive as the “disease” develops. Since it is practically impossible to see the beginning of wear of the rear oil seal, replacing the rear crankshaft oil seal on a VAZ 2109 takes place if, when the car is moving, clutch slipping is observed, which is caused by the leaked oil spraying onto the clutch basket and onto its release plate as well. If you notice at least one of the listed signs on your car, then I would not advise you to delay the repair procedure, since the price of a new repair kit is not comparable to the cost of engine repair. What does the engine have to do with it, you ask? The thing is that leaks of lubricating fluids lead to their uneven distribution to the mating surfaces, which is fraught with possible oil starvation of individual engine parts. In the first category of risk of oil shortage is the engine crankshaft itself, which manifests itself in scuffing on its working surface.
Consequences of oil starvation
Also, a consequence of oil leaks through the crankshaft seals is the passage of solid mechanical particles into the oil seal, which, like an abrasive, wear out the working surface of the oil seal on the crankshaft, which already leads to more complex and costly repairs.
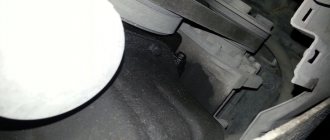
Front cuff workplace
Replacement Guide
Before you begin, make sure you have all the necessary materials on hand. Read the instructions carefully and watch the video.
Front cuff
The front cuff is in a more convenient place than the back one and wears out faster, so let's start with it.
Tools
To change the front crankshaft oil seal of a VAZ 2109, you need standard tools that almost any car owner has:
- a set of keys, sockets and screwdrivers;
- rags;
- capacity.
This video shows one of the replacement methods for a VAZ 2109. It also explains what caused this malfunction.
Stages
- As with other work related to the power unit, the first thing you need to do is turn off the power to the car. To do this, remove the negative terminal of the battery.
- Now you need to loosen the bolts that secure the generator.
- We directly remove the belt drive itself.
- Drain the engine oil into a prepared container.
- We dismantle the protection of the power plant.
- Remove the oil pan.
- Remove the camshaft belt. Here you need to act carefully and carefully. The crankshaft and camshaft must under no circumstances turn. Otherwise, the valves may be damaged due to the pistons hitting them.
- Remove the crankshaft pulley. This is done using two screwdrivers.
- The key will also need to be removed.
- After unscrewing the two bolts, we remove the oil receiver.
- Next, unscrew the six bolts and remove the oil pump.
- Take a large flathead screwdriver and remove the old cuff.
- Now you need to thoroughly rinse the pump cover with gasoline and wipe it off.
- The place where the new cuff will be installed must be lubricated.
- We install the new one so that its working part is directed inward.
- We press in the cuffs using a mandrel of the appropriate diameter.
- We return the pump to its place.
- Now all that remains is to install the dismantled components and parts in reverse order.
- Pour the drained lubricant into the motor. You can, of course, take advantage of the opportunity to replace it.
That's it - the procedure is completed.
It is not necessary to remove the oil pump; you can change the front oil seal in place, just like the rear one!
The request returned an empty result.
Back cuff
The rear cuff is located in a slightly different place and to replace it we will have to work a little more.
Tools
To replace the rear oil seal, we will need almost the same tools as when replacing the front one.
Stages
- Disconnect the negative terminal of the battery.
- The first step is to remove the flywheel.
- Next, remove the rear shield of the clutch housing.
- Unscrew the bolts that secure the rear cuff holder.
- We dismantle it along with the gasket.
- Place the holder itself so that it is convenient to work with it.
- We remove the old cuff from the holder.
- Use a rag to thoroughly clean the holder. Immediately inspect its condition to see if there is any damage - chips or cracks; if such occur, then it must be replaced.
- We install a new one in the socket.
- Using the appropriate diameter of the mandrel, press it in. Make sure that the working edge is turned inward.
- Regardless of the condition of the holder sealing gasket, it needs to be replaced.
- We lubricate the edge and flange of the crankshaft with machine lubricant.
- We install the holder.
- We install the removed components and parts.
The request returned an empty result.
At this point, the work of changing the rear oil seal on a VAZ 2109 can be considered completed.
Sorry, there are no surveys available at this time.
Replacing the front cuff
As mentioned above, replacing the front crankshaft oil seal on a VAZ 2109 is the most common and popular procedure, therefore, when carrying out repair work, it is very important to strictly follow all the recommendations of the manufacturer and be extremely careful, since the properties of the rubber from which the oil seal is made are such that it is very easy to damage during installation. There are two ways to replace the front crankshaft cuff: quick - “homemade” and recommended by the manufacturer.
First way
The method invented by the car owners themselves is as follows:
- Remove the timing belt;
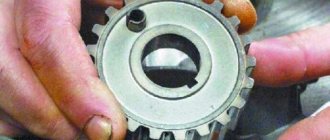
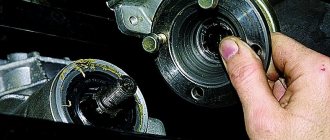
- Using two screwdrivers/winders, remove the toothed pulley from the crankshaft, do not forget about its key;
Removing the crankshaft pulley and its key
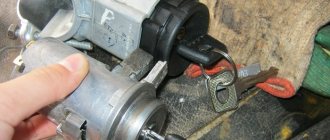
- Using a hook or screwdriver, tear out the old cuff;
Taking out the old cuff
- We put the new cuff in place, and to make installation easier, lubricate its surface with oil;
- Using a mandrel, hammer it in until it stops.
Installing a new oil seal
Second way
When replacing the front crankshaft oil seal on a VAZ 2109, we will need the following:
- A pair of screwdrivers;
- Socket wrench set to “17”;
- Socket and open-end wrenches, as well as a “10” head;
- As a mandrel, the head is set to “27”;
- Timing pulley tensioner key;
- Since the “correct” replacement of the front cuff requires dismantling the oil pump, you need to stock up on a new gasket;
- And, of course, a new oil seal.
Next, you need to provide access to the engine crankcase, for which we put the car on an overpass or a lift, drain the oil and, as with any repair, disconnect the battery.
- If available, remove the engine protection, or rather its crankcase;
- Using a ten key, unscrew the four bolts securing the protective timing cover and remove it;
- We unscrew the six bolts securing the protective cover of the right half of the engine compartment using a key “8”;
- We remove the generator drive belt by loosening its tension with a key “17”;
- Remove the right front wheel;
- Having engaged a low gear, using a nineteen key, we “tear off” the bolt securing the pulley, then unscrew it and remove the pulley itself;
- We install the piston of the first cylinder at top dead center (attributable to the compression stroke). In this case, the installation marks on the rear protective casing and the camshaft drive must match, and the mark on the flywheel, visible through the clutch housing hatch, is located opposite the middle division of the installation scale.
Advice! You can turn the crankshaft by turning the hanging front wheel and engaging fifth gear.
- Using the key “17”, loosen the tension roller and remove the timing belt;
- We dismantle its lower cover from the clutch housing by unscrewing the four bolts securing it with a “10” key;
- Using a “10” head, unscrew the sixteen bolts securing the engine crankcase cover and remove it along with the gasket;
- Using the same head, unscrew the bolts securing the oil receiver to the oil pump and to the second main bearing, remove it;
Removing the oil receiver
- By analogy with the first method, use two screwdrivers to dismantle the toothed pulley (we also keep an eye on the key so as not to lose it);
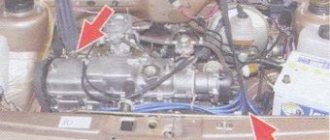
- Using a “10” wrench, unscrew the 6 bolts of the oil pump (fastening it to the engine block)…
Unscrew the oil pump
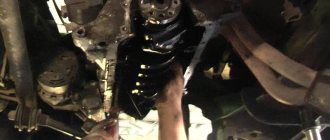
- ...and after tapping the pump housing, remove it together with the oil seal.
Removing the oil pump
We considered the further replacement process in the first option, but the assembly process itself occurs in the reverse order. Don’t forget to put a new gasket under the oil pump, having previously coated it with sealant (this makes it easier to install on the cylinder block).
Attention! When installing the oil pump, you must make sure that its guide pins fit into the corresponding technological holes in the engine cylinder block and that the working edge of the oil seal was not deformed during installation.
It is also advisable to install a fresh gasket under the crankcase cover.
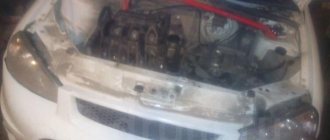
Replacing the crankshaft oil seal on a VAZ 2109, where to start and how to do everything
I'm slowly rebuilding the engine, today I decided to install a crankshaft seal; oil was leaking from the old one.
Changing it is simple and easy, you don’t need anyone to pay for anything, you can do it yourself without a service station.
By removing the generator pulley and the lower gear. I pulled out the old oil seal using a self-tapping screw, first twisted it into it, then pulled it out with pliers.
Then I bought a new one for 45 rubles, took sealant, cotton wool, a screwdriver, and a flashlight instead of a piece of pipe to press it in, installed it in 10 minutes.
The main thing is just to remove the wheel, and turn the steering wheel to the right all the way, and you also need to remove the timing belt, it is easy to remove. I did all this because I am now rebuilding the engine, on my own, without the help of specialists who charge exorbitant amounts of money for this. They are the same self-taught people, they just need to collaborate and do nothing complicated there, you just need to understand the workings of the mechanism. And fortunately there is a lot of information on the Internet, enough to feed a service station!