What is the difference between an injector and a carburetor?
The fuel system in a car is designed to ensure an uninterrupted supply of the fuel mixture under any operating conditions of the car, and its engine must work equally well at idle speed, and at increased loads, also during sharp acceleration.
What is the difference between an injector and a carburetor? On a carburetor car, the supply of fuel (gasoline) and its mixing with air is carried out using mechanics, while an injection vehicle is controlled electronically. The carburetor system (CS) includes the following elements:
- gas tank;
- mechanical fuel pump;
- fuel lines (pipes and hoses);
- carburetor;
- air filter with housing;
- fuel filters.
Due to the operation of the gas pump, fuel from the tank through the main line, passing through the filters, enters the carburetor unit (CU), where it is mixed with air in the required proportion, and then enters the cylinders and burns under pressure. Often, to prevent excess pressure, systems of this type are equipped with a check valve with an additional line for draining gasoline into the gas tank, also called “return”.
An injector or distributed injection system (MIS), unlike a CS, does not have a mechanical unit for mixing fuel with air, but more precise control and dosing is provided by an electronic control unit (ECU or controller). Depending on the modification, the SRV circuit may differ slightly, but the principle is the same for all such systems; it usually includes:
- gasoline tank;
- fuel filters;
- electric fuel pump (submersible or remote);
- a line consisting of tubes and hoses;
- injectors (one for each cylinder);
- throttle assembly;
- fuel rail;
- check valve;
- ECU;
- wiring;
- air filter with housing;
- idle air control (or IAC);
- various sensors - air flow (flow meter, mass air flow sensor), temperature (DTOZh), ambient air (DTOV), detonation (DD), throttle valve position (DPDZ), camshaft (DPRV) and crankshaft (DPKV) shafts.
Also, the SRV is often supplemented with an absorber, an idle speed solenoid valve (EMV), and lambda probes (oxygen sensors). Over time, the injector circuit only becomes more complex, it is “overgrown” with an increasing number of sensors and control systems. Having figured out what the difference is between these two fuel systems, now let’s look at how you can install a different type of vehicle on a car.
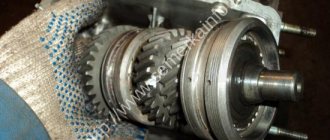
The device of a simple injector
The simplest car injector includes:
- Sensors;
- Electric fuel pump;
- Controller (ECU);
- Pressure regulator;
- The actual injector (nozzle).
Sensors are needed to measure parameters such as:
- Air mass;
- Throttle position;
- Air temperature;
- Fuel consumption;
- Crankshaft position.
The ECU is the brain of the fuel injection system. It controls the injectors according to a certain algorithm, processes signals from sensors, and makes the necessary calculations.
The electric fuel pump forces gasoline to the pressure regulator, which maintains constant pressure in the system.
The injector is a solenoid valve that is activated when control voltage is supplied from the ECU. The opening moment of the injector determines the amount of fuel and air supplied to the combustion chamber. The fuel assembly supply channel of the injector is designed in such a way as to ensure effective atomization and distribution of the mixture in the cylinder.
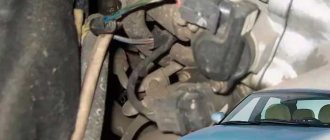
Installing an injector on a carburetor classic
Connecting and servicing the wiring of a VAZ 2106
So, today we will tell you how to convert a classic carburetor engine into an injection one.
We described this procedure using the example of converting a carbator VAZ-2107 into an injection one; in principle, the instructions are suitable for any similar classic engines. In general, I decided to evolve and switch from mechanical mixture formation to electronic, simply from a carburetor to an injector. I'm tired of constantly pulling the choke handle when warming up, looking at the smoked spark plugs and the drooping tachometer needle when under load, especially in winter. No, it’s clear that building a turbo engine is much cooler than simply switching from a carburetor to an injector. But just think about how much it will cost you to repair a turbine if it fails https://turbos.com.ua/about - I think it won’t seem a little
What engine can be installed on a VAZ 2106 instead of the standard one?
Timely repair of the VAZ 2106 engine
It doesn’t matter what engine the car owner installs in the VAZ 2106, he must register the conversion of the car with the State Traffic Safety Inspectorate, because such a need is associated with registering any changes in the car. Otherwise, when checking documents and the VIN code does not match, the car may be considered stolen
Then there will be more problems than from the very first day after the conversion and registration of the new engine.
Let's now look at what power units can be replaced if you are planning to change the engine and all its stuffing.
Domestic options
The following table will show which domestic options are suitable:
| Engine model | Engine capacity | Power | Modification of a domestic car |
| 1.3 MT basic | 1,3 | 64 | eleventh |
| 1.5 MT basic | 1,5 | 72 | troika |
| 1.6 MT basic | 1,6 | 75 | six |
There are several more optimal options for the VAZ 2106 from a domestic manufacturer:
- Largus;
- VAZ 2114;
- Lada Granta;
- Lada Kalina.
It should be taken into account that the procedure for transferring an engine from a Lada Kalina is quite difficult. The crankshaft bearing will need to be reinstalled to a figure-eight bearing. Additionally, mechanics are modifying the flywheel, exhaust system and accelerator drive.
Filling volumes do not exceed those specified for the VAZ 2106 engine. The engines do not differ from each other in weight and size.
If you want to install a more powerful engine, you should remember that the car may become less controllable, acceleration may increase, and the braking system, which is not designed for power, may not work or fail in a timely manner.
Engine from a foreign car
The most suitable engine for the VAZ 2106 is from foreign-made cars such as Fiat Croma 154, Lancia Thema 834, Alfa Romeo 06476. Nissan-made engines are also almost ideally installed on the VAZ.
As power increases, the design of the vehicle is also redesigned. The brake system and suspension are strengthened, the gearbox and axle are changed. A new cooling system is being installed and the thermostat sensors are being changed. This is necessary to prevent the engine from overheating.
Experienced mechanics do not recommend installing more powerful motors yourself. Since rearranging engines in a garage can lead to accidents on the road.
Diesel engine for VAZ 2106
A diesel engine can also be installed on the VAZ 2106. A diesel engine such as 3S-FE may be suitable. When installing this power unit, no major modifications are required, as happens when installing a powerful motor. The price category is also suitable for the owner of a VAZ 2106.
3S-FE are supplied from Japan in large quantities to the Russian market and at low prices. In garage conditions, many car owners transfer them to their sixes.
The main thing is to observe the following parameters:
- dimensions and weight of the previous engine;
- the power of the new one should not exceed 150 horses;
- safe connection of all vehicle systems to the new engine.
By observing the three points described above, you can install a diesel engine in a VAZ 2106 with a calm heart.
Is it worth installing a rotary engine?
Yes, rotary engines give power to a car. Previously, they were produced by VAZ and installed on their cars. But due to the problems experienced by car owners, the plant refused to install rotary power units. Currently, Mazda is producing rotary engines.
A rotary motor can be installed on a model 2106 car. But it will require a complete rework and expansion of the engine compartment. Therefore, experienced mechanics do not advise doing such things. Since the car owner will only spend a lot of money. And you can get more power from a car than it was by installing an engine from Fiat. I have already written about them above.
16-valve engine on VAZ 2106
One of the options for tuning the “six” is replacing the 8-valve engine with a 16-valve engine, for example, from a VAZ 2112. However, the whole process does not end with a banal replacement of engines. Quite serious, painstaking and expensive work lies ahead. The main stages of this type of modification are:
- For a 16-valve engine we install an injection power system.
- We adjust the mount on the engine mounts (classic mounts are used).
- We change the crown on the flywheel, for which we knock down the old one, and in its place we put a part from a VAZ 2101 with preheating. Then we grind off the collar on the engine side of the flywheel (you will have to turn to a lathe). This is necessary for the starter to fall into place. After finishing work on the flywheel, we balance it.
From the listed points for installing a 16-valve unit, you can understand and preliminary assess your capabilities both financially and technically. If you do not have the necessary components and knowledge, you will have to seek outside help and “pour” additional funds into this type of hobby.
Video: installing a 16-valve engine on a “classic”
The “six” engine lends itself well to boosting, and it is not necessary to be a specialist with extensive experience to increase the volume of the unit. By gradually improving your car, you can end up with a fairly “peppy” car that will make you feel more confident on the road.
In this article we will consider installing an injector on a VAZ 2106-2107 and other classics. Why do you need to do such a swap, someone might think, there may be several reasons, and the first most important one is that the carburetor is already a thing of the last century, it constantly requires driver intervention, as the idle speed gets lost, becomes more or less, or the speed begins to float, increases fuel consumption and so on, you can do a lot more listing the problems associated with the carburetor, and the ignition on carburetor engines leaves much to be desired. On injection engines everything is better, on them everything is already controlled by electronics and if something goes wrong, you don’t need to guess what exactly is broken, go for diagnostics and find out all the problems with the engine.
Now let's look at what we need to install the injector on a VAZ 2106-2107 , the first is the engine itself from any injection classic, you can buy it at any disassembly site and it will not be very expensive, then we will need a gas tank with an electric fuel pump also from an injection classics, along with it you need to purchase a return pipe that goes from the engine to the gas tank, you will also need attachments such as an intake receiver, a manifold, a generator, an old starter will do, and a control unit with wiring (oblique), you also need a radiator from the injector . You may still need all sorts of little things, but this will be known during installation. The installation itself is carried out in the usual manner as when replacing an engine on a classic, there is nothing particularly complicated. You will also need to replace the tachometer, since the tachometer on the injector operates from the control unit and they have different voltages. After installation, you will enjoy driving a fuel-injected engine and forget about such unpleasant problems as with a carburetor. If you have questions, ask us in the comments. Also read other interesting articles about this on our website.
The operation of a carburetor engine is accompanied by several problems (failures). After all, the carburetor needs to be adjusted periodically, the idle speed often fluctuates, and in severe frost there can be problems starting the engine. In addition, in order to prepare the fuel-air mixture (FA) with the correct ratio, you need to carefully adjust the position of the mixture quality and quantity screw. In addition, the level in the float chamber affects fuel consumption. In addition to these nuances, problems arise with ignition and the accuracy of its installation. Therefore, car owners remake carburetor engines and install an injector with their own hands.
Features of the injector, list of equipment for replacement
Engine Cooling System Maintenance
Before installing the injector yourself, you should first of all turn to theory. The vast majority of VAZ 2106 cars (modifications 21060, 21061, 21064, 21065) were equipped with carburetor naturally-aspirated engines of 1.45 and 1.6 liters with the same cylinder head (cylinder head) - 2101.
This cylinder head is not suitable for installing an injector on it, since it has inlet holes of inappropriate shape and does not have studs for attaching the intake manifold to the receiver. Of course, you can remake it for cost-saving reasons, but if you do not have special knowledge, then it is better to purchase a ready-made cylinder head assembly from the modernized Niva - 21214.
The Niva's engine is not much different from the 2106 engine, so its cylinder head is ideally suited to the design characteristics.
In case of financial problems, you can purchase an empty cylinder head and replace the valves and other things from the old head into it. But again, this requires knowledge and experience. In addition to the cylinder head, you will need to purchase the following equipment from the VAZ 21214.
- The ramp is assembled with nozzles and pressure regulator.
- The receiver is complete with a throttle assembly and idle air control.
- Intake manifold.
- Gasket for intake and exhaust manifolds.
- Receiver gasket.
- Front engine cover with a hole for the crankshaft position sensor (CPS).
- Crankshaft pulley with space for DPKV.
- DPKV.
- Throttle position sensor (TPS).
- Instant air flow sensor (MAF).
- Antifreeze temperature sensor.
- Speed sensor.
- Knock sensor (DS).
- Accelerator pedal with drive cable.
In addition to the above spare parts, you will also need to purchase:
- Engine control unit (controller) January 7.2.
- Wiring for the control unit (braid from the injection VAZ 2107).
- Ignition module with bracket.
- High voltage wires.
- Electric fuel pump from Volga or Daewoo Damas.
- Fuel hoses and filter (injection).
- Electric radiator fan (only if there was none before).
- Plugs for the mounting location of the distributor and mechanical fuel pump.
It is better to buy electronics from the Lada 110 family for engines with 8-valve cylinder heads.
Replacing the carburetor with an injector
Now let's look at a more popular and frequent option for upgrading the engine power system, namely installing an injector on a carburetor power unit. In short, to solve the problem you need to replace the intake manifold, receiver, install an air filter housing, change the fuel line, install another gas tank with an electric fuel pump, mount an ECU, etc.
As an example, let's take the replacement for the VAZ model, which was produced in different configurations with a carburetor and injector (2108, 2109, etc.). As a rule, used spare parts are used for such alterations. At the heart of the electronic injection system, many use the Bosh M1.5.4 control unit.
This type of ECU is relatively easy to flash; there are many upgraded firmware versions available for it. The catalyst and lambda probe (oxygen sensor) are also excluded from the general scheme.
- So, work begins with replacing the fuel tank. If the tank is dirty, then it must be rinsed first. After this, the electric fuel pump is installed. Let us add that in some cases it is possible to insert the pump into the fuel line without replacing the tank itself.
- Next, you need to drill an additional mounting hole in the BC for the knock sensor (knock sensor). There are also holes for mounting the bracket. The bracket is needed to install the ignition module.
Note that on some motors the holes may already be drilled at the factory. If there are no such holes, then you need to look for special low tides on the BC. The hole depth for the knock sensor is 1.6 cm, for the bracket 2 cm. Drilling must be done carefully so as not to damage the block. Also, after drilling, it is necessary to cut the internal thread.
- To gain access to the unit, you will need to remove the front bumper, drain the antifreeze, remove the cooling radiator, etc. You also need to take into account that the coolant outlet pipe will need to be replaced with a similar one, but with a temperature sensor.
Some also change the thermostat using a tee from the VAZ 10th model, which allows you to connect the expansion tank. At the same time, you will need to replace the gasket, since the old one is usually destroyed or damaged after removing the outlet pipe.
- The next step will be to work with the internal combustion engine itself. First you need to drain the engine oil, remove the timing belt and toothed pulley, and remove the engine sump. As for gaskets, you should strive to preserve the ones you already have, since it can be difficult to purchase new ones of good quality.
Further improvements to the engine include replacing the oil pump of the lubrication system. You also need to replace the standard generator pulley with a damping one. At the same time, the generator is also being changed, for which fastenings are prepared separately. The alternator belt is replaced with a V-type belt.
- Now you can move on to the ignition, power and electronic control systems. You will need to remove the battery, distributor, fuel pump, air filter housing, carburetor, manifold and other elements.
You also need to remove the throttle cable, since on versions with an injector this cable is longer. The choke cable, the ignition system wiring under the hood, the coil and switch, and the idle control system are also removed. Replacement work will also require removing the fuel pipes and the vacuum booster hose, which also needs to be replaced with a longer hose (suitable from a VAZ classic).
- A sufficient number of manipulations will require connecting various elements of the ECM, ignition, sensors, etc. In other words, electrical work begins, for which you need to disassemble the instrument panel.
Among the main operations, the need to lay out the wiring harness from the ignition switch and implement the tachometer input should be highlighted. Connecting the check light bulb will also require laying a separate wire. The wiring from the engine compartment must be pushed into the cabin, after which the connection is made. You also need to connect the injection system wiring to the mounting block.
You will also need wiring to connect the dashboard with the wires to the fuel pump. This is necessary for the correct operation of the fuel level indicator in the tank. The standard wires running along the floor to the tank are replaced with new ones, and there must be a special connector for connecting the pump.
Additionally, you need to make sure that the cooling system fan is working properly. To do this, you need to short-circuit the wires that go from the fan to the sensor that turns it on. Next, the controller, fuses and relays are mounted in those places where their placement was previously provided. Upon completion, a so-called plug is mounted on the cylinder head, to which the “ground” of the injection system is connected.
- Now you can install the manifold, install the fuel rail with injection nozzles, install the receiver and throttle pipe. Also at this stage the throttle cable is replaced.
Then the fuel line is laid along the bottom of the car. The most difficult part is often the passage of the “return”, which must be carried out under the steering mechanism. To solve the problem, you need to release the steering rack fasteners on one side, and then ask an assistant to press the mechanism with a crowbar or pry bar.
- The final stage of work with the internal combustion engine power system can be considered the final installation of the fuel tank. If everything is in order, you should connect the fuel lines. Maintain reliable fixation of all elements using clamps and fasteners.
Now you can activate the fuel pump (supply power to it) and create pressure in the fuel system. This is necessary to check the tightness, and such diagnostics must be done before the injectors are installed in their injector holes. If the check of the injectors and all pressure connections is successful (no fuel is leaking anywhere), then the fuel rail can be attached to the manifold.
- Next, you will need to install the necessary ECM sensors, mount the ignition module, and install the spark plug wires. Separately, you should check the reliability of the “ground” fastening, the quality of the wiring, the tightness of the connections of hoses and pipes.
The completion of the entire process of modifications can be considered the installation of an air filter, as well as the connection of the heating of the throttle pipe and the crankcase ventilation hoses of the internal combustion engine. Now the engine can be started, after which it may be necessary to adjust the quality of the fuel-air mixture in idle mode, etc. It is best to entrust such work to those who specialize in ECU chip tuning.
Why change a carburetor engine to an injection engine, and is it necessary?
Some drivers ask: why is it necessary to replace a carburetor engine with an injection one? Basically, everyone does this to install 4th generation gas equipment, and 2-3rd generation gas installations will work much better than on a carburetor.
This is due to the fact that the injection will no longer go through two chokes, but through one. You can leave everything on the carburetor brains, but then you will have to forget about gasoline, because standard injectors will not work if the control unit is carburetor.
Another positive point is that in the design of the intake manifold, in any throttle position, both intake valves operate. There is also a difference in fuel consumption. But the consumption itself mainly depends on the car, gearbox, axle, etc. And the mandatory use of high-grade fuel in an injection engine will not save you money. The car starts up much better after the changes, in any frost.
Important! For normal operation of the injector, it is necessary to flush the system every 25 thousand kilometers.
Pros and cons of the injector.
The injector provides fuel injection either into the air stream or into the combustion chamber.
Numerous sensors monitor air flow, engine speed, knock and crankshaft position. The control unit processes data from sensors and controls the injectors, ensuring the right amount of fuel is supplied at the right time. The injector provides better mixing of air and fuel compared to a carburetor. Therefore, the power increases slightly.
Injection engines are more complex, but the composition of the air-fuel mixture better suits any operating mode.
How to install an injector with your own hands
Car enthusiasts often ask how to install an injector on a carburetor-type VAZ 2106? In order to carry out the alteration, it is necessary to prepare the necessary list of parts and assemblies. To do this, you will need to have an engine with injection from a related car and a fuel tank with an electric fuel pump from a car from the same model range. When wondering how to convert a VAZ 2106 to an injector, you need to buy a return pipeline from the power plant to the fuel tank, some attachments and equip the exhaust system with the appropriate spare parts.
When thinking about how to install an injector, you should remember that you need to purchase a so-called ECU. "oblique" type. Also, for the electrical circuit to work correctly, the tachometer should be replaced, since on an engine with an integrated injection system, this device, which is responsible for measuring the number of engine revolutions at a given power, is integrated into the power plant control system and connected to the on-board computer. This device must be replaced due to different voltage characteristics and the device from carburetor “six” models is incompatible with the on-board equipment of an injection engine.
Using the equipment listed above, you can install the injector on a VAZ 2106 yourself, and this procedure, by and large, is no different from the similar amount of work required to install the engine on classic models of this vehicle.
To make it easier to understand the technology for replacing the power plant, you can find a video on the Internet on installing an injector on a VAZ 2106. It explains what parts are needed for the conversion, and which spare parts from the old components are suitable for upgrading the “six”.
Naturally, you will need to make certain purchases, for example, an injector for a VAZ 2106, the price of which varies depending on the degree of engine wear. Accordingly, if the power plant is purchased at a car store, its cost will be quite high. When purchasing a disassembled motor unit, it will cost significantly less due to practical wear and tear of the product.
Transition to VAZ 2106 injector
Purchase and inspection
Another dream of mine is coming true - installing an injector. It was decided to upgrade the car to an injector.
So, we have the following:
Head and valve cover
Reel and pipe
Throttle and part of the fuel system
Fuel tank assembly
Forces and some sensors
It is worth noting that the condition of the car from which all this was removed was in relatively poor condition... this is primarily confirmed by the broken timing belt. The camshaft, rocker, valves are completely replaceable. And everything would be fine, because most of the parts can be rearranged from the carb head, but as for the valves, this is only a repair:
— Replace the valves — Grind in the valves — Replace the guides (all or only worn ones)
Also check and grind the plane!
I also bought the main spare parts that need to be installed new:
I also want to note that I will leave one lambda and not install a catalyst, so the ECU will be sewn. I found a rummaging guy, I’ll give it back one of these days...
That's all! See you in the next parts!
PS I gave the head to a specialist for repair. We do:
— Grinding in seats for new valves — Replacing 4 exhaust guides (intake — live) — Grinding the plane
After all the purchased used parts were washed, it was time for inspection.
Using articles freely available on the Internet, information was found on checking the main sensors, mainly with an ohmmeter. The check showed that everything was OK! There was no suspicion.
Next, I washed the injectors using the city-collective farm method: using CarbCleaner, a syringe for 5 cubes and glue) (ps info on this method can be easily found on the Internet)
That's it, you can start installation.
The first step was to remove and unscrew everything related to the carburetor:
Next, as I said in the FIRST part, I sent the head for repair. It was thoroughly patched up - the guides at the exhaust were replaced, and new valves were ground into the seats. We also checked (sanded a little) the plane - everything was ok! After I took it away, I set about assembling it. — Installed oil scrapers (ELring) — Dried the valves
Springs, plates, rocker, camshaft, etc. — I rearranged everything from the “carb” head, because everything there is in excellent (read: almost new) condition.
Next, it’s the turn of the fuel system.
First thing's first - the tank. I installed and secured the valve and vapor separator. Replaced the fuel pump grid.
Then he took up the gas line. I used my original 07s as feed and return. The vapor ventilation channel is a standard carburetor duct.
Well, how could we do without WIRING (the most interesting part for me). I already did it at night... and I’ll say I didn’t notice how it went. First, I scattered the “injector scythe” and figured out the “what-where” diagram:
Next, it’s time to implement the wiring...
ruthless... and primitive
So the next day came... and an exhaust was planned for it. More precisely, its refinement.
With the help of a welder, we made room for the lambda.
now DK has a place
Then the engine assembly stage began. Everything was much simpler there. In general, the engine was assembled.
I will say that there were a lot of small mistakes and improvements: - For example, adjusting and finding the best location for the air filter box... and also cutting and adjusting its bracket!
— For example, adjusting and cutting out the fan bracket, space for the DPKV!
The electrics inside the cabin, namely the ECU itself, and the bracket with the relay and OBDII connector were located temporarily on a shelf...
The wires on the 2nd DC, which I abandoned, I carefully twisted and placed next to the ECU.
Technical characteristics of the motor 2106
The VAZ 2106 engine incorporated the design of the 2103 internal combustion engine and the cylinder diameter of the 21011 engine, so the volume increased to 1570 cm 3, power to 74.5 liters. s., and the weight remained almost unchanged - 121 kg.
After a failure with the timing belt in the internal combustion engine 2105, the manufacturer AvtoVAZ returned to the chain drive. The standard for the 2106 engine was version 2103; the cylinder diameter was increased to the original 79 mm, as in modification 21011.
Therefore, the technical characteristics of the internal combustion engine are important:
| Manufacturer | VAZ |
| Engine brand | VAZ-2106 |
| Years of production | 1976 – 2006 |
| Volume | 1569 cm 3 (1.5 l) |
| Power | 64-75 hp |
| Torque | 87.3 Nm (3400 rpm) |
| Weight | 121 kg |
| Compression ratio | 8,5 |
| Nutrition | carburetor Solex 1107010-01, then 1107010, since 1980 Ozone 1107010-20 |
| Motor type | in-line |
| Number of cylinders | 4 |
| Location of the first cylinder | near the timing chain |
| Number of valves on each cylinder | 2 |
| Cylinder head material | aluminum alloy |
| Allowable warpage | manifold gaskets (intake/exhaust) 0.08 mm cylinder head gasket 0.05 mm |
| Valve seat | width 2 mm, angle 45° |
| Camshaft | one upper cylinder head inside, phase width 232°, exhaust valve advance 42°, intake valve lag 40° |
| Camshaft oil seal | diameters – 40 mm, 56 mm, width 7 mm |
| Cylinder block material | cast iron |
| Cylinder diameter | class A – 79 – 79.01 mm class B – 79.01 – 79.02 mm class C – 79.02 – 79.03 mm class D – 79.03 – 79.04 mm class E – 79.04 – 79.05 mm |
| Pistons and rings | piston made of aluminum alloy with tin coating, cast iron rings, compression outside chrome plated (top) and beveled (bottom) |
| Piston diameter | class A – 78.94 – 78.95 mm class C – 78.96 – 78.97 mm class E – 78.98 – 78.99 mm |
| Gaps | piston/cylinder wall – 0.153 – 0.173 mm (standard) or 0.19 mm (maximum) piston rings – 110 mm relative to the cut plane |
| Upper compression ring | 1.535 – 1.555 mm |
| Lower compression ring | 3.957 – 3.977 mm |
| Oil scraper ring | 2.015 – 2.035 mm |
| Gap between piston groove and ring | 0.03 – 0.07 mm |
| Crankshaft | cast iron, casting |
| Number of main bearings | 5 |
| Gearbox neck diameter | 50.795 – 50.775 mm |
| Main journal gap | 0.1 – 0.5 mm |
| Connecting rod bearings | shaft journal diameter – 47.814 mm liner thickness – 1.448 mm liner width – 28.025 – 28.975 mm |
| Crankshaft oil seals | front – diameters 42 mm, 60 mm, width 7 mm rear – diameters 85 mm, 105 mm, width 10 mm |
| Piston stroke | 80 mm |
| Fuel | AI-92 |
| Environmental standards | Euro 2 |
| Fuel consumption | highway – 7.8 l/100 km combined cycle 9.2 l/100 km city – 12 l/100 km |
| Oil consumption | maximum 0.7 l/1000 km |
| Engine oil for 2106 | 5W-30 – 15W-40 |
| Engine oil volume | 3.75 l |
| Replacement frequency | every 55,000 km |
| Operating temperature | 80° |
| Motor life | declared 120,000 km actual 200,000 km |
| Adjustment of valves | nuts and feeler gauge |
| Cooling system | forced |
| Coolant quantity | 9.85 l |
| water pump | polymer impeller, mounted on a block |
| Ignition | distributor |
| Candles for 2106 | A17-DVR, FE65CPR, A17DV-10 |
| Gap between spark plug electrodes | 0.5 – 0.6 mm |
| Valve train chain | double-row roller, 114 links |
| Cylinder operating order | 1-3-4-2 |
| Air filter | dry with replaceable cardboard cartridge and pre-cleaner, temperature adjustment according to the season |
| Oil filter | recommended Mann W914/2 |
| Flywheel | 129 teeth, 0.62 kg internal hole diameter – 25.67 mm outer diameter – 27.75 mm no offsets |
| Flywheel mounting bolts | M10x1.25 mm, length 23.5 mm, |
| Valve stem seals | Manufacturers Horse or Corteco |
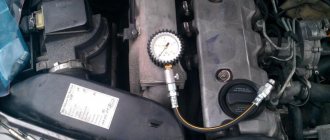
| Compression | pressure in the cylinders from 10 – 14 bar, pressure difference in individual cylinders within 1 bar |
| Oil temperature | 80°С |
| Thermostat temperature | 80 – 84°С |
| Valve pressure inside the radiator cap | 0.7 – 1 bar |
| Content of harmful products in the exhaust | CH -1 |
| Tightening force of threaded connections | spark plug – 31 – 39 Nm flywheel – 61 – 87 Nm clutch bolt - 29.4 Nm bearing cap – 68 – 84 Nm (main) and 43.32 – 53.51 (connecting rod) cylinder head – two stages 31 – 41 Nm, 96 – 118 Nm |
The manual includes a description of the parameters that the manufacturer recommends for its engines.
Other modifications
VAZ-2106 "Tourist"
A pickup truck with a tent built into the body, created by order of the technical directorate. The project was rejected by the plant's head management, and the only silver copy was repainted red and subsequently used as in-plant technical equipment.
VAZ-2106 “Half past six”
A single copy, made according to a special order received from L. I. Brezhnev or someone from his entourage after the demonstration of experienced VAZ-2107 to the top leadership of the USSR in 1979. In addition to export bumpers, it differed in the seats and radiator grille from 2107, as well as a modified under its installation under the hood.
Replacing the carburetor with a system with distributed fuel injection
Carburetor cars are gradually disappearing from our lives; such cars are no longer produced by industry, and their design is considered obsolete. But the question of whether a carburetor injector is better or not is still relevant; debates on this topic are often held on automobile forums.
Each type of fuel system (FS) has its own advantages and disadvantages; the injector is a modern unit that provides a more accurate dosage of the air-fuel mixture. But the carburetor circuit is simple, it is easier to diagnose, and often not only specialists, but also many drivers can deal with the problem.
Preparing for installation
After purchasing all the necessary spare parts, you can begin upgrading. First you need to dismantle unnecessary equipment, in particular:
- loosen and remove the generator belt;
- remove the crankshaft pulley and camshaft drive cover;
- dismantle the distributor, fuel pump and switch;
- remove the carburetor and air filter;
- dismantle the old cylinder head along with the manifolds;
- unscrew the exhaust manifold and coolant distributor tee from the cylinder head (located in front of the manifolds in the direction of travel of the car);
- dismantle the accelerator drive rods, the gas pedal and unnecessary wires (to the coolant sensor, ECXX, distributor);
- remove the gas tank (if it will be replaced).
Next, preparatory activities should be carried out.
- Drill a hole on the ebb of the coolant distributor tee, screw a new antifreeze temperature sensor into it and install the tee on the new cylinder head.
- Secure the TPS in its proper place in the throttle valve assembly.
- Close the holes in the block left after removing the mechanical fuel pump and distributor with plugs.
- Extend the return line to the fuel tank, if there is none.
- Attach the electric fuel pump mounting bracket in the trunk or under the bottom and embed the fuel pump into the fuel supply hose.
https://youtube.com/watch?v=XV7dU7qXgmA
Carburetor vs injector
An injector malfunction is much more difficult to resolve than a carburetor malfunction. You need to connect to the controller, and for this you have a special program. Otherwise, you will have to contact a car service, and you have to pay for it. The injector has more parts distributed under the hood. Moreover, the quality of the fuel also plays a big role. A large number of sensors requires a lot of wiring. The injectors sometimes become clogged, or the electromagnet winding burns out. Interference and interference affecting the wiring distorts the signals, so the location of its installation plays an important role.
The carburetor can be repaired almost on the knee. It is easy to remove, disassemble and assemble. If there is no source of compressed air nearby, you can blow it out with your mouth using a tube. Adjusting it will not be difficult if you have the appropriate knowledge.
It's up to you to install an injector or leave a carburetor!
Advantages of an injector for VAZ cars
The advantages of the injector include the fact that this device mixes fuel with air in the combustion chamber of the cylinder, due to which much less engine power is consumed. As mentioned above, in cars with a carburetor, about 10% of engine power is additionally consumed precisely because the carburetor mixes gasoline and air vapors before being supplied to the engine.
Another important advantage of the injector is that the amount of injected fuel is monitored electronically. This allows you to inject exactly as much gasoline as is required in a particular case. And the fuel injection system instantly reacts to the changed load, that is, thanks to the injector, the dynamics of the car improves.
It is worth noting the lower toxicity of exhaust gases.
A very important plus for all drivers is that a car with an injector does not have to be warmed up in winter. The fact is that the injector makes starting the engine much easier, and this ease does not depend on weather conditions.
The injector lasts for a long time, it is highly reliable, etc.
In a word, we can say with confidence that modern injection systems have many advantages over carburetors. Therefore, if your car still has a carburetor, then you should install an injector.
Rework
To replace a carburetor with an injector yourself, be sure to arm yourself with the following components:
- Cylinder head from VAZ 2112 with receiver and manifolds;
- Knock sensor;
- Throttle pipe with throttle position sensor;
- Mass air flow sensor and a number of other elements.
Replacement kit When everything is ready, you can get to work.
- Remove the old cylinder head. Plus, remove all attachments in the fuel assembly, gas tank and ignition system.
- Remove the alternator, thermostat, pulleys and belts.
- Install a new gas tank with a pump, borrowed from a donor - an injection VAZ.
- Remove the carburetor and ignition system components that need to be replaced.
- Disconnect the cooling system pipes and hoses. Here, install a completely new kit from the injector.
- Remove the pan.
- Install new pistons from an injection donor and connecting rods at 10. Standard carburetor components are not designed for an injection compression ratio. Plus there are special recesses for other valves.
- Install a new unit with an underflow on the cover for the DPKV, replacing the standard oil pump. If you can remove the cover, then only that will be replaced.
- After removing the old cooling system pipes, install new ones. The best solution is to replace the entire set. Buying it won't really impact your overall budget.
- Prepare everything necessary to mount the 16 valve head. The fasteners match, only the bolts from the old head are long and need to be shortened. Plus, don’t forget to make a size 12 hole in the new head.
- Install new fuel lines from the donor.
- Connect your new gas tank to the lines.
- Route the wiring from the control unit to the fuel pump. You can use old fuel level regulators from a carburetor car.
- Cut a hole in the wall of the engine compartment through which the wiring will be routed. This way you won't have to make the standard wires longer.
- Install the knock sensor by drilling a hole in the block and tapping a size 8 thread.
- Be sure to replace the water pump using a unit from donor 2112.
- Get a new crankcase breather and oil dipstick. Install them instead of the previous ones.
- Install a new cylinder head. Just don't forget to change the gasket, which corresponds to a different head.
- Install a thermostat borrowed from a VAZ 2112.
- Connect the coolant pipes.
- Remove the rear timing cover and rollers. The pulleys from 2112 are dismantled. The belt must be installed in accordance with the marks.
- Install the new generator along with the drive. For the new generator, the upper fasteners will remain intact, since they are not provided for by the design of the carburetor VAZ 2109. Therefore, fasten the pair of lower mounting bolts as securely as possible.
- Place all the sensors in their new places.
- Seal the valve covers with a good quality sealant.
- Assemble the ignition module, wires, spark plugs and other components.
- Install the air filter.
- Get your exhaust system back to normal. The muffler is often left stock, but the resonator and other components are taken from the donor.
- The wiring is connected to the dashboard and the lock.
- Fill in new oil, refuel the car with high-quality fuel.
- Start the engine and take it for a test drive.
Is it possible to convert a carburetor engine into an injection engine?
If we consider the difference between a carburetor and an injection gasoline engine, then we can briefly say in the fuel supply system.
In internal combustion engines, fuel is mixed before entering the combustion chamber. A mixture of gasoline and air is created. This process is called carburation. In fact, in these types of engines this process is carried out, only in carburetor engines - mechanically, and in injection engines - electronically. In injection engines, fuel is injected using nozzles, which are called injectors. Hence the corresponding name. The brain, called a microcontroller, based on data from various sensors, sends signals about the receipt of the required amount of fuel. And, unlike a carburetor engine, fuel will not flood the spark plugs. Many drivers are concerned about the question: is it possible to install an injector instead of a carburetor? It is possible to replace a carburetor engine with an injection engine, but such a replacement will have both advantages and disadvantages. Advantages of replacing an injector instead of a carburetor:
- The engine runs better and the number of repairs is reduced;
- Fuel consumption is slightly reduced;
- Engine operation does not depend on air temperature (works well in both heat and cold);
- The engine picks up speed better;
- There is electronic control of robotic vehicle systems;
- CO emissions into the atmosphere are reduced by up to 75%.
Disadvantages of replacing an injector instead of a carburetor:
- Car repairs and diagnostics become more complicated;
- High price;
- Requires the use of more expensive gasoline.
Important! European countries have banned the production of cars with carburetor engines due to poor environmental performance. The carburetor system does not even meet EURO 3 standards. Therefore, the future belongs to the injection system.
Why change a carburetor engine to an injection engine, and is it necessary?
Some drivers ask: why is it necessary to replace a carburetor engine with an injection one?
Basically, everyone does this to install 4th generation gas equipment, and 2-3rd generation gas installations will work much better than on a carburetor. This is due to the fact that the injection will no longer go through two chokes, but through one. You can leave everything on the carburetor brains, but then you will have to forget about gasoline, because standard injectors will not work if the control unit is carburetor. Another positive point is that in the design of the intake manifold, in any throttle position, both intake valves operate. There is also a difference in fuel consumption. But the consumption itself mainly depends on the car, gearbox, axle, etc. And the mandatory use of high-grade fuel in an injection engine will not save you money. The car starts up much better after the changes, in any frost.
Important! For normal operation of the injector, it is necessary to flush the system every 25 thousand kilometers.
What you need for transformation, spare parts and tools
Let's look at how to make an injection engine from a carburetor engine. The main problem for conversion is, of course, the cost of this process. But if you still decide, then you will need to purchase the necessary parts:
- Oil pump with mounting for the crankshaft position sensor;
- Ignition module with bracket;
- Set of high-voltage wires;
- Thermostat tee;
- Generator with top and bottom mounting and V-belt;
- Air filter with mounting kit, upper and lower half housing, supports (2 pcs.);
- Fuel filter with fastening;
- Throttle pipe with gasket;
- Receiver with mounting kit;
- Fuel pressure control;
- Intake manifold with gasket;
- Injector ramp with injectors (4 pcs.);
- Fuel main drain and supply pipes, drain and supply ramps;
- Throttle cable with bracket;
- Connector hose;
- Gas tank;
- High pressure fuel hose kit;
- Electric fuel pump with a clamping ring;
- Controller;
- The crankshaft pulley is damping;
- Wiring harnesses for the ignition system, fuel pump, injectors;
- Sensors for crankshaft position, detonation, air flow, temperature;
- Plug with gasket (instead of distributor);
- Clamps, hoses, nuts, bolts of various sizes.
The tool must be necessary to carry out the processes of installing these parts and dismantling them.
Preparatory work
The process of replacing a carburetor with an injector is very labor-intensive, so really evaluate your capabilities and abilities. It may be worth contacting specialists right away. If you nevertheless decide to make drastic changes, then you need to do some preparatory work and distribute the work into stages, which must be carried out in the following sequence:
- To make the work easier, you need to drain all the fluid from the car and remove the bumper and radiator.
- The next step is to disassemble the engine power supply and ignition system.
- Installation of injection system sensors and electronics installation.
- Laying a fuel line along the bottom of the body.
- Installing the tank and fuel pump.
The preparatory work is very labor-intensive, but the end justifies the means.
How to make an injector with your own hands
Let's look at how to install an injector instead of a carburetor.
Did you know? The first engine using an injector was made in 1916 in Russia by Mikulin and Stechkin, but it worked for only three minutes.
Replacing the fuel system
Replacing the fuel system begins with dismantling the carburetor fuel system, tank and fuel lines. A necessary element in this process is a large number of VDshki since it will be difficult to unscrew all the elements. Next will be the installation of injection lines, a fuel filter bracket and the filter itself, fuel hoses, a fuel pump and its mounting.