ENGINE 11183 1.6L 8-valve JSC AvtoVAZ, the engine is known to car enthusiasts under the names: 11183; engine 21114; 2114; Kalina motor; motor Kalina, etc. VALUE Cylinder displacement, cubic meters. cm - 1.596 Rated power, l. With. (at 5200 rpm) - 82 Maximum torque, Nm (at 2700 rpm) - 120 Number of cylinders - 4 Number of valves per cylinder, pcs. — 2 Total number of valves, pcs. - 8 Cylinder diameter, mm - 82 Piston stroke, mm - 75.6 Spark plugs - A17 DVRM, BPR6ES (NGK), etc. Cylinder operation diagram - 1 - 3- 4- 2 Power system - Injector (distributed injection with electronic control) Fuel Unleaded gasoline AI-92 Fuel consumption, l./100 km. (city/highway) - 8.8/5.7 Lubrication system Combined (splash + under pressure) Type of engine oil - 5W-30, 5W-40, 10w-30 and 10W-40 Amount of engine oil, l - 3.5 Cooling system — Liquid, closed type Coolant — Based on ethylene glycol Motor life, thousand hours. (theory/practice) - 150/300 Weight, kg - 127
Car problems: 1-Reduced speed and traction for a couple of seconds. 2-On gasoline (there is still gas) it makes a little noise... 3-In the dark there is a bright ring of breakdown around the spark plug insulators.
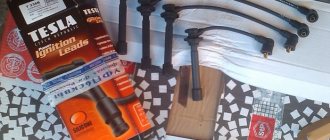
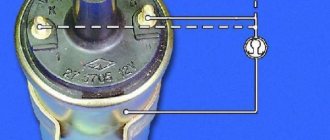
Old high-voltage wires: Tag-No. 9216 01/21/13 13:03:54 PES/SCC SAMARA RUSSIA On the other hand: PES/SCC RUSSIA SAMARA 2190 3707080 rev.00C Wire resistance. 1-5.5 kOhm 2-4.7 kOhm 3- Does not show, infinity. 4- 3.2 kOhm
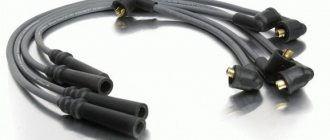
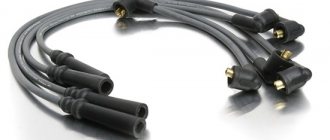
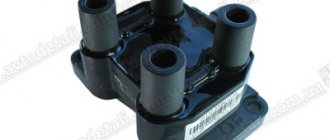
I bought new high-voltage wires: high-voltage wires with 8 valves. "Milena" 2111-3707080 For all fuel-injected VAZ cars (8kL) Resistance up to 7 kOhm How to connect.
AVTOVAZ's recommendations for spark plugs are as follows: Applicability of spark plugs for VAZ cars.
JSC ZAZS, Russia A17DVRM BERU, Germany 14R-7DU CHAMPION, England RN9YC NGK, Japan BPR6ES DENSO, Japan W20EPR BRISK, Czech Republic LR15YC BOSCH, Germany WR7DC
JSC ZAZS, Russia - AU17DVRM BERU, Germany - 14FR-7DU CHAMPION, England - RC9YC NGK, Japan - BCPR6ES DENSO, Japan - Q20PR-U11 BRISK, Czech Republic - DR15YC BOSCH, Germany - FR7DCU
Interelectrode gap: Classic ignition system - 0.5 mm (tolerance +0.05) BSZ - 0.7 mm (tolerance +0.05) Injection - 1 mm (tolerance + 0.1) (this is for us)
I came to the following conclusion for myself:
From studying various topics. 1st place BOSCH, WR7DPX 1.1mm = from 220 RUR 1 piece 2nd place EZ Standard. T17DVRM 1.0 mm = 280-380 rubles 4 pcs. 3rd place - NGK, BPR6ES - 11...1.1mm = 500 rubles 4 pcs.
We get the car from the passport. BOSCH, Germany WR7DCX 1.1mm = 345 rubles 4 pcs JSC “Robert Bosch Saratov” or EZ, Russia A17DVRM A15DVRM 0.7-1.0 mm = from 185-220 rubles 4 pcs. NGK, Japan BPR6ES = from 150 rubles pcs
Checking high-voltage wires.
1 Method. At night, in a dark place, with the lights turned off, open the hood, start the engine, and carefully inspect the coil and armor wires for a bright white glow near the spark plugs and breakdown in the wires and coil. It would be advisable for someone to turn on the gas; there will be a more pronounced glow in the event of a breakdown.
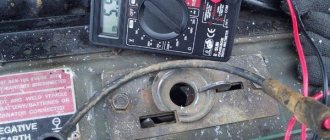
Set the multimeter value to 20 kOhm. We connect the multimeter to the ends of the armored wire (plug-coil), and look at the readings on the display. The resistance on a working armored wire shows less than 15 kOhm, or there is not much difference with the other armored wires, then it’s normal. Essentially, the resistance should be in the range of 1.5-8 kOhm, depending on the length of the wire. If higher, there will be poor sparking under certain conditions. And if it is lower, or without resistance at all, then there will be a lot of interference, especially in the receiver, and sometimes the panel is faulty... So keep that in mind. Checking the high voltage ignition coil.
Introduction
High-voltage wires of VAZ cars are one of the most important elements in the ignition system. It is the wires that transmit high electrical voltage from the module to the spark plug.
Failure of the wires affects not only the formation of a spark, but also the operation of the entire power plant. This article will talk about how to correctly select and independently replace high-voltage wires on a VAZ car.
Below we discuss the procedure for connecting wires to the ignition module, as well as examples of the highest quality and best wires that can be purchased in terms of price and quality.
High-voltage wires - replacement of Lada Kalina (VAZ 1118, 117, 1119)
To perform the test, you will need a multimeter.
Advice
In order not to confuse the terminals on the ignition coil (ignition module), it is more convenient to change the high-voltage wires one at a time.
Execution Sequence
1. Prepare the car for the operation.
2. Disconnect the high-voltage wires from the spark plugs.
3. Disconnect the ends of the high-voltage wires from the ignition coil (module).
4. Using a multimeter (and ohmmeter mode) measure the resistance of the wires.
5. For serviceable wires, the resistance (depending on the length) should be in the range of 3.5-10.0 kOhm.
High-voltage wires should be replaced as a set.
6. We connect the wires to the spark plugs and the ignition coil in accordance with the cylinder serial numbers marked on the wires and on the ignition coil.
It is necessary to connect the wires to the ignition coil only in accordance with the serial number of the cylinder. The wire insulation is marked with the serial number of the cylinder.
Checking and replacing spark plugs
Spark plugs can be checked with a special tester, which is sold at a spare parts store.
Or, with the help of an assistant, you can check the spark plugs by turning them out and inserting them into the tips and positioning them as shown in Figure 2.
The assistant turns on the starter, while you watch for a spark between the electrodes of the spark plugs. Of course, these methods cannot show the complete characteristics of candles.
Since the spark plug must be subjected to special testing in a special installation. Using a special installation, the spark plug is checked for pressure, temperature, insulation and sparking, etc.
When purchasing spark plugs, it is advisable to check them in the store with a tester and visually inspect them for deformations and cracks in the insulator.
Spark plugs should be replaced every 30,000 km. Spark plugs A17ДВРМ or their foreign analogues - LR15YC-1 (BRISK) and WR7DCX (BOSCH) should be used.
To do the job you will need a special 21mm spark plug socket wrench.
1. Disconnect the high-voltage spark plug wire.
2. Wipe with a rag and blow with compressed air from a tire pump the area where the spark plug is installed.
3. Using a 21 mm socket wrench for spark plugs, unscrew the spark plug.
4. Before installing the spark plug, use a set of round feeler gauges to check the gap between its electrodes. The gap should be 1.0 -1.15 mm.
5. Adjust the gap by bending the side electrode.
To avoid damaging the threads in the cylinder head, you should first screw the spark plug in by hand and then tighten it by inserting the wrench into the wrench extension. The spark plug tightening torque is 30-40 N/m.
A poorly tightened spark plug can fly out during operation and damage the threaded part of the spark plug hole in the cylinder head. But you can’t overtighten the candle either.
6. Wrap the spark plug into the cylinder head.
7. Similarly, we replace the spark plugs of the remaining cylinders and connect high-voltage wires to them.
Design of high-voltage ignition wires and requirements for them
High-voltage ignition wires are designed quite simply. They consist of a conductive element with a metal tip, two plastic caps and reliable insulation.
The most important element of spark plug wires is the insulation, which performs two functions:
- Does not allow moisture to enter the conductor;
- Minimizes current leakage during transmission.
Metal tips of spark plug wires are necessary to ensure electrical connection between the wire leads and the contacts of the spark plug and ignition coil. It is necessary that the metal attachments:
- They were securely fixed on the wire and firmly connected to the elements on the terminals, thereby preventing the dissipation of transmitted energy;
- They had increased anti-corrosion protection, which is necessary for long-term operation of the wires.
Plastic caps are also an important element of spark plug wires. Their task is to protect the terminals of the ignition coil and spark plugs from the influence of the external environment. Like metal tips, plastic caps should be connected as tightly as possible to other parts in the current transmission circuit.
Based on the information above, it is possible to identify the main list of requirements that apply to high-voltage wires. They have to:
- Cope with assigned conductive tasks;
- Reduce current leakage to zero during its transmission from the ignition coil to the spark plugs;
- Withstand the aggressive environment of the engine compartment;
- Work at different temperatures.
Heat, vibration, aggressive environment - the developers of spark plug wires try to protect them from all this. Insulation works, but it also has its own service life, which cannot be clearly defined. Over time, high voltage wires will become less efficient and will need to be replaced.
What should be the resistance of high-voltage ignition wires?
p, blockquote 23,0,0,0,0 –>
In order to obtain the most complete information about the serviceability or malfunction of a high-voltage wire, a method of measuring its physical parameters is used.
p, blockquote 24,0,0,0,0 –>
The simplest electrical measuring tool that should be in the trunk of any car is a multimeter. A simple small multimeter made in China is a little larger than two matchboxes in size and costs about 300 rubles.
p, blockquote 25,0,0,0,0 –>
In high voltage wires, two main parameters are checked: the resistance of the current-carrying conductor
and
insulation resistance
. The second parameter cannot be measured using a conventional multimeter; for this you need to have an expensive megohmmeter, since the insulation resistance must be several hundred megohms.
p, blockquote 26,1,0,0,0 –>
The resistance of the center conductor should be in the range from zero to several kiloohms. This depends on the type of high-voltage wires and the presence of limiting resistance in the ignition system.
p, blockquote 27,0,0,0,0 –>
Limiting resistances began to be used when cars began to be equipped with radio receivers. They significantly reduce the level of radio interference. In addition, they have another important function of protecting the ignition coil and control circuit from breakdown in the event of an overload in the high-voltage circuit. This is possible if the spark plug has a short-circuiting deposit, as well as if a high-voltage wire breaks down on the car body.
p, blockquote 28,0,0,0,0 –>
In many cars, limiting resistances are placed in a slider; in some cars, spark plugs have a limiting resistor. Sometimes resistors are inserted into the spark plug caps. But most cars use distributed resistance inside high-voltage wires.
p, blockquote 29,0,0,0,0 –>
In other words, the current-carrying core of a high-voltage wire is made of a conductor with high resistivity:
p, blockquote 30,0,0,0,0 –>
- nichrome, an alloy of nickel and chromium;
- cotton threads impregnated with a soot solution with a resistance of about 20 kOhm/meter;
- polymer conductive material with a resistance of about 15 kOhm/meter;
- fiberglass coated with graphite.
Sometimes such a conductor has the shape of a spiral, as in electric stoves.
p, blockquote 31,0,0,0,0 –>
To check high-voltage wires, the multimeter must be switched to resistance measurement mode at a limit of 20 kOhm. Next, connect the probes of the device to the opposite terminals of the wire.
p, blockquote 32,0,0,0,0 –>
p, blockquote 33,0,0,0,0 –>
The measured resistance should not exceed a resistance of 20 kiloohms (usually this value ranges from 500 to 3000 ohms). For ignition wires with distributed resistance, its value depends on the length of the high-voltage cable.
p, blockquote 34,0,0,0,0 –>
Some brands of cars, such as DODGE, use a varistor as an additional resistance. Its conductivity changes depending on the voltage; such a wire cannot be checked with a multimeter.
Replacement of high-voltage wires of VAZ Lada Kalina in auto repair shops in Moscow
18 car repair companies
- TTS Motors
- Pyatnitskoe highway, 2
- +7 (495) 24… show all
- The site of the company
- Lorant
- LR-west
- Master MB
- Lexus on the market
- Auto-rad
- Technical center gm east
- Auto complex
- Ddcar
- Nivus
- Bers-auto
- Master motors
Popular companies
Why did it happen so?
Perhaps the automatic requests do not belong to you, but to another user accessing the network from the same IP address as you. You need to enter the characters into the form once, after which we will remember you and be able to distinguish you from other users exiting from this IP. In this case, the page with the captcha will not bother you for quite a long time.
You may have add-ons installed in your browser that can make automatic search requests. In this case, we recommend that you disable them.
It is also possible that your computer is infected with a virus program that is using it to collect information. Maybe you should check your system for viruses.
If you have any problems or would like our support team, please use the feedback form.
High-voltage wires of the Lada Kalina are needed to supply electric current from the ignition coil to the spark plugs. Malfunctions in the high-voltage wiring lead to the fact that the engine vibrates, “troubles” while driving, or operates unstably at idle.
BB: professional replacement
If you have decided to contact the service for the process of replacing high-voltage wiring, then it is, of course, a good thing, but not worth the money that will be asked of you. They can also confuse your brain on the topic of how often high-voltage wires need to be changed, with the logic that it is better to take care of prevention in advance than to get stuck on the highway. You won’t get stuck on the highway, the contact is not a sensor, even the last one doesn’t die right away. Replacement will cost from 1000 rubles. The advantage of service in this case will be the fact that they will look at the candles for you. And they will definitely be cleaned (they tend to become oily, which negatively affects the throughput for pulses through high-voltage wires).
Replacing high-voltage ignition wires
- a simple operation accessible to every car enthusiast.
High voltage wires
designed to transmit impulse from the module or ignition coil to the spark plugs. If the high-voltage ignition wires malfunction, interruptions in engine operation occur; it may vibrate and “triple” at idle.
Basic malfunctions of high-voltage wires
:
- insulation breakdown, current leakage
- core rupture
- increase resistance
- mechanical grinding of insulation
- unreliable attachment to the spark plug or ignition module
To replace high voltage wires
, you need to buy a new set. When purchasing, it is better to choose silicone wires; they better retain elasticity and flexibility, especially in winter.
Before replacing, make sure that the ignition is turned off.
Do not remove all the wires at once. It is important not to disturb, since the spark must enter the cylinders in a certain sequence. For example, VAZ engines have cylinders operating in the order 1-3-4-2. That is, the spark is supplied first to the first cylinder, then to the third, then to the fourth and second.
Cylinder numbers are usually counted from left to right, with the first cylinder being the one closest to the timing belt.
The sockets on the ignition module are also numbered, but usually this module is located in places where it is simply not visible or is splashed with dirt.
Therefore, it is better to remove the wires one at a time. For example, remove the tip of the wire from the spark plug of the 4th cylinder and pull out the second end from the ignition module socket. Replace the removed wire with a high-voltage wire from a new set.
Usually the wires for each cylinder differ in length, so it is better to compare the removed wire with a new set and select one of a similar length from it.
We perform similar actions with the remaining wires.
When laying new wires, make sure that they do not touch moving parts anywhere or rub against adjacent elements.
After replacing the high-voltage wires, start the engine. If it “troubles” or stalls, it means you have violated the order of connecting the high-voltage wires
, which was mentioned above.
Diagram, procedure for connecting VAZ high-voltage wires.
First, let's decide which of the four cylinders is first?
The first cylinder in front-wheel drive VAZs is located closer to the timing belt. If you look at the engine from the front, the first cylinder is the leftmost). And then everything is simple - from left to right - 1, 2, 3, 4.
In rear-wheel drive VAZ Classic and Niva, the first cylinder is located closer to the front bumper of the car.
Checking high-voltage wires. To check the wires, you will need a multimeter tester. Check the resistance of the wires - it should be no more than 20 KOM (in practice, the longest wire of 1 cylinder has a resistance of up to 10 KOM). If the wire resistance is more than 20 Kom, it must be replaced. Carefully inspect the wires for chafing on parts of the motor or other wires. In case of significant abrasion, replace the wire. In case of minor abrasion, it is possible to lay the wire so that it does not rub and fix it in this position.
Laying wires. Do not try to connect the wires in a bundle. Disassemble the wiring harnesses, release the wires from the plastic holders. Connect the high-voltage leads to the corresponding cylinder spark plugs. Lay the wires so that they do not rub against each other, engine parts, or hoses. Avoid sharp bends and tension on the wires. After connecting all the wires, secure them into the bundle with special comb holders included in the delivery kit.
The procedure for connecting I/O wires to a VAZ carburetor (2108, 2109, 21099)
The central wire from the distributor cover always goes to the ignition coil (bobbin).
The outlet of the distributor cover, which faces towards the front of the car, is connected to the first cylinder.
The outlet of the distributor cap, looking down, is connected to the third cylinder.
The outlet of the distributor cap, looking rearward, is connected to the fourth cylinder.
The outlet of the distributor cap, looking up, is connected to the second cylinder.
The procedure for connecting high-voltage wires to a VAZ Classic, Niva with a carburetor and distributor.
Central wire from the ignition coil (bobbin)
Injection VAZ produced before 2004 with an old-style ignition module (4-pin low-voltage connector)
Actually, on the module body it is already indicated which cylinder the pins correspond to - but we duplicated them in red in case the module gets completely dirty, and you might not be able to see it in the photo.
Injection VAZ produced after 2004 with a new ignition coil (3-pin low-voltage connector)
As with the old-style ignition modules, the new coils are also marked with pins corresponding to the cylinders. But the connection order is different from the order on the old-style ignition module. Be careful.
Operating principle and device
High-voltage wires are the connecting link between the coil (ignition module) and the spark plugs. The voltage generated in the ignition module is transmitted to the spark plug through a high-voltage wire, and then the spark plug produces a spark in the combustion chamber of the internal combustion engine.
The wires have powerful insulation that can withstand enormous voltages without breakdown of the insulation. People quite often hear the name armored wires; high-voltage wires got this name because of their powerful insulation.
Device
A high-voltage wire consists of a core (also a conductor) placed in powerful shielded insulation. The core in the wire is shielded to preserve the voltage pulse from external influences and protect against breakdown.
At the ends of the wire there are tips made of a special alloy with the lowest resistance coefficient to ensure the best contact with the spark plugs and the ignition module.
Wiring replacement process
Before the VAZ 2114 armored wires are replaced, it is necessary to remove the old cables. To do this, you should: 1. Turn off the engine ignition. 2. Open the car hood. 3. Remove the old wiring leading to the engine and ignition unit. To maintain the order of connecting high-voltage wires of the VAZ 2114, you must be guided by the following diagram:
Cylinders are numbered from left to right. In the module, the internal ignition cylinder 1 is located on the lower left side. The second and third cylinders are located in the left and right compartments, respectively. The output of the fourth cylinder is located at the bottom in the right compartment.
High-voltage ignition wires of the VAZ 2114 are part of the ignition system, through which an electrical impulse is transmitted from the module to the spark plugs. When the current hits the spark plugs, the fuel mixture ignites in the combustion cylinders, which gives rise to a new stroke of the engine.
BB wires must be of high quality
The design of the GDP, unlike conventional wires, is quite complex. In addition to the conductive core (which is made of copper) and protective insulation, they have metal tips and plastic protective caps.
Metal tips act as contacts; they fit into the sockets on the spark plugs and the ignition module. The durability of the GDP directly depends on how well the tips are made. When purchasing, be sure to check the strength of their attachment to the wire.
Diagnostics of Lada Kalina wires
Before connecting high-voltage wires on Kalina purchased at a car dealership, you need to assess the current state of the car's wiring. For diagnostics, the car owner will need an analog or digital multimeter.
Before connecting the device, you need to inspect the wires for external defects. These include:
- ruptures;
- abrasions;
- cracks;
- broken.
If no external damage is observed, you need to connect a multimeter. You need to check the resistance of the armor wire, so you need to switch the device to ohmmeter mode. After this, the armored wire is disconnected from the spark plug and ignition coil. The ends of the wire are connected to the contacts of the multimeter, after which the device will show the current resistance level.
Data on normal resistance values are applied to the insulating layer. For passenger cars, normal values are in the range of 4-10 kOhm. In this case, on one specific car, the data values for individual wires should not differ by more than 2.5-3 kOhm. If this threshold is exceeded, then there is a problem in the ignition system.
There are several ways to check the functionality of the wiring without using measuring instruments:
- Use of additional insulated wire. You need to strip both ends of the additional wire. Short one end to ground, and run the other bare end along the caps, joints and the entire contour of the wire being tested. If there is a defect, the tester wire will give a spark;
- You need to drive the car into an unlit box, open the hood, and start the engine. If there is a breakdown in the VP insulation, the damaged area will spark.
The easiest way is to take a working high-voltage wire and test it on each cylinder by elimination.
How to check high voltage wires
Finding high-voltage wires under the hood is not difficult, and diagnosing them is not fraught with any difficulties. There are three ways to check high-voltage wires, each of which allows you to determine whether there is a breakdown in them.
Visual diagnostics
The easiest way to check spark plug wires for insulation damage is to visually inspect them. It is necessary to carefully check that there are no cracks, cuts or severe abrasions across the insulation area.
Another way to visually check spark plug wires is to observe their operation at night. It is necessary to open the hood of the car at night, start the engine, turn off the headlights and watch the high-voltage wires. If they have strong insulation breakdowns, in the dark the “crickets” will be visible to the naked eye.
Wire check
To check the spark plug wires, an ordinary wire with stripped ends on both sides can be used. In the dark, with the engine running, it is necessary to short-circuit one part of the wire to ground (the car body), and run the other part along high-voltage wires in search of a place where the stripped tip will begin to produce a spark. It is important to check not only the insulating material around the conductor, but also the plastic caps.
Diagnostics with a multimeter
A multimeter in automotive diagnostics is most often used as a voltmeter, but it also has another useful function - the ability to measure resistance. To take measurements, you must completely remove the high-voltage wires (or disconnect one wire on both sides). Next, with the probes of the device set to ohmmeter mode, you should touch both sides of the wire, as a result of which the multimeter will display information about the resistance.
The resistance of serviceable high-voltage wires is up to 10 kOhm. At the same time, it can vary practically from zero. This depends on the type of wires themselves, the insulation used in them, the length, the presence of microdamages, and so on.
How to check high voltage ignition wires?
Automotive high-voltage (HV) wires play an important role for internal combustion engines, since they help transmit high current from the ignition coil to the spark plugs. The serviceability and efficiency of the wires determines the timeliness and intensity of ignition of the fuel-air mixture, and therefore the correct and uninterrupted operation of the engine. Despite their simplicity, wires have many different “sores” and can cause a lot of troubles to their owner, which in one way or another will affect his nerves and pocket.
Malfunctions of high-voltage wires (common problems):
As a rule, the malfunction boils down to the fact that current either does not flow to the spark plug at all, or it does, but in limited quantities. This can happen for the following reasons: — There has been a break in the current-carrying wire through which the pulse travels. — There is a current leak, that is, the insulation is damaged and the current flows to the side. — The resistance exceeds the permissible value. — Problems in contacts (with a spark plug or ignition coil).
Buying new wires
In this section we will describe which high-voltage wires are best purchased for Kalina at a car dealership.
Standard wires from universal parts from AvtoVAZ will cost approximately 500-600 rubles. Set includes 4 pieces. Components for Kalina from early years of production are cheaper - about 400 rubles. High-voltage wires Kalina 8 cells. 50-70 rubles cheaper. Wires from third-party manufacturers, including foreign ones, are available for sale. For example, wires of the “HUCO” brand are distinguished by an increased insulating layer and, accordingly, cost more - about a thousand rubles. A complete ignition wiring harness for a Kalina costs about five thousand rubles in online stores.
Among “Kalinovodov” “high-voltage” brands “SLON” are popular. These products are distinguished by their ductility, resistance to fractures and, in general, have a longer service life compared to factory components at a competitive price - about 700 rubles.
Lada Granta Snezhinka ® › Logbook › 0363 + 1304 and 1302. Replacement of spark plugs and explosive wires.
For almost a week now, when it’s cold, errors have been appearing that seem to have been eliminated 10,000 km ago. Previous blog entry about a similar breakdown. I turn off the car, reset the errors in the BC and they don’t appear all day, and in the morning the tripping occurs again. I don’t understand what’s going on with the car? who fixed it? How? and who did it? Has anyone heard anything from friends? please write in the comments.
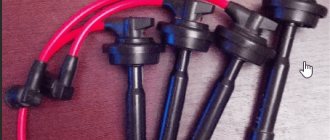
Since it was time to replace the wires, and also different spark plugs were installed during the previous repair, I decided to change everything in the kit, it turned out not bad.
I took the candles according to the “Behind the Wheel” tests, as well as based on the reviews of my comrades about the plant in Engels. Because there were no spark plugs for the 8 valve ones, I took from the 16th valve, but I also had to change the spark plug. I chose the wires between the original Lada (elephant) and the factory Elephant)) I chose the Elephant because... the price was the same, but the characteristics were better than those of the Lada Detail.
I'm looking for a way out of the problem with errors, because... I did the valve adjustment 10,000 years ago, but the parameters shouldn’t be off?
Total: BB wires - 550 Spark plugs - 300 Spark plug wrench (head 16) - 200
Price: 1,050 ₽ Mileage: 111,111 km
Replacement and connection of high-voltage wires on Kalina
This type of repair work is one of the simplest during car operation. Apart from a set of new wiring, the car owner will not need anything (it is better to buy silicone-based wires - they remain elastic at low temperatures). Before repairing the wiring, you need to “de-energize” the car by disconnecting the battery terminals. There is no need to start work if you are not confident in your own qualifications. It is better to pay experienced servicemen than to spend money on a new ignition system later.
The most important thing: do not disrupt the order of connecting high-voltage wires on Kalina . Each wire in the set is connected strictly to a specific cylinder. Wires usually vary in length. The sockets in the ignition unit also contain matching numbers.
The spark enters the cylinders in a certain order. The wires must be connected accordingly. The order is:
- First cylinder;
- Third cylinder;
- Fourth cylinder;
- Second cylinder.
It is better to check the location of the cylinders before starting work according to the vehicle’s operating manual. Cylinder numbers are read from left to right. The first one is closest to the timing belt.
It is recommended to remove and connect the wires one at a time to minimize the risk of incorrect connection order. During installation, you need to check that the new VPs do not rub against nearby structural elements, get pinched or break.
After completing the replacement, you need to “power” the car and start the engine. If the problems persist: the engine stalls or stalls, then the order in which the new wiring was connected was violated.
Replacing high-voltage wires of the ignition system
High-voltage wires of the engine ignition system are special design elements that ensure the transmission of high-voltage pulses from the ignition coil to the engine cylinder spark plugs. If the high-voltage wires are in good condition, if other elements of the ignition system work smoothly, a spark appears in the cylinders in a timely manner, and the engine starts and runs stably in any weather. If even one of the high-voltage wires is damaged and needs to be replaced, starting the power unit becomes problematic, and during operation the engine will, at a minimum, stall and stall at the most inopportune moment.
Features of the design of high-voltage wires and their possible malfunctions
A standard high voltage wire consists of several elements. This is a conductor, a reliable layer of insulating coating, contacts and protective caps. In some cases, high voltage wires (armor wires, explosive wires, etc.) are equipped with resistors to suppress electromagnetic interference and other elements that make the design of the conductors more reliable and their operation more convenient. Depending on which particular element of the high-voltage wire has become unusable, the malfunctions of the transmission link of the ignition system also differ:
- if the insulating coating is destroyed, breakdown and leakage of currents occurs through the high-voltage wire, as a result, the voltage sufficient to form a spark and ignite the working mixture ceases to flow to the electrodes of the spark plugs;
- if a conductor becomes unusable, the resistance level of the conductor automatically increases (the consequences of this malfunction are almost the same as in the first case);
- If the contacts oxidize or break, then during engine operation short-term breaks in the electrical circuit occur, as a result of which the power unit begins to operate intermittently.
In all of the above cases, the high-voltage wires of the ignition system must be replaced, because it is impossible to repair them on your own or even by service specialists. This is simply not provided for by the design of high voltage wires.
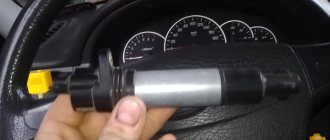
Lada Granta Red Luxury Mechanics › Logbook › Coils die while standing. And young
So the well-known misfortune overtook me - the coil died. She did not die long, but painfully.
When certain symptoms occur in the behavior of a car, people often do not suspect this particular malfunction. Some blame the spark plugs, some the injectors, some the air, some the mass air flow sensor, some the gasoline. In a word, there is no agreement among the operators.
So, all these components have nothing to do with it. Let us immediately indignantly discard our favorite gasoline, which, with the help of the viral activity of half-educated journalists and C-grade students from car service centers, is “Well, very, very bad.” We are not C students, so our gasoline is normal. Quite edible.
Otherwise, it should be recognized that the symptoms are very nonspecific. Indeed, one can suspect anything. To my taste, in general, they most closely resemble air leaks into the manifold. But no - it's a coil. Now I will describe them (the symptoms) with all possible care, so that everyone knows exactly how the coils on the 21126 motor die.
It all started on a damp, chilly evening. At idle speed, the warmed-up engine (86°C) suddenly began to stall - about one misfire every 3-4 seconds. This can be felt by the swinging of the tachometer needle and increased vibration in the cabin. From the outside, this is easiest to hear at the exhaust pipe - from there the sounds of a specific, quiet sneezing are heard. Everything about the movement was flawless.
After about ten kilometers, when starting off, one cylinder began to fail. 15-20 meters after starting, at about 2000 rpm, while still in first gear, it jerked into gear. On other gears everything was fine. At idle, the engine continued to stall at the same frequency. The slightly cooled (72°C) engine worked quite normally. From that moment on, I began talking to the check engine light in a human voice, calling it to its conscience and convincing it that enough intrigue - it was time to light up.
The next day in the morning, the cold engine was already slightly throttling, especially after reaching speeds below 1000. While driving, it worked without any problems. Starting off, just like the day before, was accompanied by a complete shutdown of one cylinder, followed by a sharp connection.
After about 20 kilometers, the engine began to tune up immediately after giving the gas during the transition from engine braking to acceleration. This happened every time and in any program.