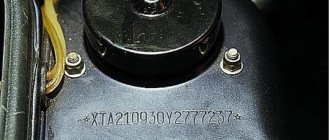
The Russian SUV Chevrolet Niva was initially equipped with two types of engines - a VAZ-2123 with a volume of 1.7 liters, and a Z18XE from the German company Opel with a volume of 1.8 liters. If the latter is installed on your car, then, as a rule, it does not cause any hassle or problems, but with the Russian analogue everything is much more complicated, since the valves periodically begin to knock, forcing the engine to work intermittently, requiring replacement of the hydraulic compensators.
Niva hydraulic compensators, a bit of theory
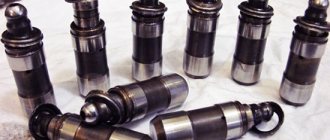
What exactly is a hydraulic compensator and why is it needed in the engine? The valves have a thermal gap. You can “choose” it in two ways. The first way is mechanical adjustment. Either with washers, as on the “eight”, or bolts, as on the “classic”. The second way is to install a hydraulic compensator between the camshaft cam and the valve. Oil is supplied to the hydraulic chamber under pressure, and thereby the valve clearance is selected. But there is one thing, BUT. For high-quality operation of hydraulic compensators, a certain oil pressure is required. According to German documentation, at least 1.5 kg at idle. On our classic engine, normal pressure at idle is 1.2-1.5 kg. But we hung a hydraulic chain tensioner and eight hydraulic compensators on our oil pump. The system is working at its limit. Let me remind you that the design of the pump remains from a penny and has a performance designed for a 1.2 liter engine. Shown in the photo. 1 – old-style hydraulic support, 2 – new-style hydraulic support, 3 – new-style hydraulic support cup.
old and new hydraulic guides
Old-style Niva hydraulic compensators
The first Chevrolet Niva rolled off the assembly line in September 2002. Until 2004-05, General Motors supplied its own hydraulic compensators (I never found the manufacturer). Cars from these years are still driven with only an oil change. But after this time, the “domestic spill” hydraulics began to appear, and problems immediately began. To this day, there are no high-quality replacements, only surgical removal and installation of a “death to old-style hydraulics” kit. Let me remind you that with old-style hydraulics you can only use old-style rockers . Details are described in a separate article.
New sample hydraulics
A separate chapter will be devoted to the new type of hydraulic compensators, as such, now only about the differences and general issues. Apply from October-November 2008. The picture is exactly the same as with the old-style hydraulics. The first couple of years, high-quality wetsuits and good hot cups. Then, hydraulic compensators of unknown origin and disgustingly processed “half-baked” glasses. There is a category of nivovods and shnivovods who firmly believe that under their hood there is not a Fiat engine from the 60s of the last century, but something new and modern. Therefore, it is necessary to put exclusively what the designers intended. For them, in December 2013, I ordered the first trial batch of original hydraulic guides from Germany. Don't be surprised, it's from Germany. Because our designers did not bother themselves with “brain activity”, but simply adapted hydraulics from BMW.
Installation of adjusting bolts.
The installation work is carried out in exactly the same way as in the previous case. The only difference will be manual valve adjustment. To do this, you need a thick probe or indicator.
To take a measurement, you must first align the marks on the camshaft and measure the clearance of valves 8 and 6, then rotate the shaft 180 degrees, and then begin adjusting valves 7 and 4. Then adjust 3 and 1, 2 and 5.
The gap on the valves should be 0.15 millimeters. Only measured on a cold engine. If this value is greater, then valve knocking will appear over time. If you install it less, they may soon burn out.
On older internal combustion engines, the problem of increasing changes in thermal clearances, increasing due to wear in the valve mechanism, was solved with the help of adjustments. This work was performed by a specially trained person. Valve adjustments were required every 10,000 km or due to wear. The specialists disassembled the engine and manually adjusted the valves - it must be said that this was a rather labor-intensive procedure that required special skills and qualifications from the master. Also, for this task, a specialized tool was needed - a set of probes.
Installation
Several times they sent me links from forums about the fact that they installed German hydraulic compensators, but it became little better than it was. The issue is not with the INA hydraulic compensators, but with the cups. If you look at how the hydraulic compensators are installed in the cylinder head, you will see that the vector of application of force by the camshaft cam goes vertically, and the hydraulic valves and cups are at an angle to the vertical. The cups are traditionally made from shit of poor “half-baked” material, so after a while (50-70 thousand km) an elliptical groove begins to appear, along which the oil pressure required for the hydraulics begins to disappear. Therefore, if you want to update the system and install German hydraulic compensators, install new glasses.
A series of articles devoted to hydraulic compensators and bolts:
Part 1. Hydraulic compensators, review article
How to check hydraulic compensators
Like any other mechanism, a hydraulic compensator can break down, expire, or exhibit hidden manufacturing defects. What can you do? The perpetual motion machine - alas - has not yet been invented.
The signs of impending trouble are the same as those of the valves: a peculiar knock begins from the depths of the engine. If you know your car, you can immediately identify the characteristic “clack-clack-clack” sound.
Also interesting: Removing the Niva engine. Video on how to remove the engine from a Niva yourself in your garage
— signs of wear on hydraulic compensators on Volkswagen TDi PD engines:
It’s hardly worth it to immediately panic and immediately “turn on the calculator” in your head, calculating how much the repair could cost. Check the oil level. Suddenly it is insufficient, and therefore the required pressure is not created in the hydraulic compensator. Just add oil to the level indicator, and after 15 minutes try to start the engine. In most cases the knocking noise disappears.
— how to check hydraulic compensators:
The second case is possible after long-term use, if low-quality lubricants were also used. Carbon deposits settle on parts of the device, coking it.
You can, of course, find something to do with your hands and try to do the cleaning yourself (as some craftsmen advise from the pages of various sites), but this can lead to serious damage.
It is better to spend money on a replacement, as all manufacturers recommend.
And finally, there is an option when the expansion joints are simply worn out. Despite the fact that their strength is designed for operation over a fairly long period of time, in our country there are cases when cars are rolled until they begin to disassemble themselves.
If a car is valuable as a memory of significant life events, then your path also lies in a car service to replace hydraulic compensators. If you don’t suffer from bouts of nostalgia, then scrap the “iron horse” so that the repair of individual small devices does not exceed its cost.
Do you know how to maintain a car battery so that it lasts a long time?
You can read how to polish glass headlights in this article.
Types of hydraulic compensators
At the beginning of the production of Chevrolet Niva cars, old-style compensators were installed, and in the fall of 2008, a modified, new version of this part began to be installed.
Hydraulic compensators Niva Chevrolet old model
Until 2005, General Motors supplied its own expansion joints, which were of impeccable quality. But then the domestic “hydriki” came along, and the problems began. The quality of the supplied parts left much to be desired; the metal from which the parts were made was raw and did not have a long service life.
New Generation
The end of 2008 was marked by the appearance of a new generation of hydraulic compensators among Chevrolet Niva assemblers. At first, about two years, there were no problems, the parts were of good quality, the metal was hardened and wear-resistant. And then the same story began as with the old ones - the glasses became “half-baked” and could not serve their owners for a long time.
Depending on the design of the timing mechanism (gas distribution mechanism), several types of hydraulic compensators are distinguished:
- hydraulic pushers;
- roller hydraulic pushers;
- hydraulic supports;
- hydraulic supports, which are installed in rocker arms or levers.
How to check and discharge the hydraulic compensator
To ensure that hydraulic compensators do not create problems, you must follow simple rules:
- The engine must be as clean as possible. We don’t mean a shiny filter cap, but clean oil, clean filters, replacing them in a timely manner and using only certified, expensive, high-quality oil.
- Flush the engine after changing the oil, but not with fast-acting rocket additives. This will only contribute to coking of the technological gaps in the hydraulic compensators.
- When knocking occurs in the compensators, you need to know how to discharge the hydraulic compensator. That is, bleed the air, remove the air plug that may form during installation. This can be done using a simple clamp - before installation, you need to fill the compensator with oil and use a clamp to compress it until the air is completely released.
- After installing the compensators, it is necessary to crank the engine crankshaft 4-5 times before starting, then wait 15-20 minutes. Only then can the plungers automatically take their working position.
- Hydraulic compensators must be replaced after 120-180 thousand mileage and can only be replaced as a set.
Also interesting: Engine tuning: Niva 4x4 - increasing power using common methods
The most common cause of knocking in hydraulic compensators is airing. Air can enter the plunger either due to excessive wear or after the vehicle has not been used for a long time.
In this case, it is necessary to let the warmed-up engine run without load at medium stable speeds for three to four minutes, then at variable speeds in the region of 3-3.5 thousand revolutions, and after that the engine should run at idle for about a minute.
This is all you need to know in order for hydraulic compensators to serve for a long time and perform their functions without problems. Keep your engine running quiet and good luck to everyone on the road!
How to identify a faulty hydraulic compensator
To determine a knocking compensator, you need to use a screwdriver, which is used as a lever, to press on those “hydraulics” that are at TDC (top dead center). If the hydraulic compensator fails under pressure from a screwdriver, it means it is not adjusted. If you want to make sure of this, quickly press with a screwdriver and you will hear a characteristic sound.
Typical faults
Problems with hydraulic compensators arise for two reasons. It is not difficult to identify them - this is either a mechanical breakdown of the unit itself, its destruction, or a breakdown of the oil supply system to the compensator.
In the first case, a common cause is wear of the plunger pair. This is an inevitable process that depends only on the operating time of the unit and the quality of the metal from which it is made. Factory defects cannot be ruled out; this is extremely rare, but it does happen. Replacing this part costs the same as replacing a regular consumable.
In the second case, the oil level in the engine matters; it can be too low or too high. The oil filter may be dirty and dirt may have entered the channels. Untimely oil change is another reason for unstable operation of the unit.
Do not forget about the correct selection of oil - use oils of the same type and preferably from the same manufacturer. The consequences of failure to comply with these rules can be disastrous; saving on oil can cost you money to repair the engine.
Device
The operating principle of this unit is that the mechanism can automatically change its length by an amount equal to the clearance in the valves. The movement of the component elements in the assembly is carried out due to springs and oil, which comes from the car’s lubrication system. Let's see how the hydraulic compensator works. We already know what it is. So, a compensator is a housing in which a plunger pair is installed. She can move. In turn, this part consists of several elements:
Causes of knocking hydraulic compensators
The knocking sound of Chevrolet Niva hydraulic compensators can be easily detected by ear; it knocks at a frequency half the engine speed. It can knock both on a cold engine and on a hot one, and the reasons for this are different.
Reasons for knocking when cold:
- Thick oil. As the engine warms up, the oil heats up, becomes thinner, and the knocking noise goes away.
- Dirt. A bad filter or old oil can cause dirt to get into the channels and holes and clog them.
- Worn or broken plunger. The cause may be natural wear or abrasive contaminants that have entered the oil.
"Hot":
- Plunger jamming. Scuffing on the plunger pair increases its wear significantly and blocks it.
- Oil with incorrect viscosity. When changing the oil seasonally on their own, sometimes owners make mistakes and fill in oil with the wrong viscosity. If it is too liquid, it quickly flows out through those. gaps.
- Increased oil level in the engine. If this is due to coolant getting into the oil, it will foam in contact with the crankshaft.
All these reasons can be eliminated yourself if you carefully monitor your car.
Causes and signs of failure of hydraulic compensators
It is important to determine when the main valves are knocking. Often, knocking occurs only when “cold”, and disappears within 30-45 seconds. The reason for this is a delay in the supply of oil to the hydraulics due to its insufficient heating. It’s another matter when the knocking of the hydraulic compensators occurs “hot”, then you will have to remove the camshaft and clean the channels. If flushing does not help, it is necessary to replace the Chevrolet Niva hydraulic compensators.
The main symptom, which usually manifests itself at 50,000 km, or even 40,000 km, is the appearance of distinct sounds in the camshaft area, and when you try to increase speed, a metallic crackling occurs. The reasons for this may be:
- The pressure in the car's oil supply system has dropped, as a result of which an air plug has formed, preventing the oil from reaching the hydraulic fluid.
- A clogged oil filter leads to clogging of the oil channels and a decrease in the flow to the hydraulic compensators.
- Reduced or increased oil level in the system, which caused excessive saturation of the oil with the air mixture, which caused the characteristic knocking sound.
- Worn seat for hydraulic compensator. As the engine operates, the temperature increases the seat even more.
When replacing the camshaft, it is necessary to take into account that the cause of knocks coming from the camshaft can also be:
- deterioration of the camshaft cams;
- wear of the rocker surface;
- erasing the end of the valve stem.
Is it worth replacing hydraulic lifters with bolts on a Chevrolet Niva
What is more practical, a bolt or a hydraulic compensator - this question worries many Chevrolet Niva owners. First you need to find out why some drivers decide to make such a replacement?
The answer is simple - the introduction of compensators gave hope to once and for all solve the issue with thermal gaps. In fact, the poor quality of hydraulic compensators only worsened the situation - more money was spent, but the problem was not solved.
How to test hydraulic compensators and determine the nature of the malfunction?
Having studied the above information, of course, questions may arise about how to determine which hydraulic compensator is knocking, how to diagnose the type of failure, and how to pump hydraulic compensators. To determine the nature of the breakdown, you should perform the following steps, and then draw conclusions.
- When, when starting the engine, an increased level of noise immediately appears, and after five to six seconds it disappears, then there is nothing to worry about. The compensators are in good condition, and the cause of the noise is oil leaking from them. Then the oil is pumped up and the noise disappears.
- Check for noise at idle speed of the car engine. If the noise is intermittent and disappears completely when the noise increases, then a malfunction has occurred. It can be caused by leaky closure of the valve, as well as by the occurrence of blockage or carbon deposits in the area of the plunger pair.
- If the engine is well warmed up and there is continuous noise at idle, then the reason is an increase in the gap resulting from abrasive wear of the hydraulic compensator. Basically, this happens, as mentioned above, due to the use of low quality oil.
- This option is also possible - noise appears at high speeds and disappears at low speeds. In this case, this happens due to the fact that the oil foams.
- If the appearance of characteristic noise does not depend on the number of revolutions, then the malfunction is more difficult to determine, since it can be caused by any of the reasons. It's better to contact specialists.
- There are times when noise can be heard at idle, which increases with increasing rpm up to 2000 rpm, no more. Here, the occurrence of noise is not related to the operation of compensators.
So, if the reason for the incorrect operation of the hydraulic compensator is the appearance of carbon deposits or blockages, then you need to clean the yoke. To do this, it is necessary to dismantle it, and then, after cleaning, the hydraulic compensator is installed in place and tested.
If the device is worn out (after long runs or due to bad oil), then there is only one way out - replacing the hydraulic compensator with a new one.
If you want to learn how to replace hydraulic compensators, you can consult with specialists or watch the corresponding video on the Internet.
It is always worth remembering the important role the oil quality plays for the operation of the hydraulic compensator. Professionals also recommend changing the oil a little earlier than scheduled. For example, if the oil is supposed to be changed after 12 thousand km, then do it after 10 thousand km.
In the case when noise appears when the speed increases and disappears when the speed decreases, a conclusion is usually made about foaming of the oil in the car. Here, the cause of the malfunction is usually determined as follows:
- Check the existing oil level when the engine is cold.
- If necessary, add oil or drain excess.
- Then you need to start the engine, while gradually increasing the speed.
- If the same noise effect occurs again, this indicates air has entered the lubrication system. This means that the parts are damaged. In this case, it is better to contact a car service specialist.
When it is necessary and when it is not necessary to change hydraulic compensators and replacement features
Ideally, during normal operation of the hydraulic compensator there should be no extraneous sounds. But sometimes you hear sounds from under the hood that make you want to replace timing parts. But hydraulic valves on engines with high mileage must be replaced - they have a high percentage of wear and tear and there is no point in repairing them. In other cases, you can get by with less radical actions.
Attention. Sometimes you shouldn’t immediately disassemble the engine and try to find out the cause of the breakdown. Often an oil change is enough for the problem to go away, and money and nerves are saved.
Among the features of replacing hydraulic compensators on a Chevrolet Niva, it is worth highlighting the following:
- if you notice an extraneous knock from under the valve cover, do not rush to immediately disassemble the timing belt and change components; first change the oil and filter;
- use oil from the same manufacturer;
- there is no need to tighten the parts too much, this may lead to breakage;
- When installing new parts, do not forget to rinse them thoroughly in gasoline.
Step-by-step procedure for replacing hydraulic compensators
If the knocking in the mechanism cannot be eliminated, you will need to replace it with new spare parts. The car is placed on level ground, the handbrake is engaged and the gear is in neutral.
- The air duct is removed.
- Release the valve cover from the pipes and unscrew the clamps.
- Unscrew the 8 bolts that secure the valve cover.
- A mark is placed on the camshaft, and the mark is left on the back of the gear.
- The sprocket bolt is loosened and the chain tensioner is removed.
- It is recommended to immerse the tensioner in the plunger and secure it with a nut with a cap.
- Unscrew all fasteners securing the camshaft, and then remove it.
- Unscrew 8 rockers and unscrew the expansion joints.
- New spare parts are installed; they should be tightened with a force of 2 kgf, using a special tool.
- The rockers are installed in their places.
- Check the intended docking marks and secure the camshaft in place.
- The sprocket and chain tensioner are mounted.
- Before tightening the chain, you should check that all the marks match, then finish fixing it with a nut designed for tensioning the chain.
- The valve cover is put in place, all pipes are connected. In this case, it is recommended to make a visual inspection of the pipes and clamps. If signs of wear are found, they should be replaced.
- Start the engine and listen to its operation. At the first start, the same characteristic knocking sound will occur, but as soon as the system is filled with oil, it will no longer occur, since the engine operation has returned to normal.
Required tools and materials
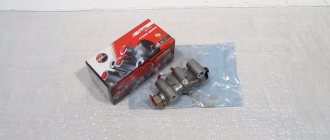
Most often, breakdowns occurred with models manufactured before 2008 and with power steering. Afterwards, the manufacturer began installing imported expansion joints. New spare parts do not fit older head models. The solution to the problem is to replace the hydraulic compensators with standard adjusting bolts. You will need:
- locking plate – 4 pcs.;
- adjusting bolt – 8 pcs.;
- the package includes nuts and bushings;
- load spring – 8 pcs.
In addition to all of the above, you will need to purchase a 213th camshaft for a model before 2008. This product has a different configuration of spare parts designed for use with the support system. When equipped with them, the engine will operate more responsively. To adjust the thermal gap, you need a 0.15 mm feeler gauge. The tools you will need are a set of wrenches.
Dismantling hydraulic compensators
The process is not difficult to complete if the car enthusiast has an idea about adjusting the valve on a classic VAZ. The whole job takes about one to two hours. Actions are performed in this order:
- The machine should be placed on a flat surface, the handbrake and neutral must be turned on.
- Release the cover of the autovalve system from all pipes and hoses, and remove the air duct.
- Open the valve cover, unscrew 8 nuts.
- The engine is set to the TTM position of the fourth cylinder. You will need to align the marks on the tidal part of the camshaft housing and the gear.
- The device for fixing the camshaft gear is removed.
- Remove the chain tensioner.
- To dismantle the camshaft, you will need to unscrew its fasteners.
- The rockers are dismantled next in line - 8 pcs.
- The hydraulic compensators are screwed together.
- The bushing installation areas are cleaned of traces of oil.
- Install four locking plates and secure them with bushings.
- The adjustment bolts are placed in the bushings, and the rocker and retaining springs are installed.
- They are installing the camshaft; it is recommended to treat the new spare part with oil in advance.
- Install the drive shaft gear and screw in the mounting bolt.
- Install the timing chain tensioner.
Installation of bolts and assembly features
Installing classic bolts instead of expansion joints allows you to get rid of many problems and the unpredictability of their operation. New hydraulic compensators are not cheap, and there is no guarantee that they will not start knocking again. For these reasons, car enthusiasts are increasingly using adjusting bolts. In this case, you will have to separately adjust the valves and perform the engine assembly steps a little differently.
- Clean all bolt holes thoroughly.
- Place the plates and screw in new pipes.
- Screw in the bolts and included springs and valve rockers.
- The camshaft is placed on its assembly point and the chain tension is adjusted. The oil supply ramp is not installed at this stage.
- Next, the valve system is adjusted.
Valve clearance
The valve system is adjusted according to the same scheme as on a classic VAZ car. In the combined marking mode, the gap is adjusted using a feeler gauge on six and eight valves, the shaft is rotated 180 degrees, then the seventh and fourth, then the third and first are adjusted by 180, the last half turn is the second and fifth valve elements.
- Adjustment is performed using a wide probe or indicator.
- Spare parts will need to be replaced every 10-15 thousand km.
- The valve distance of 0.15 mm is set using a feeler gauge; it should be adjusted only during a cold start. Otherwise, if the value is less, there is a risk of burnout; if the value is increased, a knock will occur.
The technical implementation of hydraulic compensators in VAZ engines encountered particular difficulties. The paired elements seem to have a simple design. The production of spare parts requires high-precision complex equipment and experts of the appropriate level. The VAZ plant did not have these important features; for this reason, replacing hydraulic compensators with bolts in a Chevrolet Niva car is the most rational option.
Adjustable hydraulic supports (hydraulic compensators).
Old style hydraulic compensators.
Everyone knows what a hydraulic compensator (hereinafter referred to as hydraulic compensator) is and what function it performs. Worse than these g.k. I haven't seen anything, and their price isn't bad. The weakest point of these tensioners is that they tend to constantly unscrew (tightening torque is from 1.7 to 2.5 kg), tighten it harder, it simply will not work. Many people try to install them on various thread clamps, but I think this is not a solution. AvtoVAZ has already stopped producing cars with such cylinder head, but there are a lot of cars with cylinder head, old model, but not everyone has the opportunity to change the cylinder head to a new model. There is a good way, already tested on many cars, to avoid unscrewing the main gearbox. Everything is very simple - tighten them not by 2 kg, but by 4 kg. We did it.
Consequences of an unscrewed g.k.
When starting a cold internal combustion engine, a knocking sound is allowed. for 2 – 4 seconds. If the knocking continues for more than this time or appears on a hot internal combustion engine, it is advisable to contact a service station as soon as possible to eliminate the malfunction of the engine.
And now the most important thing for those who are delaying repairs. An unscrewed cylinder head first breaks the oil drop ramp, wears out the rocker and camshaft cam due to incorrect clearance adjustment and knocks out the threads in the cylinder head, which leads to the replacement of the cylinder head with a new model)))
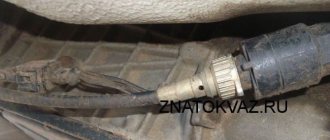
Timing chain tensioner
Installed on Niva 21214 and 2123. After passing 1 maintenance, I recommend getting rid of this part and replacing it with Pilot 214 (mechanical tensioner). The hydraulic chain tensioner is very unreliable, especially when starting a cold internal combustion engine. The main malfunction of the chain tensioner is that the oil from the tensioner flows back into the system (the tightness of the tensioner is broken), and accordingly, the chain tension has weakened. And what we get: when starting the engine if the tensioner is faulty, the oil needs time to fill the tensioner and bring it into working condition. And then there are only two scenarios: the chain will rattle for 5 seconds and become tense, or the chain will simply fly off, which threatens a very expensive repair of the cylinder head.
New type hydraulic compensators.
I don't see any drawbacks in these hydraulic compensators. A very good option for the Niva family of cars. The only thing I had to deal with was unscrewed glasses, but the car mechanic who did not tighten them is to blame here (tightening torque up to 11 kg). When tightening glasses less than 4-5 kg, there is a possibility of them unscrewing. The consequences are the same as with the old sample. Please note that they are very loosely tightened at the factory.
Malfunctions in the operation of hydraulic compensators of a Niva Chevrolet car
Bleeding is necessary in order to remove air that has entered the cavity of the hydraulic compensator. Today we decided to tell readers about how to bleed hydraulic compensators.
You can pump in two ways. One involves bleeding using a running engine. The second is done manually. Oil is forced in.
The first option is needed if the newly installed hydraulic compensators knock when starting the car or if the car has been idle for a long time and some of the oil may have leaked out of the hydraulic valve.
Hydraulic compensators, if they are in working condition, but there is air in them, after three to five minutes of engine operation they stop knocking. If this does not happen, perform the following operations with the engine running:
• The engine should run at 2500 rpm for 3-4 minutes. You can change the speed from 2000 to 3000.
• Let the engine idle for 30-40 seconds.
• The engine stops and remains in this state for one minute.
• The engine starts. If the knocking noise disappears, this means that the hydraulic compensators have been pumped. If the knocking does not disappear, the entire cycle is repeated. The cycle can be repeated 5-7 times until a positive result is achieved. If the knocking does not subside, then the cause is much deeper and needs to be diagnosed.
The second option is needed if the hydraulic compensators are removed. Let's find out how to bleed hydraulic compensators when they are removed. This procedure can take a long time if the hydraulic compensator is not disassembled. If you take it apart, the process will go a little faster. True, washing and cleaning the hydraulic compensator will take a lot of time.
If the HA is not disassembled, then it must be placed in a flat container with clean oil. The hydraulic compensator should be with the plunger facing up. The oil level should be above the middle groove. After this, the pumping process begins. You need to apply force to the plunger with your finger, and dirtier oil should begin to come out of the valve.
Press and release several times until clear oil comes out. If oil does not appear after pressing, it is likely that the ball is stuck in the valve. You can gently move the ball with a needle. But the surface of the ball should not be damaged.
In order to pump the hydraulic compensator differently, it needs to be disassembled. How to bleed hydraulic compensators when disassembled? You need to lightly tap the HA on a flat surface. It is advisable if it is a sheet of rubber or a piece of fabric placed on a wooden surface. Knock until the plunger starts to come out.
The plunger is then disassembled. All parts are washed in solvent, all dirt and deposits are removed. Often the cleaning process takes quite a long time, since dirt is difficult to remove.
After this, the plunger containers are filled with oil.
It would not be amiss to remind you that before pumping the hydraulic compensator, you need to change the oil and check its level so that the airing effect does not occur again.
If after all the operations the knocking does not disappear, then you need to contact a mechanic who will make a diagnosis and give recommendations for engine repair.
Hydraulic compensators VAZ 21214
Every day cars are becoming more advanced and smarter. New systems, instruments and devices are being produced that allow us to spend less time on vehicle maintenance and repair. Such devices also include hydraulic compensators (HC).
So, hydraulic compensators are devices that independently regulate valve clearance. Specially created to replace mechanical valve timing regulators that were less efficient. A conventional valve installed on a VAZ 21214 engine does not have a main valve, so every 10 thousand km. you have to manually adjust the gaps using a special feeler gauge. If this is not done, fuel consumption increases, the car engine begins to make noise and dynamic characteristics decrease. It becomes clear that mechanical adjustment has become obsolete. And so the “mechanics” were replaced by hydraulic compensators. With them everything turned out to be much simpler: they themselves set the required valve clearance, thereby increasing the engine life and reducing fuel consumption.
The device of hydraulic compensators.
Previously, rockers were used to adjust valves on VAZ engines, and the clearances were adjusted using special screws. On new engines, compensators are installed that look like adjustment bolts, but the clearances are adjusted automatically due to the plunger pair and oil pressure.
The hydraulic compensator consists of:
- Housings
- Return spring
- Top and bottom of plunger and check valve.
Installation of hydraulic compensators on a VAZ 21214
To work you will need:
— Clean motor oil
— Tweezers (can be replaced with a slotted screwdriver)
Before installing the HA, they must be disassembled and thoroughly washed in gasoline. Dry and put back together. After that:
- We check the hydraulic supports. To check, you need to press your thumb on the assembled hydraulic support; it should squeeze and move apart freely (without jamming)
- The next step is to install the oil supply ramp and screw in the dry hydraulic mounts by hand
- Using a torque wrench, tighten the hydraulic mounts (22 N per m). Again we check that when pressed it is pressed all the way, and then returns to its original position. If it sticks:
a) swap the hydraulic support with the neighboring one
b) reduce the moment to 18 n per m
c) replace with a new one
!All hydraulic clamps must be tightened to the same torque
4. Next, you need to fill each hydraulic mount with oil. To do this: take out the plunger and put it in a clean place, use tweezers to take out the piston with the ball and also put it aside; We fill the engine oil into a syringe and fill it into the hydraulic support housing to the brim, after which we lubricate the piston and insert the piston into the housing, pressing the valve ball with an awl. Fill the plunger with oil and insert it into the body.
All steps have been completed and the hydraulic mounts have been installed, then you need to get the engine into working condition. After that you can safely start!
How to check hydraulic compensators for functionality, repair them or replace them
Checking the performance of hydraulic compensators
To check the hydraulic compensators, you need to remove the valve cover and check the elasticity of the hydraulic compensator with your hands.
The hydraulic compensators are checked by penetrating under the valve covers and turning the crankshaft by the central nut. Due to the drive of the gas distribution mechanism, the camshaft begins to rotate.
At those moments when the cams of the pushers are directed in the opposite direction from the hydraulic compensator, an alternate check for elasticity and the presence of free play begins. This can be done either by hand or with a special tool.
If the hydraulic compensator is soft or loose, then it is necessary to begin repairing it.
After removing the hydraulic compensator, it is necessary to wash it in clean gasoline, diesel fuel or kerosene, or in a special washing liquid that breaks down carbon deposits and fats. It is necessary to lower the part there, rinse and wipe.
You need to find a hole and use a metal object suitable for its diameter to press it to open it. During this, the hydraulic compensator should be lowered into the liquid so that it penetrates inside.
It is necessary to repeat these steps several times.
Disassembling and cleaning hydraulic compensators
After cleaning the hydraulic compensators, they must be lubricated with oil before installation.
Through the same hole you need to get rid of the flushing fluid and excess air, while simultaneously clamping the hydraulic compensator itself. After this it should press freely.
After washing the hydraulic compensator, you can put it back in place if there are no visible defects. It must be lightly oiled before installation. Next, the part is installed in the reverse order of removal.
After this, you need to start the car and assess the situation. If the knocking continues, then repairing the hydraulic compensators will no longer help, you need to replace them.
Also, if after removing the hydraulic compensator it is discovered that there is damage on it, then the part must also be replaced with a new one. To replace hydraulic compensators, you should purchase a suitable part from the store and install it in place of the old one.
Of course, many car enthusiasts are interested in the question of how much it costs to replace hydraulic compensators. It is impossible to answer this question unequivocally. The final amount depends on the number of standard hours spent on this procedure. Also, do not forget that the cost of parts for different cars varies.
Checking the functionality of the hydraulic compensator
As long as the hydraulic compensator works well, the car owner will not hear any unnecessary sounds from the power unit. Its appearance may indicate a malfunction of the hydraulic compensators.
Large gaps can cause a decrease in engine power, increased fuel consumption and premature valve wear.
Before considering the issue of diagnosing hydraulic compensators, you need to understand the reasons for the formation of defects in it, namely:
1) Determine the oil level in the crankcase of the power plant: it can be either high or low. In both cases, the oil may be saturated with air, which means that the oil inside the hydraulic compensator will be compressed, or rather not the oil, but the air contained in it.
2) Natural wear of hydraulic compensator elements. Moving components are constantly being rubbed, which can lead to a leak in the system.
3) From time to time, the surface of the mechanism becomes dirty. Particles of dirt and metal get inside. Due to the high precision components of the hydraulic compensator, even very small contamination can cause poor operation of the mechanism.
While the engine is running, a characteristic sound will occur from the faulty hydraulic compensator. It also happens that car owners may confuse this sound with the sound coming from poorly functioning valves.
To determine a faulty hydraulic compensator, a phonendoscope is used, its receiving element is applied to the places where the hydraulic compensators are located. By comparing sounds, you can understand where the defective mechanism is located.
In this place you can hear a characteristic strong knock.
You can make a tool with which you can check the condition of the hydraulic compensator yourself; the basis of this tool should be a metal rod. In the middle of this rod we make a special handle, either wooden or plastic.
At one end of the rod we place a resonator, which can be made by taking an aluminum beer can. We apply the second end of the rod to the location of the hydraulic compensator, and the resonator to the ear.
You will hear all changes in the incorrect operation of the mechanism by a characteristic strong knock.
After you have discovered a defect in the hydraulic compensator, it needs to be dismantled. And only after that make a verdict. If it can be disassembled, then we disassemble it and determine the level of wear of the internal parts.
After you have carried out the maintenance, and the hydraulic compensator can be easily squeezed with your fingers, this means that it cannot be restored. And if this engine part cannot be disassembled, then you need to purchase a new one.
If you are not confident in your abilities, you should seek help from specialists at a car service center.
Read news about the new Niva
- Do-it-yourself Niva suspension lift. How to lift the front and rear suspension of a Niva car?
- Engine VAZ 21213 Niva
- Niva Chevrolet air conditioning installation - Online auto workshop
- Amount of oils and fuel liquids VAZ 4×4 2121 Niva "
- Suspension lift in the field yourself || Niva suspension geometry
- Body parts
- Bicycle in winter: how to ride in the snow
- Differential with electric locking Niva, Chevrolet Niva (cross-wheel) (22 splines) “Autogur73”
Diagram and principle of operation of the device
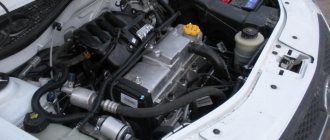
Under the hood of Niva
This mechanism is not particularly complicated. It includes 5 main parts:
- frame,
- sleeve,
- plunger springs,
- plungers,
- check valve
Sometimes you can find a plunger without internal holes. The upper part of this device is something like a sphere and is a kind of support. The bushing provides the motor functions of the mechanism. The plunger spring is located between it and the bushing.
The operating principle of the device is as follows. The camshaft cam, which is turned back to the pusher, cannot influence the mechanism, so the plunger is pushed out by the spring. This creates a gap. Oil from the lubrication system enters it through the ball valve of the hydraulic compensator. The ball valves are then closed by the action of the spring in the plunger. The cam, which is now turned with the side opposite to the hydraulic pusher, gradually lowers the mechanism lower and lower. At the same time, hydraulic compensators transmit pressure to the timing valves. At the same time, the pusher moves down, and the plunger pair moves with it. As a result, some oil is expelled.
After this, the new Chevrolet Niva hydraulic compensator changes slightly in size, and now a gap appears in the gap between the pusher and the cam. There is no need to worry about a small oil leak, since its shortage is constantly compensated by the supply of substances from the engine lubrication system.
Thus, the volume of portions of incoming oil changes, the dimensions of the hydraulic compensator and, accordingly, the automatic selection of the gap. The cause of the trouble may be thermal expansion or wear of some parts of the gas distribution mechanism.