What to make spacers for speakers from
How to properly make spacers in the front doors under the front? I’m interested in what material is better to use, how thick it should be, and if anyone has a drawing, please share. What's the best way to mount them?
ps: I saw that Bloom suggested putting this in the faq on MLC, but no one bothered to do it.
I'll post a small photo report on the spacers
We take plywood (I took 15mm) and outline the outer side according to the standard speaker. Click to view the attached file. The inside side is approximately the template from the box.
Next, take a screwdriver. Drill, whichever one you like. We drill holes in the inner frame. Click to view attached file
I didn’t apply mastic. Didn't impregnate it with anything. Screwed it directly onto the splenium.
Thank you all for your attention. Titus, thank you
PS, I didn’t bother with epoxylin. I screwed them into triangles. Click to view attached file
Titus, thank you. PS, I didn’t bother with epoxylin. I screwed them into triangles. Click to view attached file
I'm happy with the result
But what if..
It turned out beautiful
I hope the audience won’t mind if I post my photos of preparing spacers
I didn't cut it out of plywood right away. I decided to try it on cardboard cats. I drew the outer contour according to the standard column.
The internal contour was successfully outlined along the decorative ring from the new speakers.
I cut out a spacer from cardboard, tried it on the speaker + checked the location of the holes for the screws in the door (everything lined up perfectly)
Now, boldly, without fear in my pants, I did the same thing on plywood. Instead of a knife and scissors - a jigsaw and a drill
cut out
Tried it on
Using a file and then a zero, I processed the “rough” areas. I screwed the speaker to the spacer with 8 self-tapping screws.
More details here
What and what places need to be sealed?
More details here
What and what places need to be sealed?
I sealed the contact areas between the speakers and the wood and the wood itself against the door. This can be done in different ways - even to the point of rolling up the entire piece of wood with a vibrator (tearing off the foil from it), or tearing the resin off the vibrator, rolling up flagella with a diameter of 5 millimeters with your fingers and one flagellum between the piece of wood and the door, with the second “wrap” the speaker at the junction and assemble it all with screws. I did it with flagella
I made some 16mm spacers, but now the trim doesn’t fit into place. Despite the fact that I cut (along with the hand)))) the plastic in a circle from the inside. There is no protruding rib in the front part.
What should I do, thinner spacers or where?
I’m tormented by the question of how to install 8″ “variety” speakers. Does anyone have any experience?
ps I’m wildly sorry that I’m writing in several messages, there’s some kind of character limiter on the PDA)) don’t take it for a flooder or a careerist)))
I made podium spacers for standard mounts. Initially I wanted to make it from 8 mm, but according to the recommendations of Pashka kurd
I found a piece of plywood 16 mm thick
The result of the assembled door and the new speaker, I cut the card under the podium by 5 mm, bitoplast was glued on the door at the place where the speaker was attached (photo was taken at night with a phone)
The terminals are crimped + soldered.
I attached the crossovers near the handle, there is a recess in the door card, well, in general, you need to look where there are such free spaces, I adjusted the crossover a little, removed the caps from the card and tried the whole thing on - it fits, it doesn’t fit.
Thank you! I think there is enough of it there, the plywood is quite smooth. Everything became tight, the sausage was squeezed out in many places.
If you don’t want to trim the card, there is an option to take thinner plywood, 10 mm, as described above.
Lada Priora Sedan › Logbook › Installed amplifier and speakers
Dratuti =) Ever since I bought the car, I really didn’t like the way the standard audio system played, so I really wanted to replace it, but due to circumstances or sessions, the money was going into some other business. In the winter I received my diploma, my studies were completed and the moment came when I could save up and buy some music. For me, the main criterion when choosing at the moment was price, quality and the fact that everything would be in the factory places, I didn’t want to cut door cards for horns and podiums. The stock radio suited me very much, but it is not ideal in terms of sound, but its functionality makes me happy and therefore it was decided that all connections would be made from it.
While I was thinking about what to buy, the wires were laid for the amplifier and speakers, the laying was carried out on different sides, the plus and minus from the battery were immediately connected to the amplifier
Everything necessary was purchased:
Then I put everything in place, there are almost no photos of the installation itself because I was busy with work, I installed everything myself and there wasn’t much time for photo sessions, but there were still a couple of photos. The rear speakers were installed in a shelf made of plywood, the first time I screwed them under the shelf so that it would not be visible from the interior, but they played the lows very poorly, so it was decided to put them in the shelf from above, it turned out something like this:
The speakers in the door were screwed through spacers and hidden behind the factory trim, we had to file down 16 spacers a little so that the trim would be good, the door was also slightly bent in the place where the speakers were standard mounted, since the new ones didn’t want to stand up, the tweeters were placed in the corners of the mirrors, with them It didn't turn out bad, but it could have been done better:
The idea of attaching the amplifier came almost immediately, it was a matter of implementation, mounting from above did not cause any difficulties, a corner was taken, the upper part was bent and a hole was drilled in it for an 8 bolt, the question remained open of how to attach from below, they suggested attaching it to the plastic of the rear armrest trim, disassembling everything I came up with the idea that if you bend the necessary fasteners, there is somewhere to fasten them in the regular places and the planks themselves will not be flush against the facing plastic, so I searched the fastening stores for the necessary fasteners and adjusted them to the installation site:
Then measurements were taken to cut out the necessary cross-sections, I wanted to make them from plywood but there was no suitable thickness, so we cut them out of what was at hand, which was MDF 1cm thick, then fitting was carried out and the places for drilling holes were marked, when While drilling, I got the idea that I could also recess the furniture bolt, then I made a recess for the caps with a pen, later everything was covered with fabric and installed in place, everything turned out just as I had imagined, and I was very pleased:
Acoustics for the front doors of Lada Granta
Installing speakers in Granta doors allows you to be independent of the body type - speakers in the doors do not require an acoustic shelf. This means that you can install speakers in a sedan and a hatchback according to the same principle.
Here we are talking only about acoustics. Read how to install a radio in Granta here.
In non-luxury trim levels, the door cards do not even have holes for speakers - only perforations in the plastic.
Preparatory work
Before we begin the installation itself, let's figure out how to prepare the car. For this:
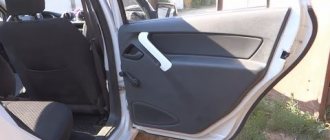
- We disassemble the door: dismantle the handle (pry up and remove the trim, unscrew 2 screws), the tip of the limit switch, two screws from the bottom of the door, overcoming the resistance of the retaining pins, pull the door card toward you and remove it from the door;
- We soundproof the door: in the warm season or in a heated garage, we cover all accessible parts of the door with vibroplast. Vibroplast StP M2 is suitable; when applying it to the door, be sure to heat it with a construction hairdryer and roll it with a pressure roller;
- If you have Spleen thermal insulation material, we cover the inside of the door card with it. This will further hide noise from the door when assembled;
- We are preparing spacers, if any are required for installing 16 cm speakers - more about them later in the text;
- We replace the factory terminals on the speaker wire in the door with normal ones (usually good terminals are included with the speakers) - to do this, we simply cut off the unnecessary connectors and attach the terminals we need to the wiring. A high-quality twist with heat shrink is sufficient;
- If the door panels do not have holes for speakers, we prepare them. It would be optimal to supply factory acoustic grids, which are installed on luxury versions of Granta and Datsun OnDo.
Item number for nets to order online: front left - 21906102097, front right - 21906102096.
Factory screens are flush with the door panel and allow you to open the glove compartment normally.
Installing speakers in Granta front doors
The standard acoustics in Grant are 13 cm speakers. They do not produce good sound, but they are easily installed in the factory holes for the speakers without unnecessary manipulation. The procedure for dealing with them is simple:
- connect the speaker cables, observing the polarity;
- fix with screws in regular places in the metal of the door or directly on the door card;
- install grids (in common parlance - grills).
An important disadvantage is that the center of the mounting hole and the place under the grill do not coincide. This means that when installed with complete grills, they will look asymmetrical and clumsy.
Standard acoustics most often do not produce a rich sound and, when installed with their own grids, look poor.
How to install 16cm speakers with spacers
In pursuit of sound, it is logical to install 16 cm speakers. This is where all the disadvantages of the AvtoVAZ design appear - the speakers either are not centered, or do not allow the window to roll down, or interfere with the glove compartment lid.
Why are spacers needed? In order not to cut the door, if you do not put the acoustics in the spacer rings, you will have to attach it to the metal of the door. This may result in the need to cut the door itself in order for the speaker to fit in, and is dangerous for the glass.
For this reason, speaker rings made of plywood are attached to the metal of the door, and the speaker itself is attached to them.
If you make your own spacers, remember: NOT the plywood may burst during installation. Too large a thickness (more than 10 mm) will not allow installing standard speaker grilles from Lada.
The procedure is as follows:
- we make or buy spacers for speakers - thickness 10 mm, material plywood;
- cut a hole for the speaker in the card and mark the installation location along it;
- put the spacer on 4 self-tapping screws;
- We install a column in it - observe the polarity!;
- install the map + install the standard mesh so that it doesn’t interfere with the glove compartment.
If the spacer bursts during installation, this may result in a rattling noise coming from the door while driving.
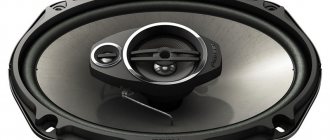
What speakers are better to put in the front doors instead of standard speakers?
We recommend the Pioneer TS-G1733I model. At a price of about 2 thousand rubles, they are freely installed through spacers in Granta doors without cutting metal and do not interfere with the glass. Easy installation will save you nerves and time.
The speakers are easily pumped with a radio without an amplifier and produce medium bass. Not component acoustics!
Installing speakers in the front doors of Priora
The main emphasis when playing music is on the front door speakers. They create volume, sound effects and acoustics inside the car. The speakers, which are built into the rear door, provide additional sound. It follows from this that it is advisable to install large speakers in the front doors of the Priora. This will make the car more comfortable, and it can be used as a source of music, for example, at a picnic.
Most often, speakers with a diameter of 13 cm are replaced with 16 cm ones, which adds sound power, although the replacement requires redoing the mounts. This is done in three steps:
Step 1: remove the door trim
This is necessary in order to get to the wires coming from the car radio. Before attaching them to the speaker, you need to trace its contours on a piece of plywood.
Step 2: cut a hole of the required diameter in the door
When the template is ready, we begin trimming. You can cut a circle of the required diameter using a jigsaw. We screw the plywood to the mounting location of the standard speaker, and attach the new speaker to it.
Step 3: Connect the Speakers
The speakers are connected to the radio using the serial connection method. Once the speakers are connected to the system, you can turn them on. If the sound appears, it means everything was done correctly. A few settings and you can enjoy music in your car.
Lada Priora Sedan "quartz" › Logbook › Installation of "16" speakers.
— Good day to everyone who follows my updates.
And for so long I thought about what speakers to install in my front doors, not in terms of brand and power, but in terms of diameter, i.e. install speakers with size “13” in place of the standard seats, well, I wasn’t looking for easy ways, having read a couple of articles about installing “16” speakers in the front doors. And so I bought the speakers (complete with tweeters, filter, full of screws, and the speakers themselves) .
1) Before buying the speakers, I vibration-isolated (STP 1.5mm.) and noise-proofed (splen 5mm.) the inside and outside of the front doors (I glued the splen only on the outer side, in the photo the splen has not yet been glued. (since I took the photo during the day and glued the splen at night).
2) First of all, I didn’t want to spoil the door trim i.e. install the speakers so that you don’t cut the factory plastic and so that the speaker on the inside doesn’t touch the lining and don’t cut the metal in the door, which I couldn’t avoid because I need a very thick podium of about 15mm, as a result of such thickness the speaker will touch the lining and When playing Dinimak there will be a rattling of the lining.
3) Installation of the speakers began with cutting out the podiums according to the template that was in the box. The material I took was 10mm thick plywood. After the podiums were cut, I painted them to avoid the plywood peeling off from moisture.
4). the podium only moved the podium to the left and higher in the reverse order so that the lower right hole remained. (I cut out the metal using the drilling method), I made the first door longer than the second so as not to do too much (and also when drilling metal or cutting anything, BE CAREFUL! DO NOT INTERRUPT THE WIRING THAT COMES FROM THE INSIDE OF THE DOOR).
5) After the work was done, I painted the galled metal so that there would be no rust, then I let it dry, after which I glued it with vibroplast (where there were irregularities, I adjusted everything with vibroplast so that the surface under the podium was perfectly smooth) after which I glued splen on top of the vibroplast and I secured the podium tightly, when installing the speaker, I glued the podium with a thin strip of splen and secured the speaker, then connected the speaker to the filter.
6) Installing tweeters on plastic triangles: installing tweeters is not difficult, I placed the first tweeter at the angle I thought was correct, but I had to tinker with the second one a little so that it would match the other.
7) Filter installation: I installed the filter on the outer side of the panel (immediately above the podium (see PHOTO).) since from the inside of the glass water enters the door and the filter is afraid of water because there are slots in the housing for heat removal. Described The most important thing is that if you have any questions, I will be happy to answer. The price is indicated only for a set of speakers.
— Well, actually speaking, everything is basically nothing complicated if you have level hands))) Thank you everyone, and if there are any mistakes in words, forgive me)) — Be careful on the roads!
Installation of 16 speakers in Priora
When installing non-standard speakers, change the speakers in the front doors of the Priora, then in the rear and on the trunk shelf. Additionally, audio components are mounted in the rear doors.
Speakers for the front doors of Priora
The first stage of installing the speakers is removing the interior trim in those places where the components will be installed, in this case the front door panels. For good sound, noise and vibration insulation (NVI) of the car body elements in which the radio speakers are installed is necessary. Therefore, in its absence, it is advisable to use the disassembled state of the front doors and glue vibration and noise insulation material.
Installing the speakers from the front involves cutting metal, since the standard holes are designed to mount speakers with a diameter of 13 cm. The easiest way to do this work is to use a jigsaw with a metal file.
First you need to mark the metal of the front door, for which you use a template cut out of paper or cardboard according to the size of the column. Sometimes a ready-made template is included with the audio components. Move the center of the new hole straight up, in this case the 16 cm speaker will not interfere with the fastening of the front door trim.
After cutting out a piece of metal, to prevent corrosion, it is advisable to treat the edges of the hole made with an anti-corrosion compound, or better yet, prime and paint.
The place where the speakers are mounted is covered with noise and vibration insulation. If there is no material, foil-coated isolon is suitable. To prevent the transmission of vibrations from the speaker, it should be installed through a spacer made of plywood or similar material, which is also covered with sound insulation. The radio speaker is attached to the spacer with self-tapping screws.
It is necessary to cut off the plastic edge of the door card located around the holes in front of which the radio speaker is installed. After that, all that remains is to connect the audio cables, assemble the casing, and you can enjoy the improved sound.
In addition to radio speakers, some audio systems include crossovers and tweeters (tweeters). As a rule, the crossover has a place on the front door map, and the tweeters are installed on the triangular elements of the interior trim opposite the place where the side mirrors are mounted. Advanced acoustic systems require the installation of tweeters on the A-pillars.
How to install speakers in the rear doors on a Priora car
There is no standard place for installing rear door radio speakers. Therefore, in order to install speakers in the rear doors, it is necessary to cut out part of the door trim. The internal space of the rear doors is limited; installation of speakers with a diameter of 16 and even 13 centimeters requires the manufacture of a spacer. If it protrudes beyond the door, it is sheathed with carpet, leatherette or other material.
Back to rear shelf
Rear shelf - space for oval speakers
Among the manufacturers, pay attention to JBL. If necessary, the holes on the shelf are cut to the size of the speakers to be installed
The material of this part is quite soft, so it cuts easily.
Crib
Instead of a conclusion, let's summarize:
- You can plug in budget sound into the Grant for an amount of 20,000 rubles or more.
- Podiums in the front doors = impossible to open the glove compartment.
- 16 cm speakers in the front doors - cut the metal of the door or prepare spacers with the factory facing of the speakers.
- The acoustic shelf covers the ISOFIX mounts.
- Audio preparation pulls wires only in the doors.
- Article numbers for ordering speaker covers and mounts are in the “Installing speakers in rear doors” section.
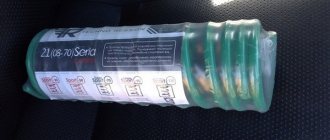
Spacers for 16 cm speakers for Lada Granta, Lada Kalina 2, Datsun at Lada Tuning Shop★ Low prices ★ Call: 8-919-819-40-37 We guarantee delivery throughout the Russian Federation and high quality goods
Specially designed spacers for standard installation of 16 cm speakers in the front doors of Lada Granta and Lada Kalina2 WITHOUT metal cutting.
1. Easy installation - the back side completely follows the curvature of the door metal. The front completely follows the curvature of the door trim.
2. The spacers fit evenly and tightly between the metal of the door and the door trim.
3. Self-tapping screws for attaching spacers included.
4. The speakers are installed on the door trim. The grids that come with the columns are used. The sound goes into the interior and not under the upholstery.
Delivery set: spacers (left and right) and 8 screws for attaching the spacers to the door.
Sending by Post: YES possible
Sending by transport company: YES possible
When installing new speakers in doors, not all standard places can ensure their correct fit. In such cases, podiums or so-called “spacer” rings help out. But their installation also has its own subtleties:
1. The most correct option for attaching the rings (and speakers) is to the metal of the door. In this case, the rings should be of such dimensions that the speaker does not play under the upholstery (as in the figure). Otherwise, the space between the upholstery and the metal of the door will act as a resonator chamber, and the sound is unlikely to please you. And the upholstery itself will noticeably “play along.”
2. Attaching rings (and, accordingly, speakers) to the upholstery is also not the best option. The upholstery does not have the necessary rigidity and will resonate. The only exception may be the mid-frequency speakers of “variety” systems, but only if the upholstery is made extremely rigid, not subject to vibrations and is securely (not on standard pistons) attached to the metal of the door. Standard partially reinforced upholstery does not provide the speakers with proper acoustic design.
3. Don't be afraid to make the podiums heavy (within reason). This will reduce the vibrations that the speaker transmits to the door; the sound with massive podiums is usually much better.
4. When making podiums, try to avoid creating “tunnels” behind the speaker. This negatively affects the sound and causes resonances at certain frequencies. If it is difficult to do otherwise, cover the inside of the podium with any light porous sound-absorbing material.
5. The most common material for podiums is plywood or MDF. Don't forget that this material can absorb moisture in a car, so be sure to protect such elements. For example, they can be painted with any suitable paint.
Information prepared by the automobile news agency “Avtoline”
How to make spacer rings for speakers
You will need: plywood, drill, jigsaw, sealant, varnish.
The thickness, width and other dimensions of spacers for columns are calculated individually in each case, so there are no universal sizes of spacers. The diagrams presented above can act as a template, which will be modified locally.
The total thickness of the spacer is determined individually. Approximately, for a speaker mounting depth of 52 cm, spacer rings 16 mm thick should be suitable.
Procedure:
- Determine the outer and inner diameter of the rings (using a sample or speaker).
- Cut out the spacer slides with a jigsaw, having previously drilled holes for installing the jigsaw blade.
- Fasten all parts of the spacer (if they are composite) using glue or self-tapping screws.
- Try on the door spacers and modify them if necessary. Make sure that the spacers fit tightly to the surface, nothing interferes with the correct positioning of the speaker, and the door trim is installed without problems (modify locally).
- Coat the rings with several layers of varnish.
When installing spacers, make sure that it and the speaker are secured as tightly as possible (stick vibration isolator strips under the ring), this will eliminate the occurrence of vibrations and rattling. Seal all cracks using caulk. It is recommended to combine the installation of spacers with sound insulation of doors.
Let us remind you that new speakers are not the only popular accessory for Lada Priora.
When installing new speakers in doors, not all standard places can ensure their correct fit. In such cases, podiums or so-called “spacer” rings help out. But their installation also has its own subtleties:
1. The most correct option for attaching the rings (and speakers) is to the metal of the door. In this case, the rings should be of such dimensions that the speaker does not play under the upholstery (as in the figure). Otherwise, the space between the upholstery and the metal of the door will act as a resonator chamber, and the sound is unlikely to please you. And the upholstery itself will noticeably “play along.”
2. Attaching rings (and, accordingly, speakers) to the upholstery is also not the best option. The upholstery does not have the necessary rigidity and will resonate. The only exception may be the mid-frequency speakers of “variety” systems, but only if the upholstery is made extremely rigid, not subject to vibrations and is securely (not on standard pistons) attached to the metal of the door. Standard partially reinforced upholstery does not provide the speakers with proper acoustic design.
3. Don't be afraid to make the podiums heavy (within reason). This will reduce the vibrations that the speaker transmits to the door; the sound with massive podiums is usually much better.
4. When making podiums, try to avoid creating “tunnels” behind the speaker. This negatively affects the sound and causes resonances at certain frequencies. If it is difficult to do otherwise, cover the inside of the podium with any light porous sound-absorbing material.
5. The most common material for podiums is plywood or MDF. Don't forget that this material can absorb moisture in a car, so be sure to protect such elements. For example, they can be painted with any suitable paint.
Information prepared by the automotive news agency "Avtoline"
You can install 13 cm or 16 cm speakers in the front doors of the Lada Granta. 13 cm speakers are installed in the doors immediately, without the use of spacers. But to install some 16 cm speakers, you will need to make special spacers, and when installing certain models, you will have to cut the metal of the door.
Basic faults
The desire to install 16 cm speakers on the Priora arises due to the poor sound quality of the standard speakers. In addition to the complete lack of music due to faulty wiring, Prior owners with a factory speaker system have to deal with:
- Wheezing.
- Hissing at high volume.
- Not loud enough.
The problem can be solved by installing high-quality audio speakers, primarily in the front. This upgrade significantly improves the sound of the audio system without requiring significant costs.
Manufacturers and prices of analogues
Car audio systems are varied. Popular among Priora drivers:
- Mystery MJ-650, cost 2000–2500 rubles.
- Alpine SXE-1750s – price from 3000 rub.
- Kicx STC 6.3 – price 3000–3500 rub.
- Pioneer TS-A1600C, Price from 4000 rubles.
- Morel Maximo Coax 6 – approximately 4000 rub.
- Hertz DSK 165.3 – about 5,000 rubles.
Prices are for a set of two speakers. Of course, this is not a complete list. The choice of audio system is limited by the desires and capabilities of the car owner.
Installation of speakers (music) - Tuning and repair of Lada Priora
I decided to install this music in my Priora:
- Head Pioneer DVH-3200UB (I took the DVD and thought I’d install a TV... so it’s been more than a year and still no TV, don’t take the DVD, it’s not needed in the car)
- front Auditor rip 165 (a subsidiary of Focal, the sound is decent, they play cleanly)
- rear Auditor RIP 165C amplifier Blaupunkt GTA 470 (tested by me over many years - powerful and reliable for the money)
There were no questions with installing the head unit: I pulled out the plug, connected the power connectors, antenna, tulips and put them in place
The speakers had to be redone, since the standard places are for 13-inch speakers, and I have 16-inch speakers. In the end I decided to install spacer rings.
We cut the metal of the door. It's a shame, but it has to be done
We install the rear shelf, making sure that nothing touches it. and enjoy good music! The wires from the radio go to the amplifier (unfortunately there are no photos), and from the amplifier they are routed to the speakers
Installation of front speakers 16 cm in diameter, installation of speakers without cuts and podiums
1. Installation of front speakers 16 cm in diameter
2. Installation of 16 columns in Priora without cutting
3. Installation of 16 speakers in a door without podiums
Installation of front speakers 16 cm in diameter
I finally got a radio. Inexpensive radio tape recorder SoundMAX SM-CCR3037.
I bought Mystery speakers.
As a friend advised, I took 16, they should have better sound. But the question is how to install it in the door, because the size is standard for 13 speakers. Today I decided to install it myself. Below is a photo report of the installation process of the front speakers. To remove the trim you will need: a screwdriver and an asterisk wrench. Thanks to AvtoVAZ I will have to buy a set of asterisk keys. There are probably many more such pitfalls.
Looking ahead, the plastic, as well as the clips on the doors of the Priora, are not bad, compared with the former two-piece.
There is a standard place for speakers for 13. There is audio preparation - it’s correct to say two wires for the speakers are brought out.
This piece of paper was already included with the speakers, all I had to do was draw a circle in a convenient place.
For the future, you shouldn’t move the hole as in this picture. The outermost clip on the casing will touch the speaker. I made a hole on the second door without moving it higher to the side. It was inconvenient to attach, but the casing fit perfectly.
To securely attach the speaker to the door sheet, I used 9mm as a backing. plywood
To prevent the clip fastening on the casing from touching, I ground down the edge of the speaker.
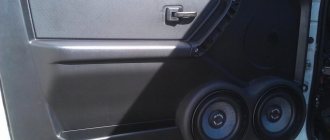
Speaker on spacer
Speaker on plywood spacer
There was no suitable material for sound insulation, but there was one at hand - foil-coated isolon.
That's not a professional thing to say, I agree. But isolon is better than nothing at all.
Everything is ready, you can put on the trim.
Installation of 16 columns in Priora without cutting
The process itself is not complicated, I chose the music carefully, but not expensively, I think this option will suit many.
The basis was a Pioneer head, which I got from my father when I was still driving a 99. A nice thing with AUX and Bluetooth
I don’t remember the name, but it’s not so important, because now most tape recorders play “at the level”, that’s enough for me. The most important incident for me was the purchase of speakers, I walked around a lot, listened, chose
I settled on an Alpine SXE-1750s in the front and an SXE-69c2 in the rear. Good mids, not crunchy lows + tweeters included (albeit without crossovers, but it doesn’t matter, they pull). I read a huge number of blogs about installing 16″ speakers in the front doors. The vast majority of them in the text seemed to hint that the doors would have to be sawed and spacers made. I decided to buy spacers at the car market so as not to suffer and make a mistake. No problem, I thought, and armed with patience, a tool and a jigsaw, I went to the dacha.
In analysis, under the noise already, the bottom layer
Having disassembled the car (doors, sills, back seat), I began to make noise on the doors. For one door, a sheet of foil-coated isolon was enough (forgive me if I named this material incorrectly, the dealer sold it to me under that name). Next, having tried on the column itself in the standard 13″ position, I was pleasantly surprised that the core is almost completely hidden in the door and, together with the spacer, reassures us that there are no hard metalwork sculptures with Zhiguli metal.
Lada Priora Hatchback “Black Style” › Logbook › Speakers in the rear doors!
Good day to all!
Well, two weeks ago I picked up my swallow from the salon, where they did soundproofing and trimmed the seats and ceiling!
Since the door trims had not yet been trimmed at that time, it was decided to embed speakers into the rear doors. I removed the trim from the doors and away we go!
The first thing I did was try out a place for the speakers on the car so that they wouldn’t rest against anything. Having found a place, I took the skins home (to the warmth). Armed with a jigsaw, soldering iron and screwdriver, I started...
Having placed the speaker against the casing, I marked the place where it would be mounted with a marker and began to cut it out. Even before starting work, I realized that the pockets (which were convex and were exactly in a quarter of the space occupied by my speaker) would be in my way very much, so without hesitation I cut them out too.
I tried on the speaker and everything fit perfectly, but there was a small hole in the casing after cutting out the pocket! Taking the soldering iron and the rest of the plastic from the front doors in my hands, since I also installed larger podiums and speakers there, I tried them on in place and started soldering! The result is obvious)))
To prevent the speaker from resting against the iron of the door, I decided to cut out a small podium for the speaker from plywood, and it wouldn’t hurt to make the casing more rigid either.
There were two options:
I left the second option.
Here's the top view:
And just the “podium” itself:
All this is now covered with black leatherette. After installing it on the car, I’ll take a photo of the end result for you!
Until recently, my car only had front speakers and that was quite enough. But recently, in one online store, namely in Ozone, a small amount of 4,000 rubles accumulated in a partner account. I ordered a few trinkets and decided to install rear speakers on my Kalina. I wanted to choose something cheaper and settled on FLI Integrator 5.
The model is described on the website as 75 Watt, but in reality the speakers say 60 Watt. It didn’t take long to install, since I didn’t bother drilling holes in the shelf and installed it in the standard places, fortunately the audio preparation already included cables. I'll tell you a little about the installation process.
- The first step is to remove the plastic mesh that is located at the edges of the shelf. They are very inconvenient to remove and if the circumstances are unfortunate, they can be broken, or rather the latches on which they are attached. So keep that in mind if anything happens.
- After removing the plugs, I inserted 13-centimeter speakers, mounted them on bolts instead of the usual self-tapping screws, and decided to test them.
We install size 16 speakers on the Priora
If your Priora has speakers, most likely their size is no more than 13 cm. Will such acoustics be able to satisfy a true music lover? Do they provide high-quality and good sound? It is not surprising that the owner of this particular car, after purchasing the Priora, first of all decided to replace the speakers in it and install 16-centimeter speakers instead of the standard ones.
It turned out to be much easier to buy them than to install them; there were some nuances here. And although there is nothing complicated in such a modification, let's see how this can be done practically. The first difficulty is that the doors of the VAZ model are designed for size 13 acoustics. So we will have to refine them.
Many car enthusiasts solve this problem simply by using additional podiums that are placed on the doors and into which the acoustics are then mounted. But not everyone likes this method; podiums create additional noise, knocking and vibration. Our owner of the Priora decided not to go down this path; he didn’t need unnecessary and extraneous sounds, so he decided to increase the existing places for acoustics.
The first step is to remove the door trim
We will not focus on this process, since almost every car enthusiast can handle this. The upholstery has been removed and we have a standard hole in front of us (see
photo). What to do next? You can use a jigsaw. If this tool is not at hand, use a regular drill. We take a compass or ruler, use them to mark points for the 15th diameter, then in these places we drill small holes along the contour. Then, using drills of a larger diameter, we drill out the holes already obtained. Make sure that the edges of the holes are smooth; you can use a file to do this.
When the hole for the new acoustics has been made, we move on to the next stage. We need to make sure that the door plane and the sound device are in good contact with each other. To do this, you can make special spacers from plywood, for example, or wood. If you don’t want to tinker, go to a specialized store and buy ready-made spacers. We fasten them with self-tapping screws or “seat” them with sealant. But remember that this must be done carefully and thoroughly, otherwise the speakers will soon begin to rattle.
Now we need to install acoustics directly in the Priora doors. Before doing this, glue some elastic material onto the spacer. For example, it could be splen. The speakers themselves can be attached with self-tapping screws. Now the final stage of our refinement, we need to thoroughly refine the plastic trim on the Priora doors.
Why is this necessary? So that the sound is of high quality and nothing interferes with it. To do this, remove part of the plastic door pocket using a sharp utility knife as a tool. You can also cut a round opening, and then attach a mesh for the speaker in it.
Now all that remains is to connect the acoustics. I will not dwell on this in detail either, since this is a topic for a separate conversation, although there is nothing complicated about this either.
What will we get as a result? More powerful and solid acoustics fit organically into the doors of the Priora. The sound has become much better quality. We didn’t have to install podiums that spoil the appearance of the interior and can rattle.
Find out what the Priora doors will look like after installation and how such speakers sound in this video.
Speakers size 16 in Priora (front doors) - installation
Drivers love high-quality loud music in the car, and Lada Priora owners are no exception. You can achieve good car audio by installing 16-size speakers in the Priora. They are placed in the front doors. This installation often stops, because the size of the holes for the speakers provided on the Priora car is 13 cm. But this obstacle to installing speakers is easily overcome. This is realized by spacers. This article will tell you how to install 16 speakers in a Priora in place of the standard speakers in the front doors with minimal effort.