Replacing the front crankshaft oil seal
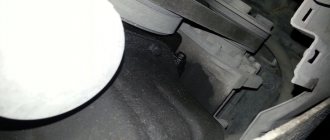
We replace the front crankshaft oil seal when traces of an oil leak appear on the wall of the engine crankcase pan, under the generator drive pulley. Remove the timing belt (see “Replacing the timing belt”).
After removing the belt, do not turn the crankshaft and camshafts so as not to disrupt the engine valve timing.
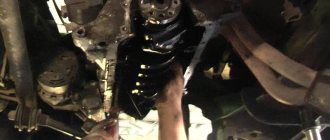
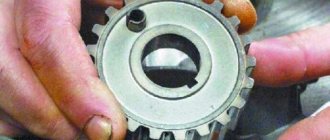
Use a screwdriver to pry off the toothed pulley.
. and remove it from the crankshaft toe.
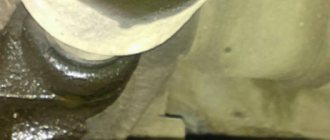
Use a screwdriver to pry off the oil seal (do not damage the crankshaft journal). . and remove it from the oil pump cover. Apply a thin layer of engine oil to the working edge of the new oil seal...
...and press in the oil seal using a tool head or a piece of pipe of a suitable size. We carry out assembly in reverse order. In this case, it is imperative to replace the timing belt.
There are many reasons why oil seals of various shafts, axes, cylinders, pushers, valves and other rotating and rubbing mechanisms become unusable and can no longer serve for their intended purpose - to hold liquids and gases under pressure in a certain volume.
Replacing the front crankshaft oil seal.
If you find traces of oil leakage through the crankshaft oil seals, first check to see if the crankcase ventilation system is clogged and if its hoses are pinched, and if necessary, repair the faults. If the oil leak does not stop, replace the seals. A sign that the front crankshaft oil seal needs to be replaced is oil leaking through its lip. In this case, oil is sprayed out by the rotating crankshaft pulley, as a result of which the entire front part of the engine and the timing belt become oily; You will need: all the tools necessary to remove the timing belt, as well as a straight-blade screwdriver (two), and a hammer.
Reasons for wear of the rear crankshaft oil seal on a Priora
According to experts from large auto repair shops, the most common causes of damage to the rear crankshaft oil seals are three factors:
- Untimely oil change.
- Poor quality product.
- Excessively high temperatures when the engine is running.
In the first case, the following happens: used oil contains a large number of microparticles and contaminants that can cause damage to the elements of the system and the rubber seal in particular.
The second factor is quite common due to the increased number of counterfeit automobile products. Naturally, fakes and defective products do not meet quality standards and do not have wear resistance or long-term tolerance of high operating temperatures.
The third reason is due to severe overheating of the internal combustion engine, which has a detrimental effect on the material of the sealing ring, as a result of which it may partially melt and lose its tightness.
What is the replacement frequency?
The recommended service life of the sealing element is about 140 thousand kilometers. However, such figures are approximate, since with the same mileage of several cars, their operating conditions may vary significantly.
Tools and materials needed to replace valve stem seals
This job requires a separate set of tools. Naturally, a regular service station has them in its “arsenal” at the beginning. But the owner of a Priora who decides to change the valve stem seals on his own will have to get them or rent them:
- A set of spanners (spanners).
- Set of sockets with a knob.
- Valve spring compressor.
- Set of hexagons.
- Screwdrivers.
- Mandrel.
- A device for removing and replacing valve stem seals and crackers.
- Magnet.
- Marker.
- Sealant for gaskets during replacement.
- A set of head gaskets to replace the old ones.
Replacing the crankshaft oil seal Priora 16 valves
Normal operation of the engine, transmission system, clutch and other components of the car is unthinkable without appropriate lubrication. This need is due to a decrease in the process of natural friction between parts. An element such as the crankshaft, the tightness of which is ensured by the crankshaft oil seal (Prior), was no exception.
Unfortunately, situations occur when the sealing element, for one reason or another, allows oil to leak, which leads to significant problems in the functionality of the vehicle systems. We will examine this problem in detail in this article.
Replacement of camshaft seals VAZ 21124, replacement of timing belt
The first time I installed the caps and dried the valves
The Lada
Priora
a VAZ 21126
16
valve engine. Were.
- Injectors.
- Ignition coils.
- Camshaft sensor.
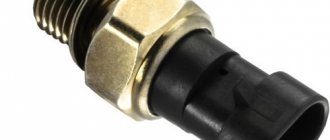
- Oil pressure sensor.
Drain the coolant into a container. Disconnect and move to the side the throttle (gas) cable. Search results for Lada Largus rear replacement. Brake discs. Does the Vesta fret have 8 and 16 valves? And proceed to the next stage.
Replacing the crankshaft oil seal VAZ 2110
Oil seals (cuffs) perform a number of important functions in the operation of the engine and other elements of the car. Outwardly, they resemble simple rubber rings, but hidden inside are flexible and thin springs that fit as tightly as possible to the axis of the crankshaft (inner part) and the engine housing (outer part). To understand the importance of these seemingly simple rubber bands, you need to know the roles of these elements in engine operation:
- Protection of the internal cavity of the engine from external factors: dust, dirt and moisture. External factors can have a very detrimental effect on engine performance.
- Preventing oil from leaking through the exit points of the crankshaft axis from the engine housing. The consequences are similar to the previous case - the engine will not work for a long time without oil.
Thus, any seal failure, be it damage or wear, can lead to costly repairs to the entire engine, so it is important to replace them promptly.
Causes of wear of crankshaft oil seals
The service life of the crankshaft cuffs is 150,000 km, but in fact this has to be done earlier due to premature wear and other mechanical damage. Knowing the main reasons for the failure of these elements, you can extend their service life. We list the main causes of wear on the crankshaft seals:
- Poor quality oil. In addition to negatively affecting the metal parts of the engine, bad oil can also affect rubber parts.
- Engine overheating. If you have caused the engine to overheat, immediately check for leaks where the shafts exit the engine housing.
- Active driving through mud, puddles, etc. – all this can negatively affect the condition of the crankshaft axis seals.
As you can see, there are plenty of reasons, but malfunctions can be avoided if you regularly monitor your car. Next, we will answer the question of how to replace the crankshaft oil seal on a VAZ 2110 in various modifications.
Replacing the crankshaft oil seal on a VAZ 2110 8 valves
In this section we will talk about dismantling the front crankshaft cuff. To carry out this work, you will need a standard set of keys, screwdrivers and, of course, new cuffs. Drive the car onto a lift, pit or overpass, and then start working according to the algorithm:
- Disconnect the negative terminal from the battery. Remove the toothed belt guard.
- Remove the timing belt. If oil is found on it, it also needs to be replaced.
- Remove the right wheel of the car, then remove the alternator belt.
- Unscrew the crankshaft pulley mounting bolt and remove it.
- Drain the oil and replace it.
- Reassemble in reverse order.
Remember that you should not save on these parts - their cost is not high, but replacement work is quite a lot. Plus, a poor quality product can end up causing serious engine damage, which will drain your wallet and waste a lot of your time.
Rear crankshaft oil seal VAZ 2110. Replacement on an 8-valve engine
Replacing the back cuff is a more difficult task compared to replacing the anterior cuff. It will take a little more time and effort to get the job done. Let's take a closer look at how to do this:
- Disconnect the battery.
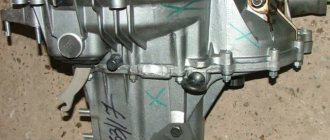
- We remove the flywheel; to do this, you need to disconnect the gearbox from the engine.
- Loosen the bolts securing the holder and carefully press out the part.
- Carefully press in the new cuff. It's better to use a mandrel.
- Coat the joints of the holder with sealant and assemble everything in reverse order.
Priora crankshaft pulley and oil seal
The front crankshaft oil seal of the Priora engine is covered by a drive gear and pulley, as in principle on all engines of a series of Russian-made cars with front-wheel drive. But it must be taken into account that on engines equipped with an ECM (Electronic Engine Control System), the pulley not only drives the generator, sometimes power steering (Power Steering) or air conditioning, but also performs another of the leading control functions.
Pulley, or damper, generator drive, its purpose
The multi-belt drive of the generator and other additional units, when installed on the Priora, in addition to transmitting torque from the crankshaft, performs another important job. To understand its meaning, it is worth making a short digression into the ECM.
The principle of operation of an engine with an “injector”
Cars equipped with an ECM are radically different from conventional carburetor cars. The fact is that the ECU (Electronic Control Unit) is responsible for all the actions of the ignition and fuel supply systems. It is he who gives the signals for the formation of a spark in the cylinder chambers. And it sends signals for fuel injection by opening the fuel rail injectors. The question naturally arises, how does the computer know that it is time to issue commands to turn on the necessary nodes?
The crankshaft sensor informs him of this. It is worth considering this process in more detail. This sensor operates on the long and well-known Hall effect. That is, the signal is interrupted when a special technological clearance on the disc being read coincides with the sensor. On “injection” cars, this signal coincides with TDC (Top Dead Center) of the compression stroke of the first cylinder. So, you need to know that on Russian cars it is the pulley that does the work of the information disk.
Priora rear crankshaft oil seal
Hello everyone who is reading)
Well, the weekend flew by quickly and unnoticed, and I spent the holiday with my beloved) I washed myself and rushed to the garage to repair :))
Replaced the rear knee seal. shaft I already took it off faster, without straining, I took it off calmly for the third time, in a short period of time. In the process of getting to the oil seal, I looked at the clutch disc and then realized that I was still on the clutch. Having measured the distance from the rivets to the friction linings, it turned out to be 0.4 mm (towards the basket, there was wear twice as much as on the side, which faces the flywheel), plus the friction linings have already moved (play), apparently they were broken for 82t. mileage And then I understand that the wishbones are moving away again for later...
At first I planned to install a clutch from Valeo
, but after shopping, the Valeo was in a box from Lada-Detal (and not in its original light green packaging), which scared me away from buying such a Valeo clutch.
As a result, I took a clutch from Luk
(which is installed from the factory).
Tech too. There was a decent leak, drops of oil were falling. I decided to replace it and see how the clutch is, what kind of clutch it is. The clutch costs Luk. The release lever could have been changed, the disc wear was 40%. The oil seal is again Corteco. "made in Italy". By the way... Corteco was founded in 1996 and has nine representative offices located in Germany, Italy, France, Great Britain and Spain, Singapore, USA, China, Brazil, Poland and Turkey. Since 2007, CORTECO has opened its offices in Russia and Serbia.
Because I install the seals by hand without any special tools, then I looked at the condition of the recently changed seals from the belt side... everything is ok. I just don’t understand how the aluminum pipe where the dipstick is located can leak (precisely aluminum, there is a connection there) ... I decided to cover it with Poxypol in the future (in the army I repaired the pan this way and ok)
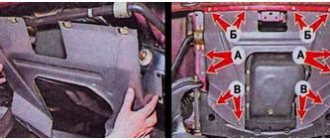
The oil seal body is screwed on with an internal torx 8...be prepared, it is difficult to remove the oil seal without removing it. There is a gasket between the body and the block... I poured sealant.
Symptoms: clutch parts are oily, causing the clutch to slip.
Possible cause: the rear crankshaft oil seal is worn out.
Tools: socket set, wrench set, flat head screwdriver, tools needed to remove the gearbox, tools needed to remove the clutch.
What is a crankshaft oil seal and how does it work?
During operation, all engine parts are fairly well washed with engine oil. Oil lubricates moving parts and reduces friction, extending the life of the mechanism. But what about the parts that come out? A striking example is the crankshaft, part of which is connected to the flywheel. After all, when such a part is brought out, oil can flow through the hole for the rotating shaft.
To prevent this from happening, to seal the hole under the shaft, the designers provided a part made of sealed material - the crankshaft oil seal. It is made of silicone or fluorine rubber and is an o-ring with a diameter equal to the diameter of the crankshaft (in the case of the rear oil seal, approximately 99 millimeters). These materials are heat-resistant, which allows the oil seal to be protected from the harmful thermal effects that occur during friction.
Special inscriptions are made on the outside of the seal. Basically, they talk about the direction of rotation of the crankshaft. This information allows you to correctly install the oil seal when replacing it.
What does it look like
These sealing elements are made of silicone or fluorine rubber. These materials were not chosen by chance - they are resistant to high temperatures, as well as to the effects of lubricating fluids. This allows you to completely avoid the risk of damage to the part due to overheating that occurs during friction. In fact, the part is a ring. The size is equal to the diameter of the engine crankshaft.
Working principle of the crankshaft oil seal
The oil seal is installed in the place of the block where the crankshaft comes out. In classic cars, where the engine is installed along the hood space, and gas distribution occurs via a metal chain drive, the oil seal is installed in the crankshaft shield in front of the support bearing. Front-wheel drive engines or those with a rubber timing belt are installed in the block itself, since shields are not used on them. However, in both cases, the oil seal has the same purpose - to prevent oil leakage from the cylinder block.
Oil pressure is created inside the crankcase, which presses the oil seal against the parts being sealed. Thus, it ensures reliable sealing of the engine against lubricant leakage.
Where installed
The seal is installed on the engine block in the place where the crankshaft exits the block to the outside. This location may differ on different cars and internal combustion engine models. So, on classic rear-wheel drive VAZs, where the engine is located longitudinally and the timing chain drive is chain driven, the oil seal is installed in the crankshaft shield behind the support bearing. On front-wheel drive cars, the engine is located transversely, and the timing mechanism is often belt-based. The oil seal in such engines is installed in the cylinder block due to the fact that there are no crankshaft shields on such internal combustion engines.
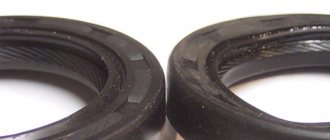
Types of crankshaft oil seals
Manufacturers, in order to save materials or reduce prices, produce crankshaft oil seals with sections of varying complexity. Let's consider their main types, namely:
- with a metal outer surface (option a);
- with a smooth surface (option b);
- with a corrugated surface (c);
- with hydrodynamic effect (d).
Types of oil seals
Model a seals will not provide the same degree of sealing as models b-d, but require less rubber for production and lower cost accordingly. A smooth oil seal (type b), even with sufficient density, will have cavities in the seat; such an assembly may “sweat”. Grooved grooves (like those of oil seal B) are crushed during installation and contribute to a tighter fit in the engine housing, this is an advantage over “bare” oil seals (a).
Special mention should be made of hydrodynamic seals (model d). They are more technologically advanced and efficient. The principle of their operation is as follows:
- special notches of small depth with the direction of rotation are applied to the inner plane;
- high crankshaft speeds swirl the oil in the area of the inner plane of the statically fixed oil seal, the oil flow hits the internal notches and receives the direction of movement from it;
- Such processes improve the efficiency of stuffing box units.
In order to further seal the oil seal-engine housing assembly, it is recommended to apply sealant to the outer surface of the oil seal before installation.
The crankshaft oil seal is installed at the points where the shaft exits the engine and is secured by pressure plates or adjacent engine components. The crankshaft has two oil seals: front and rear. The rear oil seal, as a rule, has a separate housing - a “flange”.