07/17/2021 25,866 VAZ 2107
Author: Ivan Baranov
Many VAZ 2107 owners, in order to save on car service costs, master some repair and maintenance operations for their car. Sometimes during such operations it is necessary to remove the crankshaft pulley VAZ 2107 9) injector. The article provides detailed instructions and attaches a video that talks about replacing the crankshaft pulley when there is an oil leak.
[Hide]
In what cases should the pulley be removed?
Most often, it is necessary to dismantle the crankshaft pulley when changing oil seals. The role of the O-rings is to prevent oil from the crankcase from reaching engine components. Over time, the seals wear out, crack, and as a result, oil leaks appear. To fix this, you need to change the seals. During this procedure, you have to remove the crankshaft pulley.
Also, the need to dismantle the crankshaft disk arises when replacing the timing belt on a VAZ 2107 injector. It is changed according to the regulations specified in the operating instructions for the VAZ 2107 injector, as it wears out after a visual inspection or if it breaks. During a technical inspection, the pulley must be inspected to identify any defects. If chips or scratches are found, the part should be replaced.
The procedure for removing the product itself is not difficult, but some problems arise.
Firstly, with access. The pulley we are interested in is located in the lower part of the engine compartment behind the generator. It is difficult to get to because other engine components are in the way. Before removing the pulley, you need to remove the alternator and power steering belt.
Secondly, the crankshaft pulley mounting nut is very difficult to unscrew. When it is put in place, it is screwed with great effort. This is necessary so that it does not unscrew accidentally while the car is moving, as this can lead to expensive repairs. While the engine is running, the nut is tightened even more. In addition, the process is aggravated by high operating temperatures, at which oil coking and metal corrosion occur under the influence of the external environment.
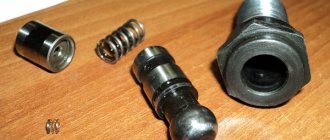
Crankshaft pulley nut size 2107
Pay for goods by credit card, using QIWI, Yandex.Money or WebMoney and save on your purchase from 4%, avoiding postal and bank commissions
This product was chosen by 1 customer
The original crankshaft pulley mounting nut for VAZ 2104, 2105, 2107, Chevrolet Niva, is intended to replace the failed standard one.
Weight, kg: 0.1 Dimensions, cm: 4 x 4 x 3 Volume, m3: 0.00005
Removal instructions
With the clutch disengaged, the crankshaft can be easily turned with a wrench.
To carry out the removal procedure, it is necessary to secure the shaft from turning.
There are special devices that are bolted to the pulley into the technological holes, preventing the shaft from turning. If there is no such device, then you need to install supports under the wheels and place the car on the fourth. You can also secure the crankshaft flywheel by inserting a long screwdriver or pry bar between its teeth.
Removal and Installation
On a VAZ 2107, the injector crankshaft pulley is held in place by a fastening nut. Another name for it is ratchet. To remove the crankshaft pulley, you will need to unscrew this nut. It is better to carry out work on an inspection ditch or overpass. The tools you need to prepare are:
- set of keys and sockets;
- socket or socket wrench 38 (36);
If the threaded connection is difficult to unscrew, there are special products, after application of which you can easily unscrew the fasteners. These products include WD oil. You can also use vinegar essence or brake fluid.
Work on dismantling and installing the crankshaft pulley on a VAZ 2107 injector consists of the following steps:
- The car must be set to the handbrake.
- The crankshaft should be fixed by engaging 4th gear.
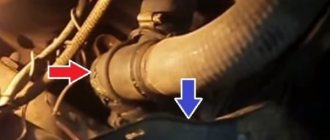
- After unscrewing the lock bolt and loosening the tension nut, you need to remove the generator belt.
- To get to the crankshaft you need to remove the front right wheel.
- In the upper part of the engine compartment, you need to dismantle the air filter and remove the engine mud shield.
- Next, you need to secure the crankshaft from turning using one of the methods described above.
- Before unscrewing, the nut should be tapped on all sides. Using a spanner, unscrew the crankshaft pulley mounting nut by turning it counterclockwise.
- If you cannot unscrew it manually, you can use another method. To do this, you need to put the car in neutral and remove the spark plugs. The wrench with the extension should be installed so that the end of the extension rests against the spar or floor in the direction of the shaft movement. At this time, you need to turn the ignition key to give a short impulse.
How to unscrew the ratchet nut of a VAZ 2107
Every second car enthusiast who tries to repair his favorite four-wheeled friend with his own hands has encountered the problem of how to remove the crankshaft pulley. After reading the instructions in the maintenance and repair manual, at first glance, the procedure does not seem complicated, however, when you first try to unscrew the ill-fated bolt, it turns out that this is not so easy. It is completely unclear how to fix the crankshaft so that it does not rotate. Another problem is where is the best way to get to the treasured bolt. Removing the crankshaft pulley causes a lot of trouble because it is too tight. There is a high probability of damaging many parts of the engine compartment or the paintwork of the body.
The problem is that the crankshaft pulley bolt (or nut, depending on the model) is tightened with great force during installation. This is done so that it does not unwind spontaneously, since if unscrewed, serious damage and expensive repairs cannot be avoided. The degree of tightening gradually increases as the engine operates and is aggravated by sticking, coking, and corrosion.
In reality, the entire dismantling process can take 10-15 minutes, but there are some techniques you need to know and use. Different motor models use either a bolt or a nut to secure the pulley. Each option should be considered.
How to unscrew the crankshaft pulley nut?
The nut at the end of the crankshaft holding the pulley is a sign of the engine of a classic rear-wheel drive car like VAZ from model 2101 to 2107, Niva and the like. Such a nut is also called a “ratchet”, since it can have ledges for a “crooked starter”.
It is better to do the work above the inspection hole. The crankshaft should be secured by placing the gearbox in 4th gear and applying the parking brake. You should stock up on the following tools in advance:
While under the car, try to unscrew the nut with a wrench with a sufficiently long lever. If the attempt is unsuccessful, put the gearbox in neutral and proceed as follows:
As a rule, on the first or second attempt the nut comes off and is then unscrewed with a regular wrench. Don't forget to loosen and remove the alternator belt.
How to unscrew the crankshaft pulley bolt?
The bolt holding the pulley predominates in engines in front-wheel drive cars, when the block is located perpendicular to the axis of the car. In this case, you will have to tinker more, since it is more difficult to get to the bolt. To work you should prepare:
In search of an answer to the question of how to remove the crankshaft pulley, many car enthusiasts begin to look for an opportunity to do this without prior preparation. By definition, such attempts cannot be successful.
In order to correctly remove the pulley, you must perform the following manipulations::
Video “Replacing the crankshaft pulley on a VAZ classic”
This video talks about oil leakage due to wear on the crankshaft pulley.
The crankshaft on a VAZ 2105 is removed either to replace it with a new one or to replace its bearings. To carry out repair work, the car must be driven into an inspection hole, overpass, or use lifts. We also prepare a standard set of tools. The procedure for carrying out repair work is as follows:
- After driving the car into a pit, remove the oil pan protection, then drain the oil and remove the pan itself.
- Next we need to remove the crankshaft rear oil seal holder.
- Remove the camshaft drive belt cover and its sealing gasket.
- Remove the camshaft drive chain.
- Now we need to remove the connecting rod caps; first we need to mark them so that each cap corresponds to its own connecting rod.
- Unscrew the bolts securing the covers, remove the cover and liner. Push the connecting rod with the piston up the cylinder.
- We do the same with the main bearing caps. We first mark them relative to their seats, after which we use a seventeen socket wrench to unscrew two bolts of their fastening. The rear cover of the crankshaft main bearing has two half rings in its grooves - one steel-aluminum ring, and the second cermet. To remove them, pry up the ends of the half-rings with a flat-head screwdriver.
- When unscrewing and removing the covers, hold the crankshaft with your hand. Then remove the crankshaft from the car engine. When removing the covers, note that all of them, except the third one, have a groove. All covers have factory marks that correspond to their serial number (the report is taken from the toe of the crankshaft). The fifth cover has two marks, which are spaced along the edges.
- After the crankshaft is removed. We remove the liners from the seats of the main bearings.
This completes the process of disassembling and removing the crankshaft of the VAZ 2105. In general, repair work related to the piston group, boring the crankshaft and replacing liners and main bearing caps is recommended to be carried out with the appropriate experience and knowledge, or contact a specialized workshop.
What is a crankshaft sensor ? In order to synchronize the ignition operation and fuel supply to the cylinder blocks on an injection engine, it is necessary to determine the crankshaft speed. This is precisely why you need a crankshaft position sensor , which is installed opposite a special synchronization disk mounted on the crankshaft.
Replacing the front silent block of the crankshaft on a VAZ 2101-VAZ 2107
Note! Today there are two replacement methods: fast and slow. Although the second method requires more time, it is more accurate. The choice and decision are yours! (The slow method is described in the article, and the fast method is demonstrated in the video at the end of the article).
Removal
1) At the beginning of the operation, remove the camshaft cover from the car engine. (read more about the process in the article: “Replacing the chain tensioner shoe”, in paragraphs “1-8”)
Note! If you have experience in replacing oil seals, then you do not have to remove the cover, but replace the oil seal immediately on the installed cover.
Keep in mind that there will be little space to replace the oil seal; there is a possibility that the oil seal will be pressed into the drive cover at an angle. Then you will need to replace the oil seal again with the cover removed.
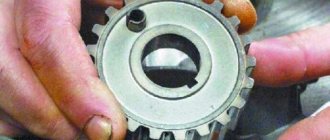
2) After removing the cover, carefully remove the silent block using a hammer and bit.
Note! Remove the oil seal only from the inside of the cover, otherwise removal will be problematic!
Installation
1) Using engine oil, lubricate the new part and install it in place on the outside of the cover. When installing the oil seal, be sure to orient its working edge towards the centering protrusions indicated by the letter “a”.
Note! In the photo below you can see that the working edge differs only in the presence of a spring!
2) Next, using a mandrel of a suitable diameter and a hammer, press in the oil seal until it stops.
3) Now pick up the previously removed camshaft cover gasket and assess its condition. If there is severe compression or deformation, replace the old gasket with a new one.
Note! To ensure that leaks through the gasket are eliminated in the future, it is recommended to apply a thin layer of silicone sealant on both sides.
For ease of installation of the lid, we recommend using glue to glue the gasket to the lid itself - it will not fly off.
4) Next, install the cover together with the gasket installed on it. Install the bolts and nuts securing the cover.
5) Then, using a special mandrel, center the drive cover so that it is level with the crankshaft.
Note! If there is no mandrel, use the previously removed crankshaft pulley and center the cover: install the pulley and tighten the fastening nut.
6) Lightly tighten the bolts and nuts securing the cover.
7) Finally, wrap them crosswise.
 Finally, tighten the oil pan to engine bolts.
Note! Install the remaining parts in the reverse order of removal.
Additional video
The video will help you understand in detail the process of replacing the oil seal; detailed instructions are provided here. Enjoy and useful viewing!
Removing the crankshaft
on the injector of VAZ 2107
Many VAZ 2107 owners, in order to save money on car service, master some repair and maintenance operations for their cars. Sometimes during such operations it is necessary to remove the crankshaft VAZ 2107 9) injector. The article provides detailed instructions and includes a video that explains how to replace a crankshaft pulley with an oil leak.
Signs of a malfunction of the VAZ 2107 crankshaft position sensor
- The first thing that may indicate the imminent death of the crankshaft sensor is an arbitrary decrease or increase in engine idle speed.
- Severe reduction in engine power
- Unable to start the engine
Removing the crankshaft position sensor
- Disconnect the contact chip from the sensor by first releasing the latch
- Using a Phillips screwdriver, unscrew the sensor mounting screw.
- After removing the crankshaft position sensor, check its operation using a multimeter
Checking the crankshaft position sensor VAZ 2107
If the crankshaft oil seal on a VAZ 2107 is damaged or worn, oil will leak from its seat. With severe wear, you will even have to often add more to the engine, since the level can drop quite quickly. In this case, it is necessary to replace the oil seal. You can do this yourself, having the necessary tools at hand, the list of which will be given below:
- Key for 41
- Chisel
- Flat blade screwdriver
- Puller
- Hammer
Removing the crankshaft pulley
- So, first of all, unscrew the crankshaft pulley, holding it from turning with a chisel (or other tool).
- Then unscrew the nut completely by hand.
Next, you can proceed directly to dismantling the pulley itself. It can be pryed off from different sides with a wide flat screwdriver, or in the fastest way - using a special puller:
Now you can remove it completely:
Replacing the front oil seal
Next, you can begin replacing the oil seal. To do this, you can pry it off with a screwdriver, or do it using one of the hooks of this same puller:
The price of a new oil seal is no more than one hundred rubles, so it’s not particularly hard on the wallet! You need to install a new one only after wiping the seat first, and do everything extremely carefully. First, we insert it exactly into its place, and then we put the old oil seal on it - and carefully punch it in a circle with a hammer until it sits tightly!
The front oil seal of the VAZ 2101-2107 engine is used to prevent engine oil leaks in the place where the accessory drive pulley is attached to the end of the crank. Although the sealing lip is made of high-quality fluorine rubber, over time its working edge wears out and lubricant leaks into the gap. Today we will share a method for replacing the front crankshaft oil seal of a VAZ “classic”. Even a novice driver can cope with the job, because to do this you don’t even have to remove the camshaft drive cover from the engine.
Select the vehicle modification to search for the crankshaft pulley
- Lada Riva 2105 2105 Sedan 1200 Junior/L 60 HP id3048 Engine: volume - 1.2 l, power - 60 hp, code - VAZ,WAS2105, type - petrol, model - BA3 2101. Drive: rear. Year of manufacture: 1981-2004
- Lada Riva 2105 2105 Sedan 1300 Spezial/L 65 HP id3049 Engine: volume - 1.3 liters, power - 65 hp, code - VAZ,WAS2105, type - petrol, model - BA3 2105. Drive: rear-wheel drive. Year of manufacture: 1981-2004
- Lada Riva 2105 2105 Sedan 1300 67 hp id45110 Engine: volume - 1.3 l., power - 67 hp, type - petrol, model - BA3 2105. Drive: rear. Year of manufacture: 1983-1987
- Lada Riva 2105 2105 Sedan 1500 67 hp id14045 Engine: volume - 1.5 l., power - 67 hp, type - petrol, model - BA3 2103. Drive: rear. Year of manufacture: 1993-2004
- Lada Riva 2105 2105 Sedan 1500 71 hp id51311 Engine: volume - 1.5 liters, power - 71 hp, type - petrol, model - BA3 2103 (KAT). Drive: rear. Year of manufacture: 1987-1988
- Lada Riva 2105 2105 Sedan 1500 S 71 hp id6658 Engine: volume - 1.5 liters, power - 71 hp, code - WAS21093, type - petrol, model - BA3 21083. Drive: rear. Year of manufacture: 1989-2004
- Lada Riva 2105 2105 Sedan 1500 Special 75 HP id3050 Engine: volume - 1.4 l., power - 75 hp., code - VAZ2105, WAS21053, type - petrol, model - BA3 2103. Drive: rear. Year of manufacture: 1985-2004
- Lada Riva 2105 2105 Sedan 1500 67 hp id45111 Engine: volume - 1.5 liters, power - 67 hp, type - petrol. Drive: rear. Year of manufacture: 1983-1993
- Lada Riva 2105 2105 Sedan 1600 76 hp id7447 Engine: volume - 1.6 l., power - 76 hp., code - WAS21074, type - petrol, model - BA3 2106. Drive: rear. Year of manufacture: 1988-2001
- Lada Riva 2105 2105 Sedan 1700 i Classic 84 hp id5700 Engine: volume - 1.7 liters, power - 84 hp, code - VAZ2107, type - petrol, model - B032123. Drive: rear. Year of manufacture: 1996-2004
In the next step, for an expanded selection, you can enter the vehicle's Vin code to go to illustrated catalogs, where you can find the layout of parts down to the bolt and duplicates that are not in the catalog of analogues.
See also other spare parts
When and why to change the front oil seal
The manufacturer recommends replacing the front crankshaft oil seal of VAZ 2101-2107 engines every 150,000 km. However, in practice such replacement has to be performed more often. Accelerated wear of the sealing element and the appearance of engine oil leaks are caused by:
- skewed oil seal during installation;
- loss of elasticity due to engine overheating;
- increased radial runout of the drive pulley of mounted units;
- use of low-quality motor oil;
- wear on the crankshaft pulley hub.
In addition, we cannot rule out hardening of the cuff due to natural aging and the possibility of a manufacturing defect - unfortunately, the quality of parts for rear-wheel drive VAZ models leaves much to be desired.
It is impossible not to notice damage to the sealing element - the rotating pulley scatters oil in the front of the engine and throughout the engine compartment. However, do not think that such a malfunction only leads to oiling of the units and a decrease in the lubricant level. If engine oil gets on the generator belt and other rubber parts, it can quickly render them unusable.
Keep in mind that the appearance of a leak through the engine seals is provoked by another factor - increased crankcase gas pressure. For this reason, be sure to check the cleanliness of the engine ventilation system.
Something else useful for you:
Step-by-step instruction
Due to the limited space between the front of the engine and the radiator, it is difficult to press in a new oil seal without distortion. For this reason, experts recommend replacing the sealing element with the front engine cover removed. Of course, doing this on a mechanic’s workbench is much more convenient, but there are also pitfalls here. As practice shows, after such dismantling it is difficult to restore the tightness along the junction line of the oil pan, and in addition, there is a danger of breaking the internal threads in a rather delicate duralumin cover.
For this reason, we recommend using the more common and less labor-intensive method, in which the damaged oil seal is replaced directly on the engine. This work will require your attention and accuracy. It is more convenient to perform all manipulations on a lift, overpass or inspection pit.
- Put the car on the handbrake and set the gear lever to fourth speed.
- Disconnect the power terminals and remove the battery from the vehicle.
- Using a 17mm socket and a long wrench, loosen the self-locking nut securing the generator to the adjusting bar.
- Having installed a pry bar or the same wrench between the generator and the right subframe (spar), use it as a lever to move the generator towards the cylinder block. This will allow you to loosen the serpentine drive belt of the mounted mechanisms and remove it from the engine.
- Moving under the car, remove the mudguard and oil pan protection.
- Unscrew the ratchet nut using a special 38 socket wrench. In some cases, the fasteners grab so tightly that even the foot brake cannot be used to block the wheels. In this case, mechanics recommend removing the starter and using a strong wrench to block the flywheel. To remove a stuck nut, the wrench is extended with a suitable pipe. Please note that the crankshaft shank has a right-hand thread, so turn the ratchet counterclockwise.
- Remove the crankshaft pulley. For these purposes, use a mounting spatula, prying the part from different sides and using the tool as a lever. However, do not overdo it, as if you press too hard, you will break the front engine cover.
To play it safe, make sure you have a puller in your arsenal. With its help, you can easily and safely dismantle even those parts that are installed with a noticeable interference. - Clean the front part of the cover, the oil seal and its seat, otherwise dirt will get inside the engine when removing the sealing element.
- Using a strong, wide-bladed screwdriver, use a strong, wide-bladed screwdriver to pry up the seal with support from the oil seal socket. Tapping the handle of the tool, remove the damaged part.
- Before installing a new oil seal, wipe its seat until it shines - this will make installation easier in the future. If the damaged oil seal is removed too easily, this indicates wear of the socket in the camshaft drive cover. To ensure sealing in the future, apply a layer of automotive sealant to the side surface of the new seal.
- Carefully install the oil seal into place. Make sure that it does not warp and fits evenly into the socket.
- Using a suitable mandrel (you can even take a wrench to remove the ratchet if it is the right thickness), carefully press the oil seal into place with a hammer.
- Carefully inspect the crankshaft pulley. If there is significant wear on its working part, then replacing the oil seal will not eliminate the problem of oil leakage. In this case, replace the part.
- Before installing the pulley, lubricate the inner and outer surfaces of the pulley hub with engine oil. Lubrication will make it easier to install the part on the crankshaft, and most importantly, it will prevent premature wear of the working edge of the oil seal in the first minutes of engine operation.
- While turning the pulley, align the groove with the key installed in the groove of the crankshaft. By shaking and simultaneously pressing on the part, ensure that the hub fits inside the oil seal.
- Screw the ratchet nut all the way in by hand and tighten with a wrench. According to the manufacturer's recommendation, the tightening torque does not exceed 101.3-125.64 N×m (10.34-12.8 kgf×m).
- Reinstall and tension the poly-V-belt of the accessory drive. Remember that excessive tension will cause accelerated wear on the alternator and coolant pump bearings. The deflection of the belt between the pump and the crankshaft with a pressure force of about 10 kgf x m is 12 - 17 mm.
- Tighten the generator mounting nut.
- Install the battery and connect it to the vehicle's on-board network. At this point the repair is considered complete.