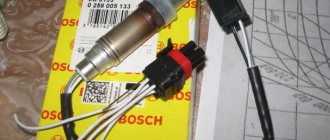
The VAZ 2114 stove valve , as on many other cars, is designed to shut off and supply hot antifreeze to the small circuit of the cooling system. The technical serviceability and condition of this part, just like the heating system as a whole, depends on both operating conditions and the quality of the coolant. And the heater tap itself should, preferably, not be a factory model. We will try to give answers to the most important questions on this topic.
The device of the VAZ stove tap
Operating principle of the device
The heater valve serves as a tool for controlling the flow of coolant that flows through the radiator of the so-called heater. It is opened with the onset of cold weather, when there is a need to warm up the windshield and interior. Passing through the radiator, the working medium heats the air pumped by the fan. In the warm season, there is no need for additional heating, so the tap must be turned off.
It is easy to control the flow of warm air when the system is working properly: in winter, to open the tap, just move the lower lever to the right (“red zone”) on the climate control panel in the cabin. Accordingly, in the summer, in order to shut it off, you need to turn the tap to the left (“blue zone”). We should not forget that we also need a stove in the summer. At this time, it serves for ventilation. The damper, which blocks the flow of coolant in a small circle through the radiator or bypasses it, is actuated by a cable from a lever on the panel.
Where is the heater valve on the VAZ 2114
The place where the faucet of the stove is located on a VAZ 2114 or on a VAZ 2109
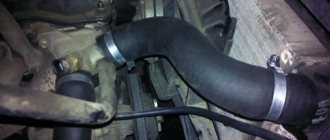
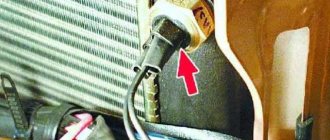
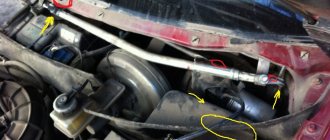
In order to see the location of the heating valve on the VAZ 2114, it is enough to remove the right side trim at the bottom under the center console at the feet of the front passenger . You will see it on the partition with the engine compartment, there are 2 more pipes that go to it. In some cases, in order to understand the nature of the breakdown of the heater tap on the Samara, you can also crawl up from the driver’s side (after first removing the side plastic cover from the dashboard and removing the carpet). But keep in mind that when dismantling you will also need to find its location in the engine compartment, under the steering rack . By the way, it’s more convenient to get there from underneath the car, since you’ll have to unscrew a couple of nuts from the studs securing it (located near the exhaust pipe, in the area of the oxygen sensor) with a “10” key and remove the two supply pipes.
The new faucet of the VAZ stove is leaking from under the damper
How to understand that the faucet is leaking
The main symptom that the heater tap is leaking is a characteristic smell in the cabin and a puddle under the front passenger's rug. It is true that a similar situation can arise in the event of a leak in the heater radiator. So if you see water under the rug, check these two elements of the cooling system first. As a rule, traces of antifreeze leakage on the faucet are visible to the naked eye; you just need to remove the plastic cover. Also, in some cases, a leak from a faucet can be observed visually, but to do this you will first have to get close to it and then move the valve by the cable (this situation can even arise on a new but defective part). When the problem with the faucet is only at an early stage, then a symptom that it is time to replace it is poor performance of the heater (when the damper is fully open, it blows barely warm or vice versa). This situation occurs if the valve is stuck in one position or is leaking (not closing enough).
The stove doesn't heat well
Car owners begin to notice that the stove is not heating well only with the arrival of cold weather, although the reasons for poor performance arise much earlier. Most often, the stove in a car heats poorly due to: airing, a faulty pump, a clogged radiator and cabin filter Read more
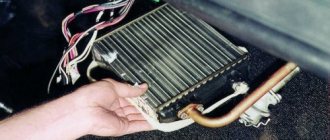
Removing the radiator of the VAZ 2114 stove
Replacing the VAZ 2114 heater radiator occurs if the old radiator leaks. If it is intact, you may need to remove the heater core to clean it from dirt. More details
Stove
The radiator of a car's interior heater is called a stove. Designed for heating inside the car and is part of the small engine cooling circle. When functioning properly, the temperature should not fall below +16 even at -25°C. Main fault.. Read more
Replacing the pump
The water pump or water pump plays an important role in the cooling system of a car. Failure of the pump leads to overheating of the engine and breakdown of parts.
Service 644 specialists easily cope with any tasks thanks to experience, modern equipment and teamwork. We offer services for replacing the pump of Russian and imported cars.
Call us
| For detailed information, please call: +7,. Lyubertsy, st., Krasnaya street, 1 “Yu” |
You can safely contact Service 644 if you need to replace the pump on an imported car. Highly qualified craftsmen perform: pump replacement for Ford, pump replacement for Skoda, pump replacement for Opel, pump replacement for Mercedes, pump replacement for Chevrolet, pump replacement for Toyota, pump replacement for BMW, pump replacement for Hyundai, pump replacement for Renault and others foreign cars. We offer: replacement of pumps for VAZ 2107, VAZ 2109, VAZ 2110, VAZ 2112, VAZ 2114, VAZ 2115, replacement of pumps for Niva and other cars of domestic manufacturers.
Prices for pump replacement in Service 644 are the lowest in Lyubertsy and VAO Lyubertsy.
List of prices for locksmith work
Chassis, Suspension (Cost, Prices for work, Price)
| Name of works | Price |
| Car chassis diagnostics | from 500 |
| Replacing rear shock absorber | from 1000 |
| Replacing the front shock absorber | from 1200 |
| Replacing the steering knuckle | from 1200 |
| Replacement of rear wheel hub bearing | from 700 |
| Replacing the front wheel hub bearing | from 1200 |
| Wheel Bearing Adjustment | For free |
| Replacing the front suspension spring | from 1200 |
| Replacement of rear suspension spring | from 500 |
| Replacing the rear c/o lever | from 500 |
| Replacing the front wishbone | from 500 |
| Replacement of trailing arm c/blocks | from 1300 |
| Replacement of silent blocks of rear longitudinal levers | from 1500 |
| Replacing rear stabilizer bushings | from 500 |
| Replacing front stabilizer bushings | from 500 |
| Replacing the front shock absorber strut support | from 1300 |
| Replacing the front suspension ball arm support | from 500 |
| Replacing the front stabilizer | from 1000 |
| Replacing the rear wheel hub | from 1000 |
| Replacing the front wheel hub | from 1000 |
| Replacement of rear stabilizer link | from 500 |
| Replacing the front stabilizer link | from 500 |
| Replacing the support bearing | from 1300 |
| Replacing the rear beam (bridge) | from 3000 |
| Replacing the front subframe | from 1400 |
| Replacing the drive (CV joint) | from 1300 |
| Replacing the front lever silent block | from 1400 |
| Re-pressing the s/w with the part removed | from 300 |
Steering (Cost, Prices for work, Price)
| Name of works | Price |
| Changing the oil in the power steering with flushing | from 700 |
| Replacing the power steering oil reservoir | from 500 |
| Replacing the steering rack | from 2000 |
| Replacing the tie rod boot (rack) | from 700 |
| Bleeding the steering rack | For free |
| Replacing the tie rod (with tip, without tip) | from 700 |
| Replacing the high pressure hose of the power steering pump | from 500 |
| Replacing the power steering reservoir hose | from 500 |
| Replacing the tie rod end | from 500 |
| Replacing the power steering pump | from 1800 |
| Replacing the steering propeller shaft | from 1000 |
| Replacing the steering wheel | from 800 |
| Replacing the steering column | from 2900 |
Engine (Cost, Work prices, Price)
| Name of works | Price |
| Oil change + Oil filter replacement | from 500 |
| Removing and installing engine protection | from 200 |
| Replacing the air filter | from 50 |
| Replacing spark plugs (without removing the manifold) | from 500 |
| Generator replacement | from 1000 |
| Starter replacement | from 1000 |
| Replacing the pump | from 500 |
| Replacing the cylinder head gasket | from 4500 |
| Replacing the intake manifold | from 1000 |
| Exhaust manifold replacement (front) | from 1300 |
| Exhaust manifold replacement (rear) | from 2500 |
| Replacing injector nozzles | from 1000 |
| From the engine sump | from 2000 |
| Replacing the oil pump | from 500 |
| Replacing the side engine mount (engine mount) | from 500 |
| Replacing the rear engine mount (engine mount) | from 500 |
| Replacing the front engine mount (engine mount) | from 500 |
| Replacing the valve cover gasket | from 700 |
| Replacing the oil pan gasket (ENGINE) | from 1900 |
| Replacing the timing belt | from 2500 |
| Replacing the timing belt + pump and seals | from 3800 |
| Replacing the Attachment Belt | from 500 |
| Replacing the timing chain | from 5000 |
| Replacing the alternator belt | from 500 |
| Replacing the power steering belt | from 500 |
| Replacing the attachment belt tensioner pulley | from 500 |
| Replacing the front crankshaft oil seal (with the pulley removed) | from 400 |
| with engine | from 8000 |
| Cylinder head bulkhead | from 2500 |
| Computer diagnostics | from 500 |
| Compression measurement | from 1000 |
| Injector flushing | from 1500 |
| Engine bulkhead | from 8000 |
| Restoring spark plug well threads | from 1100 |
timing belt replacement cost, timing belt replacement Megan, timing replacement cost, timing replacement price, timing belt replacement, timing belt replacement price, timing belt replacement, timing belt replacement cost, timing belt replacement Megan, timing belt replacement cost, how much does it cost to replace a timing belt, how much does it cost timing belt replacement, timing belt replacement mega, timing belt replacement cost, timing belt replacement cost, timing belt replacement cost, timing belt replacement cost
Transmission and manual transmission (Cost, Prices for work, Price)
| Name of works | Price |
| Changing the oil in a manual gearbox | from 500 |
| Clutch replacement | from 3000 |
| Replacing the clutch (with subframe removal) | from 4500 |
| Replacing the manual transmission shifter | from 1000 |
| Replacing the flywheel (with the gearbox removed) | from 500 |
| Replacing the manual transmission pan gasket | from 1500 |
| Checking the gearbox oil level | For free |
| Replacing the speed sensor | from 300 |
| Diagnostics of the gear shift mechanism | For free |
| Replacing the rocker seal | from 500 |
| Replacing the CV joint axle shaft seal (Gearbox-MECHANICAL) | from 1200 |
| Replacing the CV joint boot | from 1300 |
| with drive | from 700 |
Brake system (Cost, Prices for work, Price)
| Name of works | Price |
| Replacement of rear brake discs (per pair) | from 1000 |
| Replacement of rear brake discs + rear pads (per pair) | from 1000 |
| Replacement of front brake discs (per pair) | from 1000 |
| Replacement of front brake discs + front pads (per pair) | from 1000 |
| Replacing rear brake pads (DRUMS) | from 1000 |
| Replacing rear brake pads (DISCS) | from 500 |
| Replacing front brake pads | from 500 |
| Checking the brake fluid density | For free |
| Replacing the master brake cylinder | from 1500 |
| Replacing the vacuum brake booster | from 1500 |
| Checking the parking brake operation | For free |
| Adjusting the parking brake | from 300 |
| Replacing the central parking brake cable | from 500 |
| Replacing the left parking brake cable | from 800 |
| Replacing the right parking brake cable | from 800 |
| Replacing the rear brake cylinder (drum) | from 500 |
| Replacing the front brake cylinder (caliper) | from 700 |
| Replacing the rear brake hose | from 500 |
| Replacing the front brake hose | from 500 |
| Replacing brake fluid with bleeding and flushing | from 1000 |
| Caliper bulkhead | from 1000 |
Fuel system (Cost, Work prices, Price)
| Name of works | Price |
| Checking the electric fuel pump | from 500 |
| Flushing the fuel tank (with the tank removed) | from 1000 |
| Replacing the fuel filter (external) | from 300 |
| Replacing the fuel filter (submersible) | from 1500 |
| Replacing the fuel line (hose, tube) | from 500 |
| C/U fuel tank | from 2000 |
| Replacing the electric submersible fuel pump | from 1000 |
| C/U electric submersible fuel pump | from 1000 |
| Replacing the external electric fuel pump | from 500 |
| C/U external electric fuel pump | from 500 |
Cooling system (Cost, Work prices, Price)
| Name of works | Price |
| Replacing the coolant (or flushing) | from 1000 |
| Replacing the cooling system expansion tank | from 500 |
| Replacing the heater radiator (without removing the dashboard) | from 2000 |
| Replacing the heater radiator (with removal of the dashboard) | from 7000 |
| Replacing the temperature sensor | from 300 |
| Replacing the thermostat housing | from 700 |
| Replacing the cooling system pipe | from 300 |
| Replacing the thermostat housing gasket | from 700 |
| Replacement of cooling radiator (automatic transmission, AIR CONDITIONING) | from 1000 |
| Replacing the cooling radiator (CAT-AUTOMATIC) | from 1000 |
| Replacing the cooling radiator (Gearbox-MECHANICAL) | from 1000 |
| Replacing the thermostat | from 7000 |
| Checking the condition of the coolant | For free |
| Checking coolant leaks | For free |
| Flushing cooling radiators and air conditioning. external | from 1000 |
| Replacing the water pump (pump) (timing removed) | from 500 |
| Replacing the interior heater radiator hose | from 500 |
Prices for muffler repairs
Muffler replacement
| Replacing the muffler corrugation | From 2000 |
| Replacing the lambda probe (oxygen sensor) | From 300 |
| Replacing the catalyst under the bottom | From 1000 |
| Replacing the catalyst at the manifold | From 3500 |
| replacing the catalyst with a flame arrester under the bottom | From 2000 |
| replacing the catalyst with a flame arrester at the manifold | From 4000 |
| Replacing the resonator, rear muffler | From 400 |
| Installing a lambda probe emulator (fake) | From 300 |
| Exhaust system diagnostics | Free (with our repair) |
List of prices for muffler repairs (Cost, Work prices, Price)
| Replacing the muffler corrugation | From 2000 |
| Replacing the lambda probe (oxygen sensor) | From 300 |
| Replacing the catalyst under the bottom | From 1000 |
| Replacing the catalyst at the manifold | From 3500 |
| replacing the catalyst with a flame arrester under the bottom | From 2000 |
| replacing the catalyst with a flame arrester at the manifold | From 4000 |
| Replacing the resonator, rear muffler | From 400 |
| Installing a lambda probe emulator (fake) | From 300 |
| Exhaust system diagnostics | Free (with our repair) |
replacing the catalyst with a flame arrester price, replacing a muffler price, muffler corrugation price, flame arrester price, muffler corrugation repair price, repairing muffler corrugation prices, muffler repair in Moscow, muffler repair
List of prices for welding work
Argon-arc welding
| Name of works | Price, rub |
| Welding of aluminum copper tube with a diameter of up to 10mm | From 300 |
| Welding aluminum copper tube with a diameter of more than 10mm | From 500 |
| Welding seam up to 100 mm | from 20 for 10mm |
| Welding seam more than 100 mm | Negotiable |
| Double welding seam up to 100mm | from 20 for 10mm |
| Double weld seam over 100mm | Negotiable |
| Welding the engine sump | From 1000 |
| Welding the engine manifold | From 700 |
| Welding the engine block | From 1500 |
| Welding the block head | From 1700 |
| Welding the cylinder head cover | From 500 |
| Welding the gearbox housing | From 1200 |
| Welding suspension parts | From 300 |
| Radiator welding | From 500 |
| Welding of any other parts | Negotiable |
Prices for soldering non-ferrous metals (aluminum, copper, titanium and their alloys)
| Name of works | Price, rub |
| Soldering 1 hole up to 10 mm | 500 |
| Radiator soldering honeycomb 1 damage | 500 |
| Radiator soldering with 1 or more damages | 300 for 1 damage |
| Soldering copper tubes | From 300 |
| Soldering of household appliance parts | Negotiable |
| Soldering an aluminum tube | From 300 |
Prices for welding work (Semiautomatic, Campy)
| Name of works | Price, rub |
| Welding seam up to 100 mm | from 5 |
| Welding seam more than 100 mm | Negotiable |
| Welding muffler pipes | From 500 |
| Small welding work | Negotiable |
Prices for car air conditioning repairs.
Prices for car air conditioning repairs.
Prices for car air conditioning repairs.
Full refilling of the car air conditioner 1500 rubles 00 kopecks.
| Name of works | Price, rub |
| Replacing the air conditioning compressor bearing | From 1000 |
| Manufacturing repair of air conditioner hose | From 1000 |
| Air conditioner diagnostics | 500 |
| flushing the car air conditioning system | From 8000 |
| air conditioning compressor repair | From 1000 |
| air conditioning compressor replacement | From 1000 |
| antibacterial cleaning of car air conditioners; | 1500 |
| radiator repair, car heater radiator repair | From 500 |
| refrigerator maintenance; | From 500 |
| car air conditioner electrical repair; | From 500 |
| Manufacturing Repair of car air conditioning tube | From 1000 |
| Replacing the car air conditioner clutch | From 500 |
| Replacing the electric coupling of a car air conditioner | From 1000 |
| Replacing the air conditioner radiator | From 1000 |
| Replacing the rear circuit of a car air conditioner | From 15000 |
| Car air conditioner bearing replacement | From 800 |
| Replacing the car air conditioner oil seal | From 1000 |
| Blowing (cleaning radiators) | From 500 |
| Replacing the expansion (capillary) tube | From 500 |
| Replacing the expansion valve | From 700 |
| Replacing the pressure sensor | From 300 |
| Replacing the filling nipple | From 300 |
| Removal and installation of receiver-dryer | From 500 |
| Cleaning the Evaporator Drain Tube | From 300 |
List of prices for car vinyl wraps.
Prices for tire fitting
Cost of straightening a cast wheel
| Radius | Cost, rub.) |
| 13 | 600 |
| 14 | 800 |
| 15 | 1100 |
| 16 | 1200 |
| 17 | 1400 |
| 18 | 1900 |
| 19 | 2200 |
| 20 | 2600 |
| 21 | 3200 |
| 22 | 3700 |
| 23 | 4300 |
Seasonal replacement of rubber, wheels, tires
| Name of works | Tire size | |||||||
| 12-14 | 15 | 16 | 17 | 18 | 19 | 20 | 21 | |
| Seasonal wheel change with balancing (Cars) | 900 | 1100 | 1250 | 1500 | 1700 | 1900 | 2000 | 2300 |
| Seasonal wheel change with balancing (SUVs – Minibuses) | 1500 | 1500 | 1500 | 1800 | 2000 | 2300 | 2500 | 2800 |
| Seasonal tire change (Cars) | 1300 | 1500 | 1800 | 2100 | 2400 | 2800 | 3100 | 3400 |
| Seasonal tire change (SUVs, SUVs, Minivans, Minibuses) | 2200 | 2200 | 2200 | 2500 | 2900 | 3400 | 3700 | 4100 |
Prices for tire fitting work
| Name of works | Tire size | ||||||||
| 12-14 | 15 | 16 | 17 | 18 | 19 | 20 | 21 | Gazelle | |
| Removing + installing a wheel | 90 | 110 | 130 | 140 | 160 | 170 | 190 | 230 | 200 |
| Dismantling + mounting of tire | 100 | 110 | 140 | 150 | 180 | 220 | 270 | 280 | 250 |
| Wheel balancing | 110 | 140 | 160 | 200 | 230 | 270 | 280 | 310 | 200 |
| Wheel cleaning | 30 | 30 | 30 | 40 | 40 | 50 | 50 | 50 | 50 |
| Re-shoeing (1 wheel) | 330 | 390 | 460 | 530 | 610 | 710 | 790 | 870 | 700 |
| Camera repair* | from 150 | ||||||||
| Puncture repair of a tubeless tire with installation of a harness* | 150 | ||||||||
| Repairing a tubeless tire puncture with installation of a fungus or patch* | from 300 | ||||||||
| Sealant Sides (2 sides)* | 250 | ||||||||
| Valve installation* | 50 | ||||||||
| Cleaning and lubrication of wheel studs, bolts (4 wheels)* | 200 | ||||||||
| Checking pressure and inflating tires | 20 | ||||||||
| Packing 1 wheel in a bag | 25 | ||||||||
| Booster (explosion-pumping of 1 wheel) | 70 | ||||||||
| Cost increase factor for low-profile tires ⩽ 50 (1 wheel) | +150 | ||||||||
| Increase in price for SUVs, SUVs, Minivans, Minibuses | +20% | ||||||||
| Mobile tire service visit | Outside the Moscow Ring Road, + 30 rub. for 1 km. (Minimum order cost 2000 rub.) | ||||||||
Additional services
| Name of works | |||||||||
| Replacing pads | from 300 rub. | ||||||||
| Replacing spark plugs | from 300 rub. | ||||||||
| Replacing lamps | from 100 rub. | ||||||||
| Accumulator charging | 200 rub. | ||||||||
| Minor repairs | by agreement | ||||||||
| Replacing wheel studs | from 700 rub. per wheel | ||||||||
Causes of heating tap failure
Of the entire cooling system, the heater valve of the VAZ 2114 is the most vulnerable part. Moreover, problems most often appear with the onset of cold weather. This is where one of the reasons for the failure of the heating tap lies: in the summer we don’t use it, it “sours” and requires repair.
The most common reasons for the failure of the VAZ 2114 heating tap:
- Leakage due to depressurization of the housing . This is a serious problem that needs to be fixed as soon as possible. If this is not done, a large leak of the cooling fluid directly into the vehicle interior may soon occur. This leak begins with the flooding of your feet - you can miss this signal, especially when there is a rug under your feet, and if you do not carefully monitor the condition of the working units.
- Souring of the locking device . The stove tap, which cannot be closed or opened, indicates that it has “soured.” Don’t rush to the service station, the matter is not urgent, but the problem should be fixed.
- Contamination with antifreeze deposits . Just like in a radiator, various deposits accumulate in the tap pipes (as a result of the breakdown of coolant or other type of dirt). So, since the damper regulates and then increases the flow of fluid, it delays it, debris accumulates inside the part, and as a result, jamming and further failure.
The technical condition of the tap, like the entire heating system, depends on the condition of the coolant. There are too many fakes on the market, which have a very negative effect on the operation of the car’s stove.
One of the reasons for the failure of the faucet and the heating system as a whole may be low-quality coolant. Don't take just anything! Make purchases in trusted stores.
But besides the quality of the liquid and materials, there are other factors that influence the rapid failure of the faucet. Therefore, at the end of the article we will give some useful tips that will extend its life or notice a malfunction in a timely manner so as not to freeze in winter. Well, for now, let’s pay attention to the choice of the heater valve for the second generation VAZ “Samara” - VAZ 2113, 2114 and 2115, or the first one - 2108 and 2109.
Signs of malfunction of the VAZ 2114 heater valve
Most often, a malfunction occurs in the cold season, when the interior heater is used at full capacity. Breakdowns are also possible in warm weather. Constant use of the temperature regulator in the cabin leads to rapid wear of the plastic parts of the faucet. We list the main symptoms of a malfunction of this element:
- The appearance of a greasy coating on the surface of the windshield. This is typical when there is antifreeze leaking from the valve body. In addition to the fact that in the event of such a breakdown, the warm airflow ceases to function normally, antifreeze vapors have a negative impact on human health;
- Stopping the supply of warm air indicates that the regulator is jammed inside the faucet;
- The main sign of a malfunction is the appearance of a coolant leak under the carpet on the driver's side. It is recommended to check this area for leaks regularly.
Useful : Design of the VAZ 2114 stove
In addition to stopping the supply of warm air, a broken faucet leads to a constant leak of antifreeze. This increases the risk of reducing the coolant level to a minimum, which is very dangerous for the engine. Sooner or later, replacing the heater tap on a VAZ 2114 is necessary on any car of this model. Even timely maintenance of the heating system does not guarantee that this unit will not fail. It's all due to a design miscalculation by the engineers. Making a faucet that constantly contains hot liquid from low-quality plastic is a clear miscalculation. Minimal deformation of the valve body leads to antifreeze seeping into the driver’s feet. Also, owners of model 2114 complain about the lack of o-rings and rubber gaskets in the design of the regulator. Instructions on how to change the stove tap will be presented below. First, let's look at the necessary list of tools that will come in handy when replacing an element with your own hands.
Which heater tap to choose
The ceramic faucet from YVVA is, according to most, the highest quality.
For VAZ-2113-2114-15 models, a single valve from 2108 is suitable. The car is equipped with far from the highest quality spare parts from the assembly line, since the membrane valve is completely plastic. True, analogues have not gone far. So, the opinions of many auto repairmen differ regarding which heater tap to choose for the VAZ 2114 and other Samar models. Some claim that you shouldn’t overpay and just buy a regular plastic one. Others say that a ceramic one can last a little longer than 50 thousand km (approximately the same service life of a standard heating faucet) and if it is not possible to install a ball one, then it is better. And still others even advise redoing the system in order to move the whole thing under the hood, and install a regular water tap there to forget about the leak problem forever. Therefore, let’s see what the manufacturers offer us, what the price is for the heater tap, and decide which one is best for your “four” to choose.
Plastic membrane (original)
In the factory configuration, the machine has a standard coolant control valve 21080-8101150-00 , which has only one, and even then a dubious, plus: low price. But you have to pay these 60 rubles again and again, every season - the leak starts where the flow control axis is located. So, given the problems that you have to face due to the failure of your car’s heating tap, it’s worth considering more reliable options. Although, to a large extent, the quality of the stove’s membrane tap depends on the manufacturer, and there may be several of them. For example, a standard plastic heater valve for the VAZ 2108 is produced by DAAZ, and in several packages (one of them is specifically for AvtoVAZ). But besides them, on store shelves you can also find such budget ones as: Aroki and Grand RiAl. This means that the problem of unreliability may lie precisely in an unscrupulous manufacturer.
Ceramic heating tap
Ceramic Luzar and ball Chance-auto heater valves for VAZ 2108-14-15 from the middle price category and the same quality.
Of all the options listed, this one is the leader in popularity. But don't think this is an obvious choice. Quite often it fails no less than the standard one, and only lasts for a couple of seasons. It is chosen solely because the ceramic curtain inside the locking mechanism keeps it tightly closed. This is where the advantages end; like the previous one, it is also not deprived of disadvantages. Firstly, it is a higher cost compared to the factory and ball models. Secondly, the throughput in this option is lower than the ball one. Thirdly, there is a lot of defects, and either at the junction or from under the lever (damper axis), a leak soon begins to appear. Moreover, most often it is the latter problem that is the reason for replacement. And all due to the fact that at the factory the hole for the rod is made with poor quality and the rubber seals quickly wear out. If reducing the incoming heat is not critical for you, and the presence of a share of high-quality parts does not frighten you, you can also purchase a ceramic heating tap.
The situation with them is exactly the same as with standard ones, different manufacturers - different quality. According to reviews of many owners of VAZ 2108, 2109 and 2113-15 cars, they are looking for the Ulyanovsk YAVVA (spare part code 2108-8101150-12 ) which will cost 350 rubles, since it has good equipment (fastening nuts, washers, rubber sealing rings), aluminum body, ceramic insides. LUZAR LV0108 on the market (100 rubles cheaper, but few are satisfied with the quality, since it lasts for 2 years or even less), modified Pramo (21088101150P), quite expensive PEKAR (costs about 500 rubles), and also the Polish Avrora (HV-LA2108) and the very budget TSN 852 (even more quality problems than the Luzar).
Ball valve for radiator
This is already a more suitable part if you focus on the price-quality ratio. for a radiator ball valve (cat. no. 2108-8101150-14 ) is slightly higher than for a standard model, but the quality is also higher, but compared to ceramic valves it is even cheaper. However, here too there is a relatively high susceptibility to souring.
The market represents only a couple of manufacturers of such faucets: Ulyanovsk ( Simbirsk Foundry Alloy ) and Chance-Auto . One of the main disadvantages of the SLS ball valve is that it is very difficult to move it from the closed state to the “open” position. And this, in turn, negatively affects the stops in the plastic drive mechanism of the dampers and the tap at the places where the cables are attached. Owners of "Samar" probably encounter such a problem even with regular efforts. So, most likely it will have to be modified, but the thickness of the walls of the pipe and the quality of the plastic inspire confidence. But the axis, although it wobbles a little, but the ball rotates in the plastic inserts and holds it very tightly. Which is true, just like ceramic, over time it will flow along the lever bushing.
Water tap in car
Yes, and this method has a right to exist. Some people think this is an overly simple solution to the problem, while others have been using it for a long time without any problems. Below we will look at this option in more detail.
Car repair and maintenance
Home → Catalog → Car repair and maintenanceSevere weather conditions in Russia make adjustments to the operation of cars. Severe weather leads to an increase in accidents on our country's roads. Simplification of car body repairs, quick replacement of body kits and removable body parts without painting, versatility of colors, thereby saving repair time and money, this is a solution for any car owners. Such a simplified system has already been developed for owners of VAZ cars - sale of body parts in color (bumpers and removable body parts), with subsequent replacement in a specialized service.
Such services are offered by the Remkuzov company - fast and high-quality replacement of body parts in color. For example: replacing a bumper on a VAZ 2114 -30 minutes. There is no longer any need to make expensive repairs to the VAZ bumper, and there is no need to leave your car in a car service center. Replacing a VAZ wing, a VAZ door, and a VAZ hood takes about 30-40 minutes. Moreover, all VAZ body parts are factory-made and painted using AvtoVAZ technology. This guarantees 100% matching of shades of old and new body elements. Each car part has its own installation specifics, for example, replacing and repairing a VAZ 2110 bumper and replacing and repairing a VAZ 2114 bumper are fundamentally different. We will advise you on all the “pitfalls”, so to speak, if you want to change the body kit elements yourself. Experienced auto mechanics also perform local body repairs of all types. The likelihood of hidden defects during body repairs is very high. Based on our experience working with body damage, we have a full range of spare parts in stock that may be needed after removing and opening the damaged parts. We also offer professional regular repairs of the chassis, engine and vehicle maintenance, which makes it possible to quickly identify vehicle malfunctions. Thus, it helps to avoid troubles on the roads and extend the life of cars.
| 0.00 rub. | 0.00 rub. | |
| replacing the beam (plastic reinforcement) of the rear bumper of a VAZ | RUB 200.00 | RUB 200.00 |
| Replacing the VAZ front bumper beam | RUB 200.00 | RUB 200.00 |
| Replacing the muffler VAZ 2101 | RUB 600.00 | RUB 600.00 |
| Replacing the muffler VAZ 2104 | RUB 600.00 | RUB 600.00 |
| Replacing the muffler VAZ 2105 | RUB 600.00 | RUB 600.00 |
| Replacing the muffler VAZ 2106 | RUB 600.00 | RUB 600.00 |
| Replacing the muffler VAZ 2107 | RUB 600.00 | RUB 600.00 |
| Replacing the muffler VAZ 2108 | RUB 600.00 | RUB 600.00 |
| Replacing the muffler VAZ 2109 | RUB 600.00 | RUB 600.00 |
| Replacing the muffler VAZ 21099 | RUB 600.00 | RUB 600.00 |
| Replacing the muffler VAZ 2110 | RUB 600.00 | RUB 600.00 |
| Replacing the muffler VAZ 2111 | RUB 600.00 | RUB 600.00 |
| Replacing the muffler VAZ 2112 | RUB 600.00 | RUB 600.00 |
| Replacing the muffler VAZ 2113 | RUB 600.00 | RUB 600.00 |
| Replacing the muffler VAZ 2114 | RUB 600.00 | RUB 600.00 |
| Replacing the muffler VAZ 2115 | RUB 600.00 | RUB 600.00 |
| Replacing the muffler Lada Granta | RUB 600.00 | RUB 600.00 |
| Replacing the muffler Lada Kalina | RUB 600.00 | RUB 600.00 |
| Replacing the muffler Lada Largus | RUB 600.00 | RUB 600.00 |
| Replacing the muffler Lada Priora | 0.00 rub. | 0.00 rub. |
| VAZ 2110 door replacement | RUB 2,000.00 | RUB 2,000.00 |
| VAZ 2114 door replacement | RUB 2,000.00 | RUB 2,000.00 |
| replacing the tailgate of a VAZ 2109 | RUB 2,000.00 | RUB 2,000.00 |
| replacing the tailgate of a VAZ 2114 | RUB 2,000.00 | RUB 2,000.00 |
| Lada Granta door replacement | RUB 2,000.00 | RUB 2,000.00 |
| Lada Kalina door replacement | RUB 2,000.00 | RUB 2,000.00 |
| Lada Largus door replacement | RUB 2,500.00 | RUB 2,500.00 |
| Lada Priora door replacement | RUB 2,000.00 | RUB 2,000.00 |
| Niva Chevrolet door replacement | RUB 2,000.00 | RUB 2,000.00 |
| replacing the rear bumper of a VAZ 2110 | RUB 1,000.00 | RUB 1,000.00 |
| replacing the rear bumper of a VAZ 2111 | RUB 1,000.00 | RUB 1,000.00 |
| replacing the rear bumper of a VAZ 2112 | RUB 1,000.00 | RUB 1,000.00 |
| replacing the rear bumper of a VAZ 2113 | RUB 1,000.00 | RUB 1,000.00 |
| replacing the rear bumper of a VAZ 2114 | RUB 1,000.00 | RUB 1,000.00 |
| replacing the rear bumper of a VAZ 2115 | RUB 1,000.00 | RUB 1,000.00 |
| Lada Granta rear bumper replacement | RUB 1,500.00 | RUB 1,500.00 |
| replacement of rear bumper LADA KALINA Station wagon | RUB 1,000.00 | RUB 1,000.00 |
| replacement of rear bumper LADA KALINA Hatchback | RUB 1,000.00 | RUB 1,000.00 |
| replacement of rear bumper LADA KALINA Sedan | RUB 1,000.00 | RUB 1,000.00 |
| Lada Largus rear bumper replacement | RUB 1,500.00 | RUB 1,500.00 |
| replacement of rear bumper LADA PRIORA Sedan | RUB 1,000.00 | RUB 1,000.00 |
| replacement of rear bumper LADA PRIORA Station wagon | RUB 1,000.00 | RUB 1,000.00 |
| replacement of rear bumper LADA PRIORA Hatchback | RUB 1,000.00 | RUB 1,000.00 |
| replacing the rear bumper NIVA CHEVROLET | RUB 1,000.00 | RUB 1,000.00 |
| Replacing the rear bumper of Hyundai Solaris | RUB 2,000.00 | RUB 2,000.00 |
| replacing the hood of a VAZ 2110 | RUB 1,000.00 | RUB 1,000.00 |
| Replacing the hood of a VAZ 2114 | RUB 1,000.00 | RUB 1,000.00 |
| replacing the hood of LADA GRANT | RUB 1,000.00 | RUB 1,000.00 |
| replacing the hood of LADA KALINA | RUB 1,000.00 | RUB 1,000.00 |
Price*
– price for registered users
| Page: 1 next → |
Prevention of breakdown of the VAZ 2114 crane
Following a few useful tips will help extend the life of your heater tap.
In order to prevent the faucet from turning sour, it is necessary to periodically move the closing/opening lever of the faucet from one position to another. This problem is especially relevant when the seasons change, when you drive all winter with it open, and in the summer you turn off the supply. By the way, in the heat or when you have to drive in low gears, in order to avoid engine overheating, it is recommended to slightly open the heater valve (move the control lever to the “red zone”), but to prevent heat from the radiator from entering the cabin, completely close the air damper.
Modification of the heater tap
On some faucets (in particular, very often these are Luzar and YAVVA), not only the locking mechanism itself can break, but also the plastic tube can burst, so to make the faucet last longer, you can select the diameter and insert an additional tube . Recently, the box from Luzar already has such a through tube and it is made of brass. According to many experienced car owners, installing a YVVA faucet without modification makes no sense at all - the passage pipe is flattened. And in its through tube it is necessary in any case to install a long (thin-walled) tube with an outer diameter of 15 mm.
It also goes without saying that regular preventive inspection of components is necessary - timely detection of problems will not only minimize your costs, but will also protect your health and that of your passengers from danger, since antifreeze vapors are highly toxic!
Repair of VAZ 2114 crane
As a rule, faucets are not repairable and if they become sour, leak, or changing the lever does not produce the desired result, they are replaced. This is much faster than trying to repair it. But what if it is not possible to buy a new faucet, and the problem has already occurred? Then there is only one way out - to try to repair the heater control valve. When liquid runs out from under the rod, you, of course, are unlikely to be able to somehow eliminate this, because only a few can select bushings or machine a new rod and sealing rings. But if the through pipe bursts or shrinks, then installing a tube of the same diameter into it and coating it with sealant will help for a while.
In the case when we are dealing with plastic, the cause of the leak is a damaged rubber membrane; the problem is also fixable, although not simple. You need to remove the valve from the heater and disassemble it. You will have two parts: the body itself and the lid with a cone and cuff. To remove the cover from the body, it is necessary to cut off the rolling belt from the side of the cover. The easiest way to do this is with an electric drill, in the chuck of which you attach a chisel or scraper.
Where to loosen the clamps
Next we have to do the flaring. To do this, drill 4 holes through (size from 0.1 to 3 mm.). This should be done strictly along the edge of the rolling. Do not allow the drill to deviate towards the middle of the cover. If this happens, further work on repairing the VAZ 2114 crane will be greatly complicated due to damage to the sealing band located on the seating surface of the cuff in the body.
The next step is to drill out the rivet that is in the cone, remove the old cuff and the remains of the rivet. You will get a hole where you need to make an M4 thread.
The new cuff can be cut from a car inner tube (preferably from a truck). The heater valve must be in the closed position. Next, you need to cut along the contour of the cover (top), making four holes for fasteners at their location (along the edges and in the middle).
A new cuff is secured to the top of the cover using a screw (M4 - the hole for it is already ready), as well as the valve itself, then you need to align the holes and tighten them with screws (M3). In this case, the nuts will be on the side of the cover.
Inlet pipe
In general, the work on repairing the VAZ 2114 heating tap is completed; now we check the tightness by first closing the outlet channel and blowing from the inlet pipe.
Think about whether you have the strength to repair it yourself? No? Then there is only one way out - only replacement.
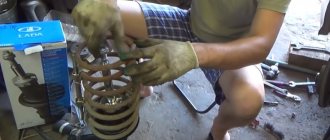
Removing the Kalina shock absorber strut
You will need : remove the front wheels, disconnect the tie rod ends from the steering arm (see “removing the steering rack”), prepare a 13-size socket wrench, a 17-size socket and socket wrench, and a flat-head screwdriver.
Comment
| If you later need to disassemble the strut, then loosen the shock absorber rod nut with a 22 ring wrench, holding the rod with a 9 open end wrench. |
Procedure:
- Loosen the 3 nuts securing the upper strut support to the body using a 13mm spanner.
- Unscrew the upper and lower bolts securing the steering knuckle to the strut using a 17 socket wrench, holding the bolts from turning with a 17 socket wrench. Remove the washers. To minimize the violation of the camber angle of the front wheels, first apply paint marks to the upper mounting bolt.
- Use a screwdriver to disengage the brake hose and steering knuckle from the strut bracket.
- Remove the shock absorber Lada Kalina.
By the way, you can remove the front struts without disturbing the camber angles; to do this, after disconnecting the tie rod ends, you will also need to remove the ball joint, the outer CV joint from the wheel hub and the caliper. Then remove the shock absorber strut along with the steering knuckle.
How to remove and replace the heater valve
The price for replacing a stove faucet at a service center will be about 1000-1500 rubles, so despite the complexity of the procedure, many try to remove and change it themselves. In addition, it is much easier and faster than doing repairs. To completely replace a VAZ 2114 heating tap, a simple set of tools is sufficient, in particular:
- Wrenches of different sizes (socket wrenches, open-end wrenches for “10” and “13”), and if it’s a head with a cardan, that’s great.
- Worm clamp with a diameter of 16-23 mm
- Silicone sealant.
- Rags.
- Screwdriver with Phillips bit.
- New heating tap.
- We also recommend that you immediately buy two pipes going from the heater tap to the radiator (since they lose their elasticity over time and can leak).
- A container where you will need to drain the coolant.
- Well, if possible, use the freshest coolant, so as not to pour back the old one.
And besides the tool, it is advisable to have an inspection hole or overpass at your disposal, since the tap is unscrewed from the engine compartment, and an assistant is needed from inside the cabin.
The work of replacing the heater tap on a VAZ 2114 car is carried out according to the following algorithm:
- Make sure the engine is completely cool before starting work. Having installed the car in the pit, remove the crankcase protection.
- Then you need to drain the coolant from the engine block (drain bolt behind the ignition module) and the cooling radiator (faucet at the bottom), as well as from the pipes leading to the faucet from the engine compartment. At the same time, treat the stud nuts with a wedge, let them dry out until the moment when we unscrew the faucet, this will greatly facilitate its dismantling.
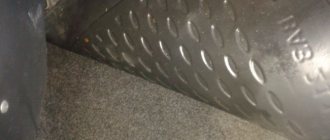
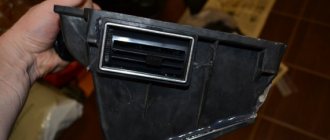
- Next in the cabin, on the front passenger side, you need to remove the side trim of the torpedo (unscrew 5 screws) and remove the carpet to get to the faucet and its pipes.
- To prevent the interior from flooding with antifreeze when the hoses are removed (by loosening the clamps with a Phillips screwdriver), the first step is to lay a rag.
- To make it convenient to remove the tap, it is better to remove the pipes from the stove.
- Go back under the car and use the key or 10mm head to unscrew those nuts from the studs and go back up into the cabin.
- Using pliers and a flat-blade screwdriver, disconnect the drive cable of the faucet locking mechanism, after first removing the bracket holding the rod. It will be more convenient to do this on the driver’s side, but then you will also have to remove the trim there.
- Now you can extract the culprit of all events.
- Take a new faucet and install it in the same place, after replacing the rubber gaskets. We install the control cable in place and check the tension.
- We carry out the same steps in reverse order. Be careful when tightening the pipe clamps, especially on the through plastic ones. After all, if you don’t hold it in enough, then in cold weather it will start to suck in air, but if you overtighten it, then many taps have such a quality of plastic that they simply burst.
After installation, all that remains is to check its operation. Turn on the fan by opening the air intake damper. Open or close the access of coolant to the stove. If the flow is blocked, the air temperature in the cabin should decrease. But do not rush to install the side covers back and during the check, look to see if the faucet is running back, since such cases have occurred more than once, especially if it is ceramic. They all have one common disease - the constipation lever begins to leak. And all because the two o-rings that are there are either weak or quickly wear out during operation.
Installing front struts on Kalina
We install the rack in the reverse order, with the mark (arrow) on the upper support facing the front of the car.
We tighten the nuts securing the upper support to the body to a torque of 19.6-24.2 Nm (2.0-2.4 kgf-m). Before tightening the nuts of the bolts securing the steering knuckle to the strut, align the marks on the eccentric bolt and the bracket. Tighten the bolt nuts to a torque of 77.5-96.1 Nm (7.9-9.8 kgf-m).
Heating system modification
One of the controversial decisions is to move the heating tap under the hood and replace it with a regular household one. Before you dare to use this know-how, you should weigh the pros and cons. One of the advantages of this action is that you do not have to worry about leakage into the cabin . In general, the service life of the parts increases, but in order to open and close the tap, you need to run to the hood or reach into your feet and turn the valve. Or, in the summer, drive with the air flow damper into the cabin closed.
And yet, perhaps you are one of those for whom this will be the optimal solution that will help you not bother with repairing the stove tap. For clarity of removal and upgrading, watch the video instructions:
How to remove the heater valve VAZ
Replacing the faucet with a water one and moving it under the hood
As you can see, despite the certain efforts required to repair or replace the faucet of the VAZ 2114 stove, it is still better to do this before the interior is filled with antifreeze. At the moment, heating taps are presented on the markets in three main types: standard, ball and ceramic. But in fact, of all those available, there are no normal ones that you can install once and forget about the problem. Plastic ones etch, ceramics melt and run, the ball one is also not without its drawbacks, but is still more reliable compared to others. Remember that preventative repairs of parts of your car, in particular the heater valve, can prevent other, significant problems.