A very simple way to replace the internal grenade seal
Grenade seals are divided into left and right, so when changing the seal, be sure to place the left seal on the left side, and the right seal on the right side. The left oil seal is brown (it is on the driver's side), the right oil seal is black (the passenger's side).
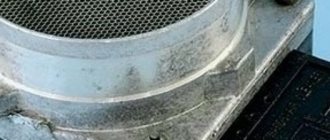
Photo. Internal grenade seals.
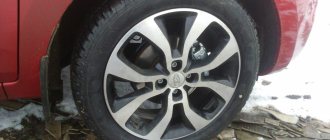
The first thing to do is to lift the front wheel on a jack; on the side on which you are going to change the oil seal, be sure to place a stump or bricks next to the jack for insurance. Remove the wheel and unscrew the hub from the ball.
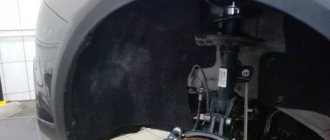
Photo. The arrow shows which bolts need to be unscrewed to disconnect the hub from the ball, there are two of them with a wrench head, seventeen.
All that remains is to pull the grenade out of the box, here’s the most interesting thing, you can pull directly on the brake disc, trying to pull the grenade out of the box, if the grenade pops out well, or the drive may pop out from the internal or external grenade, then it’s an extra hassle to put the drive in place.
How to replace wheel drive seals on a Lada Priora
The front wheel drive seals can be replaced without removing the gearbox.
We carry out the work on an inspection ditch or overpass.
Draining the oil from the gearbox
Remove the left and right front wheel drives (see “Removing the front wheel drives”).
Use an impact puller to press out the right drive oil seal.
Press out the left drive oil seal in the same way.
If there is no impact puller, you can press it out with a mounting spatula or a powerful screwdriver
The gearbox can be equipped with two types of oil seals: both with and without oil drainage notches.
Oil seals without notches are interchangeable for left and right drives.
Seals with notches differ:
at the left drive oil seal, the arrow on the housing points counterclockwise, at the right drive it points clockwise.
Using a mandrel of a suitable diameter, press in a new right wheel drive oil seal.
You can use the old oil seal as a mandrel when pressing. Similarly, press in the left wheel drive oil seal.
Apply a thin layer of transmission oil to the working edges of the oil seals.
Reinstall the drives of both wheels. Pour oil into the gearbox.
Replacing the gear shift rod hinge boot and rod seal
Move the protective cover off the gear shift rod hinge
Using a 10 mm spanner, unscrew the hinge locking screw.
We take out the screw
We move the joint assembly with the control rod from the gear selector rod
Remove the protective cover of the hinge from the switch rod
Using a powerful slotted screwdriver, pry the oil seal holder by the collar evenly from different sides.
Press the race with the oil seal out of the clutch housing socket
Using a mandrel of a suitable size, press the oil seal out of the holder (Fig. 
We clean the race and the seat under it in the clutch housing from the old sealant.
Select a mandrel (for example, a tool head) with a diameter close to the outer diameter of the oil seal.
We press the oil seal into the cage until it stops (the working edge of the oil seal should face the clutch housing).
We apply transmission oil to the working edge of the oil seal, and sealant to the outer surface of the race.
We put the cage on the switch rod and press it into the clutch housing socket, resting it with a mandrel of a suitable size on the collar of the oil seal cage.
We carry out further assembly in reverse order. We replace the damaged hinge cover.
Before assembly, clean and degrease the threads of the hinge locking screw and apply sealant to the threads.
Before tightening the screw, we ensure that the holes in the hinge and the gear selector rod match.
The bolt securing the hinge to the rod differs in length and color. This bolt is cadmium plated (gold colored finish). Cannot be replaced with other bolts.
If the shank taper or thread is damaged, the bolt must be replaced with the same one. The bolt is fixed with TB-1324 glue.
If there is no such glue, then you can use another similar thread locker.
Pulling out the internal grenade from the gearbox. Video
Therefore, it is better not to try to tear the grenade out of the box by pulling the brake disc, but to insert a prybar under the grenade and a tube under the prybar, try to squeeze the grenade out of the box if it was squeezed out perfectly. It happens that a grenade cannot be squeezed out, then it is knocked down with hammer blows.
Photo. Removed grenade from the gearbox.
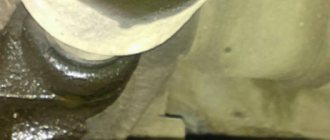
But before squeezing out the grenade, place a container to collect the oil; it can be made from an old canister by cutting a hole. If the oil in the box is normal, then it will definitely flow out of the box.
Photo. It is shown how you can use a pry bar to squeeze the oil seal out of the gearbox.
The grenade has been removed, squeeze out the old oil seal from the gearbox.
Photo. Grenade seal location.
Remove the old oil seal, wait until the oil is gone, and wipe the oil seal installation area clean with a cloth. For greater confidence, the new oil seal can be coated with sealants, and with light blows of a hammer on the oil seal circle, it can be seated in place.
Photo. Clogging of the oil seal into the gearbox.
The seal was hammered in, all that remained was to insert the grenade into place. Aim the grenade at the box and push it into place. Then assemble in reverse order.
What’s good is that when replacing the grenade oil seal this way, the alignment and camber of the wheel will not be disrupted, so you won’t have to adjust it.
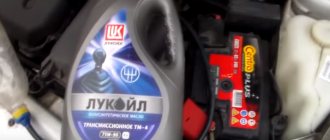
Photo. The arrow shows the oil filler plug bolt into the gearbox.
All that remains is to add oil to the gearbox. To do this, you need to unscrew the bolt plug, which is good, the bolt plug is also the oil level in the gearbox, oil is poured into the gearbox until it flows from the oil filler hole, as little as it starts to flow out means this is the oil level in the gearbox.
Photo. The arrow shows a watering can with a tube for pouring oil into the box.
There are many different methods and devices for pouring oil into a gearbox. I use a simple watering can and a tube, put the watering can on the tube, and insert the tip of the tube into the oil fill hole in the gearbox. But this method is not very fast, since the oil is thick, but if there is no rush, you can wait a little while the oil fills the box. Usually a liter of oil is enough to top up.
Replacing the gear shift rod oil seal
We replace the gear selector rod oil seal when we detect an oil leak through it from the gearbox. Remove the power unit mudguard (see “Removing the power unit mudguard”). Having unscrewed the locking screw of the gear selector rod hinge with a wrench “10”, we move the joint assembly with the control rod off the rod and remove the protective cover of the gear selector rod hinge (see “Replacing the cover of the gear selector rod hinge”).
Using a powerful slotted screwdriver, evenly (from different sides) pry the oil seal race by the collar... ...and press the race with the oil seal out of the clutch housing socket.
practical guide
Replacement of drive seals is carried out without removing the gearbox from the vehicle.
The oil seals of the right and left drives are not interchangeable (catalog numbers: right oil seal - 21100-2301034-00 or 21100-2301034-01; left oil seal - 21100-2301035-00 or 21100-2301035-01)
Do not remove both drives at the same time or, if necessary, install a special mandrel in place of one of them to prevent the side gears from falling out of the differential box.
Execution Sequence
1. We prepare the car for work.
2. Drain the oil from the gearbox.
3. Remove the drive.
4. Using a large slotted screwdriver or a spatula, pry up the oil seal and remove it from the gearbox housing.
5. Lubricate the working edge of the new oil seal with transmission oil and press it in, using the old oil seal as a mandrel.
6. Install the drive.
7. Replace the second wheel drive oil seal in the same way.
Add a comment Cancel reply
You must be logged in to post a comment.
Priora gearbox oil seal
We replace the gear selector rod oil seal when we detect an oil leak through it from the gearbox. Remove the power unit mudguard (see “Removing the power unit mudguard”). Having unscrewed the locking screw of the gear selector rod hinge with a wrench “10”, we move the joint assembly with the control rod off the rod and remove the protective cover of the gear selector rod hinge (see “Replacing the cover of the gear selector rod hinge”).
Using a powerful slotted screwdriver, evenly (from different sides) pry the oil seal race by the collar... ...and press the race with the oil seal out of the clutch housing socket.
With a suitable size mandrel...
...press the oil seal out of the cage. We clean the race and the seat under it in the clutch housing from the old sealant. We especially carefully inspect the surface of the hole in the gearbox. In case of large scuffing of this surface or a malfunction of the holder, the holder should be installed on a preparation of the “cold welding” type. Having selected a mandrel (for example, a tool head) with a diameter close to the outer diameter of the oil seal...
...press the oil seal into the cage until it stops (the working edge of the oil seal must face the clutch housing). We apply a thin layer of sealant to the outer surface of the oil seal race, and transmission oil to the working edge of the oil seal. We put the clip on the switch rod and insert it into the hole in the clutch housing. Leaning a mandrel of a suitable size on the collar of the oil seal...
...press the clip into the clutch housing socket. We carry out further assembly in reverse order.