Removing and disassembling the fuel module
We carry out the work to clean the strainer, replace the fuel level sensor, fuel pressure regulator or fuel pump. Relieve the pressure in the power system (see “Replacing the fuel filter”). Disconnect the wire terminal from the negative terminal of the battery. Inside the car, remove the rear seat cushion.
We bend the sound insulation valve...
...and use a Phillips screwdriver to unscrew the four self-tapping screws securing the fuel module hatch cover.
Remove the hatch cover.
Having pressed the clamp of the wiring harness block...
...disconnect the block from the fuel module connector.
Simultaneously pressing the two clamps of the tip of the fuel drain tube (we press the lower clamp using a wire hook)…
...disconnect the tip of the fuel drain tube from the fitting of the fuel module cover. Squeezing the two clamps (green) of the tip of the fuel supply tube to the filter...
...disconnect the tip from the fitting of the module cover.
Using sliding pliers (leaning on the protrusions of the fuel tank flange), we move the pressure ring of the module cover by the protrusions. By rearranging the pliers, we gradually turn the ring.
Remove the pressure ring.
Carefully, trying not to damage the fuel level indicator sensor float, remove the fuel module from the tank.
Remove the rubber gasket. Cover the hole in the fuel tank with cloth or cardboard to prevent foreign objects from getting into it.
Disconnect the ground wire tip from the slip ring terminal on the fuel pressure regulator body.
We pry it off with a slotted screwdriver...
...and remove the fuel pressure regulator mounting bracket.
Remove the contact ring from the regulator body.
Using pliers, remove the fuel pressure regulator from the module cover socket.
The regulator connections are sealed with two rubber rings.
Using a slotted screwdriver, press out the clamp of the wire block...
...and disconnect the wire block from the cover connector.
Using a slotted screwdriver, press the wire block clamp...
...disconnect the wire block from the fuel pump connector.
Using a slotted screwdriver, press out the lock of the fuel level indicator sensor...
...and move the sensor along the grooves of the module cup.
Remove the fuel level indicator sensor assembly with the float, wires and wire blocks.
We extend the two guide posts of the module cover from the grooves of its glass.
Remove the spring from the guide post of the module cover.
We press out the three clamps of the fuel pump holder...
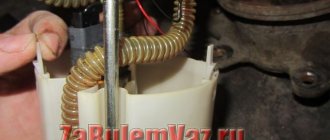
...and remove the holder with the pump from the glass.
Lada Granta fuel pump repair
Lada Kalina Station wagon 111730 E-GAZ Riesling 610 Logbook Adjusting the valves Kalina 8 cl
This article discusses the basic procedures for repairing the Lada Granta fuel pump. The fuel module (fuel pump) of the Lada Granta includes a fuel level sensor, a coarse fuel filter, an electric pump and a pressure regulator. All these elements are installed in the bracket and body of the fuel module. The main malfunctions of the fuel module: - failure or incorrect operation of the fuel level indicator sensor; - clogged or damaged module fuel filter; - failure of the fuel pump; - failure of the pressure regulator. In most cases, malfunction of the fuel level sensor is caused by contamination or oxidation of its contact group.
Repair and inspection operations of the Lada Granta fuel pump
Repair of a car fuel module is shown using the example of a car with a VAZ-21116 engine. On cars with other engines, this work is performed in the same way.
1. Disconnect the drain tube from the module glass by prying it up with a screwdriver.
2. Overcoming the force of the spring, move the module glass slightly up along the guides and, using a screwdriver, remove the retaining ring from one of the guides. After this, the module glass can be moved slightly away from the bracket.
3. Disconnect the ground connector from the fuel pressure regulator.
4. Using a screwdriver, press out the clamp of the wiring harness block...
5. ...and disconnect it from the intermediate block.
6. Disconnect the wiring harness connector from the fuel pump.
7. Unclench the two latches of the fuel level sensor and, moving it up along the grooves of the module cup...
8. ...remove the sensor from the module.
9. Wash the sensor rheostat contacts and its slider plate with gasoline, and then wipe with a lint-free cleaning cloth soaked in alcohol.10. Using a screwdriver, pry the spring clamp of the fuel pressure regulator...
11. ...remove the clamp from the bracket...
12. ...and remove the regulator.
13. Inspect the pressure regulator O-rings. Replace heavily compressed, hardened or torn rings by removing them by prying them off with a screwdriver.
Before installation, lubricate the sealing rings of the fuel pressure regulator with a thin layer of grease or engine oil.14. Press out the plastic clips...
15. ...and remove the module shell from the bracket guides.
16. To replace or clean the fuel filter, pry up its base with a pointed tool...
17. ...and remove the filter from the pump nozzle, overcoming the resistance of the spring lock washer.
18. Before reinstalling the filter, remove the lock washer, straighten it with pliers and install it in the filter housing.
19. Install the filter in the reverse order of removal.20. To replace the electric pump, press out the plastic clamp...
21. ...and remove the electric pump from the bracket.
22. Assemble the Lada Granta fuel module in the reverse order of disassembly.
Replacing the Lada Granta fuel pump
The fuel pump of the Lada Granta car is equipped with electric submersible fuel pumps. The pump supplies and circulates the mixture in the fuel system. Recently, the car has been equipped with an electric submersible fuel pump from the Bosch brand. This device has the following characteristics:
- rated voltage - 13.5V, operating - in the range from 6 to 15 volts;
- maximum volume of pumped mixture
- the frequency of replacing the fuel filter is 1000 operating hours;
- range of fuel classes: AI-92 - AI-95.
Replacing the fuel pump on Grant
Before changing the fuel pump on a Lada Granta, the motorist must relieve the pressure inside the fuel lines. To “zero” the car’s fuel system, you must:
- Put the Granta at neutral speed;
- Apply the parking brake;
- Remove the rear sofa;
- Disconnect the wiring from the fuel pump;
- Start the Lada and wait for it to stall;
- Crank the starter for a few seconds.
To work with the fuel filter, the car enthusiast will need:
- flathead and Phillips screwdrivers;
- spanner set to “10”;
- hammer;
- rags.
After resetting the fuel lines, it is necessary to remove the terminals from the battery so that the possibility of supplying power to the fuel pump is completely excluded.
Installing a new fuel pump
The first step is to open the fuse panel (on the left side of the front panel) and remove the element responsible for the operation of the unit.
Next, dismantle the rear sofa and remove the plastic trim. Below it is the fuel tank flap (on the right side). The hatch cover is held on by four screws - remove them using a screwdriver. Next, disconnect all the fittings from the cover of the old fuel pump.
Using a “10” wrench, unscrew the nuts of the pressure ring of the fuel pump, of which there should be 8 pieces along the entire diameter of the ring. Next to the clamping ring there is a pin with which the ground wire is in contact. We throw off the wire, and then completely remove the clamping ring. The ring unscrews counterclockwise; for ease of dismantling, it needs to be tapped with a hammer.
You need to make sure once again that all wires and lines adjacent to the part are disconnected. Only then can you remove the used unit and place a new one in its place. You also need to install a new O-ring between the tank opening and the pressure ring - it is made of rubber and wears out quite quickly.
Installation of a new pump is carried out in the reverse order. Before disassembling, draw a diagram or photograph the original location of all fittings and hoses on the fuel pump cover.
Lada Kalina fuel pump replacement
The stability of the power plant in a car is achieved due to the correct functioning of most components. Among the most important mechanisms is the fuel system. This statement is also true for the domestic model of the budget segment Lada Kalina. In the fuel supply unit of the car we are considering, one of the main components is the fuel pump.
It is designed to ensure an uninterrupted supply of gasoline to the fuel rail in sufficient quantity and at a given pressure. Next, the fuel is supplied to the intake valves located in the manifold. This is done through nozzles. Then the “torch” of atomized fuel is mixed with air, forming a mixture in the required proportion (regulated by the computer), which is sent to the cylinder chambers for combustion.
However, it happens that the pump does not pump. Therefore, many car owners are interested in how to check it and how to remove it.
What are the main advantages and disadvantages of the pump?
Initially, the design features of this unit will seem simple. However, in order to understand in detail the principle of operation of the unit, it is necessary to proceed to an explanation of the following aspects.
The situation is interesting in that the fuel tank in the Lada Kalina is placed by the developers under the bottom in the rear of the car. It is connected to the fuel rail under the hood via lines. To be able to supply gasoline at a given pressure parameter, you will need an efficient and high-performance gasoline pump.
The main feature of this unit is that it operates on an electric drive. This allows the pump not only to efficiently supply fuel to the elements of the injection system, but also to have enviable reliability.
The main advantages of the fuel system pump unit are considered to be:
- timely provision of injection elements with the required volume of fuel, regardless of the engine operating mode;
- high safety, because the fuel pump stops functioning as soon as the engine stops.
simple design and decent resource;
Next, let's look at the main disadvantages that this unit has acquired:
- noise during operation;
- need for constant cooling;
- sensitivity to fuel quality indicators.
It is the use of substandard gasoline in combination with untimely replacement of the filter that can guarantee the failure of this expensive unit. There is a situation when the engine does not pump. In this case, you need to know how to check it and, if necessary, how to remove it.
Adjusting the clutch of Lada Granta
Rear wheel bearing Lada Granta
Fuel tank volume Lada Granta
The need for fuel purification
To prevent malfunction of the pump unit in Lada Kalina, it is necessary to purchase fuel only from trusted suppliers, and also promptly replace the filter element of the system.
Impurities must be filtered not only through the specified consumable component. They are also neutralized:
- in a mesh located on the suction pipe of the pump unit;
- in the filter module for fine fuel purification, which is “embedded” directly into the line;
- using the mesh located near the pressure level regulator in the ramp;
- mesh until it gets inside the nozzle.
The aspects reflected in the first two paragraphs have a significant impact on the correct functionality of the pumping unit.
It is necessary to replace the filter in a Lada Kalina car after an interval of 30 thousand km. Owners systematically forget about the need to clean or replace the mesh on the pump nozzle. This is not surprising, since the manufacturer did not regulate this type of work and did not indicate the frequency of actions. They begin to “move” only in situations where the fuel pump exhibits characteristic malfunctions.
However, there are recommendations based on the experience of the owners. They hint at the need to clean or replace the mesh (if it is damaged) every 60 thousand km (or earlier).
How to maintain the pump and what are its main breakdowns?
The power system unit in Lada Kalina does not always require its own replacement. Sometimes you can get away with repairs. For this purpose, you will need to first stock up on the necessary tools.
Diagnosis of a node is carried out by monitoring its two main parameters:
- working pressure;
- productivity.
After dismantling the device, it would be useful to measure its rated current and a similar indicator during maximum load. To carry out these measurements, you will need to place the pumping unit on a special stand.
The first stage of monitoring is measuring the voltage at the power connector, which is connected directly to the network. This indicator should be 12 Volts. The working pump makes a characteristic noise. The disadvantage of this method is the possibility of incorrect readings from the diagnostic device if there is a weak contact in the pump switching circuit. In fact, the operating voltage can be significantly lower than the indicated 12 Volts, and the device will show exactly this value.
One of the reasons why the pump stops functioning is the failure of the control relay. This breakdown is very easy to diagnose. There is a special symbol on the instrument panel that gives a signal to the driver of the Lada Kalina if a designated malfunction occurs in the system.
Cleaning the part
Replacing the Lada Granta fuel pump in some cases is not the only way to get rid of fuel supply problems in some cases. To restore the functionality of the fuel pump, it requires thorough cleaning. To do this, you need to dismantle the unit using the method described above.
Next, unscrew the lower part of the fuel pump cup. The glass has a filter mesh that needs to be removed using a screwdriver. The mesh will need to be cleaned with a rag and rinsed in solvent. After this, the remaining elements of the fuel pump are cleaned.
After cleaning is completed, it is recommended to install a new coarse mesh, as the cells on the old one may be damaged.
Before performing work, read the operating instructions so that you know in advance where the Lada Granta fuel pump is located, as well as how to attach it. It is better to carry out work in a well-lit room away from open flame sources. For protection, use gloves to avoid damaging your skin with gasoline or solvent.
Removing and installing the fuel module Lada Granta
If increased noise is heard during operation of the vehicle, this is especially noticeable when starting the engine, or at idle speed, and if engine power drops, then most likely the fuel pump is faulty or the mesh on the pump module is severely clogged.
First you need to check the fuel pressure, as described in the article - “Checking the fuel pressure of the Lada Granta”.
If the fuel pressure is higher than 4 kg/cm2, then the pressure regulator installed in the fuel pump module is faulty and must be replaced.
If the pressure is below 3.8 kg/cm2, then the fuel filter may be clogged - see the article on replacing the fuel filter - “Relieving fuel pressure and replacing the Lada Granta filter.”
Purpose and principle of operation of the fuel pump
Chevrolet Niva fuel filter: where is it located and how to replace it
The fuel pump is designed to pump fuel from one point to another. In a car, the role of the first point is played by a fuel reservoir - the tank, and the second - by the engine, where the pumping takes place. This process occurs at a certain pressure, which is maintained by the pump reducer, which is a very important point.
Fuel pumps are divided into 2 types according to the type of drive: electric and mechanical. Inside the first there is an electric motor with a mini-pump, which operates from the mains and uninterruptedly pumps fuel into the engine. The second type is becoming increasingly rare, as it is installed on carburetor cars, and operates due to the reciprocating movement of the lever.
How to change the fuel pump on a Lada Granta: photos and videos
The fuel pump for the Lada Granta is not a consumable item and usually does not bother car owners. Replacement is simple, but the price tag for the fuel pump is steep, but more on that below.
Replacing the fuel pump on video.
Replacement tool
The Soviet hammer - they haven’t come up with a better one yet!
Replacing the fuel pump in detail with a description of each step
The algorithm of actions is as follows:
- Remove the negative terminal from the battery. A mandatory requirement if you carry out any work that affects the electrical system of your car.
- The fuel pump is located under the rear seat. The rear seats need to be raised, I remove them altogether. It comes off easily. You need to “pull the string” in the center of the seat and remove it.
Pull the loop and pull it up
- We lift the rug and clean out the dirt in the seat. It must be clean, as this dirt can get into the fuel tank.
The contour of the slot is indicated in the figure - Disconnect the fuel pump connector to relieve pressure in the fuel system.
- Next, under the hood, unscrew the cap from the fuel rail, and use a screwdriver to press the breather (nipple) - this releases the pressure.
Relieving pressure from the fuel rail using a screwdriver
- Put the cap back on. Below I will describe an alternative option for relieving pressure in the fuel frame.
- Unscrew the 4 bolts securing the fuel pump.
4 bolts securing the plastic fuel pump cover
Remove the fuel hoses from the fuel pump.
Removing hoses from the fuel pump
- Next, using a hammer and a drift (chisel or straight screwdriver), we “scroll” the pump counterclockwise.
- Next, remove the lock washer by simply pulling it up.
- And take out the fuel pump.
An alternative option for relieving pressure in the fuel rail
The main method is a little inconvenient and dangerous. Since gasoline can ignite, and if the muffler pants have not yet cooled down, it can cause a fire in the engine compartment. Therefore, there is an easier way.
- Disconnect the power supply from the fuel pump.
- Start the car and let it run until it stalls on its own.
This method also relieves pressure in the fuel rail. Its advantage is that if you have a 16-valve engine, you do not have to remove the cover from it to get to the nipple!
Choosing a fuel pump for the Lada Granta
The fuel pump is universal and fits all models of the VAZ family.
There isn't much choice. There are two models on the market, and according to reviews, they do not cause problems. You can take any one.
The fuel pump on Kalina, Priora and Grant is the same!
Replacing the fuel pump mesh on Grant
I think there is no need to explain once again that the design of the fuel pump on Kalina and Grant cars is not at all different. That is why the entire process of replacing the components of the fuel pump on the above cars will be the same. Also, it is worth noting that when compared with the models of the 10th VAZ family, there are some points that differ.
Causes of clogged strainer on Grant
It is not necessary to change the grid so often, since when refueling with normal fuel, it can easily travel more than 100,000 km. But symptoms may appear that indicate a clogged fuel pump mesh:
If you begin to notice the problems described above, then the first thing you should do is look at the mesh filter and, if necessary, replace it.
Procedure for replacing the fuel pump mesh on a Lada Granta
Since the fuel filter on a Lada Granta car is located directly in the tank, it must be removed from there. To do this, one half of the rear seat is folded back, after which the two screws securing the hatch are unscrewed. Below it is the fuel pump. To remove it, you need to do the following:
- Relieve pressure in the vehicle's power system
- Disconnect the block with power wires
- Disconnect the two fuel pipes from the fuel pump cover.
- Move to the side the retaining ring that secures the pump in the tank
- Pull out the entire module assembly
After this, you can begin removing the mesh filter without any problems.
We move a little to the side three latches - latches, which are clearly shown in the photo below.
Now we move the lower container to separate the module into two parts, first disconnect the tube, which is shown in the photo.
Now we completely separate the two parts of the module.
Now we have full access to the mesh, and it is enough to pry it with a screwdriver so that it moves away from its seat. You may have to apply a little more force than expected, but you can remove it without any problems.
As a result, we obtain a removed strainer, which, as can be seen, is quite heavily contaminated, although in this example we are considering a car with only 65,000 km mileage.
Now we take a new mesh and install it in its place in the reverse order.
In the photo above you can see the black rubber plug. Of course, it must be removed before installation. Also thoroughly rinse the pump container inside and out so that there are no particles of dirt or other debris left on it!
To do this, it is best to use a special carburetor or injector cleaner, such as the one shown above. Then you can assemble the entire structure and install it in the gas tank.
Before starting the Granta engine for the first time, it is necessary to pump fuel several times without starting the engine: pumping two or three times is usually enough. Now you can start the engine and check the result of the work done. The mesh should be replaced regularly, as this example shows that even with a short mileage it is already quite dirty.
The price of a new fuel pump mesh for Grant is about 50-70 rubles.
Signs of malfunction and replacing the fuel pump on a Lada Granta
The main symptoms of a faulty VAZ fuel pump on a Lada Granta car are a drop in pressure in the fuel system, and as a result of this, the car moves jerkily and the engine cannot be spun up to maximum speed. Also, if you hear uncharacteristic sounds in the area of the rear seats, similar to a short-term howl, then most likely it’s time to repair the car, namely, replace the fuel pump of your Grant.
Procedure for replacing a VAZ fuel pump on a Lada Granta
- We open the fuse mounting block, which is located on the dashboard to the left of the driver’s seat, and take out the element we need, which is responsible for the fuel pump.
- We lift and remove the rear seat sofa, and then remove the trim underneath it
- There is a black hatch on the right side. Under its cover there is access to the fuel pump
- Using a Phillips screwdriver, unscrew the four screws and remove the hatch cover
- After accessing the fuel pump, disconnect the power terminal and pipelines.
- Using a hammer and screwdriver, unscrew the retaining ring counterclockwise, which secures the fuel pump into the car tank.
- Using a rag to remove dust and dirt from the area of the upper part of the fuel pump, carefully remove it and replace it.
- Reassembling in reverse order
Signs of malfunction and replacing the fuel pump on a Lada Granta with your own hands
Replacing the mesh and cleaning the fuel pump
- After the plastic cup of the fuel pump has been removed from the gas tank, carefully unclip the four plastic latches and remove the lower part of the cup
- As a rule, there will be a huge amount of dirty deposits in the glass, and the mesh will be completely covered with dirt.
- Using a screwdriver, remove the screen and thoroughly clean all parts of the fuel pump.
- We install a new mesh (coarse filter), assemble and install the fuel pump in the tank.
Replacing the mesh and cleaning the fuel pump
Where to buy and what is the price of a VAZ fuel pump for the Lada Granta
The price of a VAZ fuel pump for the Lada Granta depends on its manufacturer. You can buy a VAZ fuel pump in the online store kemp103.ru
Signs of a fuel pump malfunction
Mechanical fuel pumps
In a mechanical fuel pump, malfunctions most often occur due to wear of the sealing gaskets and the formation of leaks between parts of the housing. As a result, the tightness of the structure is broken, air gets in, fuel stops getting into the carburetor and the engine stalls. A similar consequence is caused by membrane rupture and valve failure. At the same time, the car begins to move jerkily until the fuel supply stops completely.
Electric fuel pumps
On cars with mechanical and electronic injection, the signs of a fuel pump malfunction are slightly different, but they can be classified into certain groups:
- The engine does not start. Rotation of the starter with dry spark plugs does not cause flashes in the cylinders. There is no pressure in the fuel line, or it is extremely low; the buzzing of the pump is not heard when the ignition is turned on or the starter is operating.
- The engine does not start, although occasional flashes occur in the cylinders. There is pressure in the fuel line, but without a pressure gauge its value cannot be determined. The candles are dry.
- The engine starts and idles normally, but pressing the accelerator causes it to stop. If you want, it is possible to raise the speed to medium, but attempts to start lead to the engine stalling. There is a black coating on the spark plugs, the operation of the fuel pump is characterized by a changing sound.
- The engine starts, holds idle speed normally, and picks it up easily at neutral speed. When driving at medium and high speeds, a “twitching” is observed. It happens that after a certain mark on the tachometer the speed does not pick up, and the engine stops producing the required power under load. At the same time, the spark plugs are white, and by their appearance it seems that the car is ignited too early or has a lean mixture.
It is worth noting that the above symptoms of fuel pump malfunctions are also typical for other engine breakdowns, and they cannot be used to unambiguously diagnose a fuel pump malfunction. For example, speed also fluctuates if there is a problem with the air sensor, throttle valve, clogged injectors or poor quality fuel.
Replacing the fuel pump (gasoline pump)
- After this procedure, remove the pump cover by lifting it up:
- Next, you will see the following picture, as shown in the photo below:
- As you can see, now you need to disconnect the power plug from the fuel pump, which is located on the left, and the two fuel fittings, located on the right. They are secured using plastic and metal fasteners. To remove the lower fitting, you need to press on the metal bracket and pull the tip towards removal; it is most convenient to do this with pliers:
- Then, when everything is disconnected, you can begin to knock down the retaining metal ring that secures the Granta fuel pump. This procedure can be carried out using a screwdriver and a hammer by placing the screwdriver on the protrusion in the ring and tapping counterclockwise several times until the ring comes free.
- Now you can remove the ring and then the pump itself. Please note that before this work you need to thoroughly wipe everything around so that there is no dust or other foreign objects. Otherwise, all this may penetrate the tank and, accordingly, ultimately clog the mesh of the new fuel pump. We take out the part, carefully, and take it out a little to the side at an angle so as not to bend the fuel level sensor float.
That's basically the whole replacement. After everything has been done, you can begin installing the new mechanism and carry it out in chronological order!
How to replace a fuel pump - Lada Kalina Blog
In order to get to the location of the fuel pump on the Lada Kalina, you must first recline the rear seats and remove the insulating trim on the floor.
We find the lace between the rear seat belt buckles and pull it up, raising both seats. Below I will tell you what tools may be needed for this repair:
- Phillips and flathead screwdrivers
- Hammer
- Pliers
Removing and installing the fuel pump Lada Kalina:
- Under the floor covering there will be a metal cover, black, as shown in the photo below. You need to unscrew 4 bolts on it:
- Next, when all the screws are unscrewed, you can safely remove it with a slight movement of your hand:
- After which the following picture opens, where we see the upper part of the Kalina fuel pump and all the fittings that are connected to it:
- Now you can begin to remove the wires and hoses and the fuel pump. First, disconnect the power plug, which is located on the left side. Push the plastic lock up a little and pull the plug to the side.
- Disconnect the fittings one by one. The lower one is removed as follows: with one hand we press on the metal locking clamp, and with the other hand or pliers we pull the fitting to the side:
- The top one is removed in the same way, only there is a slightly different latch - green. You need to press on it with one hand and pull the tip to the side with the other.
- It is advisable to clean everything around the fuel pump thoroughly so that when dismantling, no dust, dirt or other debris gets inside the tank.
- Next, you can begin to remove the large metal ring that secures the pump. The factory uses a special puller for these purposes, but you can do without unnecessary devices. Simply place a flat-head screwdriver on the end of the ring and slowly tap it in a counterclockwise direction with a hammer until the ring comes out of the mounting grooves.
- The Jonnesway screwdriver coped well with this test, its body remained intact and undamaged after numerous hammer blows! After the clip has popped out, it can be removed:
- Now you can start removing the fuel pump. Take it by the top and gently lift it up. You should be very careful not to bend the structure on which the float is attached. To do this, while lifting the pump (closer to the very top), tilt its upper part slightly towards the right rear door. And take it out, as if diagonally, so as not to catch the float.
- The photo below shows the result of the work done to remove the Kalina fuel pump:
If this part needs to be replaced, then install a new pump and perform the installation in the reverse order. Be sure to wipe the rubber and around the seat dry before doing this so that no debris gets into the tank.
List of materials on the same topic
