Removing the front seats of Lada Kalina
Required tools: “E-10” head (or a regular “8” head), “10” head, “13” head.
- Move the seat back until it stops, and unscrew the 2 screws of the front mounting of the slide using the “E-10” head.
- Move the seat all the way forward and unscrew the 2 rear mounting screws for the seat slide.
- Remove the front seat of Kalina through the front door opening.
Removing the passenger seat is done in the same way.
How to remove and install Lada Kalina car seats
Page 1 of 3
Seats are usually removed to clean the interior and the seats themselves, as well as to better access the components and parts of the instrument panel and vehicle controls.
Removing the front seat and slide
1. Move the seat back all the way and use a screwdriver to disconnect the torsion bars from the pillow base post.
2. We remove the torsion bars from the grooves of the brackets
6. Recline the seat back
7. ...and using a 8mm head we unscrew the two bolts of the front fastening of the slide.
8. The travel stop is secured with a bolt from the outer slide.
Move the seat all the way forward.
9. Using a 8mm socket, unscrew the first bolt of the rear fastening of the internal slide.
10. Unscrew the second bolts of the rear fastening of the internal slide.
Unscrew the rear mounting bolt of the outer slide.
11. Remove the chair and take it out through the front door opening.
Unscrew the seat belt buckle.
12. Disconnect the spring.
Removing the rear seats of Kalina
- Lift the rear seat cushion by the strap, unscrew one nut securing each hinge to the floor with a 10mm socket.
- Remove Kalina's sofa cushion.
- Unscrew the 2 nuts securing the backrest brackets to the floor on the left and right sides using a 13mm socket.
- Fold the backrest, unscrew the 2 bolts securing the backrest brackets on the left and right sides.
- Remove the back of the sofa.
Installation of the left side of the backrest and seat cushion of the Kalina is carried out in the reverse order.
Lada Kalina Hatchback Vedryshko › Logbook › Repair of the back of the front seat
Hello people. I encountered a problem that the backs of the front seats do not recline. If you twist the handle, only one part of the seat lowers, while the second part stands still and the seat becomes skewed. Having taken it apart, nothing became clearer... I ask for help, how does the mechanism work?
If you remove this light insert, the seat is adjustable, but then it wobbles...
Removing and installing Kalina seat slides
Required tool: 8mm socket.
- Move the slide so that the fastening bolts are visible through the technological holes. Unscrew the bolts securing the slide to the seat using a 8mm socket.
- Remove the slide assembly with the moving mechanism lever.
- The slide is attached to the frame with 3 bolts. Remove the end of the travel lever shaft from the inner slide hole. A spring is installed between the lever and the outer slide.
When reassembling the slide, before installing the lever shaft into the hole of the outer slide, first put a spring on the shaft and place the short mustache of 1 spring on the latch. Then, squeezing the long mustache 2 springs (can be tied with wire), insert the shaft into the hole in the slide, so that this mustache goes under the slide.
How to remove the rear seat on a Kalina
Hello everyone, I don’t have time to write down what I did to the car...for example, I changed the suspension all around.
But that's not what this post is about. Over the summer, the blue inserts on the seat trims became pretty dirty; they needed to be tidied up. There are several ways to wash them, for example, we remove the seats, take them to the car wash, or take out our Karcher and bathe the seats without taking them apart. The advantages of this method are the minimum labor costs. I see the disadvantages for myself in the possible rust coating of the untreated metal seat frame. I chose the method of completely disassembling the seats and washing the removed trims in the washing machine... So, to disassemble and reassemble the LKS seats you will need: - Pliers (for removing the rubber holders around the perimeter); — Side cutters (for biting off metal rings); — Ties at least 100 pcs. (to replace metal rings); — A flat-head screwdriver (for opening the plastic locks of the casing along the perimeter); We remove the seat by unscrewing the 4 bolts on the slide, disconnect the heating pad, and take it to the garage (home).
We remove the pillow along with the covering from the frame, the covering is attached to the foam pillow using rings, they can be unbent, as I did on the first few, or better yet, cut out using side cutters
The body of the Novaya Kalina was unified with the Granta and in many ways the mounting locations of the components and elements coincide. The same applies to the seats. The fastening of the sled is no different, and therefore removing the chairs is not a difficult process at all.
Initially, when the K2 had not yet entered serial production, many media discussed the future use of American Lear Corporation seats. But the contract never materialized for reasons still unclear. Therefore, the Russian supplier was retained.
How to fold out the back seat on a Kalina sedan
Tool:
- Driver for socket attachment
- Knob attachment 10 mm
- Knob attachment 13 mm
Note:
The work is shown on the example of the left side of the seat. The cushion and backrest of the right side of the seat are removed in the same way.
1. Lifting the rear seat cushion by the strap, use a 10 mm socket bit to unscrew one nut securing each hinge to the floor.
2. We remove the pillow.
3. Using a 13 mm socket, unscrew the two nuts securing the backrest brackets to the floor on the left and right sides.
4. Having folded the seat back, use the same tool to unscrew the two bolts securing the backrest brackets on the left and right sides.
5. Remove the seat back.
6. Install the backrest and cushion on the left side of the seat in the reverse order.
The article is missing:
- Photo of the instrument
- High-quality photos of repairs
Lada K alina 2 . BACKSEAT
The rear seat is equipped with head restraints that can be locked in only two positions: fully raised or fully lowered. To raise, pull the headrest up until it locks (you will hear a click).
To lower the head restraint, press the left latch as you did for the front head restraint (see “Adjusting the front seats,” page 27) and lower the head restraint.
All three rear seat head restraints can be removed in the same way as they were for the front seat head restraint (see “Adjusting the position of the front seats,” page 27).
To increase the luggage compartment area, the rear seat can be folded. The backrest and rear seat cushion can be folded completely, 2/3 or 1/3.
Fold the rear seat in the following order.
4. Unfasten the micro-lock of the middle passenger's seat belt strap by inserting the ignition key into the slot shown by the arrow in the photo and, pressing the latch, move the belt to the side.
I don’t know what about the Kalina sedan, but in a station wagon you can make quite a decent platform for transporting cargo. Although the trunk itself is quite large, by folding out the rear seats you can get almost three times more space.
The seats fold out quite simply, but owners who just bought Kalina may not know this. I myself had a similar story with a VAZ 2112; after half a year of operation, I only later found out that the seats can be folded down to create a flat platform, and load fairly large cargo.
The first step is to fold the bottom row; to do this, just pull the laces, which are located right next to the seat belt buckles. And to recline the back, you need to pull the levers at the end on each side, and also pulling them towards you, lower them all the way down. The pictures below show everything clearly, but the levers themselves on the backs are not visible because of the covers, but I think everyone understands where they are.
How to remove the skids on Kalina
- First of all, we will need to completely remove the front seat of our Kalina, which requires intervention and replacement of the runners. Read about this in this section.
- Next, turn the chair over to a comfortable position and perform the following steps, which are described below.
- The removal procedure will be shown using the example of one slide, which is located next to the adjustment lever, since this is where certain difficulties may arise. By pressing the lever, we set the position of the runners so that the fastening bolts are in sight and can be freely unscrewed. From one edge:
And on the other hand, where there are two more fastening bolts, so that they become visible, it is necessary, with the adjustment lever pressed, to move the skids in the desired direction so that the bolts are visible through the holes, as shown in the photo below:
- After all this has been done, we move the sled a little to the side, as is clearly shown below:
- Next, you need to pull this part up with a little force and it will come out without difficulty:
On the other side, everything is made even simpler, since there are only two bolts securing the runners to the seat and there is no spring that will get in the way.
Hatchbacks Lada Kalina, Lada Samara, Lada 112. A look at the back
Hatchbacks Lada Kalina, Lada Samara, Lada 112. A look at the back
LADA > Kalina
LADA KALINA (VAZ-11193)
Five-seater 5-door hatchback. Body options: sedan, a station wagon is also being prepared.
Engine: 8-valve petrol 1.6 l (81 hp) with distributed fuel injection.
Transmission: 5-speed manual. Drive is on the front wheels.
Options: “standard”, a little later - “luxury”.
Expected price: $8620 (250 thousand rubles)
Five-seater, 5-door hatchback, serial production began in 2000. Body options: sedan, station wagon, coupe.
Engine: since October 2004, a 16-valve petrol 1.6 liter (89 hp) with distributed fuel injection has been installed.
Transmission: 5-speed manual. Drive is on the front wheels.
Options: “standard” and “luxury”, additionally power steering and air conditioning.
Price: $8520 (247 thousand rubles)
The five-seater 5-door hatchback has been in serial production since 2003 to replace the VAZ 21093. Body options:
3-door hatchback, sedan.
Engine: 8-valve petrol 1.5 l (77 hp) with distributed fuel injection.
Transmission: 5-speed manual. Drive is on the front wheels.
Options: “standard” and “luxury”.
Price: $7240 (210 thousand rubles)
In 2004, Lada Samara 2 replaced the first generation cars on the assembly line. Prototypes of the 2113 and 2114 hatchbacks received a fifth door that extends to the bumper—this trunk is much more convenient to use. During testing, another advantage emerged - due to the rounding of the “back part” of the rear, the glass remains clean even in slush! Unfortunately, for the sake of economy, the “old” door was used in the series.
The "tenth" family - essentially a further development of "Samara" - is devoid of many of its shortcomings. Undoubtedly, the Lada-112 looks more elegant and modern than the fourteenth and the quality of the bodywork is higher.
If we, without a doubt, classify the “fourteenth” and “twelfth” as hatchbacks, then this “Kalina” is perhaps closer to station wagons. At least her "back" is not a "hatch" at all.
The latest model “Kalina” is already a modern car of European level. At least externally, in terms of the size and uniformity of body gaps, it is almost inferior to most of its foreign classmates. The interior matches the exterior - elegant and ergonomic.
EIGHT AND SIXTEEN
The VAZ 2111 1.5-liter eight-valve injection engine provides the Samara with good dynamics and moderate fuel consumption. Well, they inherited good handling from the first generation.
But it is unlikely that the manufacturer will ever offer power steering, ABS, air conditioning or airbags to the owners of these cars, even as options.
Subtleties when installing the slide
- When replacing these parts, a slight difficulty may arise, and this applies to the side where the chair position adjustment lever is located, since there is a spring there, which will then need to be installed in place. To do this as simply as possible and without unnecessary problems, you must first put the slide on the edge of the spring and the end of the lever, approximately all of this will be at an angle of 30 degrees. The picture below shows it more clearly and is marked with arrows:
- When everything is hooked, holding it in the same horizontal position, we bring the runners closer to the seat and put this edge (there is a special hole there) on the lever rod:
Immediately after this, we attach the fastening bolts and tighten everything conscientiously, as it was from the very beginning. It is better not to twist the ratchet, as you will ruin the tool and will not achieve the required tightening. The procedure on the other side is carried out exactly the same, only you will not have problems with the spring and therefore everything can be completed much faster. If you have any questions, please contact us and we will sort it out together.
Hatchbacks Lada Kalina, Lada Samara, Lada 112. A look at the back
Hatchbacks Lada Kalina, Lada Samara, Lada 112. A look at the back
LADA > Kalina
LADA KALINA (VAZ-11193)
Five-seater 5-door hatchback. Body options: sedan, a station wagon is also being prepared.
Engine: 8-valve petrol 1.6 l (81 hp) with distributed fuel injection.
Transmission: 5-speed manual. Drive is on the front wheels.
Options: “standard”, a little later - “luxury”.
Expected price: $8620 (250 thousand rubles)
Five-seater, 5-door hatchback, serial production began in 2000. Body options: sedan, station wagon, coupe.
Engine: since October 2004, a 16-valve petrol 1.6 liter (89 hp) with distributed fuel injection has been installed.
Transmission: 5-speed manual. Drive is on the front wheels.
Options: “standard” and “luxury”, additionally power steering and air conditioning.
Price: $8520 (247 thousand rubles)
The five-seater 5-door hatchback has been in serial production since 2003 to replace the VAZ 21093. Body options:
3-door hatchback, sedan.
Engine: 8-valve petrol 1.5 l (77 hp) with distributed fuel injection.
Transmission: 5-speed manual. Drive is on the front wheels.
Options: “standard” and “luxury”.
Price: $7240 (210 thousand rubles)
In 2004, Lada Samara 2 replaced the first generation cars on the assembly line. Prototypes of the 2113 and 2114 hatchbacks received a fifth door that extends to the bumper—this trunk is much more convenient to use. During testing, another advantage emerged - due to the rounding of the “back part” of the rear, the glass remains clean even in slush! Unfortunately, for the sake of economy, the “old” door was used in the series.
The "tenth" family - essentially a further development of "Samara" - is devoid of many of its shortcomings. Undoubtedly, the Lada-112 looks more elegant and modern than the fourteenth and the quality of the bodywork is higher.
If we, without a doubt, classify the “fourteenth” and “twelfth” as hatchbacks, then this “Kalina” is perhaps closer to station wagons. At least her "back" is not a "hatch" at all.
The latest model “Kalina” is already a modern car of European level. At least externally, in terms of the size and uniformity of body gaps, it is almost inferior to most of its foreign classmates. The interior matches the exterior - elegant and ergonomic.
EIGHT AND SIXTEEN
The VAZ 2111 1.5-liter eight-valve injection engine provides the Samara with good dynamics and moderate fuel consumption. Well, they inherited good handling from the first generation.
But it is unlikely that the manufacturer will ever offer power steering, ABS, air conditioning or airbags to the owners of these cars, even as options.
The front seats of all three hatchbacks are approximately the same in terms of comfort and living space, except that the interior of the Kalina looks more fresh. However, the latter is a matter of taste
The base engine of the “twelve” is a sixteen-valve engine, the volume of which has increased to 1.6 liters since last year (ZR, 2004, No. 12). The old one and a half liter Lada-112 also provided excellent dynamics, but with the updated one, thanks to better elasticity, it became easier to get underway, and while driving it is possible to change gears less often. Owners will be pleased with low fuel consumption, good smoothness and relatively low noise, but with vibrations, alas, the situation is somewhat worse.
The Viburnum hatchbacks will initially have high-torque eight-valve VAZ 21114 engines with a displacement of 1.6 liters. A little later, a new 1.4-liter engine will appear, not inferior in power, but more economical and “cleaner” (ZR, 2004, No. 9).
Thanks to the high seating position and low window sill line, visibility in the Kalina is clearly better, which is especially valuable when operating in the city. And the compactness of the car will come in very handy here.
How to remove the seat from the rear sofa on a Lada Granta - photos and videos
Unlike the “Sport” modification, the seats of the Lada Granta Liftback are not equipped with height adjustment. For a driver of average height this is not significant. But for those who are over 180 cm or under 165 cm, this becomes a problem.
Often, owners independently install seats from Opel, Ford, Mercedes-Benz, Audi in order to increase comfort.
Driver and passenger front seat overview. Adjustment mechanism
The ergonomics of the driver's seat are good, the range of settings for the steering column and seat allows a driver with a height of 180 cm to fit comfortably. However, the longer the distance, the faster fatigue sets in; the right leg increasingly becomes numb from the limited position.
For the first time in the Lada Granta Liftback model, the seat is equipped with lateral support. This was previously installed in the second generation Kalina, Kalina Sport. Scheme for manufacturing the structure:
- metal frame;
- foam pillow;
- back.
The frame is a supporting structure. The backrest and cushion are installed on the movable hinges of the frame. In the Liftback model, the backrest is solid, the height is proportional to the height of 170 cm. There are bolsters on the sides that provide a comfortable seat for the driver and passengers.
The seat elements have a spherical structure: springs covered with special foam and polyurethane are placed on a metal base. The top is covered with upholstery fabric.
Removing the front seats of Lada Granta
Required tool: 8 key. The front seats of Lada Granta are installed on skids that are attached to the floor.
- Move the seat all the way forward.
- Unscrew the two rear mounting bolts for the guide slides and remove the spring washers.
- We move the seat all the way back, and similarly unscrew the two front bolts with washers.
- If seat heating is installed, then disconnect the block with wires. Raise the seat and disconnect the seat belt sensor wiring harness connectors.
The second front seat is dismantled in a similar way. Installing the seats is done in the reverse order.
Removing the front seat of a Lada Kalina - do-it-yourself vase repair
If you have problems or damage to the front seats on your car, then to repair them you first need to remove them.
This procedure is quite simple on Lada Kalina, you just need to have a key with a special TORX-E11 head.
If you have such a head, then removing the seats will not be difficult for you. First you need to unscrew the two front bolts, moving the seat on the skids all the way back.
This is what it looks like when we freed the front part:
Now you need to move the seat the other way around - all the way forward to gain access to the rear:
Using the same key, we release this side, unscrewing the bolts, and everything is now ready - the front seats are ready for removal. You can safely lift it up and take it out of the cabin; surprisingly, it is very light.
And be careful not to lose the washers, otherwise it will constantly unscrew without them. The passenger car can be removed in exactly the same way; there are absolutely no differences.
Let us remind you that the previous article on our website was about on-board computer error codes. I recommend adding it to your bookmarks.
Rear seat overview. Adjustment
In the back of the Lada Granta Liftback it’s already cramped for three, but there’s plenty of space for two. The sofa is flat, without ergonomics. For tall passengers, long trips will be painful.
Adjustment of the sofa is not provided, unless you move up and down around the perimeter yourself. Don't forget about the restrictions on the back of the seat back and roof lining.
In order to increase safety and reduce the likelihood of injury to passengers, the rear row of seats is equipped with seat belts.
How to fold out the seats in a Grant Liftback
The rear backrest folds in a 60/40 ratio, which is very convenient and practical when transporting non-standard loads. Press the side clamps of the upper backrest and lower the desired side.
If necessary, the back row folds completely onto the floor, forming a flat platform without steps or bends. Folding the seats is easy: just press the side hinges of the upper backrest. The lower sofa is fixed with metal hinges at the base.
Owner reviews
| № | Positive |
| 1. | Kirill , 33 years old: I am completely satisfied with the original seats on the Granta Liftback, comfortable, ergonomic. Height is 175 cm, I don’t feel any discomfort. |
| 2. | Vitaly , 41 years old: I installed heating on the standard seats, nothing else is needed. It’s very nice that they installed lateral support, it was so lacking in Priora and Vesta. |
| 3. | Mikhail , 30 years old: my positive review of the back sofa. Comfortable, practical, good material, easy to clean. |
| 4. | Gennady , 29 years old: the quality of the seats is average, I’m satisfied, I put on the covers. I'm going to install heating. |
| Negative | |
| 1. | Victor , 24 years old: I don’t like standard seats, I bought a second generation Opel Astra at the market and installed heating. My advice to motorists. |
| 2. | Peter , 36 years old: everything is good in the Grant Liftback, except for the seats, they are not comfortable, too soft, the fabric is the cheapest. Replaced from third generation Ford. |
| 3. | Vitaly , 28 years old: my height is 185 cm, my original seats are not equipped with height adjustment, it’s so lacking. Replaced from Opel Astra. |
Removing the front seat
1. Move the seat back all the way and use a 10mm head to unscrew the two screws for the front fastening of the seat slide.
2.
Having moved the seat all the way forward, use a 10mm head to unscrew the two rear mounting screws for the seat slide.
3.
We take out the front seat through the car door opening.
Removing the front seat slide
We move the seat slide so that the bolts securing the slide to the seat frame are visible through the technological holes in the slide.
1. Using a 8mm socket, unscrew the bolts securing the slide to the seat frame. Each of the slides is attached to the frame with three bolts.
2.
Remove the slide assembly with the longitudinal movement mechanism lever.
3.
We remove the end of the lever shaft of the longitudinal movement mechanism from the hole in the inner slide and from the hole in the outer slide.
A spring is installed between the lever and the outer herrings. Similarly, we remove and disassemble the front passenger seat.
We assemble and install the front seat in the reverse order.
Before installing the lever shaft into the hole of the outer slide, first put a spring on the shaft and place the short mustache of 1 spring on the latch, then, squeezing the long mustache of 2 springs (can be tied with wire), insert the shaft into the hole of the slide so that this mustache goes under the slide .
Repair of front seats of VAZ-2104, 2105, 2107 (the backrest falls)
The essence of the problem and solutions
The back of the front seat of the VAZ classic falls back due to wear and cutting of the teeth of the latch comb. This is the part that will have to be replaced during repairs. You can buy it at an auto parts store; there are right and left combs (do not mix them up). At the same time, you can replace the locking screw.
These brackets need to be replaced
The price is not very high, but the repair itself is complicated: you will need to cut out the old part (it is welded by contact welding) and weld a new one. Therefore, you can take on repairs only if you have a garage equipped with welding, an angle grinder, a drill and other plumbing tools and you know how to use them all.
Another way to restore the retainer is to use a repair (reinforced) comb. It is welded directly onto the broken fastener; there is no need to cut anything off and the repair is faster.
Repair (reinforced) seat back clamp for VAZ-2107
If you don’t have all this, then try looking at auto repair shops for a seat with a well-preserved latch. Even if its cover or cushions are damaged, you can transfer the upholstery from your seat to a new frame. Welding is no longer needed here; anyone can do the job.
Removing the seat
You will need “8” and “13” mm wrenches, preferably socket wrenches with a ratchet. Move the seat to the extreme forward position.
We unscrew the two screws of the rear fastenings and remove them from their sockets.
Unscrew the seat mounting screws
Move the seat to the rearmost position. We unscrew the screw at “8” of the outer fastening at the top and the nut at “13” at the bottom of the seat near the inner fastening. We take the seat out of the car. We turn the seat over and place it on a stand for ease of use. You can simply put it back in the trunk.
Installing a reinforced seat clamp comb
To install a reinforced comb, you need to straighten a worn and broken comb. Protect the seat cushion and the screw with linings made of fireproof materials. Boil cracked parts. Install the reinforced comb, aligning it with the screw and welding it to the bracket.
Installation of a reinforced seat clamp comb VAZ-2107. Arrows indicate welded cracks.
Disassembling the pillow
If you decide to install a new factory-made bracket, you will have to remove them to avoid burning the foam and other parts of the seat cushion when cutting and welding the bracket.
To do this, remove the covers, if any, and use a flat screwdriver and pliers to bend the metal tabs around the perimeter of the seat.
Bend the trim tabs
Carefully unhook the trim and remove the pillow.
Removing the worn-out bracket
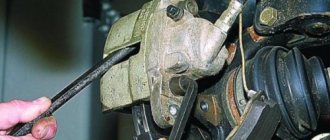
We take out the wire retainer of the screw and turn the screw out of the socket. To avoid interference, it is better to remove the seat slide from the side of the bracket by unscrewing the two fastening screws.
Remove the stopper and turn out the screw
To remove the old part, you need to drill out the welding points with a drill of about 5 mm. Where this is inconvenient, you will have to use a grinder and a chisel.
We adjust and weld new parts
Set the backrest to the “sitting” position and mark the position of the new part.
We grab the comb at two points and check once again for correct installation.
We finally boil the part.
After cooling, we clean the seams with a grinder and cover them with paint or anti-corrosion mastic.
We weld the backrest clamp bracket
We check the condition of the springs, solve the problem of “sagging”
While the seat cushion is disassembled, another problem can be solved. The springs often break off from the sides of the seat and it begins to sag greatly under your weight. Weld metal plates of suitable replacement in place of the broken ones and fasten the springs in place. You also need to return the wires that connect the springs to each other. If they are lost, then look for a suitable replacement.
Torn spring mount
For those who like a firmer seat, we can recommend cutting a lining from a fiberboard sheet to a size slightly smaller than the pillow and, when assembling the seat, placing it on the springs.
Removing the rear seat
The work is shown on the example of the left side of the seat.
The cushion and backrest of the right side of the seat are removed in the same way.
1
. Lifting the rear seat cushion by the strap,
Using a 10mm socket, unscrew one nut securing each hinge to the floor.
2. Remove the pillow
3
. Using a 13mm socket, unscrew the two nuts securing the backrest brackets to the floor on the left and right sides. 4. Having folded the seat back, use the same tool to unscrew the two bolts securing the backrest brackets on the left and right sides.
5. Remove the seat back.
Install the backrest and cushion on the left side of the seat in the reverse order.
All articles on repair and maintenance of Lada Kalina - “Repair Lada Kalina”
Good day to all.
While the car is waiting for a salary to replace the heater core, I decided to wash the seat upholstery (my family). No sooner said than done. I’ll make a reservation right away - I only removed the passenger seat and the back seat without a backrest (I’ll explain why a little later).
And so let's go: for removal we will need a 10 socket, as well as an 8 socket (or an asterisk, I don’t remember which one). I had exactly 8 in stock. The rear sofa has 4 nuts for 10, and the front one has 4 bolts for an asterisk (the head for 8 is ideal).
And so we unscrew the seats and take them home (someone removes the upholstery on the spot, but I think it’s more convenient and easier to bring it home. Moreover, the seats can be easily removed).
Let's move on. Disassembly. For disassembly you will need a Phillips screwdriver (to remove decorative plastic) and a flat screwdriver (to remove the upholstery itself. Some use pliers, but in my opinion a screwdriver is more convenient).
After removing the elastic, you need to either bend or cut the wire holding the upholstery with the foam. The fastening of the upholstery on the back of the front seat is slightly different. On the sides and bottom there is a groove in the groove, when disassembling it is clear without explanation
You also need to remove the headrest guides and the Kalina emblem. The latter is attached through paralon to a plastic crap (I don’t know what to call it) and to fabric with staples.
The upholstery is removed and you can start washing.
The springs on the front seat were sagging, so it was decided to turn them over. On the back, I left the top 2 as they were (curved back, but turned the rest over. Like lumbar support)
I don’t remember where, but I read that to prevent the seat from sagging, they tighten the springs with clamps
While I was doing all this, my wife soaked the upholstery
After a night in the bathroom, they went to the car. Strangely enough, they dried in the bathroom in about 4 hours. I didn't wait and started reassembling it.
It was decided to replace the wire with clamps
The rest is in reverse order.
Now that you’ve read everything and some are already scrolling further, so as not to burden people’s brains at the very beginning, I’ll explain why I didn’t remove the back of the rear seat - the back of the upholstery is attached to pistons, which I was frankly too lazy to go after))).
This is where I will end the story... I hope I helped someone.
Thank you all for your attention and good luck in your endeavors. See you in the open spaces of the drive.
PS I will be grateful for reposts and likes. That's all for sure now.
Price tag: 0 ₽ Mileage 36070 km
Lada Kalina Hatchback Gray Wolf › Logbook › Minor repairs to the driver's seat
Hi all!
Ever since I bought the car, I've had a problem with the covers on the front seats, especially on the driver's seat. Over the course of 7 years and several owners, the seats bent down significantly, causing the stretched covers to fall inward and after each trip they had to be adjusted so as not to sit on a lump of browned fabric. I got pretty tired of this after three months and after reading Kalinovodov’s bulletin board I decided to act.
Even though there are covers, I still decided to wash the original upholstery, it won’t obviously get worse, and there will be less smells. We remove the upholstery, the most tedious thing was to unhook the iron fasteners that hold the upholstery in the center, but pliers and a screwdriver helped defeat them.
I fiddled a little more with the headrest holders; it was quite difficult to clamp the latches on the back side and pull them out at the same time. I soaked this whole mess in a bathtub with powder for an hour.
While the upholstery was being washed, I turned over the springs on the seat, due to this the seat rose 4 cm, the main goal was achieved.
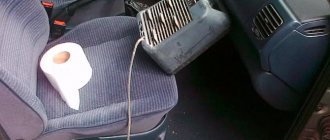
I rinsed, squeezed, dried on the heater ((oil radiator) one by one, it dries surprisingly quickly by the way, I dried everything in 2-3 hours. I put everything back together, the hardest thing was again to tighten the pieces without tearing the foam, but I did it successfully. Like this the upholstery looks like now.
Next, I pulled on the covers, this time securing them not only at the front and back with standard ties, but also making small holes on the sides and securing them at several points to the seat frame.
After everything, the seat looks much better, there is no wild sagging of the seat and no unnecessary odors, the covers do not dangle or get knocked down. Also, in the process of disassembling the seat, in the back pocket of the original upholstery I found an old timing belt, which apparently was left there just in case, and its condition is not bad, only on the edge by 1 mm it rubbed against something (apparently from it there is black dust under the mudguard shield near the pulleys, since the one that stands now is intact).
If I have time, I’ll get to the passenger seat at my leisure, although it’s not that shaky.
In the meantime, I’m very pleased with the result. Thank you for your attention!
source