How to install the firmware of the Lada Priora radio
The standard Lada radio, despite the fact that it is considered a fairly modernized part of the multimedia system of domestic cars, has several disadvantages that present certain inconveniences and limit the ability of users to listen to music files and radio, as well as drive a car.
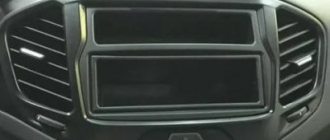
Radio cassette Lada
The new firmware for the standard Lada Priora radio will allow you to further configure a 3G modem, GPS, and also use advanced functions for car control. Depending on the version of the program for MMS, the device can be made more convenient, or it can be turned into a full-fledged on-board computer. You can perform the firmware in a specialized service center, or you can do it manually, but in this case you will act at your own peril and risk, because Your actions may void your device's warranty.
How to properly remove a radio without special keys
Many motorists face the problem of removing the radio in their car. Some people cannot remove the standard device installed at the factory, others inherited the music along with the car, and others simply lost special keys. There are also plenty of reasons for dismantling - from repairing wiring to buying a new stereo system. Hence the demand for information arose on how and with what help you can carefully remove the car radio without damaging the plastic of the front panel. And although the operation is primitively simple and can be easily performed with improvised means, there are pitfalls in it that you need to be aware of.
Video on how to prepare an SD card for flashing the radio
Firmware order:
- Copy the firmware files (Chain.bin, chain.lst, NK.bin, TINYNK.bin) to the root of the SD card.
- Remove the flash drive from the USB port.
- Insert the SD card into the MMC.
- Restart the radio (for Lada Kalina 2/Priora - hold down the power button for 15 seconds, for Lada Granta hold down the volume button for 15 seconds).
- During the download, an update will occur, after which the radio will boot into desktop mode.
- Without rebooting the radio, go to the screen calibration mode (Start/Settings/Control Panel/Stilus/ to the Calibration/Recalibrate tab), then press the screen during the countdown.
- Reboot the MMS with the SD card inserted.
- The firmware of the radio is complete, the SD card can be removed.
Audio, video and photo
The radio supports audio formats: MP3, WMA and WAV. While a tune is playing, the display shows information about the album, artist, and cover art (if any). You can adjust the shades of sound using the equalizer (there are 6 pre-programmed settings for Jazz, Rock, Voice, etc.). The sound quality is not bad, quite clear, without audible cuts in the highs or lows.
MMS supports only one video format: WMV with a resolution of 320*240px. To play video files you will have to use a converter, for example, Xilisoft Video Converter Ultimate. It will not be possible to play a video without conversion, for example, in 720p resolution, the picture will slow down, and the sound will lag behind the video, due to the insufficiently powerful processor.
Review of MMC Lada Granta (luxury) and Lada Kalina 2 (standard)
Review of MMC Lada Kalina 2 (luxury) and Lada Priora (luxury)
The radio is capable of opening photos, supported formats: JPEG, .JPG, .JPE, .BMP, GIF, .PNG. For example, a photo with a resolution of 1400x800px and a size of 1MB will open in about 1 second, and a photo of 1978x3456px and a size of 7MB will take as much as 9 seconds.
It is worth noting that after purchasing a car, the antenna comes as a gift. You will have to install it yourself.
Description of types of firmware.
Versions 1.7 and 1.13 are stock. The navigation built into the car only works on 1.13, 1.23 and 1.24.
1.9, 1.10, 1.11 are based on 1.7; 1.23 is based on 1.13. In 1.7 there are only 11 IDs that can be forwarded to the COM port, no dividers, etc. no, and adding them is very difficult. In 1.13 there is an ID group (3 pieces 481, 551, 280) with dividers, an ID group without dividers (4Ax) and an ID group (8 pieces) without dividers disabled in the firmware. Also, information from some IDs is taken and processed inside the CAN controller. However, I don’t know how to get it. In 1.24 (modified 1.23) it was possible to receive IDs with a mask, that is, select the range of received IDs. I did this with the 7E8..7EF range to receive diagnostic requests from all controllers in our cars. ID 4A2 only for combinations with built-in GPS and only with a connected 6-button steering column switch.
Each version has its own pros and cons: Versions based on 1.7: + Reflashes well even with the engine running. — Data transmission is choked (if you often send data to the CAN controller, it stops being sent to the bus). — Not enough ID. Versions based on 1.13: + Data transfer does not choke. + Lots of IDs. + There are dividers (it really helps reduce the load, because ID: 180 messages are sent 100 times per second) - Flashing is very sensitive to bus activity, etc. (there have been cases of corruption).
Pinout of contacts of the head unit priors
| A | B | C | |
| 1-SCV | 1-Speaker RR+ | 1-line output LR | 11-AUX IN |
| 2-TEL MUTE | 2-Speaker RR- | 2-line output RR | 12-AUX GND |
| 3-Speaker RF+ | 3-GND line outputs | 13-CD BUS * | |
| 4-BAT+ | 4-RF Speaker- | 4-line LF output | 14- |
| 5-Control ant. | 5-Speaker LF+ | 5-line RF output | 15-CD BUS GND * |
| 6-Backlight | 6-Speaker LF- | 6-12V | 16-A+ CD * |
| 7-A+ | 7-Speaker LR+ | 7-RXD | 17-U+ CD * |
| 8-GND | 8-Speaker LR- | 8-TXD | 18-CD-NF GND * |
| 9-GND | 19-CD-NF LEFT * | ||
| 10-line subwoofer output | 20-CD-NF RIGHT * | ||
* Pins 13-20 of connector “C” are used to connect the CD Changer
Tags: pinout of contacts of the head unit Priora, linear outputs of the head unit Priora
Be the first to comment
Leave a comment Cancel reply
You must be logged in to post a comment.
Source
Why bluetooth doesn't work
Most often, failure occurs due to the fault of Sony smartphones. We have already looked at how to connect bluetooth to the Lada Vesta, so it’s worth trying the pairing again.
Connection may not be possible when the Bluetooth function in Vesta is not activated in the radio. Press the button to accept the call, the system begins to function. If this does not resolve the problem, it is best to contact your dealer. Also, this problem may appear after trying to connect several phones. There may be other reasons why Bluetooth does not work on Vesta, including a factory defect.
Connecting a 2 DIN radio to a standard place in the car
How to connect a 2 DIN radio with aliexpress in a car
DIN stands for "Deutsche Industriele Norme" - or "German Industrial Standards". The standard dimensions of a radio tape recorder installed in the car's standard socket. These standards are used by all manufacturers of cars and car radios (or almost all), at least all Chinese radios supplied to us from aliexpress, all of them are assembled according to 1 DIN standards, and more often - 2 DIN. By the way, 1 DIN is the size of the radio, the width x height of which is 180x50mm. 2 DIN - 180x100mm, with the installation depth of all DINs being 160mm. There is also a very rarely used standard for radio dimensions 1.5 DIN - 180x75mm. But finding such a radio is very rare, so today we will consider the usual size of a multimedia player - 2 DIN.
So, in order for us to connect such a radio, if we previously had a 1 DIN radio in the car, we will have to remove the old radio and install the ears on which the radio is attached under the dashboard from the new radio (these are most often included with the radio, but always please specify). In addition to the ears, we will also need a frame sized 2 DIN, which will no longer be included with the radio. It must be purchased separately for each vehicle. It is very advisable to treat the places of fastening and contact of the plastic of such a frame with an anti-creaking composition, otherwise not very pleasant squeaks will be produced in the cabin; they will not appear immediately, but over time.
So, with the installation of the radio, everything is more or less clear (for those who are not very clear, watch the video of installing the 2 din radio below). Now we need to look at the connection diagrams for the 2 din radio, and also figure out its pinout.
Connection diagrams for 2 DIN radio
Most Chinese 2 din radios from Aliexpress are connected to the car via an ISO - Euro connector. This is the most universal connector and the easiest to connect to almost any car. And the pinout is quite logical and simple.
Pinout of ISO - Euro connector of Chinese 2 din radio from aliexpress (example - Podofo - 7018B). Similar radios with an ISO connector will have the same pinout.
Designation of wires of a Chinese 2 din radio
But there are other connectors often used on Chinese radios. I suggest you familiarize yourself with their pinout and subsequent connection
Pinout of 2 din radio from China
The meaning of the 2 din connectors of the radio
Meaning of 2 din radio wires
Connecting tulips 2 din radio
You can read more about the pinout of the ISO-Euro connector and connecting Podofo radios and similar ones on the pages of our website.
Video - examples of connecting 2 DIN radios
Connection diagrams are, of course, good, but it’s much more clear to see how someone has already gone before you by connecting a 2-din radio to a standard place and made a fairly sensible video about it. So, I suggest you familiarize yourself with the most outstanding works of connecting radio tape recorders that are only available in the YouTube collection.
Connecting a 2 din radio using the example of a Lada Priora
Connecting a 2 din radio in a Kia Rio or Hyundai Solaris
Connecting a 2 din radio in Renault Logan or Sandero
Connecting a 2 din radio in a Toyota Corolla 120
From the videos it follows that there is nothing particularly complicated, except for partial disassembly of the car’s dashboard, connecting a 2 din radio to its standard location is no different. You just need to buy everything you need, understand the connection diagram and pinout of the radio, as well as the wires, and slowly connect everything. This process will not present any problems for any more or less handy person.
How to connect a camera, phone and steering wheel buttons to a 2 DIN radio
The issues of connecting steering wheel control buttons, a rear view camera and synchronizing a phone with it to a Chinese 2 din radio are so extensive that one article is not enough to discuss these topics. Therefore, we decided to break these topics down into the following articles:
Mms 2190 firmware Priora 2 free download
Firmware for standard LADA Kalina 2 and Granta radios
To change the appearance of the menu of the supplied radio and expand its capabilities, you will need an SDHC (SD) memory card not exceeding 4Gb in size. The SD card should be formatted in advance on the computer using the FAT file system.
Preparation for firmware:
1)Save the archive with the firmware on your PC and unzip it;
2) Copy all files from the FirmWare folder to the SD card via a card reader.
Firmware:
1. The USB port of the radio should not contain a flash drive;
2. Insert the card with the firmware files into the car radio connector;
3. Reboot the head unit by holding down the function keys (power key or volume key) until the display completely darkens;
4. After this, starting the desktop will talk about flashing.
Preparing for work:
1) Calibrate the screen. Click on the phone icon. Go to the “Calibration” section. Click on the “Recalibrate” button. The time countdown will start;
2) Without waiting for the time to expire, tap on the screen;
3) Without removing the SD card, restart the GU. A new menu will be presented to your attention. The firmware process is completed.
Firmware download
1. Stock firmware
software version with Russian locale, WiFi drivers, Russian Windows interface and keyboard
software option only for MMS from new batches, THIS SOFTWARE IS INCOMPATIBLE WITH THE FORMER 23.0.2.38 a distinctive feature of this software is the presence of the Launcher.exe file in the Windows folder, software with Russian locale drivers for WiFi and Russian Windows interface and built-in keyboard
2. Modified firmware
Firmware with altmenu ver.32 Kalina_mod_ver.23.0.2.32.rar (35.15 MB) Verified.
Russified time and date and correctly displayed Russian symbols Kalina_II_altmenu_rus_clock.rar (28.2 MB)
New menu XLada_NewMenu7.36.rar (12.09 MB)
3. REMOVING A DUMP FROM MMS
With an already flashed MMS, there is no point in taking a dump.
The dump is removed before flashing the firmware in case you have non-standard software and you destroy the device during the flashing process, then the device can be restored using the dump.
1. Download the program Attached file NDumpCE6+.rar ( 65.67 KB )
2. Unzip it onto an SD card or USB flash drive with the exFAT file system (in case the dump exceeds 4GB)
3. We go to the desktop of our MMS
4. Launch NDumpCE6.exe
5. In the program window, make sure that the “Full NAND” checkbox is checked and select “DISK1:” from the drop-down list and click “Save” to confirm
6. After the operation is completed, a file with the .img extension should appear on the SD (or USB) card, about 120 MB in size for old versions of MMS and about 4 GB for new ones, this is our dump
1. This operation is absolutely safe for your device
2. Before starting the procedure, it is best to remove everything from the USB port
Attention owners!
The owner assumes responsibility for possible problems with the radio after changing the firmware. In addition, such an operation excludes warranty service for the music system in the event of a breakdown. This firmware is intended for LADA car radios (Granta and Kalina-2).
How to remove the radio without keys?
If standard keys are lost, you need to make homemade ones, focusing on the shape of the slots. To see them, remove the device’s removable panel and plastic frame. Here is a list of available tools with the help of which owners of various cars manage to unlock the latches:
- thin steel strips 6-15 mm wide;
- stationery knives;
- plastic clamps for electrical wiring;
- nails and straight wire - for round holes;
- thin screwdrivers and other similar items that fit the shape of the cracks.
These steel strips can be used instead of keys
Reference. In many radios, the mounting slots are visible from the outside, so there is no need to remove the front panel and plastic frame.
The first step is to remove the front panel of the radio.
To remove the car radio, use the same algorithm:
- Insert first one and then a second strip of thin metal (or a utility knife, thin screwdriver) into the technological opening. Feel each latch unlock.
- If the turntable is supported by 4 clips, insert four instruments.
- Slowly remove the radio from the niche at the same time as the improvised keys.
The strips need to be inserted into the side slots
Advice. When using steel strips to open latches, be sure to wear cloth gloves to avoid cutting your hands on the sharp edges.
The music center is removed along with the strips
Nuances of multimedia firmware Grants (2190)
It is quite easy to carry out the firmware itself when installing the mms 2190 firmware. To do this, it will be necessary to use an SD card.
Let's concentrate! This card is subject to mandatory and preliminary formatting using the “FAT16” version.
Among the common flaws that occur after the dashboard firmware is installed, even if it is the latest version, is the Lada logo freezing on the display of the head unit.
This moment can be provoked by the following factors:
- failure to comply with required formatting principles;
- the presence of an outdated version of the SD card that differs from “SDHC”.
After successfully formatting the card and selecting software (for example, “New Menu V7.391 Nitro”), you will need to acquire the latest firmware and unpack the product onto a previously prepared SD media.
Regarding the “Firm Ware” folder, note: the files located in it will need to be redirected to the root directory of the card itself. Upon completion of the copying process, disconnect the flash card from the PC, not forgetting about the safe removal technique.
Now we confidently insert the SD card with the prepared files present on it directly into the MMC. Then turn on the head unit. We wait for the full download to complete and by long pressing the volume button, we reboot.
The act of rebooting is characterized by four stages, the display of which is implemented in 4 lines of process status. After filling out these lines, the device starts in the usual mode, as evidenced by the appearance of the corresponding original menu. After a few seconds, the device transitions to the altmenu.
Let's pay attention! If the USB multimedia connector is occupied by another device or connected to it, then the process of launching the altmenu becomes impossible. After the slot is released, the MMC will require another reboot.
The USB splitter “DNS ATH-08” has acquired a significant advantage – multi-polarity. The GPS receiver and other USB modules connected to the “head” are combined with the altmenu, but become inactive.
After the MMS 2190 firmware is completed on a Lada Granta car, its display displays a new type of desktop, namely “Wince”. The 4 files previously mentioned and copied into the depths of the root directory of the map are “responsible” for the presence of the interface on the desktop.
The subsequent manipulation is associated with the need to configure new software in the standard multimedia device of the Lada Granta car. For these purposes, click the “Start” button, after which we follow the following route: “StartSettingControl Panel”. Sometimes owners complain about the slowness of the “Control Panel” opening process, but this phenomenon disappears after rebooting the MMC in forced mode.
When the control panel is open, in its interface click on the “Stylus/Calibration” symbol. With this action, the user of the new software gets the opportunity to calibrate the touch screen for response accuracy.
Upon completion of the simple calibration procedure, a timer appears; you should not wait for the completion of the counting process. Feel free to click on the screen.
Now the long-awaited time has come for the forced reboot process. Long and holding pressure on the volume key (10 seconds or more) allows you to implement this process in MMC. At this moment, the removable media, which contains the new software, continues to reside in the connector of the head unit of the Lada Granta car.
Having completed the reboot action, the device will first display the standard menu, and then, similar to the preparation procedure, the altmenu. If you need to return to the “native” menu, you should hold down the “Native” key.
The process of rebooting the device, after the dashboard firmware has been flashed, requires its connection via a USB splitter of the specified model with the Globalsat BU-353S4 GPS wave receiver. If there is none, then upon completion of the process itself the “head” will display the normal menu mode on the display.
Such common settings as sound, as well as audio or video, are present in any multimedia device in the domestic Lada Granta car.
“NewMenu V7.391Nitro” needs a manual way to install the indicated options, which will require:
- log in to the “soft/radio” folder;
- resort to activating the “start.exe” file.
The procedure will agree to associate present files with the extensions “exe” and “ahk”. This manipulation is quite important and allows you to achieve stable functionality of the MMC, which is used to flash the dashboard firmware.
Main functional features of devices
The main characteristic of DIN 2 universal radios is the presence of a display that can be used for different purposes.
In addition, such systems have the following features:
- Most devices today offer users touch controls. In this case, it all depends on the model, since on sale you can find 2 DIN car radios that are controlled using buttons. However, touch technology has proven to be practical and reliable, which is why it is a hit with many consumers.
- Ability to play files in a wide variety of formats. That is, the radio can be used not only as a music player, but also as a video player, since such systems allow you to work with video files. If necessary, the system can be synchronized with a mobile gadget or tablet, which will allow you to read data from third-party devices. It should also be noted that such systems allow you to read files from different media, in particular, CDs and DVDs, USB drives and SD cards.
- On sale you can find not just music systems, but also radios with navigation. Thanks to the large display, the driver can easily set up and use the system with a GPS navigator. When purchasing such a device, you should focus on the software on which it runs. For example, many users praise devices with the Navitel platform, since the maps in this software are well adapted to domestic roads.
- Built-in Bluetooth adapter. This function is available in every second 2 DIN car radio today. This option allows you to synchronize any mobile gadget that has a Bluetooth option with the head unit. The driver will be able to add contacts from the phone book to the radio, as well as play tracks from portable gadgets. In addition, if the phone is synchronized with the system, the driver will be able to talk on the phone with other subscribers without being distracted from the road.
- Decent sound quality. As practice shows, usually double radios allow you to provide optimal sound quality, of course, if the car has more or less normal acoustics installed (video author - Dmitry Istomin).
Advantages and disadvantages
Let's look at the pros first:
- ease of control and configuration thanks to the large screen;
- affordable price for most devices - you can choose a model according to your capabilities;
- many different functions used to perform certain purposes;
- convenient platform;
- the ability to connect a rear view camera, but it all depends on the model;
- competitive sound quality, especially if the car has normal acoustics;
- Most radios have a TV tuner function, which allows you to watch television programs;
- ability to read information from different media.
But such car radios also have disadvantages, in particular:
- if you prefer a cheap option, you must understand that it will not work as stably as more expensive analogues;
- As practice shows, the TV tuner in most models is very weak;
- Devices running on the Android platform freeze more often than others.
Transition frames for installation
Adapter frame for audio system
Adapter frames are used to install head units in the center console of a car. Modern car manufacturers are doing everything possible to ensure that non-standard radios cannot be installed in their cars. Accordingly, when purchasing a non-standard car radio, the car owner may encounter difficulties in its further installation. It is necessary to take into account that the frames are different, sometimes they can take up a lot of space on the dashboard.
If you install a multimedia system with a transition frame, you will be able to close any gaps that may appear on the center console as a result of installation. The choice of frame is carried out in accordance with the car model, as well as the year of manufacture. If you are the owner of a new car, then it is quite possible that you will not be able to find a frame on sale, since their production begins some time after the car is released (the author of the video is Alexey Vasiliev).
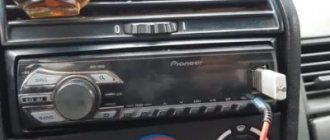
Tips for installing a radio in Lada Priora
In order to avoid unforeseen difficulties during the installation of the radio in the Lada Priora , it is recommended to use the advice of experienced car enthusiasts:
- 1. Before installing the radio, you need to thoroughly study the connection diagram for media devices. If the player's connectors are connected incorrectly, there is a high probability of failure of some vehicle systems;
- 2. There are many models of radios from different manufacturers. Some of them have individual connectors with an additional adapter included for the ISO standard. This fact should be taken into account when choosing an audio device for Lada Priora , since one of the connection options in this situation would be cutting the wires and directly soldering them to the car’s wiring;
- 3. When directly connecting the standard radio, you can use special terminals;
- 4. The connection diagram for the audio player via ISO will remain the same when replacing the radio with a new one.
Do not twist or wrap electrical tape to connect wires directly. How to check the thermostat without removing it from the car. 2 years ago. How to change a Renault Logan. This type of insulation is dangerous when operating a car in winter, since at low temperatures the adhesive-based tape is deformed and destroyed, which will lead to a short-circuit in the car's wires.
We will talk about how to install a Clarion radio of double height instead of two pockets in the center console of a car.
That is, there is already a 1 DIN hole (a pocket or glove box is inserted there, scientifically) in the car, and a radio of the same size can be installed there without any problems. This standard has been adopted for a long time and most automakers comply with it. But installing a double-din device is a task for the Master.
Installation on the first generation Priora
To install the car radio in its original location, you need:
- Disconnect the battery from the vehicle's on-board network.
- Remove the 1DIN decorative frame with a box for small items from the center console of the instrument panel. The assembly is held in place by plastic latches located in pairs at the top and bottom of the drawer. Removal is carried out by pulling the part towards you; it is possible to bend the edges with a plastic mounting spatula.
- The rear has mounting points for the factory patch harness equipped with ISO connectors. It is necessary to disconnect the plugs from the box, which is then set aside.
- Connect the pads to the radio and check the operation of the device. Priora cars are supplied from the factory with a constant supply of positive power, independent of the position of the key in the ignition switch. It is necessary to change the wire connection, following the operating instructions for the head unit. The positive signal sent when the ignition is turned on is taken from the rear window heating button.
- Lay the wire leading to the external antenna. The cable runs under the plastic trim of the A-pillars and the roof panel. To reduce the likelihood of noise, the wire is wrapped in fabric insulating tape or foam rubber.
- Reinstall the removed trim elements.
- Connect the antenna power from the ISO connector and check the functionality of the acoustic device in radio receiver mode.
- Place the standard mounting shaft into the hole in the center console. The part is attached using tabs that are pressed out with a screwdriver. During installation, it is necessary to ensure maximum fit density, which will reduce vibrations of the radio when moving.
- Connect the power, speaker and antenna plugs to the connectors on the back of the head unit. Place the radio in the guide shaft until the locking latches engage. Check the tightness of the installation, and then place the decorative frame in place.
To install a 2 DIN radio you will need:
- Remove the front trim of the instrument panel along with the central air ducts.
- Cut the connecting jumper between the standard socket for the radio and the plug. Expand the rectangular hole to the dimensions specified in the technical documentation for the head unit.
- Using a saw, modify the plastic frame inside the instrument panel.
- Place metal guide slides in the resulting window on the front trim and secure them by bending the triangular fasteners.
- Reinstall the removed parts, and then connect the new head unit and insert it into the guide shaft.
- Check the functionality of the equipment, configure the radio receiver and loudspeakers.
- Install a decorative frame located around the perimeter of the front panel of the radio.
Firmware for radio Kalina 2/Granta
You will need an SD card up to 4GB formatted in FAT. In the future, it will be possible to use a card in exFAT format.
Attention!
| The author is not responsible for all your actions. In addition, flashing the MMC leads to loss of warranty. |
Procedure : 1. Copy the firmware to an SD card (up to 4GB in FAT). 2. Copy files from the “FirmWare” folder to the root of the memory card. 3. Remove the flash drive from the USB port. 4. Insert the SD card into the radio. 5. Reboot the GU by long (about 15 seconds) pressing the power button (for Lada Kalina 2) or the volume button (for Lada Granta). 6. A flashing will occur (4 status bars will run through) and the radio will reboot itself into the desktop.
How to Install a Radio on Priora 2
install radio
priority in Lada
Introduction
Lada Prior - The location of the famous “tens” has been improved. Modern design and new configuration details have made this economical Russian car quite popular among car owners. But, despite this, every Priora owner strives to modify his car to his own taste, to make it more comfortable and elegant. How to install fog lights on a Lada Grant. Often lovers of clean and high-quality acoustics change their standard audio player to a more modern version. Installing a radio on Lada Priora has some features that can be found in this article.
Modern car players are quite functional and varied not only in external design, but also in configuration, installation and connection methods. I changed 1 din to stock radio 2, stock 2 din radio works as usual. When choosing a car player, priority should be taken into account all the features of its size, the ability to connect connectors and the quality of parts.
Features of the Lada Prior radio installation
As a rule, the radio installation has priority
includes several types of audio players:
Media player 2 DIN for LADA Priora
These designations indicate the dimensions of the mounting hole for the radio, which correspond to the dimensions 180x50x160 mm on 1 DIN and 180x100x160 mm on 2 DIN. Optional install
A more modern version of the 2 DIN radio, the motorist will have to perform the function of sawing through the partitions of the car's front console to widen the opening for the player. In some cases, adjusting the size may require cutting or purchasing a suitable adapter frame for the console, which is much more difficult than installing a 1 DIN.
Benefits of new technologies
MMC Lada Kalina 2 is characterized by a simplified control system. Now all the necessary options can be obtained with 1-2 taps on the screen. The system is equipped with a more functional resistive screen. Unlike the standard Kalina radio with a capacitive version, the resistant screen has improved performance characteristics. The device is able to operate without failures in any temperature conditions.
Lada owners often complained that in sunny weather it became impossible to use the car radio. This is due to the numerous glares that make the characters on capacitive screens almost unreadable. The designers, when developing the second version of the radio, took this drawback into account.
If desired, the car owner can choose a model with a mini-visor that protects from glare.
The maximum display area of MMS Kalina 2 is 7 inches. Its operation is based on the Windows CE 6 operating system. The version developed specifically for radio tape recorders has characteristics close to optimal. It takes a few seconds to turn on the device. The amount of RAM ranges from 128 to 256 MB. Firmware for the Kalina 2 radio has significantly improved the technical capabilities of the equipment. Now they are as follows:
- support for wav, wma, mp3 formats;
- 6 programmed shades of music playback;
- the display of the Lada Kalina 2 radio shows information about the song and album during playback;
- there is the ability to play video in wmv format;
- the multimedia system supports maximum video resolution at 320*240 pixels;
- it is possible to play video files of other formats, but for this you will have to use a convector;
- availability of FM radio;
- micro SD card support;
- Lada radio firmware makes it possible to view images saved in bmp, gif, jpe, jpg, jpeg formats;
- The maximum photo size is not limited, but if it exceeds 2 MB, then the Kalina multimedia firmware will open it from 2 to 10 seconds.
Basic functions of the radio in Priora
How can you listen to music in a car from a flash drive or phone if the standard radio does not support it?
Finding a suitable radio station is done manually or automatically. The search is carried out in the FM and VHF wave bands. You can remember the station you like and go to it by pressing buttons 2-6. Settings data is displayed on a small screen, the backlight of which is designed to match the lighting of the main instruments and sensors of the front panel.
The standard Priora radio is attractive because it allows you to easily adjust the equalizer. To do this, press the EQ button and begin selecting the appropriate sound type. It is possible to connect discs with MP3 audio files. Therefore, the driver and passengers of the car can listen not only to popular stations, but also include their own collections of interesting tracks.
https://youtube.com/watch?v=5PPX_YraIXU
The functionality of individual buttons differs when playing music from a radio station and from a media device. For example, using buttons 2-6, you can not only select a station stored in memory, but also switch to the next folder on the media, select playing tracks in a circle, or switch to playing in a mixed order.
All data on the operating mode, file name and other data will be displayed on the small screen of the radio. This allows you to select optimal system operation settings.
The standard Priora radio is equipped not only with a CD drive, but also with a USB output. This feature allows you to use it to play tracks from both regular flash drives and portable devices.
The uniqueness of the domestic car audio system is the ability to connect both mobile phones and portable hard drives. An external hard drive with a capacity of no more than 120 GB will be easily read by the standard audio system.
Video on how to prepare an SD card for flashing the radio
Firmware order:
- Copy the firmware files (Chain.bin, chain.lst, NK.bin, TINYNK.bin) to the root of the SD card.
- Remove the flash drive from the USB port.
- Insert the SD card into the MMC.
- Restart the radio (for Lada Kalina 2/Priora - hold down the power button for 15 seconds, for Lada Granta hold down the volume button for 15 seconds).
- During the download, an update will occur, after which the radio will boot into desktop mode.
- Without rebooting the radio, go to the screen calibration mode (Start/Settings/Control Panel/Stilus/ to the Calibration/Recalibrate tab), then press the screen during the countdown.
- Reboot the MMS with the SD card inserted.
- The firmware of the radio is complete, the SD card can be removed.
Pinout of car radio connectors
ISO pinout or pinout is the identification of each electrical connection pin in a connector or diagram according to its corresponding numbering and functionality. The speaker system of any manufacturer is connected to the standard ISO connectors of the car. Proper pinout will help you get a good sound at the output and not burn out the connectors with voltage. You can understand the wires using standard diagrams. You can install any brand of car radio without having specialized knowledge in electrical engineering. When working with non-standard connectors, do not forget about safety. “Ring” the wires using a multimeter.
Pinouts for various brands of cars and radios
Before getting started, read the instructions for the receiver, and also pay attention to the markings and features of the product itself. The pinout of radios is influenced by standard connectors in different cars.
Pinout diagram for ISO connectors for pioneer radios
Connecting the acoustics of this well-known brand, which is popular among motorists, has some features. Be sure to read the installation manual before starting work. Installation is simple, the main thing is to understand the purpose of each color. In addition to the instructions, the kit includes two “chips” with 4 pairs of contacts: for power and acoustics.
The pinout of the plug has 10-20 outputs, the functionality of each connector varies depending on the model. The KEH series is characterized by the following circuit: No. 1 - antenna, No. 2 - ignition, No. 3-6 and 8-11 - amplifiers. To avoid confusion, please read the instructions carefully.
In order not to burn out the acoustics, before connecting the speakers you need to connect the radio, check that it lights up and switches.
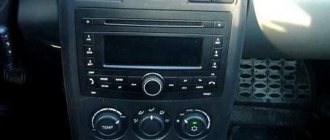
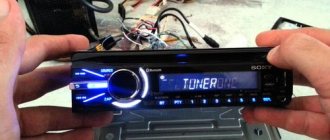
LADA Priora/Lada Priora: Standard audio device (radio tape recorder)
Due to numerous requests, I hasten to tell you about the standard Priora tape recorder Yes, yes, you heard right, such a thing exists
I’ll say right away that this 1Din device with a false panel has the following characteristics: reads CD/MP3, is equipped with USB, two-channel output, has built-in BlueTooth and is equipped with an LCD display
By the way, one of the advantages of this device is that it fits well into the overall interior of the car.
First, let's go over the quick buttons: ST - stereo/mono switching. BAND - switching bands. AF—turn on/off the mode for receiving alternative frequencies when receiving RDS stations. TA—turn on the traffic information standby mode. PTY—select the program type when receiving RDS stations. SCN - scanning during playback. RPT - repeat song/disc (folder) SHF - shuffle =) MODE - switch modes. AS/PS - auto scanning and memorization of memorized stations, selection of tracks. SCAN - scanning stations. DISP - options for displaying information on the display. EQ—switch equalizer presets.
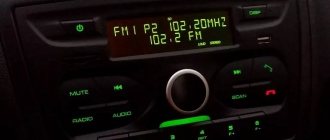
Well, the radio is like a radio. Ranges FM1-FM3, ORT and MW1-MW2. There is auto and manual tuning, auto scanning with memorization, review of memorized stations, as well as a choice of stereo/mono modes. There is also a mode for receiving RDS stations, searching and waiting for traffic information to be received, searching for stations based on the type of programs being transmitted, as well as searching for alternative frequencies.
What we have: Reads Audio, MP3 and WMA CD(R, RW)... Everything is as usual: switching between tracks, rewinding, repeating a track/disc, shuffling, moving 10 tracks forward/backward and scanning the disc. It is also possible to select a track by number or by file name (only for MP3, it seems) + select a folder on an MP3 disk.
The input for the flash drive is located in our glove compartment.
USB version 1.1 and 2.0. File systems FAT12, FAT16 and FAT 32. The maximum capacity of a flash drive is 120 GB. Listening functions are similar to those of a CD player.
Next we should talk about equalizer presets. We have only 4 of them:
And as a rule, no one uses such presets... so here, this is clearly unnecessary.
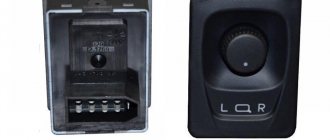
The next stage of my story will be the quick settings block. You can dig into them by pressing the central toggle switch once.
As we can see, we were not spoiled with the settings either. They only gave us the opportunity to mock the timbre adjustments for low and high frequencies, as well as the transfer of sound from left to right and from front to back.
Further. If we press the central toggle switch longer, we will find ourselves in a block of settings, which, as a rule, are set once.
INVOL—sets the initial volume level. ADJ - setting the current time. BEEP - turn on/off the sound confirmation mode for pressing buttons. TAVOL — setting the volume level when receiving traffic information.
BTVOL - volume control in Bluetooth mode. EON—turn on the mode for receiving RDS stations with extended service.
LOUD - enable loudness compensation. LOC - enable local/long-distance reception mode.
Next I’ll tell you about BlueTooth. It's a useful thing, I'll tell you. The only annoying thing is that if you are not alone in the car and you receive an incoming call, the contents of which you would like to keep to yourself, then you have to hang up, because all passengers will be able to listen to the interlocutor, because it broadcasts through all the car speakers