Introduction
Every owner of a domestic Lada Priora strives to improve their car not only externally, but also to increase engine power, reduce noise in the cabin and make it more maneuverable on the road. The exhaust gas exhaust system on the VAZ 2170 also needs to be modernized, since the standard exhaust manifold removes exhaust gases with a slight delay, which “presses” the engine, depriving it of the ability to operate at full power. Installing a spider on the Lada Priora helps solve this problem.
However, there are cases when car owners also note negative factors that arise after installing the spider. In order to understand the need to modernize the exhaust system of the Lada Priora, it is necessary to understand its structure, operating principle and measures to improve its functionality.
Review of the exhaust system of Lada Priora
The exhaust gas exhaust system on the Lada Priora performs the following functions:
- exhaust gas removal;
- noise reduction when the engine is running;
- neutralization of toxic hazardous substances in exhaust gases.
The basis of the Priora exhaust system includes:
- 1. Exhaust manifold with converter;
- 2. Resonator;
- 3. Main muffler;
- 4. Auxiliary muffler;
- 5. Connecting pipes.
Exhaust on Priora
The manifold is used to remove exhaust gases from the cylinders into the exhaust pipe. The tightness of the connections is ensured by sealing with a metal gasket in two layers between the block head and the exhaust manifold. The attachment of the exhaust manifold to the cylinder head on one side goes into connection with the converter on the other. The collector and converter connected into one unit make it possible to reduce the warm-up time to the operating temperature of the latter, which significantly increases the efficiency of the converter.
Installation of oxygen concentration sensors at the inlet and outlet of the converter ensures constant monitoring of the quality of exhaust gases. The connection between the intake pipe and the manifold has a heat-resistant seal in the form of a metal-asbestos gasket. And the metal compensator connecting the additional muffler with the exhaust pipe serves as a vibration damper from the engine to the body and the entire exhaust system.
The exhaust gas exhaust system is connected by attaching it to the body brackets using 4 rubber rings. On the main muffler, the suspension cushion has a reinforced structure, which is due to the increased load on it.
How does the collector work? What functions does the “spider” have?
Here, with the exhaust valve open, the gas is under pressure (in the chamber), and normal pressure is observed in the manifold. This produces a wave that, reflected from the resonator or catalyst, is directed back to the cylinders, where, mainly at medium speeds, it merges with the next exhaust stroke. Thus, an additional opportunity is obtained for the next portion of exhaust gases to escape from the cylinder.
On many cars, manifolds are made of cast iron and are installed so that one part is attached to the internal combustion engine, and the second to the catalyst or (if there is no catalyst) to the exhaust pipe. To avoid burns and increase fire safety, these parts are fenced off with a metal screen.
What is a “spider” for Priora and what is it for?
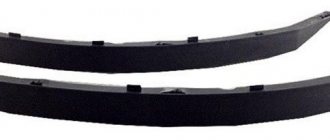
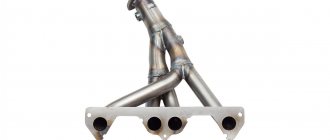
Tuning the exhaust system of the Lada Priora includes replacing the exhaust manifold with a similar sports version, which is called the “spider”. The main difference between the original manifold and the spider is that the latter has a larger diameter and the same length of outlet pipes, which facilitates the rapid release of exhaust gases from the cylinders to the exhaust pipe.
This spider design prevents exhaust gases from flowing back into the combustion chamber, which increases engine power and performance. In addition, the manifold performs the function of purging the combustion chamber and filling it with a combustible mixture due to the pressure that is created when exhaust gases are released.
Stinger exhaust kit
To tune the Priora exhaust system, a ready-made kit for installing a direct-flow Stinger exhaust with additional components that are perfectly attached to each other is often used. As a rule, the tuning kit includes the following parts:
- new muffler with nozzle;
- spider;
- resonator Stinger Sport with a pipe diameter of 51mm.
The need to install a “spider” on Priora arises when:
- long vehicle acceleration time;
- low engine power;
- failure of the old exhaust system, where installing a spider on a Priora is considered as an alternative to the old one.
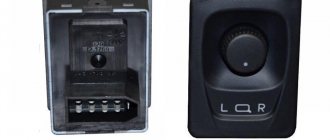
On the tuning parts market there are many modifications of “spiders” made by different manufacturers. Some models are produced without oxygen sensors, which requires reflashing the electronic engine control unit.
There are spiders with long and short pipes, which are indicated by the corresponding numbers 4-2-1 and 4-1. These designations reflect the shape of the spider pipes, that is, 4 pipes merge into 2, and then into 1, in the second option, respectively, 4 pipes are immediately combined into one, which significantly reduces the length.
The most popular among car enthusiasts has become the long spider 4-2-1, which, unlike the short one, shows good results in a wide speed range. A short spider 4-1 is better suited for forced engines operating at 6-10 thousand rpm.
Lada Priora Station Wagon WagoNetKa › Logbook › Installing a Stinger exhaust on a 4-1 spider. Second day.
Well, we continue.
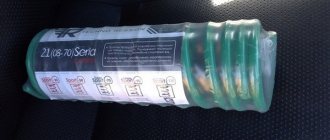
I went in the morning to get studs, brass nuts and washers. I bought the gasket earlier, but let's include it in this purchase. Stinger sent some nonsense, but at least it was free. M8 long hairpin - 1 pc. M8 studs - 7 pcs. M8 washers - 8 pcs. Brass nuts M8 - 8 pcs. Exhaust manifold gasket 21126 metal package - 1 pc.
I don't know what it costs. I dialed what I needed, they said 350 rubles. Gasket 155 rub. in Lada Detail.
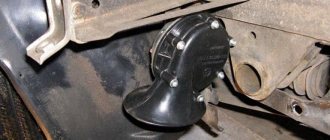
The first thing to do was. This is to unscrew the rotten shield. It makes it very difficult for the spider to get through from below, and it’s simply rotten.
As you may have noticed, all three studs successfully broke off with the nuts. The studs are bodies, and God bless them.
Having removed the next rot, it was necessary to screw in the missing studs. I bought everything, but only installed those that came out on their own, I didn’t force it out. I also attached a gasket to try it on.
It was also necessary to prepare the extension cord and the oxygen sensor itself. Still, everything moves under the bottom, and there the conditions are more aggressive, I decided to wrap everything up with tape. And in general, it’s definitely not possible to leave the extension cord as is.
It seems like a small thing, but it took a lot of time. You could try installing the spider itself.
Well, what can you do, I started filming it. At least nothing came off there. Without this bracket, the spider flew like a glove onto the stilettos. A long, tedious process of procrastination began. Everything is very inconvenient, but can be solved with a set of sockets and a couple of extension cords.
Let's also look at the top view.
So what will you bet? Take off the bracket right away, it will save a lot of time. Moreover, when you are alone and without light, lying on the floor pushing this piece of iron, you don’t immediately understand what’s going on. Well, the view from below.
As you can see, nothing interferes with the 4-1 scheme. Why the manufacturers stuck with 4-2-1 is not clear.
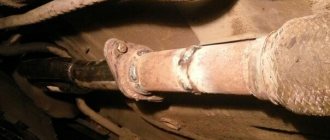
The resonator and the spider matched well, no issues. We install the ring, springs and tighten the bolts to the end of the thread. There's nothing to show there.
I also redid some of the wiring and rearranged it for myself. I cut off the wire with the connector from the second lambda and wrapped it all up with tape. It turned out to be a kind of stub. I laid out the extension cord properly so that it wouldn't get fried by the new spider.
Well, I started the car, everything began to smoke, the burning process lasted about ten minutes.
I looked under the bottom and looked at the connections. It seems that nothing is “siphoning”. But you will need to check it again after your trips.
In the next post, we'll look at the logs of an unflashed engine with a new exhaust. Well, I’ll say a few words about the sound. I personally don't care about it, I care about efficiency. I will also try to make a new measurement of 0-100 and 402 meters on the instrument.
Source
Installation of “spider” 4-2-1 on Lada Priora: step-by-step instructions and price
To install a new spider collector, you will need:
- flat screwdriver;
- 13mm head with extension;
- WD-40 lubricant.
It is recommended to perform the work in the following sequence:
- 1. Remove the auxiliary muffler from the manifold by bending the edges of the plate and unscrewing the three mounting nuts on the pipe, after making sure that the Priora exhaust system has cooled down;
- 2. Remove the protective screen and locking plate;
- 3. Gradually disconnect the old factory manifold from the cylinder head. First of all, you need to separate the wire connectors from the oxygen sensors. Then unscrew the bolts securing it to the cylinder block and remove the bracket. Unscrew the eight nuts connecting the manifold and the block head and remove it;
- 4. Free the holes in the cylinder head from carbon deposits, lubricate the open studs with graphite lubricant;
- 5. Place the 4-2-1 spider on the open studs and reassemble the exhaust system in the reverse order;
- 6. Make sure that the spider does not come into contact with wiring and body parts, which can lead to their deformation due to strong heating.
Exhaust installation steps
Before installing a spider on a Priora, you should pay attention to the cost of this design. The price range for various modifications of spiders ranges from 2 to 7 thousand rubles, taking into account consumables and labor. The installation process takes no more than one hour.
Lada Priora Hatchback Tuning Sport › Logbook › Spider 4-2-1 + program
Usually the first thing I do when tuning a car is completely change the exhaust!
The dynamics and gasoline consumption change dramatically. Since this is not my first car, I began to understand a little about spiders, what resonators to install, and the rear part. But since I was strained with money, I decided to limit myself to only the spider and the program. Whatever spiders you want on the market: small 4-1, large 4-1, 4-2-1 spiders. There are a lot of ordinary metal, stainless steel, with different pipe diameters. It all depends on what you want to achieve. 4-1 short really starts to help after 4000 rpm. Before that I set it to ten, but I didn’t feel any increase in power at all, it only got worse. With a catalyst for 2 gears, it was possible to accelerate to 110 until the cutoff worked, after installing the spider it was 90 and that’s it! I usually buy all the spare parts on the wholesale market, the price of such a piece of iron is 2300, well, since I really like to bargain, and I’m a regular customer, I bargained for 1700!)))) + 180 rubles. Whenever possible, the gasket should always be replaced with a new one. The photo shows the diameter of the pipes... Comments here I think everything is useless and so clear. The larger the diameter of the exhaust pipe, the better, but the maximum can be installed on a 1.6 liter engine. this is 51 pipes, otherwise there will be no sense at all. For installing a spider on 16kl. for an engine they charge on average from 500 to 1500 rubles. But since I live in a private house, the garage is fully equipped, I can do all this myself.
But not everything is as simple as it seemed, this car has an environmental class of Euro 3, they simply decided to choke the car at the factory with oxygen sensors!)))) There are 2 of them, the main function is performed by 1 sensor, and the second one simply controls the 1st one. But the spider only has one sensor. After I installed everything I decided to start the car, but to no avail. The car started, but did not hold idle speed at all, I had to move the throttle cable by 3 divisions, then everything became normal, except that the check light came on, well, actually this was to be expected, the 2nd sensor was hanging out in the air!))) Then I went to flash it. The computer was Bosch 7.9.7+, just flash this computer like January without any options at all, you need to resolder the transistors. But for professionals it's 15 minutes of business. They removed the computer, disassembled it, re-wired it, and then started flashing it. Successfully, but it takes a very long time to load the program into the Boshi, about 3-5 minutes. My own uncle does all this, so he charged me the minimum wage of 1200 rubles. although he charges 3k for this work. Then I started trying the firmware one after another, it took about 2 hours, sometimes it doesn’t work at the bottom, then vice versa, sometimes it works, but the consumption just doesn’t fit into any limits. In the end, we found one that suited my taste. But I rode for a week on the new program, something is not right, it picks up to 150, and then it’s like there’s a limiter, it picks up but with difficulty. Before this, the factory firmware 200 came with a catalyst.
+ the EUR plays an important role, the firmware for Priors that are designed for the steering wheel is not suitable for cars on which the EUR is installed.
I called the guy like this and that, well, I don’t like it, there’s no market, I don’t like it, come over and fill me up with another one! It just got new Priora Tuning Sport firmware. We filled it up, drove out onto the highway, and there was such a blast from the bottom that you got stuck in the back of the seat, dialed up to 200 in a moment. He turned around and went back. I liked everything, but what kind of consumption is it? When I was driving home, I was simply amazed, the consumption was 5.6, taking into account the fact that I was driving up to 140 km.h., I arrived in the city, reset it to zero, and drove 115 km in a day. average consumption shows 7.9 liters. not bad. Now I’m riding on this firmware, it’s better not to think about it for my hardware yet, as he said.
Advantages and disadvantages of installing a spider on a VAZ 2170
After installing the “spider” on the VAZ 2170, Priora owners note the following positive changes in its operation:
- the car accelerates faster;
- the maneuverability of the car on the road improves;
- the engine sound is reminiscent of a sports car engine;
- the engine becomes more powerful up to 10 hp;
However, often a change in the design of the exhaust system associated with the installation of a spider can also have negative consequences:
- engine noise often becomes higher and is transmitted into the car interior;
- there is a need to reflash the electronic engine control unit after installing the spider.
Replacing the Priora catalyst with PAUK
Many Priora owners are not satisfied with the performance of the basic catalytic converter and they turn to a car repair shop to replace it with a PAUK. The principle of operation of the PAUK is almost the same as that of a conventional manifold - it also removes gas from the cylinders of the power plant. There are several types of elements, but the principle of their installation is the same:
- The Lada Priora is installed in the “pit”, after which the technician removes the crankcase protection.
- The bolts securing the manifold and catalyst tube are unscrewed and the elements are disconnected.
- In case of partial replacement, the catalyst remains in place; in case of complete replacement, it is dismantled.
- Then the technician lifts the hood and unscrews the exhaust manifold bolts.
- The technician dismantles the base manifold.
- Next comes the installation of the SPIDER.
- The SPIDER is attached to the catalyst, and when completely replaced, to the catalyst's alternative, the flame arrester.
Despite the fact that replacing the Priora catalyst with a Spider does not look very difficult, it is strictly not recommended to undertake it yourself. If any problems are detected, you should immediately seek help from competent specialists.