Do-it-yourself Largus Cross tuning
Modernization of the model is mostly aimed at increasing the level of comfort, reducing fuel consumption, increasing dynamics, and improving appearance.
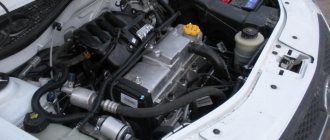
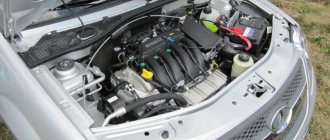
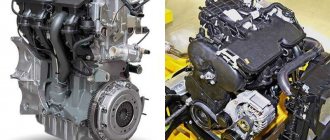
Engine
One of the options for tuning the car in question is to improve the power unit, which is capable of developing from 102 to 106 hp. depending on the settings and features of the motor. For a measured ride, these characteristics are quite enough. However, there are car enthusiasts for whom the standard power is not enough. You can modify the engine in the following ways:
- perform chip tuning by flashing the electronic control unit;
- change characteristics by replacing engine parts.
Chipovka
The most popular option for upgrading a power plant is chip tuning. If the work is carried out in a specialized service, where the unit is flashed with a program with properly calibrated parameters, then you can get greater dynamics from the car. Depending on your wishes, the electronic unit can be re-flashed to suit your needs:
- reduction in fuel consumption;
- reduction of exhaust toxicity;
- improvement of dynamic performance.
Reprogramming the unit yourself is not recommended, as there is a high probability of side effects. High-quality work costs about 4–10 thousand rubles. As a result of its implementation, it is possible to improve the elasticity of the engine and reduce consumption by 1.5 liters per 100 km. If the results of chipping seem insufficient to you, then you need to engage in more global modernization.
Technical improvement
Intervention in the design of the motor can improve the initial power characteristics by 10–40%. Refinement involves intervention in the following nodes:
- supply system;
- gas distribution mechanism;
- injection elements;
- cylinder-piston group.
Chassis
If the owner of the Largus Cross is not satisfied with the characteristics of the suspension, changes can be made to it. Through modifications you can improve the driving performance of the car. Changes can be aimed at the following actions:
- installation of reinforced suspension elements;
- increase or decrease in clearance;
- installation of parts with improved characteristics (stands, stabilizers, etc.).
The clearance of the Largus Cross is 170–195 mm, depending on the configuration. These indicators are quite enough for confident driving both in the city, on the highway, and for trips into nature. If the ground clearance seems too low, it can be increased by installing special spacers for the shock absorbers. These parts are mounted between the cup and the racks.
There is also a more complex and expensive option for increasing ground clearance: replacing shock absorbers and springs or installing larger wheels. As for reducing the ground clearance, in relation to the Largus Cross this procedure is simply inappropriate, unless the goal is to make the car an exhibition piece.
Video: increasing ground clearance using the example of Logan
Brake system
Tuning the brake system involves installing larger brake discs or products with perforations and notches. Thus, it is possible to increase the efficiency of the brakes and improve the removal of heat and moisture from the working surface. When choosing brake discs, you should focus on the standard size of 260 mm.
In addition to original wheels from Renault-AvtoVAZ, you can install products from the following manufacturers:
- BM;
- Hella;
- MinTex.
Appearance
The owners put a lot of effort into changing the appearance of the Largus Cross. Let's look at the main elements that can be modified:
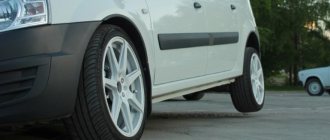
- front and rear bumper. If desired, the car can be given a more sporty and dynamic look by installing tuned bumpers;
- thresholds. Installing thresholds improves the appearance of the car, the landing is visually lowered and when installing the box on the roof, it is easier to use;
There are actually quite a few options for external tuning. For example, you can repaint the car, do airbrushing, tint the windows, etc. If the financial side of the issue is not decisive, then modifications can be made endlessly. However, the Largus Cross is far from the most suitable car for these purposes.
Optics modernization
The standard headlights cause a lot of criticism. Despite the changes made by the designers, the optics still do not differ in originality from other VAZ models. Owners of Largus cars can improve the optics by installing lensed headlights. Compared to stock, this lighting makes the car attractive and improves safety when driving at night. Both xenon and bi-xenon can be installed in the headlights. The second option is a lamp with built-in low and high beam.
Standard headlights can also be equipped with angel eyes, which are a fairly popular tuning element today. In addition, the attractiveness of the fog lights can be improved. To do this, install a frame with chrome elements or with daytime running lights.
The taillights are also not deprived of attention. Today, various tuning options are offered that will not only change the appearance of the Largus, but will also add originality and increase safety, which is possible thanks to LED elements. This is due to the fact that the dimensions and brake lights made of LEDs are clearly visible in the dark, during the day and in bad weather.
Salon
Since the driver and passengers spend most of the time inside the car, a lot of modifications are also made to the interior decoration. Interior tuning involves solving one or more problems:
- improved comfort;
- expansion of functionality;
- improvements according to the personal preferences of the owner.
Specific actions directly depend on the goals set and the budget allocated for interior modernization.
Tidy improvements
If you listen to the opinion of many car owners, the standard instrument cluster is not very informative. To make this element more readable, you can install a digital instrument panel that is compatible with the standard wiring. If you do not want to completely change the instrument panel, you can replace the backlight lamps and controls to your liking. Thus, the lighting will not distract from the road during long night trips.
Interior and trunk lighting
Improvements to the lighting in the cabin can begin with the lampshade, since this element does not provide sufficient brightness of the backlight. Modernization comes down to replacing standard W5W light bulbs with LED ones. If the brightness is still not enough, install additional LED boards directly into the lampshade, connecting them parallel to the standard lamp and fixing them with double-sided tape. For better light diffusion, you can use foil, which is glued to the inner surface of the lampshade.
In addition to the interior, the lack of lighting in the Largus is observed in the luggage compartment, which is especially inconvenient in the dark. As additional light sources, you can use LED strips or lamps that are placed on the ceiling and connected to the trunk light connector. Additionally, you can organize illumination of the driver’s and passengers’ feet, as well as the thresholds when the door is open. For these purposes, LED strip or special lampshades are also used, which are connected to the door ends. Such modifications will provide the interior with a sufficient level of illumination.
Heating and ventilation
For Russian winters, it would be a good idea to equip the car seats with heating. When installing such equipment, you should use products from trusted manufacturers to avoid accidental fire. It is recommended to purchase kits specifically for Largus and install them in specialized services if you are not confident in your own abilities. In addition to heating, the ventilation system on the car in question should be improved. Despite the presence of air conditioning, there is simply no cabin filter from the factory. With simple steps, the filter element can be installed in its regular place using a screwdriver and a utility knife.
Video: installing a cabin filter on Largus
Noise insulation
On the Lada Largus Cross, sound insulation from the factory is present, but in a minimal amount, which does not provide a decent level of silence in the cabin. To increase comfort and reduce extraneous noise, the interior is completely soundproofed. To do this, the interior is completely disassembled, the body is cleaned of possible contaminants and dried. After this, the roof, pillars, floor, engine shield and doors are covered with a layer of vibration and sound insulation materials.
Interior styling
Modification of the interior depends only on the imagination and finances of the owner. Low-cost methods include installing seat covers, steering wheel covers and gear levers.
Additionally, you can cover the torpedo with carbon film. For more serious changes, you can replace the standard seats with sports ones. However, this option would not be entirely appropriate, since the car was initially designed for measured driving. Comprehensive tuning of the Largus interior involves complete reupholstery with the selected material. One of the additional elements that the owners of the model in question install is the armrest between the front seats. A wide variety allows you to choose a product of a suitable design and the necessary fastening.
Tuning doors and trunk
The doors on the Largus can also be modified if desired. First of all, attention is paid to the additional seal that is applied to the doorway or the door itself. Thus, the doors will close more quietly, less noise and dust will penetrate into the interior, and in winter it will be warmer inside. Doors can also be equipped with glass closers. This device provides:
- opening and closing the glass with one touch of a button;
- closing the windows when arming the car;
- raising the windows when closing the doors using the central locking remote control.
You can install a subwoofer in the trunk, thereby improving the sound of music in the cabin. However, if the machine is used to transport goods, then installing such a device may cause some inconvenience. Therefore, before introducing a subwoofer, you should think about its placement and design.
Soundproofing Lada Largus on your own
Soundproofing Lada Largus
Sound insulation of the Lada Largus is needed, like any car, to improve acoustic qualities and get rid of extraneous sounds. The interior of any car is not ideal and over time a lot of noise penetrates into it. This especially bothers music lovers who cannot imagine life without good music. It is clear that noise from outside will interfere with the enjoyment of musical compositions. From this publication you will learn how sound insulation is carried out on a Lada Largus.
Start
Soundproofing on Lada Largus
People are thinking about soundproofing a car in cases where they are dissatisfied with the quality and to build an audio system. The sound inside the car directly depends on the percentage of extraneous noise. It is clear that the more there are, the worse the sound will be reproduced.
Note. Even a simple noise insulation operation, which does not involve the full range of work, significantly increases the sound quality. This immediately becomes noticeable even to a non-professional.
To begin with, before carrying out work, you need to set the final goal, which implies the result in the end. If the process concerns improving acoustic properties, then the purchase of special materials is necessary. If the owner wants to get greater driving comfort from sound insulation, prepare other materials.
Note. Let us note one important detail. If the budget is limited and the work is carried out with your own hands, there is no need to pursue a full range of sound insulation. In this case, you can isolate the machine not entirely, but in parts. In this way, you can eliminate large-scale errors and save your budget, because the cost of repairs will be minimal.
Soundproofing in Lada Largus
We act independently
Today, salons providing soundproofing services cannot boast of increased demand. The main reason for this phenomenon was the insufficient quality of work. This aspect is indicated by numerous lamenting reviews from upset owners. Here the situation forces you to resort to an independent soundproofing device.
To implement the procedure yourself, you need to acquire the following tools and materials:
- industrial hair dryer;
- pressing roller;
- solvent and scissors.
Materials
Materials for sound insulation
We read this paragraph very carefully, since all the most important things depend on the materials. If it is chosen incorrectly, all noise insulation work will go down the drain.
Vibroplast Silver
This is a very flexible and elastic material for carrying out noise. Differs in the following features:
- It is a polymer self-adhesive composition combined with aluminum foil;
- The material is made with a marking pattern, which is 5x5 cm squares, which makes it easy to cut the sheet into pieces of a certain size;
- Vibroplast Silver does not allow moisture to pass through, does not decompose over time and includes components for corrosion protection;
- The material, which also has the properties of a sealant, ideally fits on surfaces with complex terrain and does not require heating during installation.
Note. Any vibration-proofing material is assessed by its mechanical loss coefficient. For Silver vibroplast it is quite good (0.25-0.35 conventional units).
- By the way, this material will cover the floor of the Lada Largus, the doors and roof of the car, as well as other parts.
Vibroplast Gold
A material with almost the same properties as described above, but has greater vibration insulation.
BiMast Bomb
This material already absorbs sound rather than insulating. It is distinguished by the following features:
- The material is an “absorber” of a multilayer structure. BiMast is three layers: front (aluminum foil), bitumen (based on a bitumen composition) and rubber, protected by an anti-adhesive film;
- It has high efficiency, does not absorb moisture and does not decompose over time.
Note. This material has been named the best vibration-absorbing material in recent years.
Splen 3004
Soundproofing material with an adhesive layer. Differs in the following parameters:
- Has high heat-insulating properties;
- It is easy to cover vertical and curved surfaces with it;
- Does not absorb moisture and does not decompose from external influences;
- It is best to use it to cover the front panel of the Lada Largus interior, wheel arches, doors and tunnel.
Note. One of the features of Splen is that it is glued on top of vibration-absorbing material. In order for it to stick perfectly, you must follow the rule: the surfaces to be glued must always be clean and completely dry. Acetone or white spirit cleans such surfaces well.
Bitoplast 5
A material that is also called anti-squeak. Differs in the following features:
- Ideally eliminates squeaks and rattles in the cabin;
- Made on a polyurethane foam base with a sticky layer;
- The material is protected by an anti-adhesive gasket and special impregnation;
- Waterproof and durable;
- It is not subject to decomposition and has high thermal insulation properties;
- It is odorless and retains its noise-absorbing properties even at very low temperatures (up to -500 degrees).
Selecting materials
At this stage, you should approach the issue of choosing materials with maximum care. Our article is intended to consider several options for “noises”, which, according to numerous positive reviews, were successfully used specifically for the Lada Largus.
- Vibroplast "Gold". This material is endowed with enviable parameters in terms of vibration isolation. Its properties resemble a sealant, which makes it easy to install on a body with a wide variety of terrain. The reverse side of the self-adhesive material has an aluminum layer. During installation, the vibroplast does not require preheating. Recommended body panels for use are door panels, underbody and ceiling.
- "BiMast Bomb." The main property of the material is not absorption, but noise insulation. It is produced using multilayer technology, where the structure of the structure itself contains three layers: aluminum foil, on top of which a rubber composition is applied and then a bitumen layer. The material does not tend to absorb moisture and has a film that protects against adhesion.
- "Splen 3004". This insulating agent is characterized by a high efficiency index. It is perfect for processing body panels with complex terrain. It resists moisture and mechanical stress well. An enviable advantage is the ability to paste over anti-vibration materials. The following body panels are recommended for coating: arches, door cavities, tunnel and front shield under the windshield.
- Vibroplast "Silver". In terms of its performance properties, this material is very similar to the “Gold” family. Here, a more affordable cost is a significant preference.
- Bitoplast "5". Car enthusiasts have nicknamed this product anti-squeak. The base contains polyurethane foam, which is resistant to moisture due to the use of special impregnation, and withstands temperature stress. Efficiency was detected in eliminating squeaks and rattles of interior components. The material also confidently copes with deformations and is not prone to decomposition. Possesses effective impregnation against the effects of adhesion. Not capable of emitting odors.
Attention! The effectiveness of any of the materials we have considered directly depends on the quality level of work. If the entire list of body soundproofing measures is not carried out at a sufficiently professional level, then you should not expect a decent result.
For clarity and ease of understanding of the materials and their features, we provide a table (see above).
Material parameters
*KMP (mechanical loss coefficient) *ZO (processing zone) *ES (operational properties)
| Vibroplast Silver | KMP | 0.25-0.35 USD |
| Weight, kg/m2 | 3 | |
| Thickness, mm | 2 | |
| ZO | Bottom, ceiling, sides, hood, trunk | |
| Vibroplast Gold | KMP | Oh, 33 USD |
| Weight, kg/m2 | 4 | |
| Thickness, mm | 2,3 | |
| ZO | Bottom, ceiling, sides, hood, trunk | |
| BiMast Bomb | KMP | 0.50 USD |
| Weight, kg/m2 | 6 | |
| Thickness, mm | 4,2 | |
| ZO | Front panel, tunnel, area above the muffler | |
| Splen 3004 | ES (degrees) | -40/+70 |
| Weight, kg/m2 | 0,42 | |
| Thickness, mm | 4 | |
| ZO | Front panel, wheel arches, tunnel | |
| Bitoplast 5 | ES (degrees) | -500 |
| Weight, kg/m2 | 0,4 | |
| Thickness, mm | 10 | |
| ZO |
There are a lot of materials for soundproofing. The table shows only the most popular ones.
Noise and vibration insulation – Largus tuning
Noise and vibration insulation is the most difficult process of all that took place in a car!!!
I did it on the weekends for a month and a half! There is no garage, and the weather was not kind.
A day was spent on the rear floor from the second row seats inclusive to the loading doors (exactly the size of the rear floor trim), half a day on the rear arches, a day on the front doors, a day on the loading doors and the rear part of the roof, a day on the rear doors, a day on the front part of the floor (the hardest part!), a day on the dash, and a day on the front of the ceiling. Total 8 days, 4-6 hours or more.
In the evening I came home tired, not sure whether there would be any effect at all, I had never done anything like this before.
Spent more than 12 thousand on everything:
- Vibra Comfort Mat Gold G2 – 2mm – 8 sheets
- Vibra Comfort Mat Gold G3 – 3mm – 9 sheets
- BiBiTon – 10 sheets
- Violon Alpha 5 (Bitoplast) – 10 sheets
- Violon pt 10 mm. (Noise-insulating Auto-felt) – 10 sheets.
All material is self-adhesive. I bought it on the website zashumim.ru
They also have a report on the sound insulation of Largus and other cars.
I glued the vibra without heating it with a hairdryer (I don’t have one and have nowhere to connect it!). The machine and the material were basking in the sun. I don’t see any point in using material twice as expensive.
For example (according to the site itself), the mechanical loss coefficient (mechanical loss coefficient) of Comfort Mat Gold G3 is 4.9 cu, and the most expensive vibration Comfort Mat Dark extreme is 5.0 cu. (price 200 and 428 rubles, respectively).
The GOLD material is soft and sticks great in the heat.
I glued the vibra without fanaticism, in pieces, on even and most “resonant” areas. There is no point in sculpting it in a continuous layer! The vibration does not dampen the sound, but when hardened, on the contrary, it conducts it very well. And on seams and bends, the iron does not “play” and vibrate as much as on flat areas.
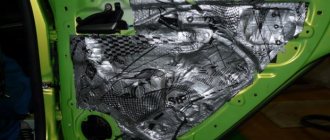
On the doors I glued 2mm vibra on both the outer part of the door and on the inside, and glued bitoplast and felt on the door cards.
On the floor, arches and engine shield, 3mm vibration, bibiton and felt. The last two must be glued in as many intact pieces as possible. However, various technological holes were left open in some places.
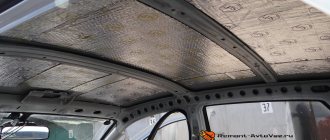
2mm vibration on the roof and felt on the underside of the ceiling. Felt and bitoplast for the rack covers.
The whole dashboard is covered from the inside and the wires throughout the cabin are covered with bitoplast against squeaking and in the area of the stove with felt. Before gluing, all surfaces were cleaned with White spirit.
I practically didn’t take any photos due to the extreme complexity of the process. In addition, all the material was in the car and it was not possible to take a photo of the entire “naked” car.
However, there are a lot of photographs and videos of detailed reports on the Internet, I see no point in repeating myself, the essence is the same.
Here is a photo of a sandwich made of vibra, bibiton and felt, the total thickness is about 16mm...
Standard upholstery is difficult to install, especially since it has a thick layer of batting. Somehow I put everything back in place, some of the clips had to be changed. There wasn’t enough material, I had to buy additional felt, bibiton and 3mm vibra, but I took bitoplast in excess, as it turned out later. In short, you can’t calculate it exactly, especially since everyone glues it differently, it’s better to take it in parts.
There is a soundproofing effect! Not global of course, but still. The sound outside became duller, shifted lower in frequency, as if you were driving a powerful truck!
The funny thing is that now all the creaks and crickets inside have become louder!
From time to time I climb with bitoplast and glue something. The farther you go, the less extraneous sounds there are. I can imagine how much Largus would cost if Renault or AvtoVAZ employees did the same work for me and other owners!!! A million no less!
A few photos. Bare iron...
Vibra 3mm. It may seem that there is not enough vibration, but, firstly, there is a factory vibration, and secondly, between the pieces of my vibration there is a factory sealant, to which it does not adhere well, I have checked...
Vibra 3mm…
Bibiton (thermal insulation 4mm)…
I was in a hurry and forgot to take a picture of the layer of felt on the floor.
Left loading door...
Source: https://xn—-7sbjbyorbwlmj0m.xn--p1ai/shumovibroizolyatciya-largus/
Do-it-yourself noise insulation
Now let's move on to the direct process of soundproofing the Lada Largus. As a rule, today rarely anyone trusts this process to the masters at the service station. This is not only about the cost of services (which are sometimes so overpriced that you want to cry), but also due to a number of other reasons.
High-quality sound insulation Lada Largus
Absolutely any Russian driver with more than 1 year of driving experience is ready and able to handle high-quality sound insulation (the approximate time it takes any driver to learn to hold a key in his hands). The main thing is to buy materials, have the necessary tools at hand and know the basic rules (what to glue where). The tools you will need are the following:
- Hairdryer (construction). This tool is a must, because without it it is impossible to imagine pasting materials;
- Roller (roller). Also a mandatory tool needed for rolling materials. Its cost in stores is low (only about 200 rubles);
- Scissors needed for cutting pieces of a certain size from materials;
- Solvent. Instead, you can also use acetone, white spirit, and so on.
Hood
The hood of the Lada Largus is a rigid frame consisting of a steel profile welded together and a steel sheet, which can essentially be called a lid. Soundproofing the hood involves gluing materials on the inside of the lid.
Note. It will be necessary to cut out small pieces of material that would repeat the shape of the cells between the stiffening frame.
- First of all, you will need to lay the first layer of vibration insulation. This is done in order to eliminate metal vibrations. It is advisable to choose materials that are not excessively elastic.
Note. Thus, most vibration absorbers can float when heated (and the first layer needs good heating).
- The material for the first layer must also have an aluminum surface. This is necessary so that the foil layer can reflect heat waves. Ideal for the first layer of BiMast, Vizomat and other similar materials;
- Pieces are cut out of the material, similar to the shape of the areas located between the stiffeners.
Note. When gluing the first layer, it is important not to get carried away with excessive layering. If this is not taken into account, the hood lid may skid over time.
- Now you will need to start gluing the second layer;
- The second layer, in principle, is not needed, since it carries not so much noise-insulating properties as thermal insulation;
- This layer works, rather, as a reflector of sound waves, which is very important for those owners who are planning to improve their car audio. For this reason, if conventional sound insulation is carried out, the second layer can be skipped. If sound insulation aims to enhance acoustic properties, a second layer is necessary.
- We put the third layer in place, the standard one.
Note. The above sound insulation is called two-stage. First, a vibration damper is used, and then a second layer of foil-coated Splen is used.
Doors
Professional car sound insulation
In terms of improving acoustic performance, doors are very important. Most of the noise from outside passes through the doors. For this reason, equal importance in sound insulation should be given to each layer of material. Let's get started:
- We determine whether front speakers will be installed in the doors (if so, then the quality of sound insulation is given greater importance);
- Vibroplast Silver or Gold should be glued to the inside of the door (the side closest to the street);
- It is necessary to cover 100 percent of the entire surface, but under no circumstances cover the ventilation and drainage holes.
- We glue the second layer again on the inside, but only on the surface on the interior side;
- When further installing speakers in the doors, damping must be carried out completely. The surface is 100 percent covered with BiMast or Vizomat. In this case, everything is closed, including ventilation and drainage holes.
Advice. First, it doesn’t hurt to believe how the mechanisms that raise windows and door locks work.
- If speakers are not installed in the door, then it will be enough to dampen flat areas of the surface with the same materials.
We continue the process, using soundproofing materials:
- An accent of 10 mm is used for pasting in the first stage. This material compresses well, which makes it easier to install the sheathing.
Note. And here we must take into account the fact that if speakers are installed in the door, then first you need to stick a circle of 10 mm Bitoplast on it (the size of the circle should be 30 percent larger than the hole for the speaker). The purpose of this operation is to absorb reflected acoustic waves. As for the Accent, it is glued in one sheet.
- The door trim of the Lada Largus is not only a source of noise and vibration, but also allows it to be used as an additional acoustic shield. Only to reduce vibrations will you have to stick pieces of Vibroplast on the back side of the standard casing.
The operation ends with the following steps:
- 5 mm Bitoplast is glued to the entire surface of the skin, overlapping the edges, and excess pieces are cut off. The casing is installed in place.
Note. When installing the sheathing in place, the following must be taken into account: the installation must be rigid. For this reason, it will be important to replace old caps with new ones and use self-tapping screws where necessary.
In addition, do-it-yourself soundproofing of the Lada Largus involves covering the car’s ceiling, floor, trunk, arches and other parts with vibration- and noise-insulating material. The instructions for carrying out each process did not fit in one article (in the articles on our website you can read more about the various options for sound insulation). During the work process, it is mandatory to watch videos and photos, various useful drawings and diagrams.
Lada Largus “Simply Clever” › Logbook › #63 Shelf and soundproofing of the ceiling
Good morning! While I was on the night shift I remembered that I hadn’t written anything for a long time. And if you dig around, there is something to write about. You’ll even have to strain and remember. Today about the ceiling! I sat in exactly the same way on my last night shift. To stay awake, I flipped through various feeds. When I got tired of scrolling through VK, Insta, Drive, YouTube, etc., I went to Avito. I bought new bindings for skis, trims for my father-in-law’s rapid car, and bookmarked several interesting advertisements. And then I came across a ceiling shelf for 1000 rubles! I immediately arranged delivery via Avito, and in total it cost me about 1,400 rubles.
I decided to combine business with pleasure. Before installing the shelf, add sound insulation to the ceiling. I went to the market and collected about 3 thousand materials. 5 sheets of deuce vibroplast, 3 sheets of 4mm splen and 3 sheets of 10mm acoustic felt. In fact, I spent less; initially I decided not to buy the splen, but I found it in the garage. But if I bought it, it would be just 3 thousand. To install the shelf, you need to insert something into these oval holes, at first I thought I would have to use some hardware, but it didn’t work out!
It turns out that everything is sold completely freely on the market. I don’t even remember what they are from, it seems like something from our automobile industry, it looked like it would fit.
I just took it and bought it, and immediately bought the correct screws for torx with them.
Some kind of nonname vibroplast. Heated it in the sun, fortunately this year there was enough of it, you couldn’t take it with your bare hand! I rolled it with a handy tool. Now tomatoes will fly about rolling in Shumka, but go through the forest)))
Next is splenia. I glued it as tightly as possible to the ribs.
And now the felt! It fits similarly to splen, in some ways it’s even simpler. The assembly did not cause any problems, the only thing I cut off by 1-1.5 cm was the foam stop next to the front lampshade. Only when I started writing I realized that I should have taken more photos. For some reason I was sure that I filmed every stage, but I can’t find it. So now it is what it is.
The result is expectedly weak. What's the point of noise from the roof if the main noise is from below. Of course, some of the noise has gone away or significantly decreased, but this has little effect on the overall picture. I rather expect more of an effect from thermal insulation. Now I want to make noise about the rest, I don’t know when I’ll decide to do it. Maybe next summer, or maybe in the fall. But I want to combine it with acoustics. And acoustics are expensive, and no matter how much I spit at the sound, there is money to be spent.
Source
SOUND INSULATION OF LADA LARGUS / LARGUS
SOUND INSULATION WARRANTY 3 YEARS
SOUNDPROOFING LARGUS IN 8 HOURS
Soundproofing a Lada Largus takes 8-9 hours. 2-3 Mos-Olympus craftsmen work on each car. Largus is a regular guest in our special. center, we have studied all the problem areas and know how to deal with them so that you are satisfied with our service. The price of sound insulation for Lada Largus depends on the materials you choose; we offer several Shumka options from 16,000 to 42,000 rubles. Next, we invite you to familiarize yourself with the noise insulation program “Comfort G2” . Which uses materials from the ComfortMat company. Reduction of noise in the cabin reaches 70%. The price of this noise insulation program for Lada Largus is 26,000 rubles.
Our specialized center for installing sound insulation Mos-Olympus cooperates with leading manufacturers such as ComfortMat, STP, ShumOff. We have developed several effective sound insulation programs to choose from. Everyone who contacts us will be able to choose a “Shumka” car according to their budget and efficiency. As evidenced by numerous positive reviews on third-party sites.
You can always control the quality of the service provided and be present during the disassembly, installation of sound insulation, and assembly of the car. Each Mos-Olympus master will always give a qualified answer to your questions about sound insulation.
Lada Largus JlaPuK › Logbook › Noise-vibration insulation of the floor and side improvements
The penultimate entry about the ShVI of my Largus. I won’t write much, mostly photos with explanations. Yesterday we decided to make a shvi of the engine shield and torpedo, in the process we decided to also dismantle the floor =)
In Largus everything is sorted out quite simply, so there shouldn’t have been any problems. We disassembled the torpedo from the steering block, etc. The first problem was removing the airbag itself. In Logan, the pillow was fastened with two screws for Torx 20, and then the design of the fastenings was simplified, which added to our confusion.
In the photos above you can see 2 brackets and 2 grooves running from the holes in the steering wheel to the edge of the bracket. You need to run a screwdriver along these grooves and move the edge of the brackets in order to then remove the pillow. As the pillow gave way, we removed the steering wheel, steering column switches, visor, dashboard and decorative trim. Next we worked on the beard.
The beard can be removed easily, it is held on with clips. When you remove your beard, I strongly recommend remembering which connector comes from where. After removing the beard, we went to remove the central tunnel to reveal the lower mounting points for the torpedo.
The dashboard is mounted with 7 bolts, 2 bolts on top under the front pillar covers, 2 bolts at the bottom of the dashboard under the plugs, 2 bolts under the tunnel cover and the last bolt is located behind the radio. The main thing is not to forget to remove the passenger side connector and the diagnostic connector from the glove compartment.
SOUND INSULATION OF LADA LARGUS - VIDEO REPORT
Soundproofing of Largus was carried out according to the Comfort G2 in 8 hours in the presence of the owner. Each Mos-Olympus master has at least 5 years of experience, which is a guarantee of careful analysis of the salon. Rest assured that not a single part will be damaged or broken during the soundproofing of the car. The technician changes up to 20 pairs of gloves while working on your car.
After disassembly, the car interior is thoroughly washed and degreased. Then the master takes photographs of the disassembled interior, photographing each element separately, the roof, doors, interior floor, hood, rear fenders, trunk lid. After this, the process of installing sound insulation begins.
During installation, all vibration material is rolled with rollers for maximum adhesion to the metal!
The first layer is a vibration-damping material made from a new-level mastic composition G-formula and HotAl aluminum foil using InFliz technology. Thanks to this, it was possible to achieve a significant increase in all indicators, especially KMP and Adhesion. Vibro thickness 2 mm.
When installing a vibrator inside a car, the entire area of the material is rolled with rollers.
Then we proceed to install the noise-absorbing layer in the Largus cabin. Polyurethane foam with an adhesive layer protected by an anti-adhesive pad. It has high heat-insulating and noise-absorbing properties. Durable and does not deteriorate under environmental influences.
Isolon is one of the most popular materials used in car sound insulation. Thickness 4 mm.
Roof sound insulation begins with the installation of ultra-light material from ComfortMat.
We mount the vibrating material and roll it with rollers.
The second layer on the car roof is acoustic felt , 10 mm thick . One of the best sound-absorbing materials, made from special high-density felt using Kniton thermal bonding technology.
High-density self-adhesive felt with a special moisture-resistant layer. 86% sound absorption
The sound insulation of Largus doors includes 2 layers of ShVI, plus anti-creak protection for all door skins. This allows you to reduce vibrations traveling through the body and improve the sound of the car's standard acoustics. Carefully, using a special tool, so as not to damage or scratch the body and door trim, we proceed to disassembly.
We degrease the metal surface of the door and proceed to installing the first layer - vibration damping material G2. Thickness 2 mm.
as the second layer . Material thickness 4 mm.
We treat each door trim with anti-squeak to eliminate as much as possible the appearance of unpleasant “crickets” in the car interior.
Trunk noise insulation includes a combination of vibration and noise-absorbing materials to achieve maximum effect.
The first layer installed in the niche of the car trunk is a vibration-damping material made from a mastic composition of a new level G-formula and HotAl aluminum foil using InFliz technology, thanks to which it was possible to achieve a significant increase in all indicators, especially KMP and adhesion. Thickness 2 mm. We install vibration-insulating material Comfort Mat, 4 mm thick, onto the arches The vibration is preheated and rolled with rollers during installation.
Then we proceed to the installation of noise absorbers. We seal the trunk niche and arches with highly effective sound insulation. Thickness 4 mm.
The soundproofing of the Lada Largus hood will also not go unnoticed. We mount the vibrator on metal and roll it with rollers to remove vibrations coming from the engine.
Sound insulation of arches of Lada Largus.
For the maximum effect of car sound insulation, we recommend that you make “liquid” fender liners. This operation is paid separately and costs 10,000 rubles. for 4 wheels. Liquid sound insulation of arches is a special mastic designed to reduce noise and vibration levels in the car interior. Material made in Germany "PromCluster".
Before starting work on soundproofing the arches, the master thoroughly washes it from dirt and dust, dries and degreases the metal. Then he begins to apply the mastic layer by layer. The thickness of the material on the arch reaches 4mm.
Liquid fender liners not only significantly reduce the noise coming from the car’s wheels, but also have excellent anti-corrosion properties. Now the car arch will be reliably protected from moisture and dust getting on the metal.
The program for soundproofing the arches on the outside of the car includes gluing the lockers with premium BlockShot material, 7mm thick.
Soundproofing of Lada Largus ComfortMat G2 program is ready. 35-40 kg of vibration and noise-absorbing materials were installed. After such a program, the car became acoustically comfortable, and will delight the owner with silence and deep sounding acoustics every day. We issue a guarantee for our work - 3 years, order - an order, a certificate and declare another car - acoustically comfortable .