Print this article Font size 16
The design of starters on the VAZ 2109 has fairly good reliability indicators. But with use and over time, they still fail.
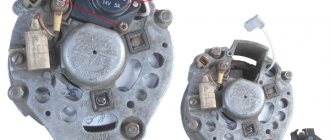
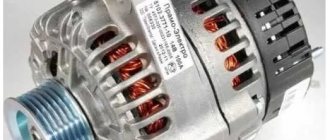
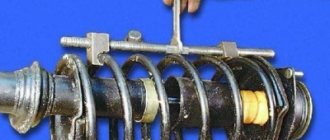
Appearance of the device
Design and operating principle
To understand the features of the repair, you must first study the design of the starter and understand how it works for the benefit of your car.
Let's start with the design. It includes four main nodes.
| Knot | Peculiarities |
| Electric motor | It transmits direct current through four brushes |
| Freewheel with gear | A clutch or bendix drives the flywheel of your car's engine. |
| Traction relay | Serves to extend the bendix with gear when turning on the electrical appliance |
| Bushings | Ensure easy rotation of the clutch, rotor, and gear. One bushing is located inside the starter, and the second is in the clutch housing. |
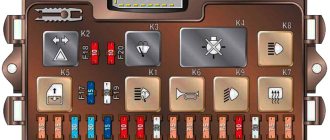
Device diagram
Having familiarized yourself with the starter diagram, you can discuss the principle of its operation.
The operating principle is to convert an electrical signal into the rotational movement of a drive gear. Current is transmitted through the brushes to the poles of the electric motor. At the same time, the clutch extends and the gear is connected to the flywheel ring. To start the engine you need a quick but easy rotation of the starter. When the engine starts, the clutch returns to its original position.
VAZ 2109 starter - how to assess problems and fix them as well as a mechanic?
For owners of domestic cars, self-repair or assembly of vital mechanisms is familiar and accessible; in this article we will try to improve our skill level and replace the VAZ 2109 starter with our own hands.
Starter circuit and purpose
On all cars, without exception, and therefore on the VAZ 2109, the starter is responsible for starting the engine, or rather, spinning the crankshaft. Essentially, it is a small electric motor. The VAZ 2109 starter device includes a movable rotor, two windings, and a bendix with a set of brushes. How does it all work? Magnetic fields of opposite values are created around the starter and rotor windings, which drives the moving element into dynamics. It is quite easy to apply voltage to the starter, but for the rotor you need an intermediary - brushes consisting of graphite and copper.
What about the Bendix starter of the VAZ 2109, this element transmits movement to the flywheel. The part consists of the following parts: a fork connecting the mechanism to the retractor relay, an overrunning clutch that ensures movement in one direction, and a gear. Many motorists are familiar with the situation when this part is erased. The slipping of the Bendix is clearly audible and indicates that the installation of a new kit is inevitable. And although the cause is often contamination of the mechanism, cleaning it is not recommended. Due to dust and soot, Bendix is subject to wear, often unevenly, and even after washing it will no longer perform its function at the proper level.
There is a gear starter and a simple one. The scheme for transmitting torque to the flywheel is excellent. The gear starter has an additional element between the armature and the bendix. Many consider this design to be more productive and less voracious. True, the gear unit is more difficult to repair.
Starter mechanism malfunctions
If any difficulties arise with starting the car, this unit is the first to be suspected, but now, knowing the design of the VAZ 2109 starter, you will quickly figure out where to look. Various sounds similar to metal grinding should also alert you; it is quite possible that your VAZ 2109 will need to disassemble the starter. The reason may lie in the flywheel, and its crown will need to be replaced. In this case, the car will most likely start, just not right away.
But if the car does not start and there are no alarming sounds, then you may have to replace the clutch. Disassemble the starter and dismantle it, try turning it in both directions. If it rotates freely, then calmly throw away the failed part. You can understand that it is necessary to remove and replace worn starter brushes installed on a VAZ 2109 by a characteristic click, after which the expected engine start will not take place.
Removing and connecting a new starter
In absolutely any of the cases described above, you will be faced with the need to take a closer look at the device. It should be noted that with the release of the VAZ 2109, the question of how to remove the starter became more easily resolved, because in this model the arrangement of components under the hood is much simpler. So, you will need socket and socket wrenches and an inspection hole. Now, regardless of whether it is necessary to replace only the bushings or the entire VAZ 2109 starter, it must be removed. First of all, all the wires of the traction relay are disconnected, after which the block is dismantled. Don't forget to remove the high voltage wire from the battery.
The next step is to dismantle the engine crankcase protection; to do this, simply unscrew the mounting bolts. Then the approach to the mechanism of interest to us is cleared. To remove it, you need to unscrew three nuts - two on the block and one in the engine compartment. The connection diagram for the new VAZ 2109 starter is the same, only it is in the reverse order, so it will not cause any difficulties.
Disassembly begins with the fact that you need to carefully knock down the locking and restrictive ring, and then, unscrewing the fasteners of the back cover, remove it. Now we get to the graphite brushes, stator and armature. It should be noted that there may not be a gearbox in this part, in which case the stator is taken out after the armature. If the design still includes this element, then you need to act somewhat differently. Although it is not difficult to remember how to disassemble the gear starter on a VAZ 2109 if it fails. The scheme will just work in reverse - the stator itself is pulled out first, then the armature, and the gearbox comes last.
Be careful, disassembly is often complicated by the loss of the adjusting washer installed on the armature axis, and the loss of other small parts - there are not many of them, but the absence of even one calls into question the further operation of the mechanism.
Now you can imagine how to remove, assemble, install and connect the VAZ 2109 starter; you no longer need to bother the mechanic with such issues.
Typical faults
It is better to start diagnosing the starter even before you remove it.
After dismantling, some signs of failure, by which the source of the problems can be determined, can no longer be determined.
Signs of a faulty element include:
- An unusual noise occurs when the engine starts;
- Complete absence or slow rotation of the starter;
- Rotation occurs, but there is no gear engagement with the Bendix ring;
- The unit rotates with the bendix, but then the clutch breaks;
- Turning the key in the ignition, there is silence.
Checking the dismantled unit
Before blaming the starter for everything, take the time to look under the hood and check the condition of the terminal contacts and connectors. Also pay attention to whether everything is ok with the battery. Only after this can you start working on the starter.
Diagnostics
To carry out diagnostics, arm yourself with a conventional tester with voltmeter mode.
- Connect the battery terminals to the poles of your measuring device. You will need an assistant to drive.
- After connecting the terminals to the voltmeter, look at the readings of the device. If the battery is working properly, the data will be 11-13 V.
- Turn the ignition key and at this moment measure the voltage. If the losses are only 1-2 Volts, then the starter works normally and does not show resistance.
- If the voltmeter parameters decrease by 2 times or more, the reason is in the starter. Or rather its bushings or brushes.
- Remove the starter and check the relay. Connect the battery terminals to its terminals on the body and transfer it to 12 V. If the overrunning clutch moves in the front cover, then the relay works perfectly. If not, replace it.
Disassembly sequence
The process of disassembling the VAZ 2109 starter takes place in several stages. It is possible that we will be able to find a breakdown at the first stage. Then you will be able to save both time and money.
Removing and inspecting brushes
At the first stage, you should evaluate the condition of the brushes. They most often become the cause of starter failure.
- First you need to open the two screws securing the protective cover. The lid can be easily removed.
- Using a screwdriver, remove the retaining ring and adjusting washers from the shaft.
- Now it’s the turn of the two tie rod nuts. You can remove the cover from the side of the collector.
- All that remains is to press out the springs with a screwdriver and remove the non-insulated brushes from the holder.
To measure the height of the brushes you will need a caliper or ruler. If the height of the brushes is less than 12 mm, they need to be replaced. The presence of cracks and chips on the working surface is also not allowed.
Removing and checking the anchor
If the brushes are in good condition, you will have to further disassemble the starter.
- First of all, you need to remove the housing along with the stator. At the anchor, you should inspect the collector and check the integrity of the winding. If there is a large deposit or breakdown on the collector, it is necessary to clean the problem areas using fine-grained sandpaper.
- The armature and stator windings are checked for breakdown with an ohmmeter.
Removing the overrunning clutch and gear
To get to the overrunning clutch with gear, you will have to remove the armature from the front cover.
- To do this, it is necessary to remove the retaining ring near the overrunning clutch, and then the limiting ring.
- Now remove the plastic stop of the lever and take out the anchor.
- Next, the intermediate support is removed from the shaft.
- The condition of the gear teeth can be determined by visual inspection. If the overrunning clutch is faulty, it must be replaced.
Disassembling the traction relay
The traction relay has to be changed when the overrunning clutch does not extend when voltage is applied to the terminals. Some starter models are equipped with detachable relays, but it is better to replace the entire assembly.
- To remove the traction relay, unscrew the two screws located in the front.
- Now, having lifted the relay, it is necessary to disconnect the anchor from the lever.
- After this, the relay is removed from the housing along with the armature and spring.
Removal of bushings
The cause of jamming when the starter rotates is often increased wear of the bushings. They are made from metals such as copper, bronze or brass, so when in contact with steel parts they fail earlier.
- The BAZ 2109 starter has one bushing in the rear cover, and the second bushing is installed in the clutch housing. The presence of defects is determined by visual inspection. The presence of cracks, chips, burrs, shells, as well as an increased degree of wear is not allowed. You can also determine the “out” of the bushings by the backlash that is felt during transverse movement of the starter shaft.
- It is recommended to change the rear bushing together with the cover. But the front bushing in the clutch housing can be removed using a tap of the appropriate size. To do this, the tap is twisted (as if a thread is being cut), and when it hits the bottom of the hole, the bushing will begin to come out.
- Before installing a new bushing, the internal surface of the part must be lubricated with motor oil.
Removal
Well, the check showed that the starter needs to be repaired. Therefore, the first thing we do is dismantle it.
- Secure the car stationary by turning on the handbrake and placing stoppers under the wheels.
- Move the negative terminal from the battery to the side. This will deprive your car of power.
- Disconnect the wire connector from the starter solenoid relay terminal.
- Unscrew the fastening nut from the relay contact bolt and remove the wire.
- If there is a crankcase guard, remove it. Here all the bolts are simply unscrewed.
- The 2 starter fixing nuts are unscrewed from the bottom of the engine compartment. But the third one is more conveniently removed from inside the engine compartment.
- Having removed the fasteners and disconnected the wiring, you can safely remove your starter from the clutch housing.
Before starting work, be sure to clean the device from accumulated dirt so that it does not get inside the structure and reduce all repair efforts to nothing.
Repair
Next, you have to check the condition one by one and take appropriate measures to eliminate problems with the following components of the starter:
- Brushes;
- Anchor;
- Overrunning clutch;
- Traction relay;
- Bushings.
Now let's talk about everything one by one.
Brushes
First, assess the current condition of the brushes. In most cases, they are the source of problems with the starter.
- Remove the pair of screws that hold the protective cover in place. The cover is now easy to remove.
- Use a screwdriver to remove the retaining ring from the shaft, and don’t forget about the adjusting washers.
- Unscrew 2 more tie rod nuts. Remove the manifold side cover.
- Use a screwdriver to press out the springs and remove the brushes from the holder.
- Measure the brushes with a caliper or ruler. If the height is less than 12 millimeters, the brushes must be replaced.
- It is also better to replace elements if there are chips, cracks and other defects on the surface.
Brushes
Anchor
If all is well with the brushes, the next suspect is the anchor.
- Remove the housing with the starter.
- At the anchor, look at the condition of the commutator, check whether the winding is intact.
- If there is carbon deposits on the collector or signs of breakdown, clean these areas with fine sandpaper.
- Check the armature and stator windings using a multimeter in ohmmeter mode.
Overrunning clutch
Parallel checking of the overrunning clutch with the armature will allow you to replace the latter at the same time.
To gain access to the clutch you will have to remove the armature from the front cover. At the same time, change it if necessary.
- Remove the retaining ring located near the overrunning clutch.
- Remove the restrictor ring.
- Remove the plastic lever stop, which will allow you to reach the anchor.
- Remove the intermediate support from the shaft.
- Check the condition of the gear teeth. If there are defects, the unit is replaced with a new one.
Bendix or overrunning clutch
Traction relay
Replacing the traction relay is necessary if, when voltage is applied to its terminals, the overrunning clutch does not extend. Sometimes the VAZ 2109 is equipped with collapsible relays. But it’s still better not to repair it, but to replace it with a new relay.
- To remove the relay, unscrew the two screws located on the front;
- Lift the relay, disconnect the armature from the lever;
- Remove the relay from the housing, grabbing the spring and armature. All elements are changed if necessary.
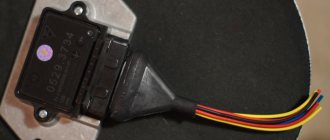
Relay
Disassembling the starter for VAZ 2108, 2109, 21099 cars
To carry out repairs, maintenance or replacement of parts, the starter must be removed from the engine and disassembled. Let's see how to do this quickly - without wasting extra time and effort, using the example of disassembling starter 29.3708, which is widely used on VAZ 2108, 2109, 21099 cars.
Required Tools
— Slotted screwdriver (phillips)
— Wrenches (open-end or socket) for 10, 13 and 17 mm
— Retaining ring puller (optional)
Preparatory work
— Remove the starter from the car engine
The procedure for disassembling the starter 29.3708
— Remove the traction (retractor) relay
To do this, use a 13 mm wrench to unscrew the nut securing the tip of the starter winding output, and disconnect the tip from the contact bolt of the traction relay. Using a slotted screwdriver (screws for a Phillips screwdriver or a 10 mm wrench can also be used), unscrew the three screws securing the relay and disconnect it from the starter housing.
Remove the starter traction (retractor) relay
At the same time, we remove the relay core earring from engagement with the tip of the drive lever (Bendix).
Remove the solenoid relay core
— Remove the protective cover of the starter brush assembly
To do this, use a slotted (Phillips) screwdriver to unscrew the two screws securing it.
Removing the starter rear protective cover
Disconnect the cover from the starter housing. Underneath there is a rubber ring-gasket.
Remove the sealing ring of the protective cover
— We remove the axis of the starter drive lever (Bendix)
To do this, use pliers to squeeze the whiskers of its latch and use them to remove the latch from the hole on the axle. We knock the axle out of the hole in the starter housing. To knock out the axle, you can use a nail of a suitable diameter and a hammer.
We remove the bendix axis (starter drive)
— Remove the Bendix travel limiter ring
We knock it down with light blows of a hammer (you can use a 17 mm open-end wrench).
We knock down the bendix limit ring
We remove the retaining ring located under it with a puller or simply pry it off with a slotted screwdriver.
Remove the bendix travel limiter retaining ring
— Unscrew the two long screws holding the two halves of the starter housing together
To do this, you need a 10 mm wrench. We take out the bolts and separate the halves. If they do not separate, lightly hit the front half with a hammer.
Unscrew the starter housing pinch bolts
— Remove the starter drive (Bendix)
Remove the rubber plug from the slot in the front of the starter housing. Using a screwdriver, disconnect the legs of the drive lever from the protrusions on the drive itself.
Removing the starter drive ("Bendix")
We push the bendix forward and take it out.
Drive parts ("Bendix")
— Disconnect the armature and the starter housing
To do this, pry it up with a screwdriver and remove the locking half-ring on the armature shank. We also remove the washer located under it.
Remove the armature shaft retaining ring
If it is necessary to remove the stator windings, unscrew the screws securing them to the starter housing.
Remove the armature and starter stator windings
— Remove the brushes
If it is necessary to remove the brushes, unscrew the screws securing them and remove them.
Removing the starter brushes
Notes and additions
— Another starter 5712.3708, installed on VAZ 2108, 2109, 21099 cars, has a slightly different design, and its disassembly differs from disassembling the starter 29.3708.
TWOKARBURATORS VK -More information on the topic in our VKontakte group and Odnoklassniki TWOKARBURATORS OK