Preparation
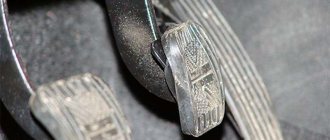
The first sign that there is air in the system is when the pedal that activates the brake becomes depressed.
Moreover, if you press and release it several times, it falls into place. Of course, with such unstable operation of one of the most important elements of a car in terms of safety, it is dangerous to go outside. Therefore, we recommend starting pumping immediately. Please note that the described symptom may also indicate other breakdowns. This is about:
- an excessively large gap formed between the piston of the main cylinder and the bolt that regulates the operation of the vacuum booster;
- liquid leakage due to depressurization of communications;
- damage to the rear cylinder thrust ring (it usually fails).
Each of these problems needs to be addressed as a priority. Only after this does it make sense to start pumping.
There is one more important circumstance. Be sure to only use the brand of brake fluid that is already in the system.
It is advisable to involve an assistant in the work, so pumping is done faster and with less labor. We will tell you below what to do if you couldn’t find a partner.
- a transparent jar or plastic bottle with a capacity of 1.5 liters;
- flexible tube (rubber, silicone, etc.);
- a set of keys;
- clean rags.
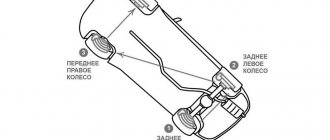
It should also be understood that air is removed from the VAZ-2115 system in a certain order. First, the procedure is performed for the rear wheel (for example, the right one), and then the front one (respectively, the left one). That is, you need to act diagonally.
Why and when is VAZ 2114 brakes needed to be pumped?
Cases when this procedure is needed:
- Replacement (removal) of the main brake cylinder.
- Replacement of tubes and hose.
- Replacing calipers.
- Replacing fluid in the system.
In other words, almost any intervention in the brake system requires bleeding.
Please also note that brake fluid should be replaced every two years, at least. The new fluid contains many additives that improve braking and help prevent the destruction of structural elements. What you will need to carry out the work:
- Brake fluid. The capacity is 1 liter, which is quite enough.
- The tube is transparent.
- Small plastic bottle.
- The key is crimped to “8”.
- Open-end wrench set to "8".
- Jack.
- 19mm wrench for unscrewing wheel bolts.
Well, that’s all, having prepared all this, you can begin the repair.
Leveling up
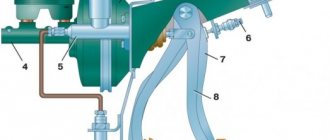
First, open the hood of the VAZ-2115. The brake fluid reservoir (TF) is located here. Remove the cap from it and check if it is filled properly. If the level does not reach the “max” mark, then add the missing volume.
Next, do this:
- unscrew the cap covering the fitting on the rear wheel brake cylinder;
- pour a little TJ into a transparent jar;
- Pull the hose onto the fitting (it should fit as tightly as possible);
- Immerse the other end of the tube in the container so that it is below the liquid level.
Now the assistant should take the driver's seat. Here he smoothly and carefully presses the brake pedal at least 6-8 times. Between pumping, you need to pause within 2 seconds.
At the end, the partner presses the pedal and leaves it in the lower position. At this point, you should loosen the fitting no more than 2 or 3 turns. A key is used for this.
If everything is done correctly, liquid will begin to flow out of the hose. Watch carefully - air bubbles will come out along with it. It is necessary to stop pumping no earlier than they stop appearing. When only the fuel fluid starts to flow, tighten the fitting. After this, the partner is allowed to take his foot off the pedal.
During the process, it is important to constantly monitor the tank - you must not allow it to become empty. If this trouble occurs, then pumping will have to start all over again. Proceed in the same way with the remaining wheels of the VAZ-2115.
Brake bleeding sequence
It is possible to solve the problem of brake squeezing in the VAZ 2114 by bleeding the system. Before starting the pumping procedure, you should read the instruction manual for this vehicle, which shows the exact algorithm of actions.
To prepare for bleeding the brake system, a number of works should be performed. To begin, put the vehicle on the handbrake, disconnect the fluid sensor from the reservoir and fix it; when bleeding the brakes on the rear wheels, insert a slotted screwdriver into the rear adjuster between the rod and the bracket. There is no need to insert a screwdriver when bleeding the front brakes.
The procedure for pumping brakes on a VAZ 2114
- First, open the hood and remove the cap from the container containing the brake fluid. It is necessary to ensure that the container is completely filled. Otherwise, the liquid should be added to the “max” position.
- You should inspect the rear right wheel and find the cap covering the fitting. You need to unscrew it and remove all dirt from it.
- Fill the prepared glass or plastic container with brake fluid.
- One end of the hose is fixed to the fitting, and the other is lowered into a container with liquid.
- The assistant should sit in the driver's seat and gently press the brake pedal. Seven presses with 2-second breaks are enough. Now he must press the pedal again all the way and leave it in that position.
- While the pedal is pressed all the way, using a wrench, you should unscrew the fitting a couple of turns.
After completing the entire specified sequence of actions, you can observe how the brake fluid flows through the hose into the container. In it you can see air bubbles that should be removed. Why should you drain the liquid until they disappear completely?
After the liquid stops draining, screw the fitting back to its original position. Now the partner must release the pedal. As the liquid flows out, you should monitor how much is left in the tank. If the need arises, the missing liquid should be added. If, while bleeding the brake system of the VAZ 2114, it all leaked out, then the procedure will have to be repeated.
The procedure should be repeated for all wheels. This procedure can be applied not only to the VAZ-2114, but also to the 2113, 2115.
Self-leveling
It is not always possible to attract an assistant to work.
Here the question arises: how to bleed the brakes yourself, and, in general, is this realistic in the case of the 2115 VAZ model? The answer will be yes. To perform the operation discussed in this article, you must use a compressor. A device is required that can maintain the pressure in the system at least 2 atmospheres. The pedal is not activated in this situation.
The work is done like this:
- select a cap suitable for replacing the one that is screwed onto the fuel tank of your VAZ-2115 (suitable for canisters in which motor oil is sold);
- drill a hole with a diameter of 14 mm in it;
- insert the fitting from the tubeless wheel into the hole;
- the joints must be treated with sealant;
- fill the tank with liquid to the maximum mark;
- Unscrew the cap from the brake cylinder fitting;
- put on the tube and place the other end in the bottle;
- Connect the compressor to the tank and activate.
When the air stops coming out, tighten the fitting and move to the other wheel.
At the last stage of the procedure, it is necessary to add brake fluid to the reservoir intended for it to the maximum and screw the cap tightly.
Next, all that remains is to check how the system works after removing the air.
The process of bleeding brakes alone
It is not always possible to invite an assistant, so most vehicle owners have a question: how can one bleed the brakes on a VAZ 2114?
Yes. This procedure can be done alone. The operation can be performed using tires. They will help create pressure inside the tank, which will be equivalent to what is created when you press the pedal.
Method No. 1.
- The process is carried out in the following way: take a wheel, which will serve as a source of pressure, using a hose, connect the neck of the tank with a thread and the nipple of the chamber.
- Before the procedure, it is worth making a similar hose. Now work is happening related to pumping the brakes, this happens in the same way as with the involvement of a person.
- The only difference here is that you don't have to press the pedal. If the brake fluid level drops during bleeding, it should be replenished.
- To do this, you will need to disconnect the hose from the threaded neck of the tank, and after filling the tank, put it in place.
- When pumping in this way, you should keep in mind that the pressure in the tire should be no more than 2 atmospheres.
Method No. 2.
- There is another way to pump the brakes, alone, when the pressure is created, using a production compressor, creating a pressure of 2 atmospheres. The next step is to screw the cap with the nipple onto the neck of the tank.
- It is permissible to sequentially screw off the fittings and drain the liquid, but the level of the latter in the tank should be monitored.
- It is very important to know how to properly bleed the brakes on a VAZ 2114 , because the need for this arises in various situations.
- Air can get in when the hose is damaged, or when the copper tubes at the rear need to be replaced, or some elements of the brake system, or when the seal in the assembly is broken.
- No matter what caused the air to enter the brake system, bleeding must be carried out, otherwise the brakes will not function.
Pumping - important nuances
In a situation where repair work was carried out on only one cylinder, then bleeding is done only on it - there is no need to touch the other wheels.
If your 2115 has ABS, there are a few things to keep in mind. Before bleeding, you should turn on the ignition, and only after that press the brake pedal at least 4 times. Then fill the tank with TJ to the maximum and then proceed as described above.
When work is done on the rear wheels, the ignition is not turned off. This allows you to use the ABS system pump - it will create the necessary pressure.
Bleeding brakes on VAZ 2113, VAZ 2114, VAZ 2115
Welcome! Bleeding the brakes is the most important part after replacing any unit in the brake system, or even after replacing the brake fluid itself with a new one. This procedure must be carried out in the cases described above, that is, after replacing something in the brake system itself, if you neglect this procedure, then you will have air in the brake system due to which you will not be able to simply brake , and in the literal sense of the word, your brakes will not work, but the pedal will simply move when you press it and when you release it and that’s it, so it’s necessary to pump the brakes.
What is needed to bleed the brakes?
When bleeding the brakes on a VAZ 2014 with your own hands, you need to keep in mind that to carry out the process you should use brake fluid identical to that found in the cylinder.
It is not permissible to use any other liquid. Before pumping, it is imperative to check whether the system has become depressurized. The procedure should be carried out together with an assistant. First prepare a hose, the size of which will be optimal for the bleeder fitting, a glass or plastic container, a wrench, and rags to clean the caps. It is important to have an idea of how to properly remove air from the brake system.
A similar process should be carried out diagonally, alternating front and rear brakes in the following sequence:
- First of all, located on the rear wheel on the right.
- Now the one on the left front wheel.
- Rear left.
- Front right.
How to bleed the brake system on a VAZ 2113-VAZ 2115?
Note! Bleeding the brakes is carried out on a car with an assistant, although it is possible without one, but it will be more difficult, and the article itself is written on bleeding the system only with an assistant!
On cars of the Samara 2 family, the bleeding system must be replaced in sequence, namely first the rear right wheel, then the front left, then the rear left and only after that the front right, generally diagonally starting from the rear wheel first!
1) At the very beginning of the operation, open the hood of the car and then unscrew the cap of the reservoir containing the brake fluid by hand. (The location of this cover is indicated by an arrow in the photo below, but only it is turned out)
2) Then, if possible, take brake fluid of the same brand, and add it to the MAX mark in the same tank, and if you bought new fluid and decided to replace it, then for more detailed information on replacing brake fluid, see article: “Replacing brake fluid on a VAZ.” (By the way, in this article to which a link is given, at the very bottom there will be a section “Important!”, be sure to read it, a lot of interesting things are said there)
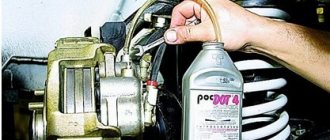
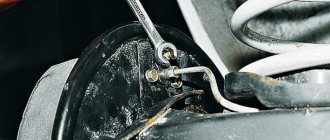
3) Next on the rear right wheel, find a small cap that covers the bleeder fitting, and after you find this cap, remove it and clean it of dirt.
4) After this cap is removed from the fitting, take the pre-prepared hose in your hands and put one end of it on the fitting, and lower the other end into a transparent plastic bottle, preferably. (If you don’t understand about the hose and the bottle, then for an example with a hose and this very bottle, see the photo below in paragraph “6”)
Note! The bottle into which you will lower the hose must be filled with brake fluid and the tip of the hose must be in this very fluid!
5) Then, when everything is done, tell your assistant to get behind the wheel of your car and then let him smoothly press the brake pedal 7-8 times and at the very end, that is, when he presses the last eighth time, let him press this pedal will remain pressed all the way.
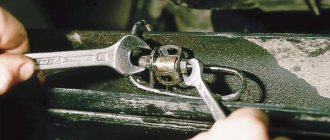
6) And at this time, start using a wrench to carefully unscrew the bleeder fitting, but in no case do you need to unscrew it completely, you just need to loosen it a little by 2-3 turns and after which you should see how the brake fluid goes into the bottle liquid.
Note! Wait and watch carefully how the brake fluid drains, by the way, you will see in it those same air bubbles that should not be present in the system under any circumstances, so continue to drain the fluid from the system until the release of bubbles into the bottles stops, and when the release of bubbles will stop, then screw the fitting all the way and only after that let your assistant take his foot off the pedal!
Checking the brake system
VAZ 2109 bleed the brakes
Before starting this work, it is necessary to check the entire system for its tightness. To do this, place the car in a garage with an inspection hole. Carefully clean the joints of rubber hoses and pipelines from accumulated dirt.
Note: do not use sharp objects, do not strike.
You need to clean it carefully - take a rag with your hands, rotate it up and down, clean one side, then the other. After this, you need to make several presses on the pedal, put a load on it or stop it with something else. Necessary:
- Go down into the pit.
- Inspect the connections and the quality of the hoses themselves.
- The joints must be dry.
- If liquid has leaked, then use gentle movements and a special wrench to tighten the connections.
Note: tightening must be done smoothly without sudden movements. Tightening the tube connections is carried out with two wrenches and they need to be installed on the two parts being connected.
- Inspect the places where the pipes are attached to the car body; if they break, make new fastenings if possible. Install them in certain parts of the body.
VAZ 2109 bleeding the brake system
- Securely secure the tubes.
- Visually assess the suitability of the rubber hoses; they should not have ruptures in the upper shell or cracks.
Premature damage to rubber hoses can occur due to:
- drainage of mineral oils and grease onto them;
- as well as mechanical damage.
According to the technical specifications of the manufacturer, hoses must be changed after 150,000 km or after five years of operation of the vehicle. Upon completion of the inspection of the condition of the system from the inspection hole, under the body of the vases, it is necessary to inspect all joints for tightness. This is also done under the hood, in the engine part. In addition, it is necessary to check the fluid level in the master cylinder reservoir. If necessary, the level must be increased to the maximum level.
How to bleed the brakes on a VAZ-2115 with your own hands?
Perhaps the most important component in any car is the brake system. It is this that allows you to slow down the car in time, ensuring traffic safety. Today, most passenger cars use a hydraulic braking system. And the cars of the Samara-2 family are no exception. Car owners should know under what circumstances they should bleed the brakes of a VAZ-2115 and how to do it correctly. All this will be discussed further in our article.
Signs to watch out for
In what cases should this operation be performed? The main reason that leads to pumping is air accumulated in the system. It can get inside for various reasons. As a rule, this is a malfunction of the brake cylinders or leaking hoses. Very rarely, air gets in due to a weak connection of the fittings, but this possibility should not be ruled out.
How to determine that air has formed in the system? The driver will notice changes in the behavior of the car. So, when you press the pedal, the car will not reduce speed as effectively. And the pedal itself will be more sluggish and have an increased stroke. The situation is critical when it completely falls into the floor, and the car barely slows down. In this case, it is urgent to bleed the front and rear brakes of the VAZ-2115.
This operation is also required when replacing brake fluid. If it has not been updated for more than three years or has become black, it definitely needs to be replaced. In addition, some fluids are changed when buying a car on the secondary market, when there is no confidence in the reliability of the system. Bleeding may also be required when doing any work on the brake system. This may include replacing the reservoir, working or master cylinder, hoses and other elements. It is not pumped only when replacing the pads, since the working cylinders are only recessed here (both in the case of front disc mechanisms and rear drum mechanisms).
Required tools and materials
To get to the fittings in the absence of an inspection hole, we need to unscrew the wheels. Therefore, you need a jack, stops and a wheel wrench. If there is a hole or overpass, the wheels do not need to be unscrewed. You will also need new brake fluid. On vehicles of the Samara-2 family, RosDot of the fourth class is used. In addition, we need a plastic bottle and a hose that will be put on the fitting (so that the liquid does not splash in different directions, but goes out into a certain container). To unscrew the fitting, you need a regular 8mm wrench.
Replacement
To replace the TJ yourself, you will need a certain set of tools and materials. This set includes:
- Brake fluid - 500 millimeters;
- A set of keys;
- Screwdriver Set;
- Transparent flexible hose;
- Container for draining old fluid;
- Dry rags for cleaning surfaces.
To work, you will definitely need the help of one more person, so when pumping, one should be inside the car, and the other outside.
Let's start the procedure.
- Unscrew the cap on the master cylinder reservoir and place it on a prepared surface. The cover is combined with the float of the fuel oil level sensor, so be careful, because a toxic and dangerous substance will remain on it.
- Unlock the rear brakes using a screwdriver. It is simply inserted between the plate and the piston. Ready.
Inserted a screwdriver
- Clean the right rear brake release valve of any accumulated dirt and dust, then remove the rubber cap that covers the valve.
- Place a flexible transparent hose onto the valve fitting and place its other end in a container to drain the liquid.
- Approximately once every two seconds, press the gas pedal all the way four times in succession. When you press the fifth time, lock the pedal in the clamped position.
- Unscrew the valve at least half a turn. As the brake fluid drains, the pedal will gradually begin to sink.
- As soon as the fluid flow stops, close the valve.
- Simultaneously with the procedure, do not forget to monitor the level of fuel fluid in the tank.
- As you pump out the old substance, add a little new one. This will avoid the formation of air locks inside the system.
- Add fresh fuel fluid into the tank until all the old fluid comes out and new clean substance begins to flow through the hose into the container.
- Having completed the work on the rear right wheel, go to the front left and perform a similar procedure. Due to this movement pattern, you will be able to completely get rid of the old fuel oil in one circuit.
- By analogy, remove the fuel fluid from the second circuit in the same sequence. Having completed draining, close the valves with caps and add new fuel fluid to the required level.
Accuracy comes first
After completing the replacement procedure, you should definitely bleed the brakes. It is strictly not recommended to go out on the road without it, since the brakes may simply not work.
Why bleed the brakes?
Bleeding a vehicle is a preventive measure aimed at ensuring stable operation of the brakes. The point is to remove foreign liquid and excess air.
Air and excess liquid can appear in the system for various reasons. Namely:
- The hoses are damaged and their integrity is compromised;
- Low-quality brake substance is used;
- System elements were replaced or brake fluid was updated;
- The seal of the vehicle is broken.
Any braking system, due to its design, can spontaneously accumulate moisture inside itself. Therefore, pumping cannot be ignored under any circumstances.
To get to the fittings in the absence of an inspection hole, we need to unscrew the wheels. Therefore, you need a jack, stops and a wheel wrench. If there is a hole or overpass, the wheels do not need to be unscrewed. You will also need new brake fluid. On vehicles of the Samara-2 family, RosDot of the fourth class is used. In addition, we need a plastic bottle and a hose that will be put on the fitting (so that the liquid does not splash in different directions, but goes out into a certain container). To unscrew the fitting, you need a regular 8mm wrench.
Preparing for surgery
So, put the car in a pit or on a flat surface, then open the hood and remove the connector for the brake fluid level sensor. Then unscrew the cap and add liquid to the maximum level. After this, screw on the lid.
Please note: if you use a lift during the work, when bleeding the rear brakes you need to place the slot in the brake force regulator (also called the “sorcerer”). To do this, you can use a screwdriver by placing it between the rod and the bracket.
When bleeding the front brakes, this slot must be removed.
How to bleed the brakes on a VAZ-2115? During the work we will need one assistant. He will press the brake pedal on command.
Correctly pumping the brakes on a VAZ-2114: order and sequence of actions
If when you press the brake pedal it fails, and after several presses everything returns to normal, it means there is air in the system . He needs to be kicked out, that is, pumped up. On the VAZ-2114 hatchback, you need to pump the brakes “diagonally”: start from the rear left wheel, move to the front right, etc. Also, if the rear axle is suspended, then install a screwdriver between the pressure regulator and the bracket.
We study the design of the brake system - watch the video.
Preparation for work
First of all, disconnect the sensor connector and secure this connector next to the tank. Then open the lid and add liquid to the MAX mark. This requires DOT-4 fluid .
Level sensor connector
On any car, including the VAZ-2114, the brakes are pumped with the lid closed. This means we tighten the lid harder, and then roll the car onto an overpass or pit.
If a lift is used, it means that when bleeding the rear cylinders, a spline is placed in the regulator (sorcerer).
Pressure regulator (sorcerer)
The screwdriver here is between the bracket and the rod. When bleeding the front brakes, remove the screwdriver.
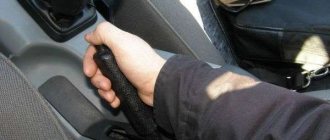
Safety precautions: the handbrake must be engaged and the ignition key must be removed.
Sequence and correct procedure for pumping brakes on a VAZ-2114
- We find a fitting on the rear wheel drum (photo 1). It is usually closed with a cap that is removed. Place a hose on the fitting.
Rear brake cylinders
Bleeding the front cylinders
Possible sequence for pumping brakes for a VAZ-2114: rear right wheel, front left, rear left, etc. Each circuit is pumped starting from the rear wheel.
Articles
- 2101-1602591 – rear cylinder fitting;
- 2101-1602591-01 – disc brake fitting;
- 2101-1602592 – fitting cap.
How to bleed the brakes alone?
It seems that one person can bleed the brakes. But then you need to increase the pressure in the tank. The source of air will be the tires. By the way, the limiting value should be considered 2 atmospheres.
The cap with the nipple is screwed onto the neck of the tank. Next, the “extension cord” is assembled. The donor wheel is hung out when bleeding the brakes.
You can open the fittings one by one and drain the liquid. But you also need to monitor the fluid level in the tank.
Topping up is done as follows: disconnect the “extension cord” from the tire, unscrew the cap, etc.
Instructions for the last chapter in one video
Yes, as on most cars, bleeding is done crosswise, but I would advise changing the old brake hoses, pads and brake fluid for a brake system that does not fail. It’s better to spend money once and forget about the brakes than to constantly crawl under the car.
Pumping is not difficult, call an assistant and pump them according to the instructions in the manual. Just keep an eye on the brake fluid level when bleeding. After bleeding, drive off with caution. Until the pedal becomes hard and the pads are in place.
Let's get started
Let's look at how to bleed the brakes on a VAZ-2115 with your own hands. So, first we need to find the fitting on the back of the rear wheel drum.
It will be closed with a protective cap. We need to remove the last one. Next, put a hose on the fitting and direct it into a plastic bottle. After this, we need the help of a second person who, on command, will press the brake pedal several times. This must be done about four to five times at intervals of one to two seconds in order to create pressure in the system. When pressed for the last time, the pedal is held to the floor. At this moment we carefully unscrew the fitting. It is important to unscrew it smoothly, since at first the liquid will flow under very high pressure. As the fluid comes out, the assistant will feel the pedal sink to the floor.
Brake system VAZ 2115
Safety when driving a car is ensured by several systems, however, the main role is still assigned to the car's brake system. Timely braking saves you from traffic accidents, and the hand (parking) brake helps to secure the car on an inclined surface. It is these elements of the car that need to be given special attention. Timely diagnostics and repairs will help protect you and your car.
Malfunctions
Possible malfunctions of the brake system and methods for eliminating them are given in the table:
Increased brake pedal travel
Leakage of brake fluid from wheel cylinders
Replace failed parts of wheel cylinders, wash and dry pads, discs and drums, bleed the hydraulic drive system
Air in the brake system
Remove air from the system
Damaged rubber o-rings in the master cylinder
Replace the rings and bleed the system
Damaged rubber hoses for hydraulic brakes
Replace the hoses and bleed the system
Increased runout of the brake disc (more than 0.15 mm)
Sand the disc; If the disc thickness is less than 17.8 mm, the brake disc should be replaced
Fluid leakage through the pressure regulator pusher O-rings
Replace O-rings
Insufficient braking performance
Oiling of brake pad linings
Wash and dry the pads
Piston jamming in wheel cylinders
Eliminate the causes of jamming, replace damaged parts, bleed the system
Complete wear of the brake pads
Replace the brake pads
Overheating of brake mechanisms
Stop immediately and let the brakes cool down.
Using pads with mismatched linings
Use only pads recommended by the manufacturer
Incorrect pressure regulator adjustment
Adjust the pressure regulator drive
Loss of tightness of one of the circuits (accompanied by partial failure of the brake pedal)
Replace damaged parts, bleed the system
Incomplete release of all wheels
There is no free play in the brake pedal
Adjust pedal free play
The protrusion of the adjusting bolt of the vacuum booster rod relative to the mounting plane of the master cylinder is impaired
Adjust the protrusion of the 1.25-0.2mm adjusting bolt
Swelling of the rubber seals of the master cylinder due to gasoline, mineral oils, etc. getting into the liquid.
Thoroughly flush the entire system with brake fluid, replace rubber parts, bleed the hydraulic drive system
Master cylinder piston jamming
Check and, if necessary, replace the master cylinder, bleed the system
Reasons for replacement
There are several characteristic malfunctions that must necessarily entail the replacement of the TJ.
- The presence of leaks from the brake cylinders, which lead to the loss of a large amount of fluid.
- The appearance of air pockets in the pipeline and hose system. They arise due to a leak in the brake system elements.
- Scuffs or deformation of flexible hoses installed on wheels. They also require replacement of the hoses themselves.
- Violation of the integrity of the sealing rings in the main brake cylinder, which leads to leakage of the working substance.
- Fluid leaking through the sealing ring of the pusher on the rear wheels.
- Violation of the tightness of the system circuit. This can be felt by a partially collapsed brake pedal.
- Mechanical failure of one of the elements of the braking system. In addition to repairing or replacing them, you will definitely have to change the TZ.
Choice of TZ
To choose the best option for a brake substance, you should take into account the main parameters of its selection so that it meets the requirements of the VAZ 2114 model. After all, this is the car we are talking about.
Index
Requirement
It must be high so that steam bubbles do not form inside the system and block the flow of liquid
Good viscosity ensures efficient pumping of fluid through the system
This criterion is responsible for the ability of a substance to absorb water
The thermal fluid should not only promote braking, but also prevent overheating of the internal surfaces due to the lubricating effect
Neutral to rubber
The composition should not have a destructive effect on the rubber elements used in the system
Corrosion resistance
The liquid should protect metal elements from corrosion and rust.
You should choose the DOT 3 marking
Having chosen the vehicle that is suitable for your car, you should replace it. It’s entirely possible to do the work yourself, but you should first read the instruction manual, consult with specialists, or watch visual video lessons.
Draining and bleeding process


