If in the past the cigarette lighter was used for its intended purpose, now it has become a kind of 12V socket, and its functions include connecting various electrical gadgets, such as a fan, a vacuum cleaner and chargers for them. Therefore, failure is a big problem for the car owner and requires an immediate solution.
You can learn how to replace and repair a VAZ 2107 cigarette lighter, as well as its structure and diagram, from this article.
According to the original idea, the car cigarette lighter was used so that the driver could light a cigarette from it instead of matches at any convenient time. Over the rather long period of operation of this device, its structure has not changed, and it can be found in any model of the domestic automobile industry, including the very first ones.
How to install a cigarette lighter on a VAZ 2105 from scratch
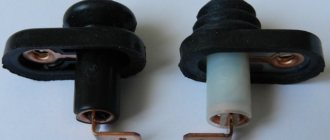
The device is a simple device consisting of a metal rod and a socket to which wires are connected, where it is inserted.
Inside the VAZ 2105 cigarette lighter itself there is a thin nichrome spiral. By pressing the button, the driver puts the device into working condition, the contacts close, and current begins to pass through the thread, heating it. After 15-20 seconds, the temperature reaches its maximum, the thermal relay is activated, returning the cigarette lighter to its place. Due to age or improper use, the device may break. If the cigarette lighter on a VAZ 2105 does not work, you should check the following places.
Replacing the cigarette lighter of a VAZ 2107 with a cigarette lighter from a VAZ 2114
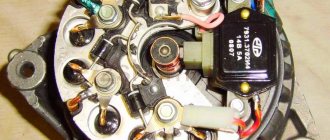
VAZ 2107 owners sometimes change the standard cigarette lighter. Reasons for replacement are:
Most often they install a cigarette lighter from a VAZ 2114/15 - the so-called Euro-cigarette lighter, which is slightly shorter than the standard one. Installing it on a VAZ 2107 is quite simple. After dismantling the standard cigarette lighter, you will only need to slightly enlarge the hole in which it was fixed.
You can use sandpaper or a round file to widen the hole.
The device is installed in the following order:
Thus, any malfunction of the VAZ 2107 cigarette lighter can be eliminated independently. To do this, you only need a minimum set of plumbing tools and following the instructions of specialists. Installing a new cigarette lighter will also not cause much trouble for the owner of a VAZ 2107.
If you find an error, please select a piece of text and press Ctrl+Enter.
The fuse must have blown
An element can fail for various reasons. Most often this is a short circuit or connecting too powerful devices. This segment is protected by a 12 amp fuse. This means that the maximum power of the connected devices is 120 Watts (P=I (12 volts) *A (10 amperes). A hint that it is the protective element that needs to be changed will be a non-working socket for a portable lamp or a faulty clock.
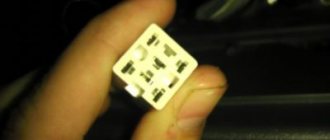
Replacing the VAZ 2105 cigarette lighter fuse is simple - you need to get to the mounting block, pull out the element and install a new one. It is located under the hood, on the right side along the direction of the car (see photo). There is a diagram on the top cover, and inside there are tweezers that make it easy to pull out parts. We remove element number F6, rated 10 amperes.
The old-style mounting block contains ancient cylindrical fuses. New models are equipped with modern knife parts. When installing, be sure to install a fuse with a rating of 10 amperes. Otherwise, if a short circuit occurs, the cables will overheat, the insulation will melt, and there is a risk of fire in the wiring.
Electrical diagram of VAZ 2107
Home • VAZ • 2107 • Electrics
Designations for the electrical circuit of the VAZ 2107: 1 – headlight unit; 2 – side direction indicators; 3 – battery; 4 – starter activation relay; 5 – carburetor electro-pneumatic valve; 6 – carburetor microswitch; 7 – generator 37.3701; 8 – gearmotors for headlight cleaners*; 9 – fan motor activation sensor; 10 – electric motor of the engine cooling system fan; 11 – sound signals; 12 – ignition distributor; 13 – spark plugs; 14 – starter; 15 — coolant temperature indicator sensor; 16 – engine compartment lamp; 17 – low oil pressure indicator sensor; 18 – indicator sensor for insufficient brake fluid level; 19 – windshield wiper gearmotor; 20 – carburetor electro-pneumatic valve control unit; 21 – ignition coil; 22 – electric motor of the headlight washer pump*; 23 – electric motor of the windshield washer pump; 24 – mounting block; 25 – windshield wiper relay; 26 – hazard warning and direction indicator relay; 27 – brake signal switch; 28 – reverse light switch; 29 – ignition relay; 30 – ignition switch; 31 – three-lever switch; 32 – alarm switch; 33 – plug socket for a portable lamp**; 34 – heater fan switch; 35 – additional resistor of the heater electric motor; 36 – indicator lamp for turning on the heated rear window; 37 – indicator lamp for insufficient brake fluid level; 38 – signaling unit; 39 – heater fan electric motor; 40 – glove box lighting lamp; 41 – lamp switches on the front door pillars; 42 – switches for warning lights of open front doors***; 43 – alarm lights for open front doors***; 44 – connecting block; 45 – cigarette lighter; 46 – hours; 47 – instrument lighting switch; 48 – diode for checking the serviceability of the warning lamp for insufficient brake fluid level; 49 – fuel level indicator; 50 – fuel reserve indicator lamp; 51 – speedometer; 52 – indicator lamp for turning on the direction indicators; 53 – warning lamp for the carburetor air damper opening; 54 – battery charge indicator lamp; 55 – switch for signaling that the carburetor air damper is slightly open; 56 – instrument cluster; 57 – econometrician; 58 – lamp switches on the rear door pillars; 59 – coolant temperature indicator; 60 – tachometer; 61 – parking brake indicator lamp; 62 – indicator lamp for insufficient oil pressure; 63 – indicator lamp for high beam headlights; 64 – indicator lamp for turning on external lighting; 65 – voltmeter; 66 – parking brake indicator switch; 67 – external lighting switch; 68 – rear window heating switch with backlight; 69 – rear fog light switch with on indicator*; 70 – fog light circuit fuse; 71 – ceiling****; 72 – rear lights; 73 – fuel level indicator and fuel reserve sensor; 74 – pads for connecting to the rear window heating element*; 75 – license plate lights.
* Installed on parts of manufactured vehicles. ** Not installed since 2000. *** Not installed since 1998. **** Since 2000, instead of one lamp on the roof, two lamps have been installed on the door pillars.
The order of conditional numbering of plugs in the blocks of the VAZ 2107: a - headlight units, headlight and windshield wipers, windshield wiper relay, carburetor electric pneumatic valve control unit; b – mounting block and three-lever switch; c – hazard warning and direction indicator relay; d – rear lights (numbering of pins in order from the edge of the board); d – alarm switch.
Self-removal and installation of the VAZ 2105 cigarette lighter
During the work process you will need a set of tools. To replace the cigarette lighter of the VAZ 2105 model you need:
To repair the cigarette lighter you will need:
You can buy both original and non-original parts on the market. The price of the element is 200 – 600 rubles. Article – PT 1001200.
The following are instructions on how to remove the cigarette lighter.
Now you can start repairing or replacing the VAZ cigarette lighter. Assembly and installation of the device follows the reverse procedure for removal.
Help with choosing a part
Today, there are many options for the VAZ 2107 cigarette lighter available on the market. The average price of a part is 200 - 400 rubles for a standard element and 500 - 600 for a European cigarette lighter. It is advisable to choose the latter option. It has several advantages relative to the classic part.
- Reliable fixation. The European cigarette lighter is securely held in the socket, and the fixing nut does not unscrew.
- The appearance and backlight are prettier.
- A modern car lighter allows you to connect several devices at the same time.
Installation of Euro cigarette lighter VAZ 2105
The standard format of the device is already outdated. The old connector does not fit well with the plugs of modern electrical appliances. Therefore, many owners replace it with a Euro-type cigarette lighter for the VAZ 2105. The cost of a device of this format is 600-900 rubles. It fits perfectly into a regular place and also provides reliable fixation.
The replacement process is carried out as follows.
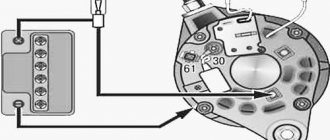
It is important to remember the connection diagram. In total, three wires come to the device: two pluses (heating the coil, backlight), ground, powered through the car body. A detailed video on how to remove the cigarette lighter on a VAZ 2105, replacing it with a Euro version is presented below.
Fuse box VAZ 2104 2105
Where is the VAZ fuse mounting block located: 2104, 2105 (carburetor, injector)
The mounting block is located in the engine compartment on the right side and is attached to the front panel. The mounting block is closed on top with a lid on which symbols for the purpose of the relay, fuse numbers and the circuits they protect are printed. Most of the vehicle's electrical circuits are protected by fuses installed in the mounting block.
| Fuse number | Current strength, A | Protected Circuits |
| F1 | 10 | Tail lights (reversing lights). Heater motor Warning lamp and rear window heating relay (winding) |
| F2 | 10 | Electric motors for the windshield wiper and washer pump. Windshield wiper relay |
| F3 | 10 | Spare |
| F4 | 10 | Spare |
| F5 | 20 | Rear window heating element and heating relay (contacts) |
| F6 | 10 | Cigarette lighter. Portable lamp socket |
| F7 | 20 | Sound signals and relay for turning on sound signals. Engine cooling fan motor and motor switch relay (contacts) |
| F8 | 10 | Direction indicators in hazard warning mode. Switch and relay-interrupter for direction indicators and hazard warning lights in emergency mode |
| F9 | 7.5 | Generator voltage regulator (on vehicles with G-222 generator) |
| F10 | 10 | Turn indicators in turn signal mode and corresponding indicator lamp. Turn signal interrupter relay. Turn signal indicator Tachometer Fuel level indicator. Coolant temperature gauge. Voltmeter. Fan motor activation relay (winding). Battery charge indicator lamp. Indicator lamps for fuel reserve and parking brake activation. Warning lamps for emergency drop in oil pressure and insufficient brake fluid level. Indicator lamp for turning on the parking brake. Indicator lamp for covering the carburetor air damper (for a carburetor engine). Electric fan thermal switch. Carburetor pneumatic valve control system Generator excitation winding (generator 37.3701) |
| F11 | 10 | Rear lights (brake lamps). Body interior light |
| F12 | 10 | Right headlight (high beam). Winding of the relay for turning on the headlight cleaners (with the high beams on) |
| F13 | 10 | Left headlight (high beam). Indicator lamp for high beam headlights |
| F14 | 10 | Left headlight (side light). Right rear light (side light). License plate lights. Engine compartment lamp Indicator lamp for turning on side lights |
| F15 | 10 | Right headlight (side light). Left rear light (side light). Cigarette lighter lamp. Instrument lighting lamp. Glove compartment lamp |
| F16 | 10 | Right headlight (low beam). Winding of the relay for turning on the headlight cleaners (with the low beam on) |
| F17 | 10 | Left headlight (low beam) |
Connection diagram of the mounting block:
P1 — relay for turning on the heated rear window; P2 - relay for turning on headlight cleaners and washers; PЗ - relay for turning on sound signals; P4 - relay for switching on the electric motor of the engine cooling system fan; P5 - headlight high beam relay; P6 — headlight low beam relay; A - the order of conditional numbering of plugs in the mounting block blocks. The outer number with the letter “Ш” in the plug designation is the block number, and the inner number is the conventional number of the plug. The plugs of the blocks without color marking are conventionally shown in brown
Location of relays and fuses in the mounting block: 1 - relay for turning on the heated rear window; 2 — place for installing a relay for turning on headlight cleaners and washers (the relay is installed on some manufactured cars); 3 — mounting jumper in place of the relay for turning on sound signals (in a variant, a relay is installed); 4 — mounting jumper in place of the relay for turning on the electric motor of the cooling system fan (in a variant version, a relay is installed); 5 — relay for turning on the high beam headlights; 6 — relay for turning on low beam headlights; F1-F17 - fuses (circuits protected by pin-type fuses are indicated in the table above).
Electrical equipment that consumes high current during operation is connected through relays that protect switch contacts from overload. To replace pin fuses and relays, special plastic tweezers are provided in the mounting block. Fuses of different ratings are painted in different colors; In addition, the fuse is marked with a numerical value of the current for which it is designed (rated value). The color of the fuse body and its correspondence to the rating 20A - Yellow 15A - Blue 10A - Red 7.5A - Brown
Diagram of the VAZ-2104 dashboard, control sensors
The driver monitors the operation of the power plant and car systems using sensors installed on the dashboard in the cabin.
I – temperature sensor; II – instrument panel; III – oil pressure lamp; IV – gasoline level sensor; V – circuit diagram for connecting electrical devices.
| 1 | Thermistor | 27 | Voltmeter |
| 2 | Contact spring | 28 | Dashboard |
| 3 | cylinder head | 29 | Gasoline level indicator |
| 4 | Paper insulation | 30 | Fuel reserve warning lamp |
| 5 | Frame | 31 | PTF rear light switch |
| 6 | Lid | 32 | Lubricant Pressure Sensor Filter |
| 7 | Pointer balancer | 33 | Spring |
| 8 | Permanent magnet arrow axis | 34 | Movable contact |
| 9 | Frame with sensor coils | 35 | Fixed contact (massed) |
| 10 | Protection diode | 36 | Diaphragm |
| 11 | External lighting switch | 37 | Crankcase |
| 12 | Oil pressure lamp | 38 | Reserve warning lamp contact |
| 13 | Coolant temperature gauge | 39 | Rheostat |
| 14 | Battery charge indicator lamp | 40 | Rheostat moving contact |
| 15 | Control lamp block | 41 | Gasoline level and reserve sensor |
| 16 | Brake fluid level lamp | 42 | Float with lever |
| 17 | Handbrake lamp | 43 | battery |
| 18 | PTF switching lamp | 44 | Generator |
| 19 | Speedometer | 45 | Oil pressure sensor |
| 20 | Odometer | 46 | Coolant temperature sensor |
| 21 | Rear defogger switch | 47 | Brake fluid level sensor |
| 22 | Dashboard mounting screw caps | 48 | Mounting block |
| 23 | Interior ventilation and heating fan switch | 49 | Egnition lock |
| 24 | High beam warning light | 50 | Handbrake lamp breaker relay |
| 25 | Turn signal lamp | 51 | Handbrake lamp switch |
| 26 | Exterior lamp |
Devices that provide comfort include a heating and ventilation system, a cigarette lighter, and small lighting fixtures.
To ensure safety and prevent burnout of electrical appliances, all wiring is insulated. Additionally, all equipment is powered through fuses, which are collected in one unit. That is, for example, if the dimensions do not work, there is a high probability that there is a short circuit in the electrical wiring through which these lighting devices are powered. The electrical diagram of the VAZ-2104 fuse box is printed on its cover, which allows you to quickly find which section of the circuit and equipment fuse has blown.
Lada 2105 “Amigo” › Logbook › Classic European cigarette lighter
There will be no installation instructions as such, as they are not particularly needed. But if you, my dear reader, decide to repeat this action, then the first thing you must do is TURN OFF THE MASS!
And it doesn’t matter to me how you do it: turn off the mass switch (like mine) or remove the entire battery and give it to your dog for safekeeping. The main thing is to turn off the power to the car, otherwise you will burn all the fuses to hell. But more on that later.
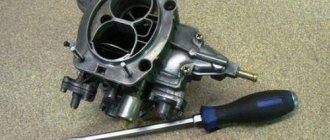
So, the process begins with good news: there is no need to throw off the torpedo (otherwise someone on these Internets scared me that there was no other way). It’s enough just to pull out the ashtray and unscrew... um... what it’s always in. Well, in short, here's a photo.
Well, here is the patient himself.
Then you need to remove the old cigarette lighter.
Lyokha disconnected all the wires except one - it was screwed on. And since it was not possible to unscrew this infection, Lyokha took radical measures.
Next, we disassemble the new cigarette lighter: we separate the green casing with the backlight bulb from the main body of the cigarette lighter (it is held there by latches) and attach it to the place where the cigarette lighter should be. Do you have the same dimensions of the socket and the cigarette lighter body? Lucky assholes! Everything was more interesting with us. In short, it sounds like this: it didn’t fit there! If the hole (angry, Trudovik) is smaller than necessary, then what? Right. The hole needs to be made bigger.
But after we got pretty tired of doing this and blew the fuse, we decided to go a different route. The point is that EVEN if we make the hole normal (and we went overboard and made it larger than necessary, so you should be more careful there), the backlight prevents you from inserting the cigarette lighter. It can be broken off and thrown away. There was an option to break it off and attach it back with glue after installation. It was not possible to disassemble it. That's why we decided... Pfft. A person with a higher education cannot explain to you what we decided. In short, we slightly improved the shape of this green plastic. With a hacksaw.
Source
VAZ 2105 cigarette lighter does not work
When developing the car, the designers provided one cigarette lighter connector located on the front panel. Today it is practically not used for its intended purpose, but is useful even for non-smoking drivers. The cigarette lighter socket on the VAZ 2105 is a 12-volt outlet where you can connect various electrical appliances.
Most often, they install a video recorder that records movement, a GPS navigator, or a charger for phones or tablets. Less often - a compressor for inflating wheels, an electric kettle, a car vacuum cleaner or a heated mug. Over time, the device may stop working. How to remove and repair the cigarette lighter with your own hands on the VAZ 2105 model is described below.
Why it might not work
The device is a simple device consisting of a metal rod and a socket to which wires are connected, where it is inserted. Inside the VAZ 2105 cigarette lighter itself there is a thin nichrome spiral. By pressing the button, the driver puts the device into working condition, the contacts close, and current begins to pass through the thread, heating it. After 15-20 seconds, the temperature reaches its maximum, the thermal relay is activated, returning the cigarette lighter to its place.
Due to age or improper use, the device may break. If the cigarette lighter on a VAZ 2105 does not work, you should check the following places.
The fuse must have blown
An element can fail for various reasons. Most often this is a short circuit or connecting too powerful devices. This segment is protected by a 12 amp fuse. This means that the maximum power of the connected devices is 120 Watts (P=I (12 volts) *A (10 amperes). A hint that it is the protective element that needs to be changed will be a non-working socket for a portable lamp or a faulty clock.
Replacing the VAZ 2105 cigarette lighter fuse is simple - you need to get to the mounting block, pull out the element and install a new one. It is located under the hood, on the right side along the direction of the car (see photo). There is a diagram on the top cover, and inside there are tweezers that make it easy to pull out parts. We remove element number F6, rated 10 amperes.
The old-style mounting block contains ancient cylindrical fuses. New models are equipped with modern knife parts. When installing, be sure to install a fuse with a rating of 10 amperes. Otherwise, if a short circuit occurs, the cables will overheat, the insulation will melt, and there is a risk of fire in the wiring.
The main causes of malfunctions of the VAZ 2107 cigarette lighter
The cigarette lighter of the VAZ 2107 quite often fails. This happens for various reasons.
Fuse blown
If the cigarette lighter is used as a power outlet to operate multiple high-power devices through a power strip, the cigarette lighter fuse, rated for a maximum current of 10 A, may blow. Due to the peculiarities of the VAZ 2107 electrical connection diagram, the clock and radio will stop working along with the cigarette lighter.
Poor contact or oxidation
Sometimes the cigarette lighter contacts or connectors become oxidized and the device stops working. In such a situation, they must be cleaned by first disconnecting the negative terminal from the battery. The latter will eliminate the possibility of a short circuit. In addition, often the connector of the device connected to the cigarette lighter does not fit into the socket tightly enough. Such unreliable contact can lead to short circuits, melting of contacts and failure of the cigarette lighter. The contacts may also melt when installing a fuse of a higher rating (for example, 15 A). In such cases, you can try to clean and resolder the contacts. If this does not lead to a positive result, the cigarette lighter will need to be replaced with a new one. The cost of a new device for the VAZ 2107 is about 150 rubles.
Self-removal and installation of the VAZ 2105 cigarette lighter
During the work process you will need a set of tools. To replace the cigarette lighter of the VAZ 2105 model you need:
To repair the cigarette lighter you will need:
You can buy both original and non-original parts on the market. The price of the element is 200 – 600 rubles. Article – PT 1001200.
The following are instructions on how to remove the cigarette lighter.
Now you can start repairing or replacing the VAZ cigarette lighter. Assembly and installation of the device follows the reverse procedure for removal.