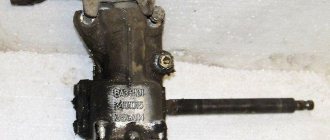
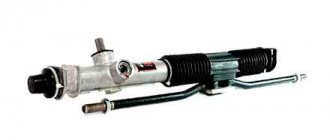
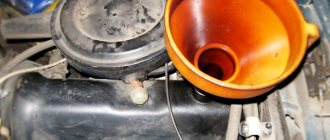
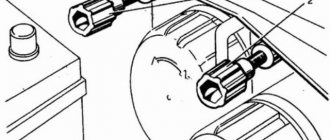
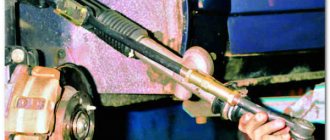
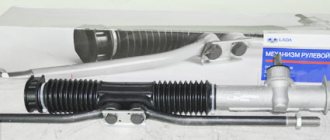
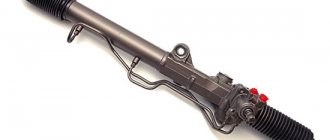
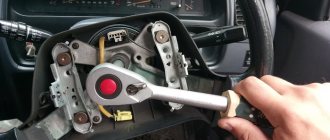
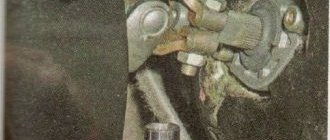
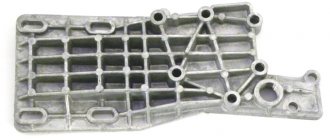
The steering gearbox is a rather old mechanical device that is now used mainly on cars of the classic LADA family. Today you will learn what a steering gearbox is - repair, replacement, adjustment with your own hands.
The steering gearbox is a small mechanism designed to transfer rotational motion to translational motion. This means that the gearbox converts the rotation of the steering wheel into a force that moves the steering rods in the right directions, causing the wheels to turn and change the direction of movement of the car.
The gear used in the gearbox is a reduction gear and consists of two elements - a worm and a gear. In addition, the mechanism has a special lever that moves the steering rods in the right directions.
The steering gearbox of the VAZ 2107 is sealed and filled with oil, which significantly increases its service life and makes it easier to turn the steering wheel, reducing the effort exerted by the driver.
Video - Steering gear repair
In most cases, this unit is not repairable, since it is relatively inexpensive and consists of only two main parts. However, the manufacturer left the option for car technicians to purchase a repair kit.
Before repairing the steering gear, let's determine the malfunctions.
- Firstly, it can be repaired if the steering wheel rotates but the wheels do not. This means that there are defects on the threaded part of its shafts that prevent the two interacting parts from touching.
- The second type of fault is oil seals. If they have reached critical wear, then the oil from the gearbox will certainly leak, which already leads to its accelerated wear. If there are other mechanical damages, the gearbox must be replaced.
First, remove the faulty unit from the car. After this, press the bipod off its shaft using two hammers. Drain the oil from the gearbox through any technological hole. Now unscrew the four bolts that secure the cover and remove it. To access the worm shaft, you need to unscrew a similar cover on the other side of the mechanism. Pull out the remaining parts and replace the faulty ones. These may include oil seals and damaged shafts. After this, reassemble the gearbox in the reverse order. Don't forget to add oil!
How to replace the gearbox?
VAZ 2106 gearbox diagram
Replacing the gearbox is a more complex operation, but it will make the steering mechanism more reliable. To replace the gearbox, use the following instructions:
- Raise the left side of the VAZ 2106 to make room for manipulation;
- Remove the wheel on the left side;
- Unscrew the nuts, after removing the pins;
- Tighten the puller bolt, remove both tips;
- Tighten the bolt on the steering shaft near the gearbox;
- Remove the shaft from the splines;
- Tighten the nuts that secure the gearbox to the body;
- Repair or replace the gearbox.
To return the gearbox to its place, follow the same instructions, but in reverse order.
Please pay attention to an important point: you should not knock out the tips with a hammer, this may damage the threads and the reliability of the steering will significantly decrease, but its reliability is directly related to the safety of the driver.
https://youtu.be/https://youtu.be/jgvC3sMuOvc
_
How to change the steering gear on a VAZ 2107
If there is more serious damage, the steering gear must only be replaced. To do this, you need to purchase a new VAZ 2107 gearbox and immediately fill it with transmission oil. Now you need to remove the faulty gearbox from the car.
- Disconnect the tie rod ends from the tie rods. To do this, first unscrew them, and then unscrew the fastening nuts using a 22mm wrench. To pull them out, you need to use a special puller, which is available in any auto parts store.
- Go inside the car and loosen the clamp that secures the steering shaft to the steering gear. Pull the shaft out of engagement with the gearbox.
- All that remains is to unscrew the three bolts that secure the mechanism to the engine compartment of the car.
- Install the new gearbox in reverse order. Before you start operating the car, do not forget to adjust it.
Change of oil
To carry out everything correctly and competently, you need to arm yourself with the following:
- wire brush;
- screwdriver;
- ring wrenches “8”, “12” and “13”;
- hex key to “12”;
- transmission oil;
- oil syringe or blowers with dispensers.
Checking the oil level in the gearbox
To do this you need:
open the hood of the VAZ and wipe the surface of the gearbox from dust and dirt, clean the filler and drain holes from adhering dirt using a metal brush;
VAZ steering gear
Unscrew the conical thread oil filler plug using an “8” wrench.
Let's start the process
In the event that an oil change is still necessary, then:
using a spanner wrench set to “12” or “13”, you need to unscrew the four bolts that secure the bottom cover of the gearbox by 2-3 turns;
Changing the oil in the steering column of a VAZ 2107
then you need to slide the bottom cover and drain the oil into a pre-prepared container with a volume of at least 3 liters, installed under the gear housing.
Changing the steering column oil of a VAZ 2107
After all, heated oil is characterized by increased fluidity, detergency and chemical activity, which means that old oil:
- will flow out faster;
- there will be a maximum volume of drained oil;
- The oil that needs to be drained, during preliminary running and warming up, will be able to better flush the gearbox from resinous deposits saturated with wear products.
The oil draining procedure requires some caution to avoid burns when hot oil comes into contact with exposed areas of the body. After this you need to do the following:
After this you need to do the following:
- using a hex wrench set to “12”, you need to unscrew the filler plug;
- Using an oil syringe, about 0.18 liters of transmission oil is poured into the gearbox through the oil filler hole;
- then the hole plug is screwed on.
Filling of oil is carried out by injection, mainly under its lower edge or, in other words, until the oil itself begins to flow out of the filler hole. You will have to work hard here, because the oil needs to be directed from bottom to top. For this purpose, special blowers with dispensers that operate on the principle of excess pressure are best suited. That is why this operation is recommended to be carried out in specialized workshops, however, if filling the oil is still carried out in a garage, then you can use a regular syringe for injecting solid automotive lubricants.
Modern oil changes in a car's steering gear can significantly increase its service life without the need for expensive repairs. Before you start changing the oil, it is recommended to watch this video.
Adjusting the VAZ gearbox
Adjustment of the steering gear is carried out to get rid of play in the steering wheel, as well as all kinds of discrepancies when it rotates with the position of the wheels. The car wheels must first be aligned.
To adjust the steering gear, you need to unscrew the lock nut on its cover from above and loosen the special adjusting screw. Ask your partner to sit behind the wheel and rotate the steering wheel in different directions with energetic, but not wide movements, while you gradually tighten the adjusting screw. As soon as the steering wheel begins to rotate tightly and the wheels move with the slightest movement, the locknut is tightened.
This completes the adjustment of the steering gear. As you can see, this procedure is not long at all and can be performed with just a 19-mm wrench and a regular flat-head screwdriver.
Steering gear
1. Disconnect the wires from the battery and remove the signal switch cover by carefully bending first one and then the other end from the bottom with your fingers.
2. Remove the steering wheel.
3. Remove both halves of the steering shaft casing.
ATTENTION: If it is necessary to remove only the steering gear housing, unscrew the bracket mounting bolts and the bolt securing the steering shaft to the worm shaft, and then slightly move the steering gear shaft with the bracket inside the passenger compartment and place a stand under the shaft so that it does not hang on the wires.
4. Remove the instrument panel and disconnect the turn signal switch and headlight switch plugs from the wiring harness plugs.
5. Loosen the clamp securing the pipe of the upper support of the steering gear shaft and remove it together with the turn signal and headlight switch, having previously unblocked the steering gear shaft from the anti-theft device.
6. Remove bracket 12 (see Fig. Steering parts) securing the steering shaft, having first freed it from the ignition switch.
7. Remove the seal 8 of the steering mechanism.
8. Having unscrewed bolt 7 securing the steering gear shaft to the worm shaft, remove the shaft into the body interior.
9. Using puller A.47035, press the ball pins of the steering rods out of the hole in the bipod.
10. Remove the steering gear housing.
ATTENTION: When removing the steering gear housing, mark the number and placement of washers 3 between the side member and the crankcase in order to install them in the same place when installing the crankcase. This is necessary to maintain the alignment of the steering shaft and the worm shaft.
11. Install the steering mechanism in the reverse order of removal.
12. At the same time, before finally tightening the bolts securing the steering gear housing and the steering gear shaft bracket, temporarily put the steering wheel on the shaft and turn the shaft two or three times to the left and right. In this case, the shaft and other parts take the correct position (self-align) thanks to the oval holes on the crankcase and on the bracket.
ATTENTION: You can separately assemble the steering gear shaft with a seal, bracket, ignition switch, turn signal and headlight switch, steering wheel and install this unit on the car.
1. Drain the oil from the steering gear housing. Secure the crankcase to bracket A.74076/R with support A.74076/1.
2. Having unscrewed the nut securing the steering bipod 2 (see Fig. Parts of the steering gearbox) and removing the spring washer, remove the bipod with a puller A.47043 (see Fig. Removing the bipod).
Replacing the VAZ 2101 steering gear: how to do it yourself
Do you need to replace the VAZ 2101 steering gear, but don’t know how to do it correctly? Then this article is for you. The fact is that the gearbox, consisting of a worm mechanism, wears out over time, and the free play (play) of the steering wheel increases many times. For this reason, it is necessary to replace the VAZ 2101 steering gear, or make adjustments if possible.
- What is needed to carry out the replacement?
- Replacing the VAZ 2101 steering gear
- Adjusting the VAZ 2101 gearbox
- conclusions
How to replace a VAZ 2106 gearbox with your own hands
Gearbox
The task of steering is to ensure that the rotation of the steering wheel is converted into turning the wheels of the car. The more synchronously this process occurs, the smoother the car will be.
On the VAZ 2106 model, the rotation converter is the gearbox. The main element through which the work is performed is the worm gear. If it fails, the best solution is to replace it. Repairing is not the best solution; this can lead to the steering wheel sticking or being difficult to rotate.
Gearbox VAZ 2106
Replacing the VAZ 2101 steering gear
If the steering gear suddenly leaks or noticeable play appears, then sometimes it is useless to carry out a full restoration. Rebuilding the control mechanism will not help either, since the old housing already has wear that will prevent the installation of new elements.
Therefore, a repair kit for the column is not a solution. Replacing the entire unit will be much more promising, and besides, you are interested in this like no one else. Your safety directly depends on its condition, on the form of the steering rod ball pins.
External view of the VAZ 2101 steering gear
To replace the column on a VAZ 2101, you will need:
- Loosen the wheel bolts.
- Remove the wheel.
- Dismantle the protection.
- Use pliers to pull the pins out of the rod ends.
- Unscrew the nuts from the ends.
- Using a rod wrench, which you can buy at any auto store, remove the ends from the cone.
- Unscrew the bolt, thereby loosening the shaft clamp.
- Using 17mm wrenches, unscrew the nuts from the three bolts that secure the steering column to the body.
- Remove the column from the car.
Installation is carried out in strictly reverse order.
At this point, the replacement of the VAZ 2101 steering gear is considered completely completed; the protection and wheel are put back, after which the procedure for adjusting the toe-in of the front wheels is mandatory.
Signs of breakdown of the gearbox and other elements of the steering system
The steering gearbox on a VAZ 2106 very rarely fails alone. As a rule, a gearbox failure is preceded by the failure of several elements of the steering system, after which the gearbox itself breaks down. That is why it is better to consider the problems of this system as a whole. We list the most well-known signs of a breakdown of the control system on the “six”:
- when turning the steering wheel, a characteristic grinding or loud creaking sound is heard from under the steering column;
- the driver observes a constant leak of lubricant from the gearbox;
- turning the steering wheel began to require more effort than before.
Now let’s look at what exactly can cause the above symptoms and how to eliminate them.
Steering system noise
Here are the main causes of noise behind the steering column:
- The clearance on the bearings installed in the steering wheel hubs has increased. Solution: adjust the gap, and in case of significant wear of the bearings, replace them completely;
- The fastening nuts on the steering rod pins have become loose. It is these nuts that usually cause loud squeaking and grinding noises. Solution: tighten the nuts;
- The gap between the bushings and the pendulum arm of the steering system has increased. Solution: replacing the bushings (and sometimes you have to change the bushing brackets if they are very worn);
- The worm bearings in the gearbox are worn out. A grinding noise when turning wheels can also occur due to them. Solution: replace the bearings. And if the bearings are not worn out, it is necessary to adjust their clearances;
- loosening the fastening nuts on the swing arms. Solution: tighten the nuts after placing the car wheels straight.
Leakage of lubricant from the gearbox
A lubricant leak indicates a violation of the seal of the device.
Oil leaks are clearly visible on the steering gear housing
Here's how it happens:
- The seals on the bipod shaft or on the worm shaft are completely worn out. Solution: replace the seals (sets of these seals can be purchased at any spare parts store);
- The bolts holding the steering system housing cover have become loose. Solution: tighten the bolts, and they must be tightened crosswise. That is, first the right bolt is tightened, then the left, then the top bolt, then the bottom, etc. Only such a tightening pattern can guarantee the tightness of the crankcase cover;
- damage to the sealing gasket under the crankcase cover. If the above tightening pattern does not lead to anything, it means that the seal under the crankcase cover has worn out. Therefore, the cover will have to be removed and the sealing gasket replaced.
The steering wheel turns hard
If the driver feels that it has become very difficult to turn the steering wheel, this can happen for the following reasons:
- Incorrect alignment of the steering wheels. The solution is obvious: install the car on a stand and set the correct toe and camber angles;
- one or more parts of the steering system are deformed. Steering rods are usually deformed. And this happens due to external mechanical influences (flying stones, regular driving on uneven roads). Deformed rods will have to be removed and replaced with new ones;
- the gap between the worm and the roller in the steering gear has increased (or vice versa, decreased). Over time, any mechanical connection can become loose. And worm joints are no exception. To eliminate the problem, the roller gap is adjusted using a special bolt, then the gap size is checked using a feeler gauge. The resulting figure is checked against the figure specified in the operating instructions for the machine;
- The nut on the swing arm is too tight. The peculiarity of this nut is that over time it does not weaken, like other fasteners, but rather tightens. This occurs due to the specific operating conditions of the pendulum arm. The solution is obvious: the nut should be slightly loosened.
Adjusting the VAZ 2101 gearbox
Adjusting the VAZ 2101 gearbox consists of one thing - reducing the steering play. This is done quite simply; you do not need to know the structure of the steering gearbox from the inside. Just look at it from the outside and see that on top there is one large screw (adjusting) and one small one (for filling oil and controlling its level).
Adjustment procedure
When adjusting the VAZ 2101, the help of a second person will be required. However, you can do everything alone, because even replacing a column on a penny turned out to be within your power. Completely unscrew the nut that is located on the screw and is necessary to secure it.
You try to tighten the screw with a screwdriver, when it refuses to go any further, your partner should pull the steering wheel in different directions. And the bolt will go easier. The steering gearbox on the VAZ 2101 is adjusted until the play is acceptable. At the end, the nut is tightened and the car is ready for further use.
VAZ 2107 how much oil to fill in the steering gearbox
- 1 Changing the oil in the rear axle gearbox of a VAZ
- 2 Steering of a VAZ 2107 car
General view of the rear axle gearbox of the VAZ 2107
The most loaded unit in a VAZ 2107 car is the rear axle gearbox. But with proper assembly, installation and timely maintenance, it can last longer than even less loaded components. As the instructions indicate, the oil in the rear axle gearbox and gearbox should be changed after break-in, then after a run of two thousand kilometers and subsequently every sixty thousand kilometers. The design of the gearbox of a VAZ car uses a special type of hypoid transmission with offset axes. This engagement reduces the noise level when grinding surfaces, but the sliding that occurs along the contact line of the teeth can lead to the risk of jamming. Using special gear oil in the gearbox can eliminate it. The mixture contains extreme pressure additives, class GL-5. This oil is called Hypoid. The volume of oil poured into the gearbox is 1.35 liters. Changing the oil in the rear axle gearbox of a VAZ 2107 is carried out according to the same algorithm as gearbox oil. The change must be made before operating the car in winter and summer. For these seasons, the oil has a different viscosity. In winter it is lower, and in summer it is higher.
conclusions
This is how column 2101 is replaced and adjusted. This guide can be applied to the entire 2101-2107 family, since they have a similar structure. Perhaps reassembling the column will not bring the desired results; backlashes may remain. Then it is necessary to diagnose the rods and check the condition of the hinges. By the way, they can cause an increase in the free play of the steering wheel.
Now the question arises about whether to carry out repairs at a service station or in your garage. Some may find it unrealistic to do the work themselves. But think that there is nothing complicated about this, you will have to unscrew a few bolts and then tighten them in the reverse order. Even the wheel toe can be adjusted if you have a flat floor in the garage and a pit. So in this regard, of course, it is better to let you do everything yourself.
But after adjustment, many may feel a slight inconvenience - the steering wheel becomes more difficult to rotate. Unfortunately, by tightening the worm gear with the adjusting bolt, you have impaired its free rotation. But if you look at it from a safety point of view, then let it be so, rather than a freewheel of half a turn.
Video about replacing the steering gearbox on a VAZ 2101:
What is needed to carry out the replacement?
Before you think about replacing, see if it is possible to adjust the gearbox of the VAZ 2101. The price of this mechanism is quite high (about 2500 rubles in stores, at disassembly 500-1500 depending on the condition). Both adjustment and replacement require a small amount of tools:
- a set of keys;
- jack;
- wide flat screwdriver.
It will be useful to have a homemade key on hand, without which replacing the 2101 socket will be quite problematic. You can make such a key from a piece of reinforcement, which must be given the shape of the letter “L”. The upper horizontal part functions as a lever, and the lower part must be sharpened so that it fits firmly into the square hole of any head (you will need it for work on 19 and 22).
Steering column VAZ 2106
The main purpose of the steering column is to transmit rotational motion from the steering wheel to the front wheels. All “classics” use structurally identical components. The mechanism is attached to the left side member with three bolts. There is a bolt on the top cover with which the gap between the roller and the worm is adjusted. The need to set the gap arises when a large backlash appears in the mechanism. The gearbox and steering wheel are connected to each other through an intermediate shaft, which is mounted on splines that prevent it from turning.
Steering column device
The steering gear housing has a worm shaft mounted on two bearings that do not have an inner race. Instead of an inner ring, special grooves are used at the ends of the worm. The required clearance in the bearings is set using spacers, which are located under the bottom cover. The exit of the worm shaft from the housing is sealed with a cuff. On the side of the spline connection on the shaft there is a recess for a bolt connecting the gearbox shaft to the shaft from the steering wheel. The worm is engaged with a special roller located on the axis and rotating with the help of a bearing. The bipod shaft at the exit from the body is also sealed with a cuff. A bipod is mounted on it in a certain position.
On the sixth model Zhiguli, the steering mechanism works in the following order:
- The driver turns the steering wheel.
- The force is transmitted through the shaft to the worm element, which reduces the number of revolutions.
- When the worm rotates, a double-ridge roller moves.
- A lever is installed on the bipod shaft, through which the steering rods are activated.
- The steering linkage acts on the steering knuckles, which turn the front wheels in the desired direction and at the required angle.
Steering column problems
The appearance of problems in the steering mechanism can be judged by characteristic signs:
- creak;
- backlash;
- grease leaks.
If any of the listed defects appear, repairs should not be delayed.
Creaks in the column
The appearance of squeaks can be caused by the following reasons:
- Excessive play in the hub bearings. To fix the problem, it is necessary to adjust the gap or replace the bearings;
- The tie rod pins have become loose. The way out of the situation is to tighten the nuts;
- large play between the pendulum and bushings. The malfunction is eliminated by replacing the bushings;
- wear of the worm shaft bearings can manifest itself in the form of squeaks when turning the wheels. To solve the problem, adjust the clearance in the bearings or replace them;
- The fastening of the swing arms has become loose. The way out of the situation is to tighten the nuts when setting the wheels straight.
Oil leak
Leakage of lubricant from the steering column on a “classic” is a fairly common occurrence. This is due to the following:
- damage (wear) of the oil seal on the shaft of the bipod or worm. The problem is solved by replacing the cuffs;
- loosening the bolts securing the crankcase cover. To eliminate leaks, tighten the bolts diagonally, which ensures the tightness of the connection;
- damage to the seal under the crankcase cover. The cover will need to be removed and the gasket replaced.
Stiff steering wheel rotation
There may be several reasons why the steering wheel turns slowly:
- Incorrect alignment of the front wheels. To fix the problem, you will have to visit a service station and carry out adjustment work;
- deformation of any part in the steering. Steering rods are usually subject to deformation, which is due to their low location and mechanical stress, for example, when hitting an obstacle. Curved rods must be replaced;
- Incorrect clearance between roller and worm. The required gap is set with a special bolt;
- tightly tighten the nut on the pendulum. The way out of the situation is to slightly loosen the fasteners.
Steering column repair
Repairing a gearbox, like any other unit, requires preparing tools and following step-by-step instructions.
Dismantling
Tools you will need:
- 17 and 30 mm head;
- long and powerful knob;
- mount;
- hammer;
- ratchet handle;
- regular open-end wrench 17.
The procedure for removing a node consists of the following steps:
- We unscrew the bolt securing the shaft and steering column.
How to disassemble
The mechanism is disassembled for the purpose of troubleshooting parts and subsequent repairs. Tools you will need:
- large socket head 30 mm;
- 14 mm wrench or socket;
- puller for gearbox bipods;
- flat screwdriver;
- hammer;
- vice.
The procedure consists of the following steps:
- We use a wrench to unscrew the nut that secures the bipod to the shaft, and then clamp the gearbox in a vice.
Unit repair
To troubleshoot parts, they are washed in diesel fuel or kerosene. After this, check the condition of the worm shaft and roller. They must not have any damage. The rotation of the ball bearings of the assembly must be free and without jamming. The structural elements of the bearings must be in good condition, i.e., be free of signs of wear, potholes and other defects. The presence of cracks in the gearbox housing is unacceptable. If parts with wear are identified, they are replaced with serviceable elements. The cuffs are changed during any repair work on the column.
Assembly
Before assembly, gear oil is applied to the internal elements, and the process itself consists of the following actions:
- Lightly hit the adapter with a hammer to press the inner ball bearing ring into the mechanism housing.
Video: disassembling and assembling the VAZ steering mechanism
Steering column oil
To reduce friction between parts inside the assembly, lubricant is poured into the crankcase. In Zhiguli, for the product in question, oil of class GL5 or GL4 is used with a viscosity class of SAE80-W90. However, some car owners use TAD-17 instead of modern lubricants. Oil in a volume of 0.2 liters is poured into the steering column.
Change of oil
On the VAZ 2106, as on other “classics”, it is recommended to change the lubricant in the steering mechanism once every 20-40 thousand km. Replacing more frequently is just a waste of time and money. If it is noticed that the oil has become very dark and the steering wheel has become heavier when turning, then the lubricant must be replaced as soon as possible. Tools for work you will need:
- open-end wrench 8 mm;
- 2 large-volume medical syringes;
- small diameter tube or hose;
- a suitable container for draining used oil.
The work comes down to the following steps:
- We unscrew the plug on the gearbox.
- We put a tube on the syringe and use it to suck out the old grease, pouring it into a container.
When adding oil, it is recommended to shake the steering wheel to release air from the crankcase.
Video: replacing the lubricant in the Zhiguli steering column
Level check
Experienced classic car owners claim that oil leaks from the gearbox even when installing a new mechanism, so periodically checking the level will not be superfluous. To determine the lubricant level, you will need to perform the following steps:
- Wipe the surface of the assembly with a rag.
- Unscrew the filler plug.
everything useful is here
Topping up oil
Using the “8” wrench, unscrew the filler plug in the steering gear housing. Fill the transmission oil to the bottom edge of the hole.
Checking the steering condition
We check the steering together with an assistant on a lift or inspection ditch.
We install the wheels in a position corresponding to the linear movement of the car. Apply a mark to the steering wheel rim with chalk.
We check the free play (play) of the steering wheel by turning it in both directions before the car wheels begin to turn. The free play of the steering wheel should not exceed 5° (or 18–20 mm along the wheel rim).
The steering wheel turning force should not exceed 20 kgf when installing the front wheels of the car on a smooth slab (linoleum).
When quickly turning the steering wheel left and right, with amplitudes of about 10°, we check by touch that there are no knocks (plays) in the joints and ball joints of the steering. We tighten the loose threaded connections.
We check the absence of axial and radial play in the pendulum arm,... ...check the absence of play in the ball joints of the rods. We check the movement of the rod tips along the axes of the hinge pins,... ...applying an axial force to the rod tips. Axial movement should be within 1–1.5 mm. After removing the force, the tip should return to its place. If there is no axial movement or the tip does not return to its place, replace the tip or steering rod assembly with serviceable ones.
Changing the oil in the steering gear on a VAZ 2101-VAZ 2107
The control gearbox of this unit has a huge number of names, some call it “Steering Column”, some “Steering Mechanism”, and some “Steering Gearbox”. In fact, of all these listed titles, the most reliable is only “Steering mechanism” since this particular title was given to this unit during the creation of cars of the “Classic” family.
But not all car enthusiasts know why a car needs this part in the first place, so now we will briefly tell you about it and show you an annotation on changing the oil in the steering gear, which is located a little lower.
To change the oil you will need: A clean rag or, instead of it, it is best to use an iron brush in order to clean the dirt from the gearbox housing cover!
In addition to these devices, you also need to stock up on: A screwdriver, as well as a main set of wrenches, a “12” hexagon and a regular or oil syringe for pouring oil into the gearbox!
Briefly about the steering gear:
This is the most basic component of the control frame, since thanks to this unit, when you turn the steering wheel, the wheels of the car also turn, in other words, it transfers the force when turning the steering wheel to the wheels, thereby steering the car.
When should you change the steering gear oil?
Read:
Many people say that there is no need to change the oil in the control mechanism at all, but if you look at it from the other side, there is still a need to change the oil.
In fact, after a certain period of time, any oils lose their characteristics and they begin to oxidize. Due to oxidation, they begin to leave sediment on the walls, thereby polluting the system, and therefore, I think it’s worth spending money on “1 liter” of gear oil.
By the way, it is necessary to change the oil in the crankcase of the control mechanism very occasionally, approximately “20,000 to 40,000 thousand km,” since constantly changing the oil is really just a waste of money. But if the oil has already lost its additives and as a result it has turned very black, accompanied by a languid turn of the steering wheel, then in this case you need to change the oil as quickly as possible so that everything returns to normal!
Changing the oil in the steering gear for a VAZ 2107-2101 from Auto overhaul
Contacts for cooperation (sponsors, advertising offers): Mail: I'm on VKontakte...
Adjusting the steering column play
The need for adjustment arises after repair of the unit or when large play appears when turning the steering wheel. If the mechanism has a large free play, the wheels lag somewhat behind the movement of the steering wheel. To make the adjustment you will need:
- flat screwdriver;
- 19 mm wrench.
We align the steering wheel in the center, and then perform the following actions:
- Using a 19 mm wrench, unscrew the nut located on top of the steering gearbox.
Video: adjusting the steering column play on a “classic”
Pendulum VAZ 2106
A pendulum arm or simply a pendulum is a part that connects the steering rods and the steering gearbox. The product is located under the hood symmetrically to the steering gear and is mounted on the right side member.
Replacing the pendulum
Like other parts of the car, the swingarm is subject to wear and tear and sometimes requires repair or replacement. The following characteristic signs indicate that problems have arisen:
- when driving on uneven roads, knocking noises are heard;
- large play in the steering wheel.
When the pendulum breaks down, sometimes you have to exert a lot of force to rotate the steering wheel.
It should be taken into account that the listed symptoms can appear not only when there is a problem with the pendulum arm, but also when the assembly is loosely tightened or the adjusting nut is overtightened.
How to remove
For dismantling you will need:
- a set of open-end or ring wrenches;
- ball pin remover.
We perform the procedure in the following sequence:
- Remove the right front wheel.
- We unscrew the fastening of the rod fingers to the pendulum lever.
Pendulum repair
Repair of the unit comes down to replacing bushings or bearings (depending on the design).
Replacing bushings
Repairs are carried out using the following tools:
- 19 mm wrench;
- vice;
- new bushings;
- lubricant "Litol-24".
The repair sequence is as follows:
- We clamp the pendulum in a vice. We take out the cotter pin and unscrew the fasteners.
Troubleshooting and assembly
After disassembling the pendulum, we check the condition of all parts. There should be no defects on the axle and lever (traces of wear, deformation). With high mileage of the car, bushings are subject to wear. Therefore, they have to be replaced with new ones. There should be no cracks or other damage on the bracket. The pendulum is assembled in the reverse order, with Litol-24 applied to the pendulum axis and the hole under it. The adjusting nut should be tightened so that the bipod rotates when a force of 1-2 kg is applied to its end. A dynamometer is used to determine the force.
Video: replacing the pendulum arm bushings on a “classic”
Replacing bearings
With high mileage of the car, the bearings in the pendulum begin to bite and jam, which requires their replacement. The tools you will need are the same as in the previous case, only instead of bushings you need bearings. Repair consists of the following steps:
- We clamp the part in a vice and unscrew the adjusting nut, but not completely.
When assembling the pendulum, the bearings are pressed so that rotation is free, but without play.
Technical characteristics of VAZ-2104/VAZ-2105/VAZ-2107:
| 2104, 21041, 21043, 21044, 21045, 21047 | 2105, 21051, 21053, 21057 | 2107, 21072, 21073, 21074, 21079 (1982-2011) | |
| Years of manufacture | 1984–1992,1984–1992, 1984-2003, 1997–2003, 1999-2006, 1998-2003 (1984-2011) | 1980–1992,1981–1999,1980-x, 1992–1997 (1984-2010) | 1982-2011,1982–1990,1991–2003,1982's, 199's |
| Brake system | Drum front and back | front disc, rear drum, hydraulic drive | |
| Dimensions (L x W x H), mm | 4115 x 1620 x 1443 | 4130 x 1620 x 1446 | 4115 x 1620 x 1446 |
| Wheelbase, mm | 2424 | 2424 | 2424 |
| Body type | 5-door station wagon | 5-door station wagon | 5-door station wagon |
| Number and arrangement of cylinders | R4 | R4 | R4 |
| Engine capacity, l | 1.3, 1.198, 1.45, 1.7i, 1 | 1.294, 1.198, 1.451 (2103) | 1.451 (2103), 1.3, 1.5i |
| Curb weight, kg | 1020 | 1060 | 1060 |
| Total weight, kg | 1475 | 1460 | 1460 |
| checkpoint | 5-speed fur. | 5-speed fur. | 5-speed fur. |
| Engine power, l. With. , at rpm | 64/5600,58/5600,71/5600,79/5600, 53/560, 71/5600 | 64/5600, 64/5600, 71/5600, 71/5600 | 72/5600, 64/5600, 80/5600, 75/5600, 72/5600 |
| Maximum torque, Nm | ND | ND | ND |
| type of drive | 4x2, rear | 4x2, rear | 4x2, rear |
| Steering type | |||
| Supply system | carburetor | ||
| Front suspension | Double wishbone | ND | |
| Rear suspension | Helical spring | Independent on transverse swing arms with coil springs, hydraulic shock absorbers, telescopic | |
| Maximum speed, km | 145 | 145 (152 for 21053) | |
| Acceleration dynamics 0-100 km/h, s | 17 | 17 | 17, (16 for 21074) |
| Fuel consumption per 100 km, l | 7 (AI-92) | 6.9 at 90 km/h, 9.5 at 120 km/h, 9.2 in the city | 6.9 at 90 km/h, 9.2-9.5 at 120 km/h |
