Every car owner wants his car not to fail at critical moments, to cause a minimum of problems and bring maximum benefit. But this directly depends on how the owner cares for, monitors, and repairs his car on time.
One of the most important components affecting safety is the steering. VAZ 2114 owners do not have to repair steering racks very often, since these units have a fairly long service life. But a number of factors and time lead to the fact that you have to pay direct attention to the helmsmen, diagnose the problem in a timely manner and promptly fix it.
Today we’ll talk about how to repair this unit yourself, as well as what measures will bring your slightly worn steering rack back to life.
Symptoms of a problem
To understand that the racks require repair, you need to monitor the behavior of the car and know the characteristic signs of a malfunction of this element.
Is it possible to determine whether the unit requires a complete replacement, or can you get by with simple repairs? We will tell you about this in the table below.
| Sign | Necessary actions |
| When turning the steering wheel, a knock is heard and play occurs | If the situation occurs while the car is moving, it is enough to carry out repair measures, use a repair kit |
| Knocking and play occurs when the steering wheel is turned when the car is stationary | This is clear evidence of the critical state of reiki. The problem can only be solved by completely replacing it. |
Lada 2109 › Logbook › Steering rack repair.
Steering rack malfunctions are quite a common occurrence in Samara. As a rule, this is a significant backlash of the rack in the body, which is accompanied by a characteristic rumble when driving over uneven surfaces.
It’s not worth it to rush into the store for a new rail right away - firstly, it’s expensive, and secondly, your own can still serve. The first thing you can start with is to try to tighten it up.
The technology for adjusting the rack is simple - tighten the adjusting nut enough so that the play goes away and the steering wheel does not rotate too tightly.
I pulled mine up 3-4 times. Enough for a while. It is not possible to completely remove the backlash, but the specific rumble goes away.
Even on my rack, over 60 thousand miles, I changed the boot 2 times, which is now torn again and needs to be changed. Those anthers that go into spare parts seem to be made of shit.
I won’t bother changing the boot again, I’ll install a used rail, which I serviced before installing it, which I’ll tell you below about how I did it.
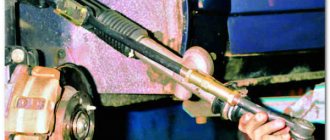
First you need to disassemble it. You don’t need a lot of intelligence for this, you just need a couple of tricky octagonal keys
About 15 minutes and the rail is disassembled into its component parts.
Then, according to the recommendations from the smart repair book, I wash the metal parts with kerosene, since this product is scarce and expensive, we replace it with gasoline, and the rubber parts must be washed with warm (!) water, preferably with baby soap.)
Next, clean parts should be carefully inspected for wear. What usually wears out there:
1. Wear of teeth on the rack and drive gear. As a rule, wear is maximum in the middle part, in the steering wheel position in which the car drives straight, which is why, when adjusting, removing knocks and play as much as possible, you joyfully drive out onto the road and discover that closer to the extreme positions the steering wheel bites and it does not return when exiting the turn .
2. Steering rack support. It is due to this that the adjustment occurs.
3. Ball and roller bearings should not have obvious signs of wear, the drive gear should rotate without jamming, and there should be no play in the crankcase.
4 Support plastic sleeve. The rail should fit tightly inside it.
5 Carter. Make sure that the seats for the bearings and stop are not broken.
These are the main points. In practice, even something that should never be broken can be broken, you have to look at everything
After assessing the scale of the problems, you can begin assembly; it’s a good idea to immediately have a repair kit:
Tightening and adjustment
As the practice and experience of VAZ 2114 owners shows, if problems arise with the racks, they can most often be repaired. The only condition is that you have an inspection hole at your disposal.
Full analysis
The first step is to tighten the rack. But how is this done? To do this, simply tighten the adjusting bolt. Adjustment is made with a 17 mm key.
After tightening the bolt, take your car out for a few kilometers to check whether the knocking or play remains. If these symptoms of the problem disappear after you have tightened and adjusted the steering rack, the repair can be considered complete.
But this doesn't always happen. The knock may remain, but the play may go away, or vice versa. In any case, if at least one sign still remains, you will have to begin a full-fledged repair with your own hands. Now you can find a number of useful videos that describe in detail the procedure for repairing this unit. Take a look, it will be useful for you.
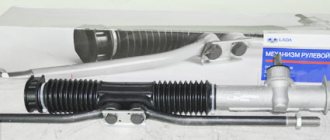
Independent replacement of the steering rack and its anthers on a VAZ 2114
This material will be devoted to the topic of repairing the steering rack on a VAZ 2114 car. This element is necessary to transfer steering force to the front wheels of the car. Alas, the “fourteenth” model does not have a hydraulic or electric amplifier, so the design is purely mechanical.
Principle of operation
Device design
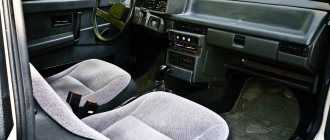
The required unit is located on the rear side of the engine in the engine compartment. Clamps hold the rail on the partition between the engine and the passenger compartment.
Typical breakdowns
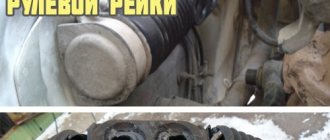
Torn steering rack boot
There are several most common reasons why the unit may need to be replaced:
- The rail has exhausted its service life;
- The vehicle is regularly driven on uneven roads;
- Having turned the steering wheel to its extreme position, sharp accelerations are often made;
- The presence of mechanical damage due to collisions with potholes, accidents, etc.
Drivers should pay attention to the behavior of their car, which itself may indicate that the steering is out of order. This may manifest itself as follows:
- The rack knocks when turning the steering wheel;
- The steering wheel jams and turns to the sides with some difficulty;
- There is knocking and vibration during travel;
- The play at the steering wheel has increased;
- The wheel alignment is disrupted. This can be determined by uneven wear of the rubber.
When is replacement required?
There are three ways to solve the problem of faulty steering racks.
| Way | When is it relevant? |
| Adjust the rack | If diagnostics show that the unit does not require repair or replacement |
| Repair | If diagnostics allows for partial replacement of elements. Replacement is provided using a repair kit |
| Replacing the unit | If the test shows a complete failure of the node. Installation can be carried out with new rods or old ones, depending on their condition. |
Let us add that if the old steering racks on your VAZ 2114 have covered more than 100 thousand kilometers, their malfunction is unlikely to be corrected with the help of a repair kit. The best option in this case is a complete replacement of the unit.
Removing the boot
Price issue
The cost of new slats depends on the manufacturer, region, and even the specific store where you are going to purchase them.
Replacement kit
If you don’t want to change it yourself, then get ready to pay about 1.5-2 thousand rubles for the services of specialists from service stations. Today this is the average price of such repairs. Again, it all depends on the level of the car service, and sometimes on its arrogance.
Replacement procedure
Replacing steering wheels will require not only your hands, but also a couple more to help. So, agree in advance with a friend that he will help you solve the problem of faulty steering.
In addition to a helper and new slats, you will also need a set of tools and materials. Be sure to include in this list:
- Set of wrenches;
- Jack;
- 17mm hex wrench;
- Balloon wrench;
- Bricks or similar materials (to support the front of the car without wheels);
- Puller for steering rods (not necessarily needed, you can do without it);
- Dry rags;
- Litol type lubricant;
- The almighty WD40.
Now you can proceed directly to replacing the steering racks. We strongly recommend that you follow the established procedure for conducting operations.
- Place the car on a level surface. No, a simple floor in your garage is enough, it is not necessary to level it with cement.
- Apply the parking brake to keep the car from moving.
- Raise the car on a jack, place logs or bricks under the front, and then remove the wheels.
- Remove the negative cable from your battery for safety reasons. Nobody needs electric shocks today.
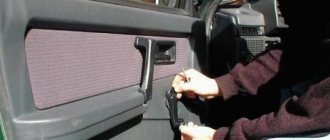
- On the driver's side inside the passenger compartment, near the pedal block, unscrew the locking fastening bolt of the cardan of your steering shaft.
- Remove the adsorber directly from the engine compartment. You can put it aside for now.
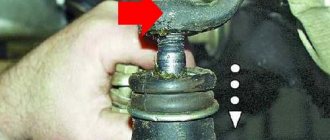
- Remove the cotter pins, which will allow you to then remove the mounting nuts from the tie rod ends.
- Using a rod puller, the ends are removed from the racks. If for some reason the puller is missing, it can be replaced by gentle, successive blows to the tips. Don't damage their threads just by doing this. They usually lend themselves, so many people do without pullers.
- Treat the rack clamp fixing nuts with an anti-rust agent. Now we are talking about the almighty WD40. Wait a while for the composition to be absorbed.
- Using a wrench, unscrew the fastening nuts. Processing with a Vedash should greatly simplify this task for you. There are four nuts in total.
- Remove the rack by pushing it through the passenger side, that is, the right side of your VAZ 2114.
- We recommend replacing the boot at the same time as replacing the racks. Over time and during the period of operation, the steering boots seriously wear out, so it is hardly worth trusting old boots to work with new racks.
- The tips are removed from the slats. At the same time, try to count the number of turns with which the nuts were tightened. This will allow you to fasten them back as close to precision as possible at the reassembly stage and, with peace of mind, go to the service station, where they will adjust the wheel alignment.
- Take your new rail, remove the plugs from it.
- Next, take Litol or a similar lubricating liquid into your hands and fill the body with this composition as much as possible.
- The ends are mounted back onto the rods. Try not to mix up the places of the nodes, although they are different from each other. However, as practice shows, this does not prevent many do-it-yourself repairmen from confusing them.
- The new rail is placed in its rightful place. To do this, the nuts are attached to the studs of the clamps.
- Now you will need your friend, comrade, assistant. Ask him to help guide the shaft drive gear to the seat located directly on the rack housing. The splines must line up exactly. Be sure to check this moment.
- A locking bolt is fixed on the cardan.
- You can safely perform all other work in the reverse order of the dismantling described above. In this case, each thread must be treated with Litol. This event will allow you to more easily deal with disassembling the elements during subsequent repairs. Or it will be a pleasant surprise for the new owner of your VAZ 2114.
Obviously, replacing steering racks yourself is not the most difficult task, but it must be done clearly, consistently and accurately.
Price issue
A new rail will cost you about 3 thousand rubles. The cost of service stations for replacing slats costs about 2 thousand rubles. That is, in total you will have to spend 5 thousand rubles if you entrust the work to the masters.
Repair kit
However, the rack is not difficult to repair. Most VAZ 2114 owners perform this event with their own hands. Plus a decent saving of money.
Disassembly, general progress of work
Before starting repairs, be sure to check that you have a special repair kit on hand. There are two configuration options: full and incomplete. An incomplete set does not include a gear and rack, which will only require a major overhaul of the VAZ 2109 steering rack. A big advantage of the chosen car model is the relatively low cost of component materials, which means that repairing the VAZ 2109 steering rack with your own hands is not only a useful activity in terms of gaining experience , but also quite economical.
So, the painstaking work of disassembling and reassembling began.
| Operations | Subtleties of work |
| Take your time, carefully disassemble the structure part by part, simultaneously assessing the condition of each of them. | The steering rack on the VAZ 2109 contains many small parts that should not be lost. Worn and damaged elements must be replaced. Replacing the steering rack boot of a VAZ 2109, with which we begin disassembling, is not a complicated procedure and does not require a separate description. |
| The most difficult part of the entire disassembly process is replacing the needle bearing. | To dismantle it, you will need a special key, although you can also use a drill with a 1.2–1.5 mm drill bit the old fashioned way. |
| After washing the steering gear housing and installing a new needle bearing (the repair kit assumes its presence), you will need to close the resulting hole, if you use a drill. | Cold welding or, even simpler, superglue with sawdust will help you here. |
| The mechanism is assembled in exactly the reverse order of disassembly, with the obligatory replacement of old components with those included in the repair kit. | Don’t be embarrassed to replace a bearing or ring that seems to be still quite healthy. Assembling/disassembling the steering mechanism is a rather labor-intensive process to repeat a not so simple service one more time because of some small detail. |
Periodic adjustment of the VAZ 2109 steering rack may be required after some time, even if the repair is successfully carried out.
We repair it ourselves
To get started, you will need a set of tools and repair kits.
Replacement kit
Be sure to include the following in your list of tools and materials:
- Repair kit for one of three configurations (more about them below);
- Bearings;
- Lubrication;
- Set of keys and screwdrivers.
Selecting a repair kit
Spare parts
As for repair kits, the standard minimum set includes four elements:
- Washers;
- Nuts;
- Bearings;
- Bushings made of fluoroplastic.
But is it enough for your specific steering rack situation? Let's try to understand the purpose and configuration of each of the three types of repair kits.
- The cheapest repair kit, the contents of which you are already familiar with, allows you to solve the most minor problems that have arisen with your slats.
- The middle kit additionally includes other bearings and shafts. Designed for more serious repair work.
- The most expensive repair kit may consist of whole new slats, that is, it involves not a repair, but a simple replacement of units.
Steering rack repair kit for VAZ 2114
When starting to overhaul the mechanism, you need to consider the market for repair kits. There are several types:
- The first consists only of rubber bands, gaskets and dampers. It is suitable for changing the lubricant inside the mechanism and for light maintenance. The price for a set is about 200 rubles.
- The second is complemented by two bearings, which is also suitable for easy maintenance of the mechanism. The cost of the set is about 500 rubles.
- The latest repair kit has almost all internal mechanisms and implies a complete replacement of units. The price is about 2000 rubles.
Before purchasing a kit, check which rack is installed on your car and write down its number. This will help you avoid making mistakes when purchasing.
Repair
To perform the repair, you will still have to disassemble the steering wheel. You can see detailed instructions in the material on replacing the steering rack.
Replacement process
Let's move on directly to the repair procedure.
- Remove the rail from its seat.
- Remove the thrust nut with a 17mm hexagon.
- Remove the thrust nut, remove the retaining ring, spring, and rack stop.
- First, the gear shaft boot is removed, after which you can easily get to the locking ring.
- Remove the nut that holds the gear bearing in place. Be prepared for the fact that it will be quite difficult to unscrew it; use some force. This is fine. It's worse if it practically doesn't hold on.
- The drive gear shaft is pressed out.
- The rail is removed from the housing.
- Next, remove the support sleeve, lubricate it and put it in place. It may take some effort to push it back.
- Replace all bearings present in the assembly. Some are difficult to extract, while others are almost impossible. But it needs to be done. If you cannot remove it at all, then cut the bearing with a chisel and remove it with pliers.
- Examine the condition of all surfaces, parts, and assemblies for any defects or damage.
- If you notice faulty elements, replace them using a repair kit.
- The design will have quite a lot of moving elements. Each of them must be lubricated with high-quality lubricant. Litol will perform well here.
- Reassemble by following the reverse disassembly sequence.
- You will definitely need help for reassembly. Therefore, agree in advance with a friend or someone else who can help you in this matter.
- Place the repaired rail in place and attach its fasteners.
- A rack is inserted into the spitz. This is where you will need an assistant. It is almost impossible to do this yourself.
- Use a chisel to loosen the clamps.
- Tighten all mounting bolts in place.
After assembling the unit, be sure to check it in action. Please note that after this you cannot operate the car in the previous mode. First, be sure to stop by a car service center where an alignment will be performed. Only after this can the repair of the unit be considered complete.
If you notice typical signs of a rack malfunction, do not delay repairing or replacing it. This can lead to tragic consequences when, at the most inopportune moment, the steering wheel stops responding to your efforts and you lose control of the situation. This is not an attempt to scare you, but a simple fact of life.
The steering rack in front-wheel drive cars is fully responsible for the functionality of the entire steering mechanism. The VAZ 2109 also belongs to this category of car. If it fails, appropriate action should be taken immediately.
The occurrence of signs of malfunction does not always indicate the need to completely replace the unit. Sometimes it is enough to repair the rack using a special repair kit.
Lada 2109 Kolkhoz cramp › Logbook › Repair and modification of the steering rack.
The steering rack on my car began to knock, and I began to feel every pebble on the asphalt in my hands through the steering wheel, and it was shaking so much that it seemed like it wanted to break out of my tight embrace. Another 30 thousand/km ago, while doing the wheel alignment, the master said that the rack needs to be tightened, but there is nowhere to pull it, it is tightened all the way. In general, I bought what seemed to me everything necessary for self-repair of the rack: -Repair kit for the rack, (there are three types: No. 1 the most expensive half the cost of a new rack with a worm, shaft and bearings, No. 2 as 1, only without the shaft and worm. No. 3 as 2 only without bearings. I bought No. 3, I couldn’t find one with bearings, and it’s not practical to buy No. 1; it’s easier to just buy a new rack. - BRT boot and 3 cable ties. - Repair kit for rack plugs (I couldn’t find the BRT, I had to take RTIauto, also from Balakovo). - Salen blocks for steering rods BRT -Special key for adjusting the rack (in my case, the octagon on it turned out to be 1.5 mm smaller than necessary, I had to sharpen it with a grinder to the required size.) -Special key for disassembling the rack (I couldn’t find it, I made it from a piece of rusty pipes). -Sewer pipe 50mm 1m long (for future bushing)
I removed the rail, I won’t describe how to remove and disassemble it, in any book, and there is a lot of information on the Internet.
After disassembly, I saw that the rack worm and shaft were in excellent condition, without scoring or wear. But the rack stop had a hole in it, and the spring pressing it was sagging, 4 mm smaller than the new one, I replaced it with new ones from the repair kit. I installed everything that was in the repair kit instead of the old parts except the stop nut, because the old one had no hole, and the new one had a hole that should be closed with a plug, but it was not included in the kit. Now about the modification, the stock bushing is too small to hold the rack, and even with the new bushing it wobbles a lot, on the 10 the bushing in the rack is already the entire length of the stroke, some for this reason put it on the eighth family, although it is longer and the fasteners need to be digested . I saw the idea of making a solid bushing in the eighth rail in this video
Then, using a construction knife, we cut off the parts sticking out in the window of the case.
And so on with each next piece, until the rail moves closely, but without effort. After inserting all 4 pieces, I cut off the protruding edges from the end,
drilled through the body and plastic
and tightened the screw to secure the pieces of plastic.
I knocked out the steering rod sales blocks with a hammer and pressed in new ones using a bolt, washers and liquid soap as a lubricant.
I removed the washers from the old silent blocks using a pull rod puller.
The washers serve to fix the boot, thereby extending its service life. They didn’t fit any washers on the new salenblocks, didn’t heat them with a hairdryer, and walked in like they were coming home.
After all that was done, I decided that the capital rail should look the part, and painted it first with etching primer, then with acrylic.
I put on a new boot,
I filled the body with “fiol” lubricant, and also lubricated the body itself so that the boot would slide over it better, put on the plugs and put it in place.
Since my wheels were removed and the car was standing on bricks, I made the adjustment immediately. I tightened it all the way, turned it back about 45 degrees, and then tightened it until the steering wheel rotated without biting or effort. The tie rod bolts were tightened when the car was standing on the ground, by analogy with the chassis, this was necessary to prevent the salen blocks from turning. After the repair, I drove more than 450 km, the beats disappeared, I am satisfied with the result of the work done.
Source
Signs of breakdown
By means of steering racks, rotational movements from the steering wheel through a rack and pinion mechanism are transmitted to the rotary levers, which turn the front wheels with rods.
If you find one of the symptoms listed below on your car, be sure to conduct a full diagnosis of the condition of the unit, and then repair it.
Signs of a faulty steering rack include:
- A grinding noise is observed in the rack area when the steering wheel is rotated;
- The steering wheel periodically sticks;
- Lubricant begins to leak from the seals;
- The steering wheel has noticeable play.
Dismantling
You will not be able to assess the current condition of the steering rack unless you dismantle the device.
There is no optimal way to dismantle the steering rack, since the process in any case involves quite labor-intensive, time-consuming work that involves disassembling many components.
- Suspend the front of the car with a jack to be able to remove the front wheels. Be sure to carefully consider safety measures, install wheel chocks and boots so that the machine does not move while the rack is being repaired.
- Disconnect the gas adsorber, disconnect the wires and take them to the side. This will give you full access to the steering rack.
- Unscrew the bolt from the spline connection. Before doing this, be sure to align the wheels using the steering wheel. The bolt is located near the pedals. To dismantle the fasteners, use a cardan head or a simple spanner.
- Clean the tie rod mounting nuts from accumulated dirt, then undo them using pliers. Unscrew the nuts using a spanner.
- Using a special puller, the rods are disconnected.
- Next, unscrew the rods from the steering rack housing. However, experts recommend dismantling the crankcase with the rods together, since in a vice the removal process is much easier.
- Once you have the rack free, remove it from under the car through the wheel arch. Clean, rinse and clamp in a regular vice.
Now you have a choice - completely replace the steering rack or try to repair it. The second option will take more time, but will save an impressive amount of money.
Removing the steering rack
When starting to repair the VAZ 2114 steering rack, first of all we need to remove it. We do this using the following technology:
- We park the car on a level surface. For safety, we put supports under the wheels to prevent them from rolling back.
- Raise the car with a jack, loosen the wheel nuts and remove it. Similar work needs to be done on the other side.
- There is a hole in the arch on the right side that is closed with a plug. Let's take it off.
- When the absorber is installed, it is necessary to loosen the clamp and, without disconnecting the hoses, move it to the side.
- Using a hammer and chisel, we bend the antennae onto the plates that hold the tie rod nuts.
- We unscrew the bolts and pull them out along with the plate. We move the pulls to the side.
- We find the junction of the column shaft with the gear shaft of the mechanism. It is located at the front panel from the passenger compartment. Let's separate them.
- Using a socket or a 13mm wrench, unscrew the brackets that hold the steering rack. They often become very rusty and unscrewing them becomes problematic, so it is advisable to first treat them with WD-40 and wait a few minutes.
- We move the mechanism towards the engine to free the shaft and remove it.
- We pull it out through the hole described in the third paragraph.
After this, the dismantling is completed and you can begin to repair or replace the mechanism.
Repair
The first thing you will need to carry out your own repairs is a repair kit. They are available at almost any auto parts store. However, we strongly recommend that you buy only high-quality kits so that the result of your DIY repair lasts as long as possible.
What you need for work
The proposed kits are incomplete and complete. You will definitely need the following kit components:
- Needle bearing;
- A pair of rubber seals for the bushing;
- Support sleeve made of plastic;
- Set of gaskets;
- Spring;
- Retaining rings;
- Support bearing;
- Drive gear;
- Boot cover;
- Rail;
- Set of ties for the boot.
Repair kit
Now that the kit is ready, the tools are available, and there is also enough free time, you can get to work.
- First, remove the boot, end caps and stops. As you disassemble elements, even the smallest and insignificant at first glance, be sure to evaluate their current condition. If necessary, all worn-out elements will be replaced with new ones taken from the repair kit.
- Using an octagon, unscrew the screw plugs, which will allow you to remove the springs, retaining rings, and thrust bushings.
- Remove the bearing and check if it has any play. The repair kit includes a new bearing, so if the old component is in satisfactory condition, it is better to replace it immediately. It’s not for nothing that you took on such a complex process to get everything done 50%.
- Remove and inspect the drive gear. Next, you can completely remove the rail itself.
- Be sure to replace the support shaft bushing, not forgetting about the rubber bands. They are also included in the kit.
- Take your time to remove the rubber bands from the sleeve. First, insert the element into the crankcase, after which you can cut off the elastic with scissors or a sharp knife.
- The most difficult step is replacing the needle bearing. To remove it, you will need a special key. But you can do without it. In this case, arm yourself with a 1.5 mm drill bit and a drill. Using a drill, make a hole in such a way as to loosen the end of the bearing. Use a punch to knock out the old bearing from the crankcase.
- Before installing the new needle bearing, be sure to thoroughly clean the steering rack housing of accumulated debris and steel shavings from drilling.
- The hole made cannot be left. To eliminate it, you can mix metal filings with superglue. This mixture will harden quickly and give an excellent result.
- Lubricate literally everything that can be lubricated in the steering rack assembly. Experts advise using Litol 24 or other lubricants of similar quality. It wouldn't hurt to lubricate the CV joints.
- Reassemble the unit by following the reverse sequence of dismantling.
Communities › VAZ: Repair and Modification › Blog › Steering rack bulkhead 2109
Good day everyone. After winter, knocking noises appeared in the steering. This means that the ill-fated plastic bushing in the rack has worn out again, since the bearings were changed a year and a half ago. It was also necessary to replace the rack boot. But... as they say... what doesn’t break, needs tuning))) One kind person shared a drawing of a reinforced bushing.
The bushing was fabricated and ready for installation.
To make my work easier and to reduce the risk of breaking something, two days before disassembly I treated all the studs with WD-40.
So. The removal process is simple and takes 20 minutes. We crawl under the car and unscrew two M6 nuts for securing the protection and one M8 nut for the lower right rack fastening.
Then, from inside the car, unscrew the M8 bolt securing the steering shaft to the rack shaft.
For ease of dismantling and installation, I hammer a thin chisel (screwdriver) into the joint of the clamp. We move under the hood, unscrew the upper M6 nut of the protection and move it to the side. Unscrew the M8 nut of the right upper rack fastening. We unscrew the bolts securing the steering rods, use a 22mm head to unscrew the two bolts and remove the rods (pay attention to the silent blocks of the levers).
From the side of the left wheel arch, unscrew the two M8 nuts of the left fastening.
That's it, we take out the rail through the left arch.
We disassemble the rack, you will need two special keys.
We wash away the remaining old grease. We evaluate the condition of the parts. We change everything necessary and you can reassemble in reverse order. But... Let's go back to the bushing... no matter how I tried to push it into the rack body, it never got into place. And the bushing sat on the shaft with enormous force and practically did not move. From this we can conclude that the above drawing is not entirely suitable for repetition or is it a marketing ploy, like here’s a drawing for you - do it, but buy the bushings from me (((( (no offense to the person who gave me this drawing, by the way, this person bought the bushing and the turner gave him the drawing.) I had to go to the store to get a factory bushing. We went for a replacement: 1. Bushing
3. Left and right support
I assembled the rack, filled it with new grease, and installed everything in the reverse order.
I had to rearrange the steering wheel because the shaft in the rack had shifted by one tooth. And adjust the rack a little, otherwise the steering wheel is a little tight, we’ll tighten it up again.
The result of the work done was again pleasing. All knocks are gone.
Source
How to determine that the rack needs to be replaced on a VAZ 2114
So there are several ways. The very first and simplest is to rotate the steering wheel. You just need to tug it from side to side. Ideally, the wheels should respond to the slightest rotation. In fact, many even new slats are not capable of this. That's the quality of the parts, you just have to live with it. Steering rack wear does not appear in any way in the form of knocks or vibrations, contrary to popular belief. If while driving the bumps are reflected into the steering wheel, most likely the steering tip needs to be replaced.
The second method is more accurate and complex at the same time. To carry out this check, it is necessary to jack up the front wheels one by one, and then swing them across the rotation in a horizontal plane. If there is a slight play, then it is somewhere in the steering, but not necessarily in the rack. There is no way to explain this; such a diagnosis can only be made by a specialist.
Before changing the rack, you can try tightening it. Thus, the gaps in the column are reduced. The main thing is not to overtighten, otherwise the steering wheel may jam. To tighten the steering rack on a VAZ 2114, you need a special multi-faceted wrench; it can be found in any auto store.
Video: replacing the rack on a VAZ 2114
Communities › VAZ: Repair and Modification › Blog › Repair of VAZ 2109 steering rack
In general, the rattling appeared a long time ago, but I couldn’t find its source, racks? No. Supports? No. Springs on the cup? No! And then it happened, I finally found out what it was. This is the mother of her rake, the bushing was taken out, well, I immediately went to the Internet to find out everything that was there and how, in general, I found this video.
2. We unscrew the fastening of the rack from the passenger compartment, there is a metal clamp put on the slots of the rack, you can move it apart with some kind of wedge, everything is simple, but inconvenient, if you want, unscrew the driver’s seat, there will be more space.