Every car owner has a moment when a hum or squeal begins to be heard from under the hood when the power plant is running.
The cause of this phenomenon, as a rule, is wear of the bearings. Most often this problem occurs with the tension pulley or generator.
High rotation speeds and loads lead to wear of these components.
Eliminating the problem of increased noise from under the hood comes down to replacing worn out elements.
But first you need to figure out which element’s bearings create noise and require replacement.
It is not difficult to check; you just need to loosen the tension on the generator belt, remove the belt and start the engine. If the noise stops after removing the generator drive, then it’s time to change the bearings.
Symptoms of a problem
The main sign of wear on the generator bearings is the appearance of a distinct noise when the rotor rotates.
Typically, bearings begin to make noise due to insufficient lubrication, mechanical damage (destruction of the cage, severe wear of the tracks) or due to the rotation of the outer race in its seat, although this happens very rarely.
It is believed that if there is no lubricant, it is enough to apply a new one to get rid of the problem.
But this is not always the case; operation of this element without lubrication is accompanied by intense wear, so after adding new lubricant, the noise may stop, but not for long; the bearing will fail very quickly.
In any case, if problems are detected with the generator bearings, it is better to replace them immediately.
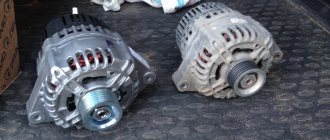
Next, we will consider how to replace these elements in the generator of a VAZ-2110 car.
The design of the generators is almost the same, so the sequence of work will be similar for generators of other cars.
The main symptom of a bad bearing
A generator can fail for various reasons. If the bearings are to blame for the malfunction, then this is indicated by a whistle under the hood.
As a rule, a worn bearing “whistles”. That is, it is not completely out of order, but it is working at half capacity, and soon it is expected to be completely defective. Charging may also not be lost, but there is a high risk of the generator jamming. Obviously, such bearings should be replaced.
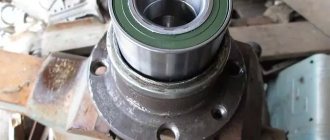
New bearing
Specialists can easily determine whether a generator bearing is faulty by listening to the noise on the removed unit using a special device.
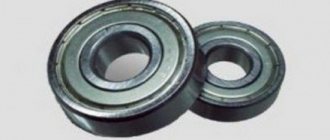
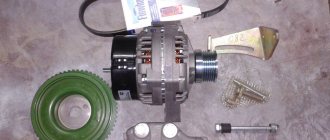
What bearings are needed?
Before starting work, you need to buy new bearings. In general, the manufacturer recommends replacing the front bearing (the one on the pulley side) along with the cover. But in this case, the cost of repairs will increase, and significantly.
It will be cheaper to simply replace the components without a cover. When going to a car dealership, you need to remember or write down the dimensions of the elements that you will need.
It is important to note that on earlier VAZ-2110 models, bearings with numbers were installed in the generator: front - 6302, rear - 6202.
On more modern VAZ-2110 bearings were already used in the generator: front - 6303, rear - 3203.
Front bearing.
Set: front and rear bearings.
How to choose, change and maintain generator bearings?
The design of the generator unit as a whole is quite complex - this mechanism consists of many elements, each of which performs a specific function. During operation, almost all component parts of the device are subject to wear; one of the elements that most often wears out is the generator bearing. You can learn more about the purpose and malfunctions of this part from this article.
Disassembly, replacement
Having prepared everything you need, you can begin work. The sequence of actions is as follows:
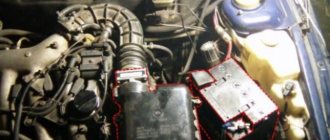
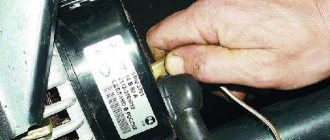
- We put the VAZ-2110 in the garage or on the site. Disconnect the negative terminal from the battery. Disconnect all wiring from the generator.
- We unscrew the fixing nut and the adjusting screw, push the generator completely towards the motor and remove its belt. Unscrew the bolts securing the adjusting bar and remove it.
- We climb under the car. We remove the front part of the crankcase protection from the car, unscrew the nut of the lower mounting of the generator, remove the bolt and pull out the generator.
All subsequent work is performed on the removed generator. - Unscrew the pulley mounting nut. There are several ways to do this. The first of them is if a hole for a hexagon is made in the rotor shaft. Use a hexagon to hold the shaft, and use a spanner to unscrew the nut.
If this method fails to loosen the pulley fastening, we use the second method. It comes down to fixing the rotor with a screwdriver. We install it in the slots made in the rotor through the ventilation holes.
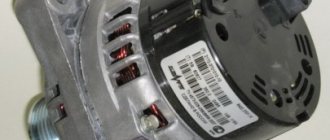
Having fixed the rotor, unscrew the nut with a wrench. If we couldn’t unscrew it this way, we’ll give up trying for now and move on to further work. - Removes the protective cover mounted on the rear of the generator. To do this, pull back the three latches and carefully remove the case.
- In order not to damage the generator elements installed in the rear part (brushes, regulator, diode bridge, capacitor) during further work, it is better to remove them by unscrewing their mounting bolts.
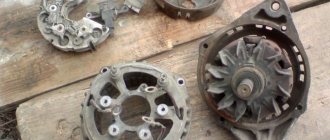
- Remove the back cover. It is attached to the front with 4 bolts. In some models, the bolt heads are made for an 8 socket wrench, in others - for a Phillips screwdriver.
First fill these bolts with WD-40, since they often turn sour. We also mark the position of the back cover to the front with a marker. You can do this in advance.
After unscrewing the bolts with a screwdriver, carefully press the back cover and remove it. In this case, the rear bearing should remain on the shaft. - If it was not possible to remove the pulley before, after dismantling the back cover, this can be done by holding the rotor in a vice. If the pulley was removed earlier, knock out the rotor from the front cover. To do this, screw a nut onto the shaft thread, holding the front cover of the generator, hit the shaft with the nut on a wooden stand - the rotor should come out of the front bearing. Unscrew the nut and completely remove the rotor.
- We knock out the bearing from the front cover. To do this, we use a suitable piece of pipe or a 27 socket from a set of keys.
Or using a pipe with a suitable diameter.
If you immediately purchased a cap with a bearing, it will be much easier. - We lubricate the new bearing and drive it into the seat using the old one. The old bearing is used as a guide and is struck with a hammer until the new element is completely seated.
After this, we flare the edges of the cover to fix the bearing in it. - Remove the rear bearing from the shaft. To do this we use a puller.
If this is not the case, you can use a regular large open-end wrench. We place one jaw of the wrench under the bearing, the rotor will play the role of a stop. We use the key as a lever, striking it lightly with a hammer. The key must be moved in a circle so that when removed it does not become distorted. - Having removed or knocked down the rear bearing, we install a new one in its place. We fill it to its location using a pipe attachment or a socket wrench. It is important that when landing, the diameter of the tube or key is equal to the diameter of the inner race of the bearing.
- Before assembly, we once again thoroughly lubricate the new bearings.
Installation and removal of generator bearings
Installation and dismantling of generator bearings depends on the purpose, type and dimensions of the device. Although the principle of operation of generators is the same - the conversion of mechanical rotational energy into electrical current, their design and repair can differ significantly. There are also similarities in the design of generators and electric motors, but the latter have the exact opposite purpose - to generate rotation from electricity.
The design of all generators and electric motors is based on:
- Rotor - the internal movable metal part, sometimes referred to as an armature;
- The stator is an external fixed part made of metal blocks with a built-in winding that creates an electromagnetic field.
In the standard design, the rotor shaft (armature) is fixed on both sides and rotates on bearings. Over time, designs appeared with a stationary rotor and a stator rotating around it. This is due to the more favorable location of the electrical taps that take the current. However, in this case the stator is also mounted on bearings. Since bearings mechanically support the constant rotation and weight of the moving part, they are most susceptible to wear. Then the question arises: “ how to change the bearing on the generator?” "
Generator repair: bearing replacement
Replacing generator bearings with your own hands is possible with small dimensions of the device. Such DC generators are used in automotive 12/24 V power supply systems. These generators are equipped with small models of single row ball radial bearings. Their wear is usually detected by drivers when the engine is running as a howling or whistling sound.
Single-phase alternating current generators (220 V) of small size with the same bearings are used in mobile devices that generate electricity by burning gasoline or diesel fuel. How to replace bearings on a generator of this type is thoroughly presented by service centers that service branded dealer networks or specialized electrical equipment.
Medium-sized generators operate in industry, at thermal power plants, and in wind turbines and are designed for a power output of 100-500 kW. Here is a wide variety of structural devices depending on the purpose and energy carrier:
- solid fuel - coal, peat;
- liquid fuel - gasoline, diesel;
- flammable gases;
- steam;
- wind.
The bearings in these generators are also different: rolling/sliding; radial / angular contact; single-row / double-row; ball/roller.
How to change the bearing of a medium-sized generator is determined by specialist service engineers based on its design, as well as the conditions of integration into the equipment system. Determining bearing wear in electrical equipment of this class often requires vibration diagnostics and thermal scanning using special testing instruments.
According to the principle of operation, alternating current generators are divided into synchronous and asynchronous. In synchronous generators, cores, windings and electromagnetic poles are placed on the rotor, and zero coils that generate electric current are attached to the stator by a star. In them, the frequencies of rotation and electric current are interdependent. In asynchronous electric generators there is no direct dependence on the rotor speed and their design is close to a standard device.
The process of replacing bearings in industrial generators can be reduced to a general scheme:
- removing the generator from the circuit;
- removing the casing;
- removing the rotor;
- removal of worn bearings;
- pressing in new bearings;
- assembly and installation of the generator.
In large-sized synchronous generators of hydroelectric power plants, heavy rotating elements are installed on plain bearings, which are less susceptible to wear under high static loads.
Installing a generator bearing of this class requires not only a special technique, the participation of a team of workers, but also the use of special lifting equipment.
Possible faults
By what symptoms can you understand that it is time to change the bearings on the generator:
- The device buzzed. If the generator unit makes noise after starting the engine, then most likely the reason is inoperative bearing devices. It happens that devices hum, and then stop. There is no need to think that the problem has resolved itself; the parts will still need to be replaced.
- The battery is charging unstably, this is due to problems in the operation of the shaft, in particular, its rotation. This problem can be indicated by a control indicator on the car’s dashboard.
- The assembly pulley rotates.
- Bearings should also be replaced if the devices become overheated. Overheating is caused by high friction of worn-out components (the author of the video is the altevaa TV channel).
Briefly about the reasons why these parts may fail:
- Components have worn out, in particular the rolling element, cage, sealing component or raceway. Many car owners think that if they lubricate the bearing in such a situation, this will solve the problem, but this is not true. Wear cannot be eliminated, so parts will have to be replaced.
- All bearing elements are initially lubricated during installation. Every car owner who has installed and lubricated parts knows how important lubrication of generator bearings is for the performance of the unit. If for some reason the lubricant is out or its level is insufficient, this can lead to accelerated wear of the part.
- The reason may also be the rotation of the outer race in the device body on the rotor shaft. This reason is also due to wear and tear of the elements or their defects.
- Abrasive particles could get inside the structure of the part, this will lead to not only noise, but also squeaking.
- Belt failure, use of an incorrect or defective belt on the shaft.
- Pulley imbalance. In case of such a malfunction, you must first find out for what reasons the imbalance occurred, and then solve this problem.
- Rotating the pulley (video author - Geha Lavbinovich).