__________________ Mala herba cito crescit
It’s better for a Grant with an automatic transmission under the Datsun nameplate than a set of French hardware under the Vesta nameplate.
Source
Design Features
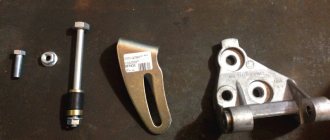
A standard generator for AvtoVAZ JSC cars consists of the following elements:
- Back and front covers.
- Air intake.
- Brush holder.
- Rectifier block.
- Stator.
- Capacitor.
- Voltage regulator.
- Pulley.
- Rotor.
Some electric generators do not have a built-in voltage regulator. For example, this element is missing in generators for the VAZ-2101.
How to disassemble a generator
- Press out the metal latches and remove the plastic cover.
- Use a Phillips screwdriver to unscrew the voltage regulator mounting screws.
- Unscrew the M10 nut. Then use a screwdriver to remove the screw and remove the capacitor.
- To remove the pulley, clamp the generator housing in a vice. Put a 21 socket on the nut, and through the hole in the head put a 8 hexagon on it. Only after you unscrew the nut can you remove the washer and pulley.
- Remove the four mounting screws to disassemble the generator into two parts.
- From the back of the housing, unscrew the screws securing the stator wire and diode bridge.
- Remove the diode bridge and the oscillator winding.
- Press the rotor out of the cover with your fingers along with the bearing.
- Carefully remove the bearing bushing.
- Take a puller and remove the bearing.
Disassembling the generator itself is much more difficult than removing the entire assembly from the car. To carry out repairs, you will need to diagnose the components of this unit.
First of all, pay attention to the brushes; they need to be changed if this element is visible from the holder by no more than 5 millimeters. If the bearings rotate tightly, then they are the defective element (a hum may be heard during operation)
The breakdown of the starter and rotor windings can be checked with an ohmmeter; the same device determines the performance of the capacitor. If nicks, scratches or burrs appear on the slip rings, they must be carefully sanded to a shine with fine sandpaper.
Replacing the generator on VAZ 2110-2112 and 2114-2115
Types of generators
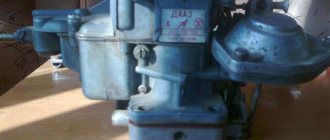
There are different types of generators for VAZ cars depending on their design. The most common generators are compact in size - 94.3701 and others.
Owners of Russian-made cars install brushless inductor-type generators. For example, devices modification 955.3701. Such generators differ from traditional equipment by the presence of permanent magnets on the rotor and field windings on the stator. Thanks to this, the design of the generator set does not contain slip rings and an alkaline unit, which is one of the most vulnerable and poorly protected.
Generators of type 955.3701 have not previously been used in passenger cars. Now they are manufactured by various Russian enterprises, including the Altai Tractor Equipment Plant. Among the main disadvantages of these electric generators are the high noise level during operation and heavy weight. This must be remembered before choosing a VAZ generator with a brushless design.
Interchangeability of autogenerators
Interchangeability of generators for Lada cars is achieved if the following requirements are met:
- the main technical characteristics of the installed generator are not lower than those of the device being replaced;
- the gear ratio from the internal combustion engine to the generator is the same;
- the devices have similar electrical circuits;
- The new generator is suitable in terms of weight and dimensions and type of fasteners.
Most Russian-made automobile generators have a 2-leg mount. These fasteners are found on both covers. For equipment of foreign brands, installation is carried out using 1 paw, the fasteners are located on the front cover.
In order to correctly install and securely fasten a foreign generator in a car from AvtoVAZ, it is necessary to replace the bracket.
About the current-speed characteristic
TLC is the dependence of the current supplied by a car generator to the on-board network on the rotor speed at a constant voltage. This parameter is calculated when the device is operated together with a charged and serviceable battery with a rated capacity of at least 50% of the rated current of the generator. The characteristic is calculated in the heated and cold states of the equipment.
Main consumer characteristics
- Maximum current.
- The magnitude of the operating voltage.
- Rated power.
- Gear ratio.
- Efficiency
- Dimensions and weight.
The main operating parameters, type and brand are usually indicated on the device label.
Criteria for choosing car generators
- Maximum power . Power is one of the main characteristics of VAZ generators. It must ensure an uninterrupted supply of current and supply electricity to the battery, which is discharged due to the operation of regular electricity consumers at low speeds of the power unit. To perform basic tasks, the device must have the required power. The required indicator is indicated in the vehicle operating instructions.
- Current strength . The factory generator installed in the car is not designed for a large number of additional consumers, but at the same time it has a certain reserve. If the autogenerator is “not enough,” then before purchasing a new device, first inspect the old equipment, clean the contacts, check the bearings, etc. You shouldn't use 120A generators in every car. First of all, it's expensive. Secondly, the current may be excessive. Such power-generating devices are installed in tuned cars with a powerful acoustic system.
- Dimensions . Before purchasing, it is also worth comparing generators by overall dimensions. The device must be compact with high technical characteristics.
- Noise level . The generator should not make too much noise during operation. This “disease” often affects high-power generators that are sold at a low price. One of the main reasons for the appearance of extraneous sounds (hum) is the poor quality of bearings, which wear out quickly.
- Availability of guarantee . If there is a warranty, you can exchange a faulty device for a new one if it is defective.
Disassembling the generator housing to replace components
Disassembling the generator is also not difficult. As a rule, this unit is only disassembled into parts, after which the faulty part is modularly replaced - there is no need to solder or rewind the winding. To repair a generator on a Lada, you will need the set of tools described above, as well as a pair of round nose pliers that will allow you to remove the insulation without the risk of damage. The entire scope of work takes no more than 1 hour and occurs according to the following action scenario:
- After dismantling the device from the car, you need to move the unit to a workbench or table and place the back cover up. The generator cover is fixed with 4 long bolts, which must be unscrewed and the device separated into 2 parts - the rotor and the stator;
- The upper part of the unit consists of a rotor with a shaft and bearing. To check the operating condition, you should ring the rotor with a multimeter and, if necessary, replace the bearing itself;
- The lower part of the unit consists of a stator, a rectifier relay and a winding. To check, you also need to test the stator and relay with a multimeter, and, if necessary, replace the insulating material around the winding;
- At the end of the procedure, we replace all faulty modules with new parts, after which we assemble the unit. During assembly, it is important not to damage the external and internal insulation.
It is important to know! The average service life of a generator on a VAZ 2110 or VAZ 2112 is 50,000 km, after which it is recommended to check the part every 3-5,000 km.
A simple method is to measure the battery voltage with the engine running - if the voltage is below 13.1 V, then the generator will soon have to be replaced.
Which generators are better to put on a VAZ?
Below are recommendations for different models of domestically produced cars.
VAZ - 2106
G-222 is a more powerful and stable self-generator compared to the standard G-221. It has a built-in battery charging relay and increased output (50 A versus 42 A), suitable for the “six”, provided that brushes from the G-221 are used or the connection diagram is changed.
Lada 2110 inside Priora 2 on R17 › Logbook › Generator 115A Priora Lux
Hi all! An entry for those who want to replace their original generator with a KZATE 115A generator from Priora Lux
Important! See addendum at the end
In size and fasteners it is the same as the standard one, in my case it was KZATE 80A. Now about the differences. On a 115A generator, the pin for the two main wires is thicker
, accordingly, it is necessary to select terminals with a hole of a suitable diameter. I cut off the old ones and soldered the new ones. This is my personal option, I think it will be enough if you just bore the hole in the factory terminal to the required diameter.
The second difference is the excitation wire on which the block is placed; there are two wires in the block; you only need the wire marked “L”
, I soldered the “male” to connect to the standard connector, the second wire is insulated.
I take measurements without consumers and with consumers, everything I could find and turn on: dimensions, low beam, high beam, front and rear fog lights, heater for 4, radio, heated front seats and rear window.
Under such a load, the generator begins to whistle, and it gives me goosebumps.
At the battery terminals:
And this is what everyone who buys a KZATE 115A generator from Priora Lux will face
Firstly:
a whistle
, which is clearly audible in the cabin and this is with the consumers turned off, I go out, my ear is closer to the generator, it doesn’t seem to whistle, I still haven’t figured out what kind of mysticism it is.
Secondly: you give the gas, release the pedal and as soon as the revolutions drop to the lowest point - idle speed, the voltage drops, along with it the light dims, the stove fan slows down
, this lasts 1-1.5 seconds and then returns to normal.
It clearly looks like this (the whistle of the regulator is clearly audible):
I'm buying a Russian one to replace it.
, I put it on and now it’s a miracle!
It works without power surges, no whistling without consumers in the cabin, and I was very pleased with the consumers turned on - silence under the hood... no extraneous sounds under heavy load.
Next, control measurements At the battery terminals
(see the list of consumers under load above):
Source
Malfunction of the VAZ 2110 generator relay
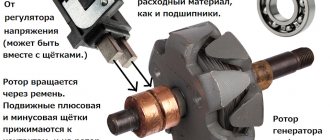
The regulator performs the function of a kind of stabilizer. Thanks to it, the voltage of the vehicle’s on-board network is the same, regardless of the number of revolutions of the running engine. Essentially, a regulator is a relay that closes and opens a circuit.
It happens like this. The voltage dropped below the required value, or rose above the norm - the relay disconnected the generator from the network. The voltage has reached the desired range - the regulator connected the device. There are no electromechanical elements in the VAZ-2110 generator relay. It is built on semiconductors. In addition, its design also includes a brush holder with brushes. It is almost impossible to repair the regulator on your own. It's easier to replace it with a new one.
Checking the functionality of the relay takes no more than five minutes. Yes, and there is no need to disassemble anything here. The diagnostic procedure is as follows. We start the engine and warm it up to operating temperature. Turn on the low beam headlights and the heater fan. Using a tester turned on in voltmeter mode, we measure the voltage at the battery terminals. The voltage should not go beyond 13.2 - 14.7 V.
If it is higher or lower, the relay is faulty. A regulator is considered faulty if its brushes are damaged or excessively worn. The minimum length of brushes is 5 mm.
Checking the tensioner belt of the VAZ 2110 generator
Checking the tension of the VAZ 2110 generator belt must be carried out periodically. If the tension is weak, the alternator belt may simply slip, especially during wet weather. As a result, poor belt tension can lead to insufficient battery charging. But you should not overtighten the alternator belt; this will lead to rapid wear of the belt itself or its unexpected break. In addition, when the belt is overtightened, the generator bearings are subject to additional stress and wear out quickly. Below is a schematic drawing that will help you understand how to properly tension the VAZ 2110 alternator belt.
The best generators for VAZ
If the generator is seriously damaged, it does not have to be repaired, but completely replaced. Parts necessary for repair may be missing, or the breakdown may not be repairable at all. Meanwhile, the on-board voltage and the quality of battery charging depend on the good operation of the power unit. It's a shame when, despite a good motor, electrical equipment does not work properly.
And if we are talking about VAZ cars, then sometimes a replacement is in demand due to the lack of power of standard devices. Modern automakers offer many additional devices that increase the level of comfort when traveling, but they also consume a large amount of electricity, and old devices cannot cope, so they have to be replaced with more powerful ones.
Many people are interested: which generator to buy if they have a VAZ? Here you need to consider them separately by model, so before you go shopping, read the recommendations of specialists and compare them with your wishes and capabilities.
Generators for VAZ 2106 and 2107
The generator on the VAZ 2106-2107 costs the same as on the VAZ 2101 - G221. If you install additional external current consumers that operate constantly, this will lead to undercharging and insufficient current will be supplied from the relay regulator. These additional devices include:
- powerful audio systems;
- fog lights;
- TV;
- preheater;
- additional heater;
- fridge.
Any similar device will lead to greater power consumption and, consequently, to premature battery discharge, even when the engine is running at high speeds. Standard devices for 2106 were developed a long time ago and are not designed for modern energy-consuming add-ons.
In this case, it is recommended to replace the standard generator with a more powerful unit.
What to install?
G 222
If you need to increase the current power, then, when deciding which generator is better to install on the VAZ 2106 or 2107, instead of the standard one, take the G 222, which was installed on the VAZ 2105, Nivakh. It would seem that it itself is no better than the standard one on the “six”, but you can take an upgraded version that will be more powerful. Unlike the 221, this unit is designed with a built-in regulator relay, assembled into one unit with brushes. The G 221 gives an output of 42 A, and the 222nd - 50 A. Increasing the cross-section on the rotor winding increases the power, although the design is completely similar to the G 221. However, to install it on the 2106 you will need minor modifications. The easiest way is to install brushes from G 221. They fit perfectly in place of the relay. This modification is quite feasible even for car enthusiasts who do not have the skill.
It can be installed on a VAZ 2106 G222 with a standard regulator, but then it is necessary to change the connection diagram of the electrical machine.
On 2107 everything is installed without problems.
Check the voltage at medium engine speeds at the battery terminals, if it is 14 V at 2500 rpm, then everything is fine. You can drive with a more powerful unit by connecting additional options.
Generator 2108
This installation has greater efficiency, delivering a current of 55 A. It is installed on both 2106 and 2107.
The mount is identical to the standard ones, there are no problems during installation. Just remember to remove the battery terminal. You'll have to tinker with the connection to 2106. There are 4 wires going to the standard device. On the “eight” - three, since the voltage relay is built-in. To get a good result, insulate the black wire, connect the rest according to the standard system. The light bulb - the discharge indicator will light up when the generator is running, and will go out if there is no charging.
It is useful to make some more minor modifications. Instead of the old relay, install a regular power one. Then the light comes on only when the engine starts and at low speeds.
On 2107 you only need to add a power relay.
2107-3701010
An even more powerful installation is from the VAZ 2107i, producing 80 A, which can also be installed on the VAZ 2106–2107. With such equipment it is possible to install any electrical systems. For VAZ 2106 only 2107-3701010 is suitable; You can use any generator of this series for the carburetor “seven”.
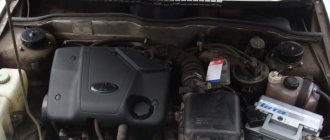
How to remove the generator on a VAZ-2110 with 8 and 16 valves
The generator is responsible for supplying electricity to the vehicle's engine. On the VAZ-2110 this unit is located in front of the engine, which makes it easier to access. Removing the unit and disassembling it is not difficult even for an inexperienced car enthusiast. Let's look at the main breakdowns that motorists encounter.
Generator operating principle
This unit consists of several parts:
- Why does the battery light on the instrument panel light up?
- frame;
- rotor;
- stator;
- rectifier bridge;
- relay-regulator;
- pulley.
Thanks to the generator, the torque from the power plant is converted into electrical energy. During rotation, the rotor creates a magnetic flux, which is regulated by a relay, and the pulley carries out a belt drive. The rotor moves with the help of bearings, and when they work well, the shaft moves easily.
Another purpose of the relay regulator is to limit the output voltage in the range from 13.6 to 14.7 V. The voltage is transmitted through the commutator rings to the brushes, and the rectifier bridge is responsible for ensuring that energy is transferred in one direction.
What types of breakdowns are common?
Most often, the generator for 8 and 16 valve VAZ-2110s fails as a result of moisture and dirt. Another reason is the wear of the components of this assembly, namely the brushes. Most often, the malfunction manifests itself as follows:
- the generator does not produce electricity;
- output current is either too high or low voltage;
- During engine operation, extraneous sounds are heard, most often a squeak or squeal.
The operation of the generator is checked using special stands or a digital voltmeter. If extraneous sounds are heard in the engine compartment area, then first of all you need to check the timing belt tension. Most often this is the reason, but after checking, remove the belt from the pulley and start the engine. The absence of noise is a reason to check the performance of the generator more carefully.
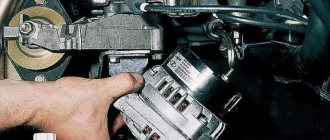
How to properly remove the generator on a VAZ-2110
If you have a power unit with 8 valves, then it is best to work from above. In the sixteen-valve version, the generator must be removed from below. To do this, first unscrew the pan. Before work, prepare several different keys. You can remove this assembly quickly if you follow the following instructions:
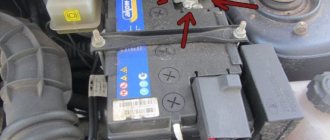
- De-energize the vehicle's on-board system - to do this, simply remove the negative terminal from the battery.
- Find the M10 nut on the positive stud of the autogenerator and unscrew it.
- There are wires connected to the generator on the back of the device, which must be disconnected before the next stage of disassembly.
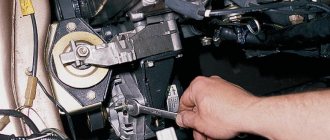
- Using a 13mm wrench, loosen the upper and lower nuts.
- Unscrew the tension bolt with a 10mm wrench to loosen the belt tension and remove it.
- Then completely remove both nuts (upper and lower) and remove the tension bar.
- Carefully rotate the generator at a right angle and remove it from the engine compartment.
If you want to repair this unit, you should thoroughly wipe it with a rag to remove all dirt.
How to disassemble a generator
First, make two marks on the metal covers. This will help you later assemble the unit without problems.
- Press out the metal latches and remove the plastic cover.
- Use a Phillips screwdriver to unscrew the voltage regulator mounting screws.
- Unscrew the M10 nut. Then use a screwdriver to remove the screw and remove the capacitor.
- To remove the pulley, clamp the generator housing in a vice. Put a 21 socket on the nut, and through the hole in the head put a 8 hexagon on it. Only after you unscrew the nut can you remove the washer and pulley.
- Remove the four mounting screws to disassemble the generator into two parts.
- From the back of the housing, unscrew the screws securing the stator wire and diode bridge.
- Remove the diode bridge and the oscillator winding.
- Press the rotor out of the cover with your fingers along with the bearing.
- Carefully remove the bearing bushing.
- Take a puller and remove the bearing.
Disassembling the generator itself is much more difficult than removing the entire assembly from the car. To carry out repairs, you will need to diagnose the components of this unit.
First of all, pay attention to the brushes; they need to be changed if this element is visible from the holder by no more than 5 millimeters. If the bearings rotate tightly, then they are the defective element (a hum may be heard during operation)
The breakdown of the starter and rotor windings can be checked with an ohmmeter; the same device determines the performance of the capacitor. If nicks, scratches or burrs appear on the slip rings, they must be carefully sanded to a shine with fine sandpaper.
Replacing the generator on VAZ 2110-2112 and 2114-2115
Lada Priora - generator replacement
The Priora requires a powerful generator; the car has a lot of electronics and a weak installation cannot cope with it.
A generator labeled 5102.3771 is recommended for the Priora, providing a power of 80 A; on luxury versions with even more electronics, a 115 A device is installed. Then which generator is better to install on the Priora?
Car owners recommend a unit produced by KZATEtm Samara plant under number 9402.3701-14, producing 115 A.
There is no need to modify it during installation, you just need to find the connector, because there are differences from the standard one. You can use a plug from a VAZ-2108 from the limit switch for turning on the reversing lights, which costs only 20 rubles.
Next, you will have to make a little modification when connecting to the “B+” power terminal in order to fit it to the desired size.
The cost, of course, of domestic units is higher than that of Chinese or Bulgarian ones, sold for 2200 and 3000, respectively. For Russian ones they ask for about 4000. But if you need repairs with Russian-made components, you can easily find spare parts.
Which generator is better to put on a VAZ 2110
VAZ 2110 factories install KATEK generators with a current of 80 A. The service life is 140,000 km, which is approximately 10 years of vehicle operation. Answering the question of which generator is better to install on the VAZ 2110, experts recommend products from Russian manufacturers.
What to consider when choosing
- Russian manufacturer or foreign? Of course, first of all, Russian manufacturers are preferable. If only because it is easier to find spare parts in the event of a minor breakdown. If you purchase a generator for a VAZ 2010 from a not so popular company, it may be difficult to find spare parts, and they will not cost you so much.
- Current strength. Factory models for VAZ 2010 - 3771 or 94.3701 - are designed for 80 A, this current is enough, even if there are additional devices that consume it. More powerful ones - 120 A - are installed in the presence of powerful acoustics, no harm is done to the battery, and you will provide all energy consumers with uninterrupted current.
- It is better to purchase a generator if there is a warranty on it. There may well be a defective product, and the warranty will provide the opportunity to replace it with a new one.
Generator Manufacturers
It is best for 2010 to purchase a standard generator from KATEK or KZATEtm Samara plant, and about 50% of owners do just that, according to statistics. They are reliable, cope perfectly with their functions, creating the necessary tension.
Among the foreign-made generators, we can recommend Bosch, Delphi and Denso, which are also reliable and popular.
Dismantling the generator on a VAZ 2110 or VAZ 2112
The algorithm for dismantling the generator on a VAZ 2110 or VAZ 2112 is not complicated and can be performed with one pair of hands within 40-50 minutes. To perform the procedure, you will need an inspection pit or a car lift, as well as a set of wrenches or socket heads, a set of screwdrivers and pliers. Removing the unit from its original location is carried out in the following sequence:
- First of all, we drive the car onto a pit or a lift, after which we unscrew all the battery terminals and take out the battery itself. To remove the battery, in some cases it is necessary to unscrew the bolt on the fixing clamp;
- Next, we move to the bottom of the vehicle and remove the crankcase protection to provide free access to the engine compartment;
- After removing the protection, carefully pull back and remove the drive belt, after pressing down the tensioner with a screwdriver or wrench;
- Then unscrew and remove the power wiring leading to the generator. Now you can use sockets with extensions to remove the fixing bolts holding the generator to the bracket;
- At the end of the procedure, you can remove the unit from the car. During dismantling, it is important to monitor the position of the buffer bushing - this unit may become deformed when removed.
Note! Before repairing the generator, it is important to inspect the condition of the wiring and drive belt. If there are breaks or any other damage, the components will have to be replaced - otherwise there is a high risk of a short circuit or an accident on the road.
Generators for VAZ 2114
The generator initially built into the 2114 is low-power, and if it also breaks down and you decide to purchase a new one, the question arises: which generator is better to install on the VAZ 2114? It is important here that the unit is more powerful, but there is no need to change the fastenings.
- The most successful replacement option for a VAZ 2014 is a generator from a Priora or Kalina with air conditioning. This installation has a power of 115 A, which is 35 A more than the characteristics of the units.
Installing these generators for 2014 usually does not cause problems, however, it will be necessary to replace the pulley, but it only costs about a hundred rubles and is not difficult to find.
- The Eldix brand generator also has a power of 115 A and works well. The disadvantage is that it is almost impossible to find spare parts, and even if there is a minor breakdown, you will have to replace the entire generator instead of repairing it.
Please note that a lack of charging voltage can occur simply due to oxidation of the battery terminals; keep an eye on them by cleaning them regularly.
Connecting a Priora generator to a VAZ 2110
Hi all! This year we have a typical Taganrog winter, instead of snow there is rain, instead of snowdrifts there are potholes and knee-deep puddles. In rainy weather, my generator belt constantly whistled when I turned on consumers. The culprit was the new Dayco alternator belt, which was ungodly stretched. But this time the whistle sounded with all consumers turned off. I crawled under the hood and saw how the generator axle, together with the pulley, was dangling relative to the body. The reason is obvious: the bearings fell apart, a hum and play appeared. The belt began to whistle constantly, even when minor consumers such as low beam were turned on. I changed the bearings in the generator about 20k km ago. This time I decided not to suffer from bullshit, but to buy a new unit. I considered different options (“StartVolt” 120A, “Electrom” (Cheboksary 120A)), but in the end I chose KZATE 115A, which is installed with.
The logic was simple, my dear KZATE lived for 12 years (almost 170 thousand km) and perhaps would have gone even longer if I had not replaced the original bearings at 150 thousand, which became a little noisy, for some crap. Smart guys in the store told me that replacing bearings is a bad idea, all the bearings on sale are crap and they don’t last long, and that’s how it turned out.
Generator installation.
The generator from the Priora is bolted to ten, only the wiring will require minor modifications. The connection chip for the excitation winding differs from the tenth one. Having gone through the stores, I didn’t find the chip I needed. The solution came quickly; I used the acoustic terminal that connects the speakers. I soldered wires to it and wrapped it in heat shrink.
Becomes like family. You will also need to drill out the positive terminals that fit on the generator. On the old generator the stud was at six, but on the Priorovsk one it was at eight.