Why is it needed?
Acoustic shelf VAZ 21099
In most cases, installing a specially designed shelf solves two problems:
- Removal of the main source of noise from the standard acoustic shelf (inherent in all VAZ cars).
- Create a solid foundation for your audio system installation.
Note: making an acoustic shelf yourself is not as difficult as it seems at first glance.
Shelf material
The standard design is made of impact-resistant polymer material.
A tuned version of a shelf made of wooden inserts - supports, covered with felt fabric, which also serves as a noise absorber.
At the customer's request, the shelf for acoustic speakers can be made of special wood. This is practiced if you want to achieve an “ideal” sound. Obviously, the cost is several times more expensive than analogues.
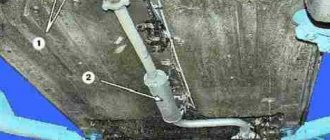
This is interesting: Checking the technical condition of the stabilizer struts.
Features of fastening and removal
Despite the apparent simplicity of this operation, the process of removal and reinstallation should not lead to subsequent rattling or distortion. The fact is that the material from which the rear shelf is made is quite fragile and cannot withstand even a small load. Therefore, the need for careful removal and installation is directly related to the longevity of its use. In some cases, you even make a VAZ 21099 shelf with your own hands.
The fastening of the shelf, taking into account the fragile plastic used on the VAZ 21099, is carried out using special plastic pistons. To release them, you need to remove the central part of the piston, after which it can be easily removed by hand. Having released the pistons, remove the central shelf.
Typically, removing the center shelf alone is not sufficient to gain access to the top of the shock absorber. At the edges, the rear shelf is attached to the side ones, which are where the speakers of the acoustic system are installed.
The speaker shelves are attached to the internal panels using a self-tapping screw and a piston similar to the one discussed above. Therefore, by carefully unscrewing 2 screws and releasing the piston, you can gain access to the shock absorber strut and standard acoustics. To raise the shelf you need to remove the wires from the speaker tips.
After removing the central part and the side elements that make up the rear parcel shelf, you can replace the struts and gain access to the torsion bars of the trunk lid hinges.
Removing and installing the rear parcel shelf Nissan Maxima QX
Removing and installing the rear shelf
| EXECUTION ORDER | |
| 1. Remove the back of the rear seat (see Section Removing and installing seats). | 3. Carefully prying up the edge of the shelf with a special tool, remove it from its seat. |
4. Installation is carried out in reverse order.
Video about “Removing and installing the rear parcel shelf” for Nissan Maxima QX
Eliminating over-sounds in the interior of a Nissan Maxima
How to remove the trim on a Nissan Maxima a33
Nissan Maxima A33
Making an acoustic shelf with your own hands
Shelf VAZ 21099 acoustic
To make an acoustic shelf we will need the following materials and accessories:
- Well-compressed plywood 10-20 mm thick, depending on the power of the audio system. It is recommended to purchase a sheet measuring 150x150 cm, that is, with a small margin.
- Acoustic material for facing (faux leather, carpet). To reupholster an acoustic shelf, one linear meter (150x100 cm) is enough.
- Powerful adhesive for covering material (glue 88, titanium “ceiling”).
- A construction stapler and several cassettes with staples. A stapler is needed to secure the material when covering the shelf.
- Special decorative canopies (for opening/closing the acoustic shelf).
- Self-tapping screws of various lengths for securing canopies and ribs for additional rigidity.
Acoustic rear shelf VAZ 21099
- Masking tape.
- Electric jigsaw.
- Screwdriver with a set of screwdrivers.
- Marking tools: pencil, ruler, compass and stencil.
Note: before starting work, you need to find a shelf stencil on which the device will be cut. In this case, the shelf can be borrowed from a car of the same brand.
Stages of work
Rear acoustic shelf VAZ 21099
Everything needs to be done in the following order:
- After applying the stencil to the plywood, we begin cutting it out using an electric jigsaw.
- When the shelf has been successfully cut from a piece of plywood, we install additional stiffeners.
Note: It is important to screw the ribs straight through the shelf using long self-tapping screws, and never use nails.
- After installing all the additional stiffeners, we treat the surface of the future VAZ acoustic shelf with several layers of stain. While the stain dries, fasten the fastening canopies.
It's easy to make your own shelf
- As the final stage of making an acoustic shelf, we give the creation additional beauty by gluing it with material. In this case, we will cover the shelf using a previously purchased piece of carpet. It is recommended to practice before starting pasting work.
Note. It is important to be careful during the gluing process, since carpet is a very capricious material. It is important to leave a slight overlap at the edges in order to cover the entire surface. In this case, it is recommended to apply the glue partially so that the empty area does not dry out.
- When completing the stage of gluing the edges, you need to secure them using a construction stapler. In this case, the staples must be placed as close as possible. After this, we cut off pieces of carpet near the awnings and give the entire structure time to dry.
Installation
So, the question of how to remove the rear parcel shelf has been successfully resolved. All repairs have been completed. The manufacture of the rear shelf for the speakers of the acoustic system is also completed. The shelf will need to be reinstalled. If the dismantling of the standard shelf was carried out carefully, then there will be no problems with installation. The operations are performed in reverse order.
If the shelf was made anew, then to secure it you will need to fasten a strip of perforated steel tape to the side end side. Fix half of it on the surface, and bend the second part for fastening to the body panels.
When installing the shelf, you need to thread and secure the seat belt. And drill a mounting hole on the plastic body panel under the curved surface of the perforated tape. At the final stage, more professional speakers are installed, connecting them to the multimedia system.
The result of the work done will not only be a cleaner and more powerful sound of music in your VAZ 21099 car. Additionally, the owner will receive a more reliable shelf that will not break in case of unsuccessful actions during the next dismantling. Also, possible squeaks from plastic parts in the interior will disappear: the new shelf is more stable and stable.
How to remove the rear parcel shelf on a VAZ 2115 yourself?
If it doesn’t stretch out, you need to look under the shelf and straighten the belt.
There should be no space left between the shelf and the glass. If there is a gap, it means that the shelf is not in its place and needs to be corrected.
We find the hole. First, install the bottom part of the piston to the end. Then we put the top one on. There is a little trick - it will come in handy if we disassemble the caps again in the future. We turn the cap of the upper piston towards ourselves with the slot for the screwdriver. Next time it will be easier to disassemble.
We install the pistons by hand without a screwdriver.
For those who broke the piston during dismantling. We are assembling the interior to the end. Buy the pistons later and calmly assemble them later.
We collect all the tools from the trunk.
Raise the back of the seat and place the belts in front of it.
Place the backrest in a vertical position. We fix the backrest on each side until it clicks. We check whether the backrest is locked by slightly tugging at the corner.
We pull out the tail of the lower part of the seat so that it ends up at the top. We lower the seat, take out the carabiners and the middle seat belt. We finally lower the seat. We press on it so that it finally falls into place.
Tuning VAZ
The answer to your request “VAZ 2115 rear shelf rattles” - click. How to repair a car yourself at home. We will help you with repairs and repair the car yourself. We know how to restore a car with minimal investment. I have attached video instructions.
Category: DIY car repair
Laughter on the topic: - Son, when you grow up, what do you want to become? - Yyy... well, this one... a gardener. Ah... well.. maybe by someone else? - Gee! Well, I'm looking for this... pool cleaner. Well, maybe someone else. - A plumber! - Soooo... Listen, mother! He FOUND THE CASSETTE along the way!!
Published by Admin: at the request of Julius
Reviews from the car owner: ConsumptionPassabilityDynamics. A Tuareg with the same volume smokes cigarettes Driving comfort especially over long distances Good adaptive xenon light Large trunk Safety The status of the car itself: oooooooooo, well, you have a Volvo, what else can I tell you Good music Excellent traction Large interior
Mercedes-Benz CLK 1998 l. With. - with your own hands
Krasnodar
Mercedes-Benz CLK-Class, 2003
650 000 ₽
Chelyabinsk
Mercedes-Benz CLK-Class, 2003
450 000 ₽
Omsk
Mercedes-Benz CLK-Class, 1997
325 000 ₽
Angarsk
Mercedes-Benz CLK-Class, 1999
350 000 ₽
See more cars on Drome
Participate in the discussion can only registered users.
Login Register
Improvement of the standard rear shelf of the "nine"
The main drawback of the standard design: the shelf on the VAZ 2109 rattles while driving. This disadvantage is quite easy to eliminate with your own hands. There are three popular options for making a shelf silent.
- Attach with Velcro.
- Press with an elastic element.
- Screw it on.
Velcro (Velcro tape) is a combination of two textile tapes, one of which is covered with micro-loops, and the second with micro-hooks. When connecting these surfaces, the hooks engage with the loops and securely fix the attached elements. Velcro comes in a variety of colors, starting with white. It is recommended to use a non-marking gray or black version in the car. The tape with loops is glued to the base, and the tape with hooks is glued to the underside of the shelf in contact with the base. By lightly pressing, the hooks engage with the loops, the VAZ 2109 shelf is fixed on the base and does not rattle when moving.
Some craftsmen use various elastic elements that press the rear shelf to the base and ensure silence when moving.
| See all advertisements in the archive |
| How to press | What can be used |
| Creating a pressing force acting on this part. | To do this, it is convenient to use a rubber car harness used to secure luggage in the trunk. A pair of loops from such a bundle is attached to the underside of the shelf: one near the left support, the second near the right. |
| To secure the shelf, the loops are placed on hooks reinforced on the underside of the base. | Elements of furniture fittings can be used as such hooks. Fixing the part from the bottom side is quite aesthetic: only four heads of mounting screws are visible from the interior. |
| How the shelf is cleared. | Simply remove the elastic loop from the hook. |
The option of screwing the rear shelf to the base with the sides ensures that this element is tightly pressed. But this is the most difficult option, requiring time and effort to use. It’s one thing if you need to press Velcro or put on an elastic loop. It’s another matter if, when fixing a part with screws, you must do the following simple operations:
- unscrew the wing of the left and then the right screw;
- align the holes in the shelf with the mounting screws;
- install the removable shelf with screws;
- twist the lambs, also one by one.
Fixing this element does not imply a force load on the connection - there is no point in securing it with screws.
Replacing rear trunk shelves on VAZ 2108, VAZ 2109
How to replace the rear trunk shelves?1) Replacing the main rear trunk shelf:2) Replacing the rear speaker shelves:
Replacing the main rear parcel shelf:
Removal: 1) First, unfold the rear seat, that is, its backrest, to access the rear parcel shelf. (see "Rear seat layout")
2) Then, while inside the car, pry the lock with a screwdriver, first on the left piston, and then on the right one in the same way.
3) And then, putting the screwdriver aside, remove both of these locks from the left and right piston.
4) After removing both locks, remove both pistons from the hole.
5) And then remove the shelf itself.
Replacing rear speaker shelves:
Removal:1) First remove both sides of the rear seat belts. (See Removing the seat belt)
2) Then find all the screws that secure the left and right shelf with speakers, and then unscrew them.
3) Next, use a screwdriver to pry up all the pins on both speaker shelves, and then remove them in exactly the same way as you removed the retaining pins from the rear shelf.
4) And to complete the operation, remove both shelves with the speakers, while disconnecting the ends of the wires from the speakers themselves.
Installation: 1) All installation occurs in the reverse order of removal.
Tuning VAZ 2109
As mentioned earlier, the optimal price-quality option for a sound system on a VAZ 2109 would be to install 4 speakers, two in front and two in back. There are no problems with the front seats, since there are standard places for 13-inch speakers in the front panel. For those who don't have 13 inches, they can make podiums for the front doors and install speakers with a diameter of 16. The rear standard places for speakers in the plastic inserts on the sides of the rear shelf are no good - they are too small to reproduce more or less noticeable bass, and the standard shelf is too flimsy to support the 6x9-inch oval speakers that are most suitable for placement in it.
Trunk tuning
Typically, car owners install a powerful speaker system in the trunk of a VAZ 21099. An LCD panel is installed along with it, which is mounted on the inside of the trunk lid. The panel is equipped with a special mechanism that extends it when the trunk is opened. These tuning options look impressive, but they have a serious drawback: you will have to give up loading various things into the trunk, since there will be very little space left in it.
There are also less radical tuning options. For example, installing neon lighting on the trunk shelf.
vote
Article rating
Advantages of an acoustic shelf
Any acoustic shelf has the following advantages:
- The sound quality of even the most budget speakers is significantly improved. Due to the fact that the speaker is tightly mounted, the sound comes out without rattling, but in this case the trunk is used as an acoustic box.
- The manufactured acoustic shelf eliminates all noise and squeaks that previously came from the factory shelf. In this case, in the places where the shelf and the plastic come into contact, you can glue a special “anti-creaking” material. In addition, in order to avoid unnecessary noise, it is recommended to glue the acoustic shelf with sound-proofing material.
- When making an acoustic shelf, podiums for speakers can be made at any angle. That is, with the help of the shelf we get strictly directional sound.
DIY acoustic shelf
- Using an acoustic shelf and additional decorative elements, you can completely hide the sound wiring. That is, the shelf, in addition to good sound, has a pleasant aesthetic appearance.
- Unlike a standard shelf, an acoustic one allows you to install more powerful speakers. For example, if the size of standard podiums ranges from 13 to 16.5 cm, then 20 cm or egg-shaped 6x9 inches speakers can be installed in the acoustic shelf.
- If thick plywood is used for firm fixation, a subwoofer speaker can be installed in the acoustic shelf. When installing a subwoofer (see How to connect a subwoofer to a car radio: lessons for amateurs), it is important to take into account the fact that the shelf must be firmly fixed, as strong vibrations will be created.
The shelf for the VAZ is ready
After the acoustic shelf is mounted in its original place, you will notice how much the sound of the car has changed. The sound will become much cleaner, the volume level will increase significantly, and bass will also be pleasant to the ear. In addition, the annoying creaking of plastic will disappear when driving. Finally, I would like to note that the installation of acoustics must be approached comprehensively. That is, high-quality speakers, a solid shelf and complete sound insulation will take the car to a new level of sound. That is, you can create an acoustic shelf with your own hands without anyone’s help. Naturally, this process requires certain knowledge, so before starting it, you should familiarize yourself with the photos on this topic. There are also many videos on the Internet that will also help. Instructions with a thorough description will not hurt. Making a shelf is suitable for those who are not satisfied with the price of factory models.
- Author: Grigory Romanchuk
Grigory adored cars since childhood, and in his teens, when he independently connected the car radio in his father’s nine, he realized that cars would be his job, hobby, calling. Rate this article: (3 votes, average: 4.7 out of 5)
Ride any car online
So the moment came when I decided to work on the sound part of my car. Although in my mind I should start with the front speakers, I decided to start from the rear, since there was nothing there at all, just a rattling standard shelf. We must pay tribute to the rationalizer; on the previous car, the standard shelf was solid, without space for speakers and, as a result, did not rattle. But the team, consisting of three parts, is thundering. It’s no wonder - the entire articulation of the outer parts of the shelf with its middle is supported by just two pistons.
However, I digress... So, let's buy a shelf. It would seem that it could be simpler - I came, I saw, I bought. Apparently this rarely happens.
The first pancake is lumpy. Rus-Trade store on Balaklavsky Prospekt, 800-odd rubles at the cash register - and now the plywood acoustic shelf is already mine. It looks pretty good, is made quite well, and even has holes for seat belts hidden under the carpet. But bad luck - it doesn’t fit in the car. Everything seems to be normal, only the shelf does not sit on the places intended for it near the rear window, but on the fastenings of the trunk hinges, which is why we have a crooked shelf and a gap near the glass. In addition, the buyer is asked to figure out how to attach the shelf itself to the car on their own - there are no holes at all. As well as any little instruction that might help in this case. I returned the shelf to the store a day later, citing the fact that it did not suit me. All that's left of it is a paper insert (I'll try to scan it soon).
Making a new rear shelf
When improving the sound system of your VAZ 21099, the option of rear-mounting high-quality speakers in the rear of the car is a good solution. However, the difficulty of placing high-quality acoustics in the back is associated not only with the possibility of reliable mounting, but also with the sound quality in this case. Speakers require a fairly durable cover to transmit good sound. In this capacity, hard, unstable plastic is difficult to imagine.
For many models, car companies that equip cars with high-quality acoustic systems offer more modern rear shelves. The VAZ acoustic shelf is made of plywood, finished with high-quality material that will not stand out from the general background of the interior. For the VAZ 21099 model today, finding an inexpensive, high-quality copy is not always easy. Therefore, a worthy solution would be to make such a panel yourself.
To make a new acoustic shelf for a VAZ, you will need to buy the necessary materials. You will need fairly thick plywood - the optimal thickness is 10 mm. To carry out minimal adjustment operations, select a piece of material with a size of 1.5 × 0.8 m. Additionally, you need to prepare:
Lada 21099 bench › Logbook › Strengthening the standard shelf 21099
Hello everyone who reads this writing!
Today I will share my experience of strengthening the rigidity of the structure and modifying the fastenings of the standard factory shelf for the VAZ 21099.
It all started when the creaks and rattles of my “favorite” shelf began to bother me more and more. I really like the design, but it is a little flimsy. Okay, at first the thought came to me about a banal replacement with an “acoustic” one. Having typed the information into Google, I received many (as I first thought) options. But as I sorted through and carefully studied the designs of these shelves, I realized more and more that this was complete junk. Everything is somehow colored, like in a circus. Anyway.
Then I decided to go to LOSK and look there (touch it, so to speak). But I was also disappointed in the market. Of course, I don’t know who makes these shelves, but in order for it to somehow fit into the car, you have to really love the brain. Also, there are no fastenings on them at all (ala do it yourself). But I can’t stand having to redo something for someone else; it’s easier for me to make something new from scratch. Also, not a single shelf can compare in design to the standard one (it’s a stamp after all). He spat and went home.
Making your own acoustic shelf
Car enthusiasts who want to assemble and install an exclusive audio system on their car often go to the trouble of making an acoustic shelf with their own hands. The question of the advisability of installing a non-standard individual system on a twenty-year-old domestic small-class hatchback does not have a clear answer. But if the decision on this has already been made, then a homemade acoustic shelf will undoubtedly come in handy.
The question of rattling of such an element of the trunk of the “nine” does not arise at all while driving. Made from 12mm or even thicker plywood, loaded with two speakers with powerful magnets, and sometimes also a subwoofer, this part is securely fixed in place under its own weight. Making an audio shelf and podiums for a VAZ 2109 with your own hands is the most expensive and time-consuming option. But it gives a truly visible (and audible) result.
The shelf is usually cut out of thick plywood or chipboard with an electric jigsaw. You can download the drawing from the Internet or draw it yourself based on the dimensions of the standard part, taking into account the speakers and subwoofer planned for installation. Acoustic system podiums are often made using the technology of filling the structure frame with hardening foam filler.
The technology involves sequential implementation of the following steps.
- A hole is cut out in the center of the planned location of the podium to place the speaker magnet in it.
- A ring element is cut out of thick plywood, which will serve as the end of the podium - a seat for the speaker.
- For each podium, a spacer element is sawn off from a 25x25 mm block, the length of which corresponds to the maximum elevation of the speaker seating element above the surface of the shelf.
- Cut off one spacer element for the minimum elevation.
- Prepare two spacers for the middle elevation points.
- Self-tapping screws secure the landing circle with the desired inclination to the plane.
- The inner cylindrical surface of the podium is formed from kraft cardboard and the podium cylinder is foamed in the spaces between the spacers.
- The open outer surface of the podium is shaped by trimming off the excess filler with a knife, after which the surface is sanded, puttied and primed.
- As a final processing operation, painting or covering with carpet is used.
They install a homemade acoustic shelf on the VAZ in the place where the standard shelf is installed, connect it to the media center and enjoy the music in their “chisel”.
First of all, we will ruin the planes.
Today I’ll tell you how to make an acoustic shelf with your own hands for a VAZ Nine. When you want bass, but you don’t want to spend the family budget on an amplifier and subwoofer, especially if you already have 6x9-inch speakers, popularly called “ovals”.
We have already discussed questions about the feasibility of making a shelf in the article about a virtual subwoofer, and in the same article about ways to subsequently improve the sound by building up the system step by step, so let’s move on to the topic.
Let's start with the necessary tools and materials.
- Birch plywood, 18mm thick, preferably of the highest quality, without knots. A sheet of 152x152 cm costs around a thousand. With excellent quality - one and a half.
- Carpet. Width - 1.37 m. Length - 80 cm. Price - from 150 to 300 rubles per linear meter.
- Glue for carpet - aerosol "Star Dreams 185 Professional".
- Self-tapping screws 41 mm for the stiffener - 10 pcs.
- Wood stain.
- Staples for staplers 8 mm, hardened “Stayer” type or other high quality ones.
- Two canopies for the opening part (photo below).
- Self-tapping screws 32 mm for awnings - 8 pcs.
- Wood saw with a “clean cut” - better than “Bosch”
- Grinding wheel with sandpaper for fortune
- Masking tape
( 2 ratings, average 4.5 out of 5 )
Shelf VAZ 21099, 2115
The car is equipped with a hybrid power unit. The 4-cylinder engine is equipped with a system that provides engine power output. There are 4 valves per cylinder. The diameter of one cylinder is 78 mm, the piston stroke is 77 mm. The engine crankshaft accelerates to 5000 rpm. Maximum torque is maintained up to 3000 rpm.
Posted by admin: at the request of Uldis
Watch the VIDEO about the rear parcel shelf on the VAZ 2115 rattling.
Answer from a car owner named Waldemar: Warm interior, excellent Shumka, excellent dynamics, comfort, smooth ride, and the consumption is not so bad! Not expensive spare parts, maneuverable!
Original title: Rear shelf rattles at 2115
Release date: April 20, 2021
Laughter on topic: John Rockefeller dreamed of earning 100 thousand dollars and living to be 100, but he earned 318 billion and lived to be 97. Not all dreams come true.
Step-by-step instructions for independent production of VAZ 2109
First, you should find the points where the decorative handles of the future design will be fixed, then drill holes in selected places that are necessary for mounting the clamps and installing the handles.
Cutting out the moving part
Then, of course, move on to making a shelf template. It is important to take into account that the structure will have a moving part, which should be marked on the cardboard template using cuts. With all this, it is strongly recommended to make sure that the movable part of the structure for which the lifting structure is intended does not come into contact with the arches of the car trunk.
Assembling the interior of the VAZ 2115 Pyatnashka. How to install the rear shelf
Raise the rear parcel shelf and turn it over to its natural position. We straighten the seat belts. We put the shelf in its place. We straighten it up and place it on the ledges in the body.
Checking the seat belts. We pull them out completely to make sure that the belt is not overlapping and is working.