Why doesn't it light up?
If suddenly electrical appliances and indicator lamps on the dashboard stop working, certain actions must be taken.
- First, remove the cover of the mounting block and make sure that the fuse is intact. The fuse markings are located on the inner surface of the cover. You should look for fuse F16 or F5, depending on the year of manufacture of your VAZ 2109.
- If the fuse is intact, be sure to check whether the contacts of the fuse you are looking for have not oxidized. It is not uncommon for shields to fail due to broken contact.
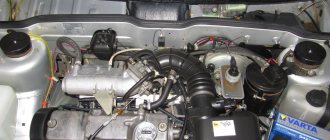
- Check if there is power to the dashboard. To do this, you will need a warning light and the ignition on. Disconnect connector X4 in the mounting block and check for voltage at pin 3. The disadvantage of the VAZ 2109 design is that when it rains, the mounting block immediately becomes wet. This causes oxidation of the contacts in the pads, which causes the electrics to stop working. Sometimes not only the contact is oxidized, but also the board of the Nine mounting block.
If none of the above actions yielded results, you will have to be disappointed. After all, now you need to remove the dashboard and check the condition of the wiring, contacts, and negative connections. Here it is better to trust a professional electrician or set aside a whole day to troubleshoot problems yourself. There is no need to rush here.
Where did the backlight go?
Tail lights for VAZ 2108, 2109, 21099
VAZ 2108/2109/21099
The functioning of the rear lights of any car is necessary for road safety reasons. These devices at the rear of the car perform a lighting and information function (warn road users about the movement of the car).
On VAZ 21099 and other models, the lights turn on automatically when changing gears and moving the car backwards.
Structurally, the lights at the rear of the car combine the following components of the lighting system:
- reversing lighting;
- side lighting;
- brake lights;
- turn signals;
- emergency alarm.
Rear view lights for VAZ 21099
The structure of the lighting devices is as follows:
- body made primarily of plastic (in some cases glass);
- lamp holder;
- latch for holding wires;
- diffuser of light rays for uniform illumination of the road surface. It is glued to the back of the product body, so if it breaks, it needs to be replaced along with the body.
The device of the rear light on VAZ 2109-2108 and 21099
The following types of rear lights can be installed at the rear of a VAZ 2108 or 2109:
- incandescent lamps. Inexpensive, but they break down relatively quickly and are not bright enough. Such lamps burn with a yellow light, which is not very visible in unfavorable weather conditions;
- halogen light bulbs . They are considered more modern and durable, since air is pumped out of their flask and inert gas is pumped in. There are models with H1 and H3 sockets on sale;
- LEDs . They burn with a cool white light and last several times longer than incandescent lamps. They are sold in strips and today often replace obsolete incandescent lamps.
LED tail lights for VAZ 2108
Causes and actions in case of breakdown
Among the reasons for the breakdown of the rear parts of the lighting system on a VAZ 21099, 2108 or 2109, the most common are:
- Bulb burnout. It happens due to wear or power surges and is almost the most popular reason for replacing rear headlights.
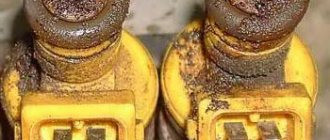
- Oxidation of contacts. Occurs due to poor quality of terminal contact, electrolyte leakage, or cracks in the battery case.
- Fuse failure. This cause of failure is due to voltage surges.
- The reverse sensor is broken or its wiring is broken.
- Burnt out contacts on the headlight film.
- Lack of ground on the board.
The most common and easiest fault to solve is a lamp burnout. The product must be replaced with a new one by turning off the light sources, opening the trunk and disconnecting the column of wires.
To do this, you will most likely have to remove the trunk trim of the VAZ 2108 or 21099, which is located behind the lamp. After this, squeezing the latches (they are located on the sides), you need to take out the panel and unscrew the lamp, after pressing on it. To install a new rear lamp, reverse the process.
THIS IS INTERESTING: Replacing the battery in a Ford Focus 2 key
Replacing lamps in the rear lights of a VAZ 2109
To clean the contacts from the white coating that accompanies oxidation, you need to clean them. To do this, remove the headlight unit. The ground must be returned to its place, and the nearby wiring must be tested for correct operation. Broken fuses on VAZ 2109 and 21099 are not difficult to find - their diagram is usually presented on the block cover.
If you are faced with the problem of constant lighting of the reversing lights, this may be caused by problems with the wiring or the cessation of operation of a special sensor located on the box.
When the car headlight switch stops working, you can get to it through the engine compartment or from underneath the car. You can diagnose the failure of this component of the lighting system as follows:
- start the VAZ 21099 and shift it into reverse gear;
- close the contacts. The rear lights should light up at this time;
- Use a multimeter to check if the contacts are closed when you turn on the rear headlight switch, having first removed the switch;
- make sure that the contacts are soldered securely, assemble the switch and check its operation again. If a normal short circuit is observed, replace it.
Replacement process
The rear lights are attached to the body of a VAZ 21099, 2108 or 2109 car using 4 nuts. To dismantle the lighting system you will need:
- head at 8;
- extension.
The operating algorithm is as follows:
- To access the nuts, remove the 21099 luggage rack at the appropriate location (if the rack is installed).
- Disconnect the power plug that is attached to the board.
- Unscrew the 4 nuts using a wrench.
- When removing the last nut, hold the taillight outside to prevent it from falling and breaking.
- After removing all 4 nuts, remove the light.
When installing a new headlight on the rear of model 21099, do not forget to connect the wiring to ground, which is attached to one of the studs.
Source: https://okuzove.ru/osveshhenie/zadnie-fary-na-vaz-2108-2109-21099.html
The left tail light did not work
I already wrote about the problem with the rear left marker. The new relay did not solve the problem. There were two options for a possible problem: - The mounting block is faulty; — The lighting lamp control relay is faulty; I rule out problems with the wire, since I checked the wire - everything is ok. It was possible to solve the problem: - Buy a new mounting block (price ranges from 1500 - 2000 rubles on the Internet.) - Go through the relay, looking for a working one, or find out later that the mounting block is still faulty and look at a bunch of relays and buy a mounting block (1 relay - 150 rubles). — Transfer the wire from the left to the right, but in this case the light control lamp may start to light up. The best option for me was
— Find out which plug on the relay is responsible for what and connect a jumper to it (price 0 rub.). So I took a copper wire and put it on the plug number 9 and 10 (connecting them). Dimensions have arrived. The control lamp does not light up - i.e. there is no error. And everything is good)))))
Why don't the lights light up?
Malfunctions that occur in the operation of side lights worry every motorist because it makes it difficult to use the car at night. After all, the traffic rules clearly state the requirements when stopping the car and turning off the ignition at night to indicate the car with illuminated side lights. Failures in the side light circuit can manifest themselves in different ways.
- One of the side light bulbs does not light up. The most likely cause is a burned out light bulb. Less common problems with poor contact are oxidation or poor connection. And very rarely - a breakdown in the wiring to the contact group of this light bulb. Although rare, this also happens. If the light bulb burns out, it needs to be replaced. To do this you need:
a) when replacing the marker lamp in the front headlight:
- turn off all exterior lights and open the hood
— unscrew the screws securing the plastic casing on the headlight with inoperative headlights
— having pulled out the socket with the burnt-out light bulb, remove it and replace it with a working one, without needing to disconnect the block with wires
- install the cartridge and casing in place
Front side lights
b) when replacing the side light bulb in the rear light unit:
- turn off the lights and open the trunk
— remove the decorative upholstery and pull out the block with wires from the contact group
- squeeze the side clamps and pull out the contact panel for the rear light with the non-working bulb
- remove the burnt out lamp by pressing it and turning it counterclockwise
- install a new lighting fixture and install the panel in the reverse order
Rear marker lights of VAZ 2114
- The side lights button does not turn on (the indicator lamp on the button does not light up). The reason is mainly due to oxidized contacts, which must be cleaned and washed with alcohol by removing the key block from the socket. Fuse F10 may fail, but then the sidebar lamps on the left side should not light up. On a VAZ 2114, an oversized fuse does not blow out very often, especially since wide plastic fuses with good contacts are currently installed in the mounting block.
- Blinking when the lights are on or dim lights. The main reason for such manifestations is the oxidation of contacts in the chain. First of all, you need to check and clean the contact group in the mounting block in the fuse circuit. The same is possible in contact groups of specific side light lamps. Do not forget that the machine is operated in conditions of high humidity and oxidation is a normal physical phenomenon that must be taken into account.
- The headlight fuse is constantly on. The reason must be sought in the mounting block. Possibly bad contacts in the fuse contact group.
The reason for the constant blowing of the insert (fuse) may be a short circuit in the general vehicle circuit. In this case, you should definitely contact an auto electrician, because the consequences can be very serious, including fire.
Brake lights don't light up: why and how to find the reason
The brake light indication is one of the most important signals indicating driver actions. Therefore, it is impossible to postpone repairs if the brake lights are not on. If you notice a malfunction along the way and you are unable to eliminate the cause of the breakdown, turn on the hazard lights and drive at low speed to the nearest service station or a place suitable for DIY repairs.
Search principle
To find a fault in any vehicle on-board network system, you should use the method of sequential elimination of elements.
The point is to consistently check electrical appliances and sections of the circuit, excluding elements from the list of reasons that could cause a breakdown. To do this, you need to clearly understand the design and operating principle of the system.
When troubleshooting, you need to move from the components that require the least effort to check, to the most difficult to diagnose elements.
Electrical diagram
We immediately emphasize that the pinout of connectors and color markings of wires may differ not only between different models of the same automaker, but also among one model of different years of manufacture. Before you start searching for the cause of the breakdown, you need to find an electrical diagram specifically for your car model.
We will consider the principle of operation of brake lights and the troubleshooting algorithm using the example of the VAZ 2101-2102 circuit. The photo shows the general diagram of the vehicle's lighting and light signaling. We need to isolate the components involved in the operation of brake lights.
- 6 – mounting fuse block;
- 13 – brake light switch. It is a non-locking button (returns to its original position after removing the force). Located directly next to the brake pedal. When the brake pedal is released, the contacts of the limit switch are open, no current passes through it. Accordingly, when pressed, the contacts close, allowing flow through the lamps;
- 19 – lamps that light up when you press the brake pedal.
We do not have a diagram of the mounting block, but we know in advance that the brake lights only work when the ignition is on. There is a wire from the mounting block to the brake light limit switch, on which there is a constant + after the ignition is turned on. As soon as the limit switch contacts close, + goes to the brake light bulbs, which are connected in parallel. The “ground” of the rear lights is common and consists of a wire screwed to the car body.
In the diagram we presented, the elements are depicted as close as possible to how they look in reality. Don’t be alarmed if you only find a schematic diagram for your car with symbolic images of the elements. Schematic diagram of external lighting for VAZ 2114, 2115:
- 3 – mounting block;
- 8 – lamps for side lights and brake lights;
- 11 – brake light limit switch;
- K4 – relay for monitoring the serviceability of brake light lamps and side lights.
Fault localization
Understanding the operating principle allows you to determine exactly why the brake lights may not light up:
- The fuse has blown. In the diagram, the fuses are marked with the letter F (from English - Fuse) and the serial number of the seat in the fuse block, for example, F3;
- poor contact at connectors;
- the light bulbs have burned out, but since the lights are connected in parallel, the likelihood that 2 lamps will burn out at once is extremely low;
- poor contact on the negative terminal of the lights. In this case, problems may begin not only with the feet, but also with the lighting of the remaining lamps in the lanterns;
- Damage to the negative track in the lamp board. From the total mass directly to the brake light lamp, the minus goes along a special path on the board. The path may collapse from water or mechanical impact;
- malfunction of the brake light switch, the so-called frog;
- broken wiring, oxidation of contacts.
To detect a fault in the electrical network, you will need a multimeter or a tester, which you can make yourself. Previously, we told you how to use a multimeter, so we won’t focus on that.
The sequence of searching for the cause of the breakdown:
- Check the fuse for the brake light circuit. The location diagram of the fuse links can be found in the repair and operating manual for your car; often the symbol of the protected circuits is located on the back of the cover covering the fuse mounting block. If the installed fuse of the required rating immediately blows, there is a short circuit (short circuit) in the circuit. Please note that the fuse can protect not only the feet, but also other circuits. Installing a fuse with an increased rating is fraught with the risk of a car fire;
- If oxidation is detected on the terminals, clean the contacts mechanically or use an aerosol contact cleaner.
- Having turned on the ignition first and holding the brake pedal depressed, check whether there is power on the positive wire that goes from the limit switch to the rear light connector. If there is power, there is a malfunction in the lights themselves;
- check whether the positive signal is coming from the mounting block to the limit switch. If + comes, but when you press the brake pedal it does not appear on the second terminal of the limit switch, then the problem is in the “frog”;
- If there is no + at the limit switch terminal, examine the circuit up to the mounting block. If the wire is intact and securely fastened in the connectors, then the problem is in the mounting block.
THIS IS INTERESTING: Where is the engine number for Ford Focus 2
If, for example, there is a + on both terminals of the limit switch when you press the brake pedal, but it does not come to the headlamp connector, then you need to look for the location of the wiring break. You can check the existing “frog” with a multimeter. Simulate the state of the brake pedal being pressed, attach probes to the terminals, turning the multimeter into resistance measurement mode. If there is no resistance between the terminals, the limit switch is faulty.
If you removed the brake pedal limit switch for diagnostics, adjust its position correctly during installation. The brake lights should light up at the slightest touch of the brake pedal. The search principle we considered is suitable for most cars. But, for example, in some cars, a relay is also involved in the operation of the brake lights, due to which the brake lights may also not light up.
That is why it is always necessary to start by reading the electrical diagram.
Source: https://AutoLirika.ru/remont/ne-goryat-stop-signaly.html
general information
VAZ 2109 electrical faults
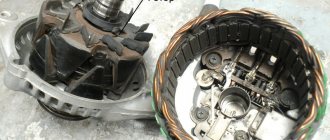
Let's start with general information. You should know that the VAZ 2109 has two power sources - the battery and the generator. The battery is designed to supply current when starting the power unit of a car, as well as to power the starter and other 12 V consumers when the engine is not running. When the engine starts, all the “initiative” goes to the generator. Now this element provides current to all consumers, even the ignition system and battery.
When the generator does not provide current
Note. Every driver must know that if the red charging lamp is on on the instrument panel, then no charge is supplied from the generator to the on-board network, that is, the stored battery energy is consumed. It is clear that the supply is limited and depends on the size of the battery and its capacity. Of course, in this case you can drive home without a generator, but you can no longer turn off the car and you will have to drive non-stop.
Work order
Working with a generator
- You need to check whether the corresponding fuse has blown. If yes, then replace it with a new one (more about fuses below).
- We start the power unit and check whether the battery charging lamp goes out. If it goes out, it means everything was done correctly.
- If it does not go out, then you need to check the cable that runs from the generator to the battery (positive). This could be where the problems lie.
Note. There are two wires coming from the battery: the thick one connects the battery to the starter, and the thin one is the one we need.
- We check the integrity of this wire. Maybe it's broken or something.
- You also need to carefully check contacts that may have become oxidized over time.
- All these faults, if found, are corrected. We start the engine and see if charging appears.
- If yes, then have a nice trip!
If there is no charging again, then you need to check the generator itself (see VAZ 2109: malfunctions on the generator and how to eliminate them). To do this, it is better to contact specialists or follow the advice that can be found on our portal.
Advice. As mentioned, you can drive with a damaged generator to a service center or your own garage. In order to minimize the battery current consumption, it is necessary to turn off all devices at this moment, such as the car radio, unnecessary lighting fixtures, fan, air conditioner, heater, etc.
Regulator check
If the motorist is experienced, then he can be advised to check the generator voltage regulator. This component is required to maintain the generator voltage within specified limits, even if the speed and load changes. It is possible that it has “worked out” and the generator is not functioning correctly. By car:
- We arm ourselves with a voltmeter equipped with a scale of up to 15-30 V.
- We always measure the voltage after some operation of the engine at medium speed.
- We measure the voltage with the headlights on, in the place between the corresponding terminal and the generator ground. The norm is thirteen/fourteen V.
- Otherwise, if the value is lower or higher, the regulator will need to be replaced.
Characteristics of side lights VAZ-2114
VAZ-2114 belongs to the Samara modification of the second generation. The side lights in them are located, in accordance with technical regulations, at the edge of the front and rear parts of the body, next to the turn signals. These lamps are included in the headlight units.
- Unlike the front side lights, the rear ones are painted red.
- The button to turn on these headlights is located in the exterior lighting control unit. It is located in the center of the dashboard above the on-board computer. If the dimensions are turned on, the green light on the switch lights up.
In the engine compartment under the hood of the car there is a mounting block with fuses. If your lights only on the left or right side do not work, then most likely one of the fuses has failed. The easiest way to notice a malfunction is element F10, since it is responsible not only for the operation of the right side of the side lights, but also for the warning lamp to perform its duties.
If the lights refuse to work on the left side, then fuse F11 must be replaced.
Feet don't work
To post a reply you must log in or register.
Messages 14
1 Topic from KUA 2011-07-13 06:52:08
- KUA
- User
- Offline
- Registered: 2009-01-18
- Messages: 85
- Reputation: [ 0 | 0 ]
Topic: Feet not working
At one point, the stops stopped working when braking, the fuses were intact, the bulbs did not burn out, and the wiring, in principle, was visually intact. New sample china.
How to find the cause of the problem, help me, I don’t know where to look!
2 Reply from Kolyan 2011-07-13 07:24:18
- Kolyan
- User
- Offline
- Registered: 2009-05-06
- Messages: 725
- Reputation: [ 0 | 0 ]
Re: Stops not working
Check the stop button under or above the brake pedal. IMHO
3 Reply from KUA 2011-07-13 11:11:38
- KUA
- User
- Offline
- Registered: 2009-01-18
- Messages: 85
- Reputation: [ 0 | 0 ]
Re: Stops not working
Check the stop button under or above the brake pedal. IMHO
how to check the button?
The terminals that go to the button have been muted, the stops are not working.
It turns out that the problem is something else.
4 Reply from KUA 2011-07-14 06:28:22 (2011-07-14 06:28:48 edited by KUA)
- KUA
- User
- Offline
- Registered: 2009-01-18
- Messages: 85
- Reputation: [ 0 | 0 ]
Re: Stops not working
There is a block next to the hood release handle, look there (this is the wiring harness back)
I rang the wiring and it turned out there was no voltage reaching the stops.
The button is working, plus it is there, the fuses are intact. but I can’t figure out where the break is, I don’t want to disassemble the interior, please help with advice.
5 Reply from Kolyan 2011-07-14 06:38:39
- Kolyan
- User
- Offline
- Registered: 2009-05-06
- Messages: 725
- Reputation: [ 0 | 0 ]
Re: Stops not working
Try to determine possible break locations using the diagram https://www.motortalk.ru/image/view/351/_original
6 Reply from ils 2011-07-14 06:43:10 (2011-07-14 06:43:38 edited by ils)
- ils
- User
- Offline
- Registered: 2009-06-16
- Messages: 540
- Reputation: [ 0 | 0 ]
Re: Stops not working
You look at the color of your wire that goes to the brake light lamps, from under the dashboard you pull out the cable to the rear lights - on high panels it is usually the leftmost one and test the wire for continuity. If it rings, then check the fuses normally again - pull out the multimeter on both legs and see if there is a beeping sound or a change in the digital indicators. If there is no break again (there was one case where they boasted that the previous ones were intact - but they burned out, and so cunningly that even a closer look looked like they were working), then you try to insert them and move them - sometimes the contact oxidizes and the circuit does not close. If this doesn’t solve the problem, then either take it to an electrician or look at the CY from the inside - maybe the track is burnt out, maybe everything inside has oxidized to hell.